Love this? Save it for later!
Share the inspiration with your friends
By the third time I made these Easy Cheese Quesadilla Dippers in a single week, I noticed my five-year-old had stopped asking what was for lunch. She just opened the fridge, spotted the container, and gave me this tiny, satisfied nod—like a tiny food critic who had finally found her groove. The first batch had been a desperate Tuesday morning experiment, born from a half-empty bag of shredded Mexican blend and a stack of flour tortillas that were about to hit their expiration date. I cut them into strips because I was in a rush, threw in some salsa for dipping because it was there, and honestly didn’t think much of it until I saw the empty lunchbox that afternoon. Not a crumb left.
What kept me coming back wasn’t just the convenience—though let’s be real, anything that takes under ten minutes and doesn’t require turning on the oven is a win in my book. It was the way those little strips held up. They didn’t get soggy. They didn’t turn into a sad, greasy mess by lunchtime. And the dipping thing? That was the game-changer. Kids love anything they can dunk. It’s like a built-in entertainment system for lunchtime. I started tweaking the method—pressing the tortillas a little firmer, letting them cool completely before packing, experimenting with different cheese blends—until I had a system that worked every single time.
These Easy Cheese Quesadilla Dippers aren’t fancy. They’re not going to win any food styling awards. But they’re the kind of recipe that makes you feel like you’ve got lunch handled, even on the chaotic mornings. And honestly, that’s a pretty good feeling.
Why You’ll Love This Recipe
Look, I’ve tested a lot of lunchbox ideas over the years. Some were Pinterest fails. Some were toddler-approved for exactly one day and then rejected forever. These Easy Cheese Quesadilla Dippers are different. Here is why they’ve earned a permanent spot in our weekly rotation:
- Quick & Easy: From start to finish, you’re looking at about 8 minutes. Perfect for those mornings when you’re packing lunches at 6:45 AM with one eye still closed.
- Simple Ingredients: You probably already have everything in your kitchen right now. Tortillas, cheese, a little butter or oil. That’s it. No specialty grocery runs required.
- Perfect for Lunchboxes: These hold up remarkably well. They don’t get rubbery or fall apart. Cut into strips, they’re the ideal finger food for little hands.
- Crowd-Pleaser: I’ve served these at playdates, and they disappear faster than you’d believe. Even the picky eaters go for them.
- Unbelievably Versatile: You can switch up the cheese, add fillings, change the dipping sauce—this is a template, not a rigid formula.
What makes this recipe different from the hundreds of other quesadilla recipes out there? It’s the technique. I found that pressing the tortilla lightly in the pan—using a spatula or even the bottom of a second pan—creates a thinner, crispier result that holds up better in a lunchbox. No sogginess. No falling apart. Just perfectly dippable strips that taste great cold or at room temperature.
These aren’t just quesadillas. They’re a solution to the “what do I pack for lunch” dilemma that haunts parents everywhere. And they’re so simple that your older kids can even start making them on their own—supervised, of course. Trust me, the first time your kid makes their own lunch and feels that little burst of pride? That’s worth more than any fancy recipe.
What Ingredients You Will Need
This recipe uses the most basic, straightforward ingredients to deliver cheesy, crispy goodness without any fuss. You don’t need anything fancy here—just good quality staples that you can find at any grocery store.
- Flour tortillas (8-inch, soft taco size): I prefer Mission or Guerrero brand for their flexibility and consistent thickness. Look for tortillas that are pliable and not cracked at the edges. You can use whole wheat or spinach tortillas for a color boost.
- Shredded Mexican blend cheese (about 1 cup): This is my go-to for the best melt and flavor. The blend typically includes Monterey Jack, cheddar, asadero, and queso quesadilla. Pre-shredded works fine in a pinch, but freshly shredded melts more evenly. For a sharper flavor, use extra cheddar.
- Unsalted butter (2 tablespoons, softened): Butter gives the tortillas that golden, crispy exterior. I use unsalted to control the salt level. You can substitute with olive oil or avocado oil for a dairy-free option, though the texture will be slightly different—less crispy, more chewy.
- Salt (a pinch): Just a tiny sprinkle on the outside of the tortilla before cooking. It enhances the flavor without making it salty.
- Salsa (for dipping): Use your favorite store-bought or homemade salsa. I like a mild restaurant-style salsa for the kids. You can also use cowboy caviar for a chunkier, more exciting dip that adds veggies and beans.
- Sour cream or Greek yogurt (optional, for dipping): Adds a cool, creamy contrast to the warm cheese. My kids love this almost as much as the salsa.
That’s really it. Six ingredients, including the dips. You might also want some optional add-ins like cooked black beans, shredded chicken, or finely diced bell peppers, but for the basic lunchbox version, keep it simple. The beauty of this recipe is its adaptability—once you master the base, you can riff on it endlessly.
Equipment Needed
You don’t need any fancy gadgets for these Easy Cheese Quesadilla Dippers. Here’s what you’ll want to have on hand:
- Non-stick skillet or griddle (10-inch or larger): A good non-stick surface is key for even browning without sticking. I use a well-seasoned cast iron skillet sometimes, but non-stick is more forgiving for beginners.
- Spatula: A thin, flexible metal spatula works best for flipping. A silicone spatula is fine too, just make sure it’s heat-resistant.
- Sharp knife or pizza cutter: For cutting the cooked quesadillas into strips. A pizza cutter makes quick, clean cuts. A sharp chef’s knife works too.
- Cutting board: Any sturdy cutting board will do. Let the quesadilla rest for 30 seconds before cutting to prevent the cheese from oozing everywhere.
- Small bowl for butter: If you’re using butter, you’ll want a small dish to hold it and a pastry brush for even application.
- Lunchbox containers: I like using compartmentalized bento boxes for keeping the dippers separate from the sauce. Small silicone cups work great for holding salsa or sour cream.
If you don’t have a non-stick skillet, you can use a well-oiled stainless steel pan—just watch the heat closely to prevent sticking. And if you’re making a big batch, an electric griddle is a total game-changer. You can cook four quesadillas at once and have lunch prep done in under 15 minutes. I found mine at a thrift store for eight dollars, and it’s been one of my best kitchen investments.
Preparation Method

Let’s get cooking. This method is straightforward, but I’ve included all the little details that make the difference between a good quesadilla and a great one.
- Prep your workstation. Lay out your tortillas, shredded cheese, butter (softened), and a small bowl of salsa. Have your skillet ready on the stove. This goes fast, so you want everything within arm’s reach.
- Butter one side of each tortilla. Using a pastry brush or a butter knife, spread a thin, even layer of softened butter on one side of each tortilla. Don’t go overboard—you want a light coating, not a greasy slick. Place the tortillas butter-side down on a plate or cutting board.
- Add the cheese. Sprinkle about 1/4 cup of shredded cheese evenly over half of each tortilla. Don’t pile it too high in the center—spread it out so it melts evenly. Leave a small border around the edge to prevent cheese from leaking out during cooking.
- Fold and press. Fold the empty half of the tortilla over the cheese-filled half, creating a half-moon shape. Gently press down with your hand to help it stick together. Don’t worry if a little cheese peeks out—it’ll crisp up nicely in the pan.
- Heat the skillet. Place your skillet over medium heat. Let it warm up for about 30 seconds. You want it hot but not smoking. Test it by flicking a drop of water onto the pan—if it sizzles and evaporates immediately, you’re ready.
- Cook the first side. Place the quesadilla in the skillet, butter-side down. Let it cook undisturbed for 2-3 minutes. You’ll see the edges start to turn golden brown and the cheese begin to melt. Use your spatula to gently lift a corner and check the color—you’re looking for a deep golden brown with some darker spots.
- Press it lightly. Here’s the trick: after about a minute, use your spatula to gently press down on the quesadilla. This helps it cook evenly and creates that thin, crispy texture. Don’t smash it—just a gentle, even pressure.
- Flip and cook the second side. Carefully flip the quesadilla using your spatula. Cook for another 2-3 minutes, pressing again after a minute. The second side usually browns a little faster, so keep an eye on it. You want both sides to be golden and crispy.
- Rest and cool. Transfer the cooked quesadilla to a cutting board and let it rest for 30-60 seconds. This allows the cheese to set slightly, making it easier to cut without everything oozing out. I know it’s tempting to cut right away—resist the urge.
- Cut into dippers. Using a pizza cutter or sharp knife, cut the quesadilla into strips. I usually cut them into about 4-5 strips, each about 1.5 inches wide. For younger kids, you can cut them into smaller bite-sized pieces. Let them cool completely on a wire rack before packing—this prevents condensation from making them soggy in the lunchbox.
- Pack with dipping sauce. Place the cooled strips in a lunchbox container alongside a small cup of salsa, sour cream, or your favorite dip. If you’re packing ahead, store the dippers and sauce separately to keep the strips crisp.
And that’s it. You’ve just made lunchbox magic. The whole process takes about 8 minutes from start to finish, and you can easily double or triple the batch to have extras for the week.
Cooking Tips & Techniques
I’ve made more quesadillas than I care to count, and I’ve learned a few things the hard way. Here are my best tips for perfect dippers every time:
- Don’t overcrowd the pan. Cook one quesadilla at a time, or two if your skillet is large enough. Overcrowding lowers the pan temperature and leads to soggy, unevenly cooked tortillas. Patience pays off here.
- Medium heat is your friend. I know it’s tempting to crank up the heat for faster cooking, but medium heat gives the cheese time to melt fully while the tortilla gets golden and crispy. High heat will burn the outside before the cheese even starts to soften.
- Let them cool completely. This is the most important tip for lunchbox success. If you pack warm quesadillas, the steam will condense inside the container and turn your crispy strips into sad, limp noodles. Let them sit on a wire rack for at least 10-15 minutes before packing.
- Use room temperature cheese. Cold cheese straight from the fridge takes longer to melt, which means you have to cook the tortilla longer, increasing the risk of burning. Let the cheese sit out for 10 minutes before using.
- Press, don’t smash. Gentle pressure during cooking helps create that thin, even texture. But pressing too hard can squeeze the cheese out and make a mess. Use a light hand.
- Experiment with the cheese-to-tortilla ratio. Too little cheese and the quesadilla is dry and boring. Too much and it becomes a gooey mess that’s hard to handle. About 1/4 cup per 8-inch tortilla is the sweet spot.
One mistake I made early on was using pre-shredded cheese from a bag. It’s convenient, sure, but it often contains anti-caking agents that prevent it from melting as smoothly. Freshly shredded cheese from a block melts much better and gives you that beautiful, stretchy texture. It takes an extra 30 seconds to shred, and it’s totally worth it.
Variations & Adaptations
Once you’ve mastered the basic Easy Cheese Quesadilla Dippers, the possibilities are endless. Here are some of my favorite variations:
- Protein-Packed Version: Add a layer of shredded cooked chicken, black beans, or crumbled tofu before folding. This turns the dippers into a more substantial meal. I love using leftover Instant Pot pulled pork for a smoky, savory twist.
- Veggie-Loaded Dippers: Finely dice bell peppers, onions, or mushrooms and sauté them briefly before adding to the quesadilla. Spinach leaves (fresh or frozen, thawed and squeezed dry) also work beautifully. My kids don’t even notice the veggies when they’re chopped small and hidden in the cheese.
- Spicy Kick: For older kids or adults, add a few dashes of hot sauce, some pickled jalapeños, or a sprinkle of chili powder inside the quesadilla. Serve with a cooling ranch dip to balance the heat.
- Dairy-Free Option: Use dairy-free cheese shreds (I like Daiya or Violife) and substitute olive oil for the butter. The texture won’t be exactly the same, but it’s still delicious. Let the dairy-free cheese sit at room temperature for a few minutes before using—it melts better that way.
- Gluten-Free Version: Swap the flour tortillas for gluten-free corn tortillas or large gluten-free wraps. Corn tortillas are smaller, so adjust the cheese amount accordingly. They also crisp up beautifully.
- Breakfast Dippers: Fill with scrambled eggs, cheese, and a little cooked bacon or sausage. Cut into strips and serve with maple syrup for dipping. This is a weekend favorite in our house.
I once tried a version with brie and fig jam for a grown-up appetizer, and it was surprisingly good. Don’t be afraid to think outside the lunchbox—these dippers are just as great for game day snacks or quick dinners.
Serving & Storage Suggestions
These Easy Cheese Quesadilla Dippers are best served at room temperature or slightly warm. For lunchboxes, I pack them cold straight from the fridge, and they’re perfectly fine. The texture holds up beautifully, and the flavor actually improves as the cheese sets.
For serving: Arrange the strips on a plate with small bowls of salsa, sour cream, guacamole, or ranch dressing for dipping. You can also serve them with a side of fresh honey mustard coleslaw for a complete meal that feels special. For a fun party platter, arrange the dippers in a fan pattern with multiple dipping sauces.
Storage instructions: Store cooled quesadilla strips in an airtight container in the refrigerator for up to 4 days. Layer them between sheets of parchment paper to prevent sticking. Do not stack them while they’re still warm, or they’ll steam and lose their crispiness.
Freezing: These freeze surprisingly well. Place the cooled strips in a single layer on a baking sheet and freeze for 1-2 hours until solid. Transfer to a freezer-safe bag or container, separating layers with parchment paper. They’ll keep for up to 3 months. To reheat, pop them in a toaster oven or air fryer at 350°F for 3-4 minutes. The microwave works in a pinch, but the texture won’t be as crispy.
Reheating: For best results, reheat in a skillet over medium heat for 1-2 minutes per side, or in an air fryer at 350°F for 3-4 minutes. The oven method (350°F for 5-7 minutes on a baking sheet) also works well for larger batches.
One thing I love about these dippers is that the flavors actually get better after a day in the fridge. The cheese firms up, and the tortilla develops a pleasant chewiness. My kids actually prefer them cold, straight from the lunchbox.
Nutritional Information & Benefits
While these Easy Cheese Quesadilla Dippers are certainly a comfort food, they can be part of a balanced lunchbox. Here’s a rough nutritional breakdown for one serving (about 4-5 strips with 2 tablespoons of salsa):
- Calories: Approximately 280-320
- Protein: 12-15 grams (from the cheese and tortilla)
- Carbohydrates: 28-32 grams
- Fat: 14-18 grams (mostly from cheese and butter)
- Fiber: 2-3 grams
- Calcium: 20-25% of daily value (cheese is a great source)
The cheese provides a good amount of calcium and protein, which are essential for growing kids. Using whole wheat tortillas adds fiber and complex carbohydrates for sustained energy. If you’re watching sodium, opt for low-sodium cheese and skip the extra salt.
For a healthier twist, use reduced-fat cheese and whole wheat tortillas, and load up on veggie add-ins. You can also swap the butter for a light spray of olive oil to reduce saturated fat. These dippers can easily fit into a balanced diet when paired with fresh fruit, veggie sticks, and water.
As with any recipe, moderation is key. These are a treat, not an everyday staple—but they’re a treat that makes lunchtime fun and stress-free.
Conclusion
These Easy Cheese Quesadilla Dippers have become a staple in our kitchen for one simple reason: they work. They’re quick, they’re kid-approved, and they make lunch prep feel less like a chore and more like a small victory. Whether you’re packing for a picky preschooler, a busy teenager, or even yourself, these little strips deliver every single time.
What I love most about this recipe is how forgiving it is. You can use whatever cheese you have on hand, swap the tortillas, change up the dips—it’s a template, not a rigid formula. The first time you make them, follow the method exactly. After that, feel free to experiment. Add some leftover chicken. Throw in a handful of spinach. Make them spicy. Make them mild. Make them your own.
I’d love to hear how these turn out for you. Drop a comment below and let me know what variations you tried, or tag me in your lunchbox photos. And if you have a picky eater who finally found something they love—trust me, I get it. That’s a win worth celebrating.
Here’s to easier mornings, happier lunchtimes, and more time for the things that really matter.
Frequently Asked Questions
Can I make these quesadilla dippers ahead of time for the whole week?
Absolutely. Cook a batch on Sunday, let them cool completely, and store them in an airtight container in the fridge. They’ll stay good for up to 4 days. Just pack them in lunchboxes as needed throughout the week. I recommend keeping the dipping sauce separate until serving to maintain the best texture.
What’s the best cheese for quesadilla dippers?
Mexican blend cheese is my top pick for its meltability and balanced flavor. Monterey Jack is another excellent choice—it’s mild, creamy, and stretches beautifully. Cheddar adds a sharper flavor, but it can be greasy if used alone. A mix of Monterey Jack and cheddar is a foolproof combination.
How do I keep the dippers from getting soggy in the lunchbox?
The key is to let them cool completely before packing. Warm quesadillas create steam, which leads to sogginess. Also, pack the dipping sauce separately in a small container with a tight seal. If you’re using a bento box, use silicone cups to keep the sauce away from the strips.
Can I use corn tortillas instead of flour?
Yes, but keep in mind that corn tortillas are smaller and more fragile. They crisp up beautifully, but they’re more likely to crack when folding. I recommend using two corn tortillas with cheese in between, like a mini quesadilla, rather than folding one in half. Cook them a little longer to ensure they’re crispy.
What dipping sauces work best for kids?
Salsa is the classic choice, but mild ranch dressing, sour cream, guacamole, and even ketchup are huge hits with kids. My daughter loves a simple yogurt-based dip made with plain Greek yogurt, a pinch of garlic powder, and a squeeze of lime juice. For a sweeter option, try apple sauce or even a little maple syrup—surprisingly good with the salty cheese.
Pin This Recipe!
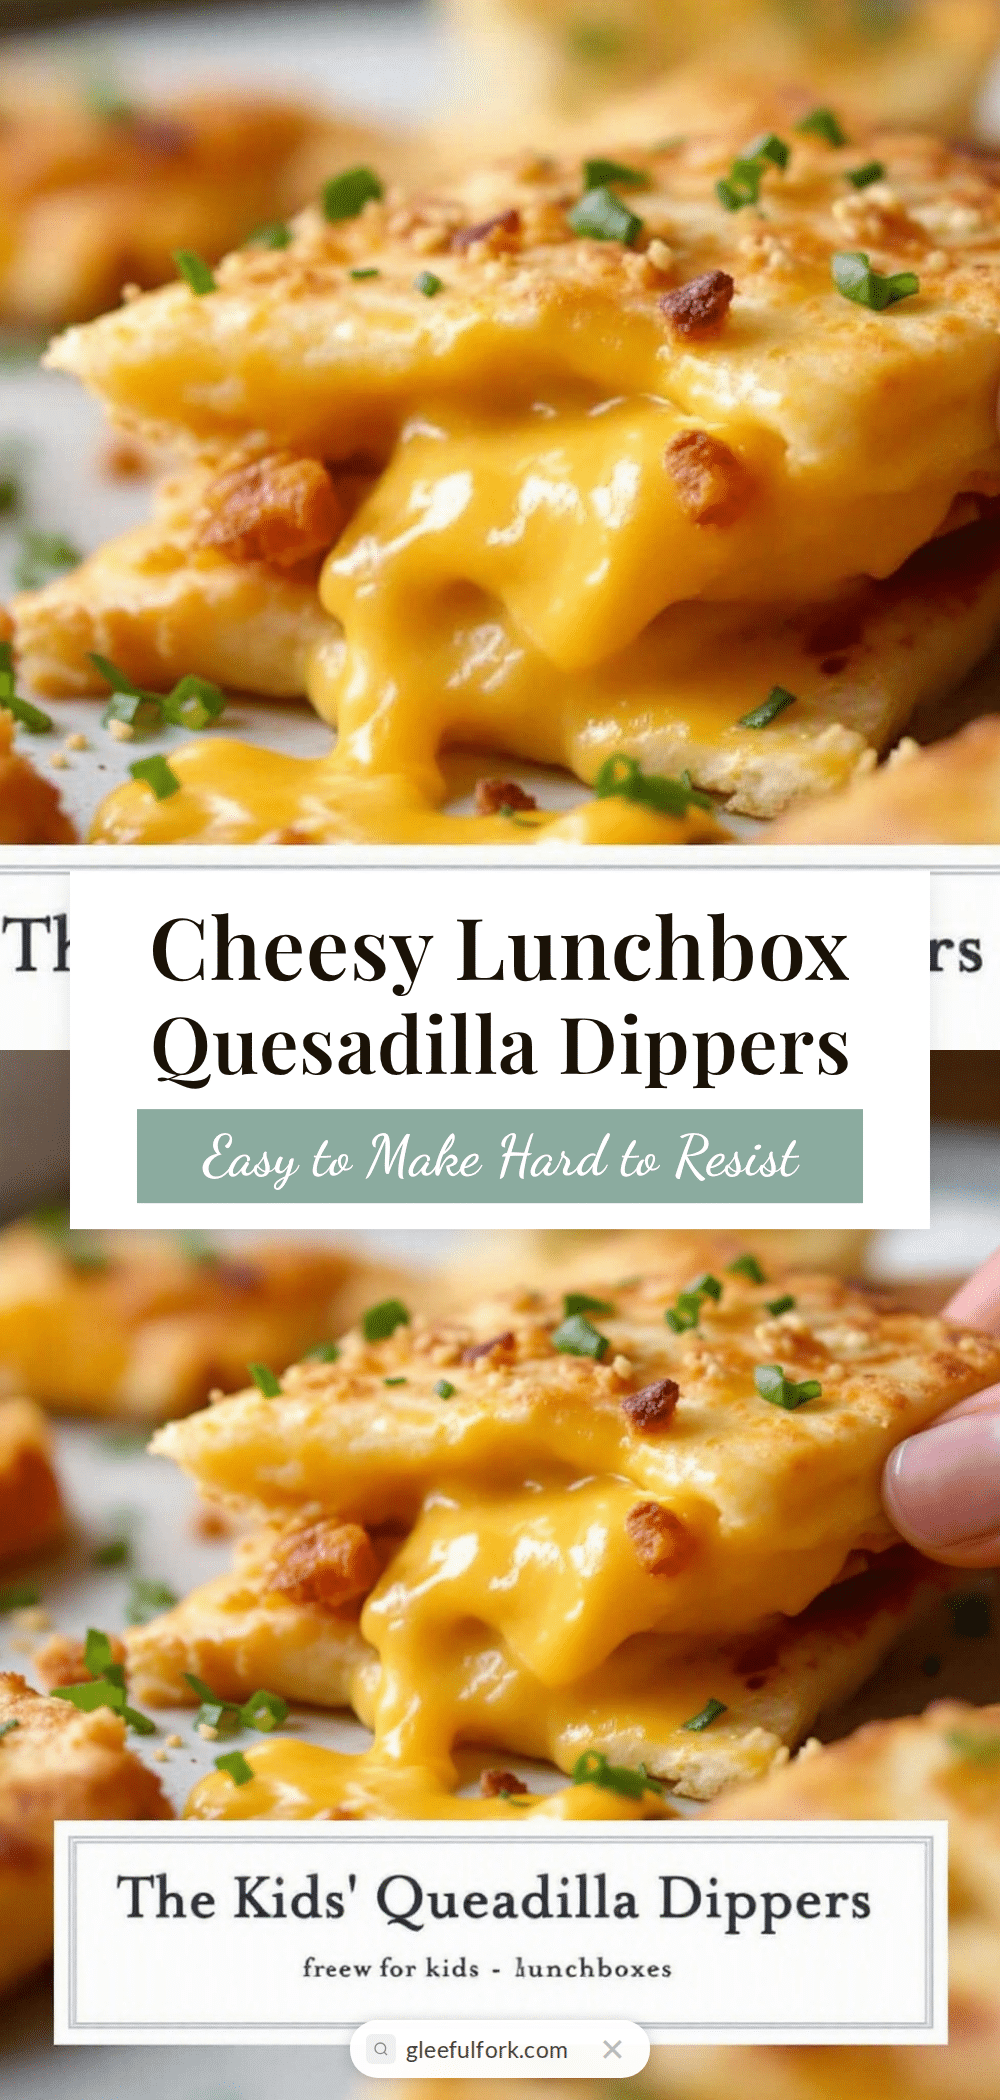
Easy Cheese Quesadilla Dippers: Best Kids’ Lunchbox Idea

Quick and easy cheese quesadilla dippers that are perfect for lunchboxes. Made with simple ingredients and ready in under 10 minutes, these crispy strips hold up well and are a crowd-pleaser for kids and adults alike.
- Prep Time: 5 minutes
- Cook Time: 6 minutes
- Total Time: 11 minutes
- Yield: 4 servings 1x
- Category: Lunch
- Cuisine: Mexican
Ingredients
- 4 (8-inch) flour tortillas (soft taco size)
- 1 cup shredded Mexican blend cheese
- 2 tablespoons unsalted butter, softened
- 1 pinch salt
- Salsa (for dipping)
- Sour cream or Greek yogurt (optional, for dipping)
Instructions
- Prep your workstation. Lay out tortillas, shredded cheese, softened butter, and a small bowl of salsa.
- Butter one side of each tortilla using a pastry brush or butter knife. Place tortillas butter-side down on a plate.
- Sprinkle about 1/4 cup of shredded cheese evenly over half of each tortilla, leaving a small border around the edge.
- Fold the empty half of the tortilla over the cheese-filled half to create a half-moon shape. Gently press down.
- Heat a non-stick skillet over medium heat for about 30 seconds.
- Place the quesadilla in the skillet, butter-side down. Cook undisturbed for 2-3 minutes until the bottom is golden brown.
- After about 1 minute, gently press down on the quesadilla with a spatula to create a thin, crispy texture.
- Flip the quesadilla carefully and cook for another 2-3 minutes, pressing again after a minute, until both sides are golden and crispy.
- Transfer the cooked quesadilla to a cutting board and let it rest for 30-60 seconds.
- Using a pizza cutter or sharp knife, cut the quesadilla into strips (about 4-5 strips, each 1.5 inches wide). Let cool completely on a wire rack.
- Pack the cooled strips in a lunchbox container with a small cup of salsa, sour cream, or your favorite dip. Store dippers and sauce separately to keep strips crisp.
Notes
Let quesadillas cool completely before packing to prevent sogginess. Use room temperature cheese for better melting. For best results, press gently during cooking for a thinner, crispier texture. Store cooled strips in an airtight container in the refrigerator for up to 4 days. Freeze for up to 3 months.
Nutrition
- Serving Size: 4-5 strips with 2 ta
- Calories: 300
- Sugar: 2
- Sodium: 480
- Fat: 16
- Saturated Fat: 9
- Carbohydrates: 30
- Fiber: 2
- Protein: 13
Keywords: quesadilla dippers, cheese quesadilla, kids lunchbox, easy lunch, quick snack, tortilla strips


