Love this? Save it for later!
Share the inspiration with your friends
It was 6:15 PM on a random Tuesday when my friend Dave texted to say he was already in the car, heading over for dinner. I panicked. I had no main course. I had no side dishes. I had a half-empty bottle of wine and a giant, slightly shriveled sugar pumpkin I’d bought for a decoration that never happened.
Honestly, throwing a pizza in the oven was the first option. But I looked at that pumpkin and thought, what if I actually used it? I scooped out the guts, which were slimy and cold, and dumped them in a colander. I rinsed them off, trying to get all the stringy bits away. That’s when I noticed the seeds. They were plump and white, hiding in there.
I tossed them with oil, salt, and some cinnamon sugar I had lying around from a baking project I abandoned last month. I threw them on a baking sheet and cranked the oven to 350°F. The smell started filling the kitchen about twenty minutes in. It wasn’t a gourmet smell, but it was warm and sweet, like a bakery.
Dave arrived just as I was pulling the tray out. He looked at the plate of golden, crunchy seeds and asked, “Is this the appetizer?” I said, “It’s the whole dinner, technically.” He ate three handfuls before I could even sit down. It wasn’t planned. It was a rescue mission. But those crispy cinnamon sugar roasted pumpkin seeds became the star of the night. Now, I always save the seeds. You never know when a guest might show up, or when you just need a snack that tastes like dessert but feels like a win.
Why You’ll Love This Recipe
Let’s be real, most people throw pumpkin seeds away. They’re slimy, hard to clean, and seem like a chore. But this recipe changes everything. It turns what looks like kitchen waste into a snack that is addictive, crunchy, and seriously impressive. I’ve tested this method dozens of times, from my first burnt batch to the perfect golden crisp you’re about to make. Here is why this specific method works better than the rest:
* **Quick & Easy:** The entire process, from scooping to cooling, takes less than 45 minutes. It’s perfect for busy weeknights or when you need a last-minute treat for guests.
* **Simple Ingredients:** You don’t need a specialty store run. You likely already have pumpkin seeds, butter, cinnamon, and sugar in your kitchen. It’s pantry-friendly and stress-free.
* **Perfect for Autumn Entertaining:** Whether you are hosting a harvest dinner, a movie night, or just want a cozy snack, these fit right in. They pair beautifully with the lazy morning breakfast board if you want a savory-sweet combo.
* **Crowd-Pleaser:** Kids love the sweet taste, and adults appreciate the nutty crunch. They are far more interesting than plain salted nuts.
* **Unbelievably Delicious:** The texture is key. These aren’t chewy or soft. They are shatteringly crisp, coated in a delicate cinnamon-sugar glaze that melts on your tongue.
* **The Secret Technique:** Many recipes boil the seeds first, which makes them tough. This method roasts them dry and hot, ensuring maximum crunch. The butter helps the sugar stick without burning, creating a professional-level finish at home.
This isn’t just a snack; it’s a texture experience. It’s the kind of thing that makes you close your eyes after the first bite because the crunch is just that satisfying. It’s comfort food reimagined—healthy-ish, fast, and totally addictive.
What Ingredients You Will Need
This recipe relies on the quality of a few simple components. You don’t need fancy imports, but paying attention to detail here makes a huge difference in the final crunch and flavor. Here is exactly what you need to get started.
* **Pumpkin Seeds (Raw, Peeled):** You will need about 2 cups of cleaned seeds. These are the star of the show. If you buy them pre-cleaned and dried, you can skip the cleaning step, but fresh seeds from a pumpkin taste much better. Look for seeds that are large and plump. Smaller seeds from carving pumpkins can work but are harder to clean.
* **Unsalted Butter:** Use about 3 tablespoons. Butter adds richness and helps the cinnamon sugar adhere to the seeds. I recommend using a high-quality European-style butter for a deeper flavor, but standard supermarket butter works fine too. Melt it before mixing.
* **Granulated White Sugar:** About 2 tablespoons. This creates the caramelization. Do not use brown sugar; it will make the seeds sticky and chewy rather than crisp. White sugar creates that hard, glass-like shell.
* **Ground Cinnamon:** 1 to 1.5 teaspoons. Fresh cinnamon is best. If your jar has been sitting in the back of the cabinet for two years, it’s probably lost its punch. Fresh cinnamon smells sweet and warm, while old cinnamon tastes dusty.
* **Fine Sea Salt:** ½ teaspoon. Salt is non-negotiable. It balances the sweetness and brings out the nutty flavor of the seeds. Kosher salt works too, but you may need to use a bit more due to the larger flakes.
* **Neutral Oil (Optional):** 1 tablespoon of avocado or grapeseed oil. I sometimes add a splash of oil to help conduct heat evenly, but the butter is usually enough. If you are dairy-free, swap the butter for coconut oil.
Ingredient Selection Tips
If you are cleaning seeds from a fresh pumpkin, make sure to rinse them thoroughly under cold water. Use your fingers to rub off all the pulp. Any leftover stringy bits will burn in the oven and taste bitter. For the best results, let the seeds dry on a towel for at least 10 minutes before roasting. Wet seeds steam instead of roast, and nobody wants a soggy snack.
Equipment Needed
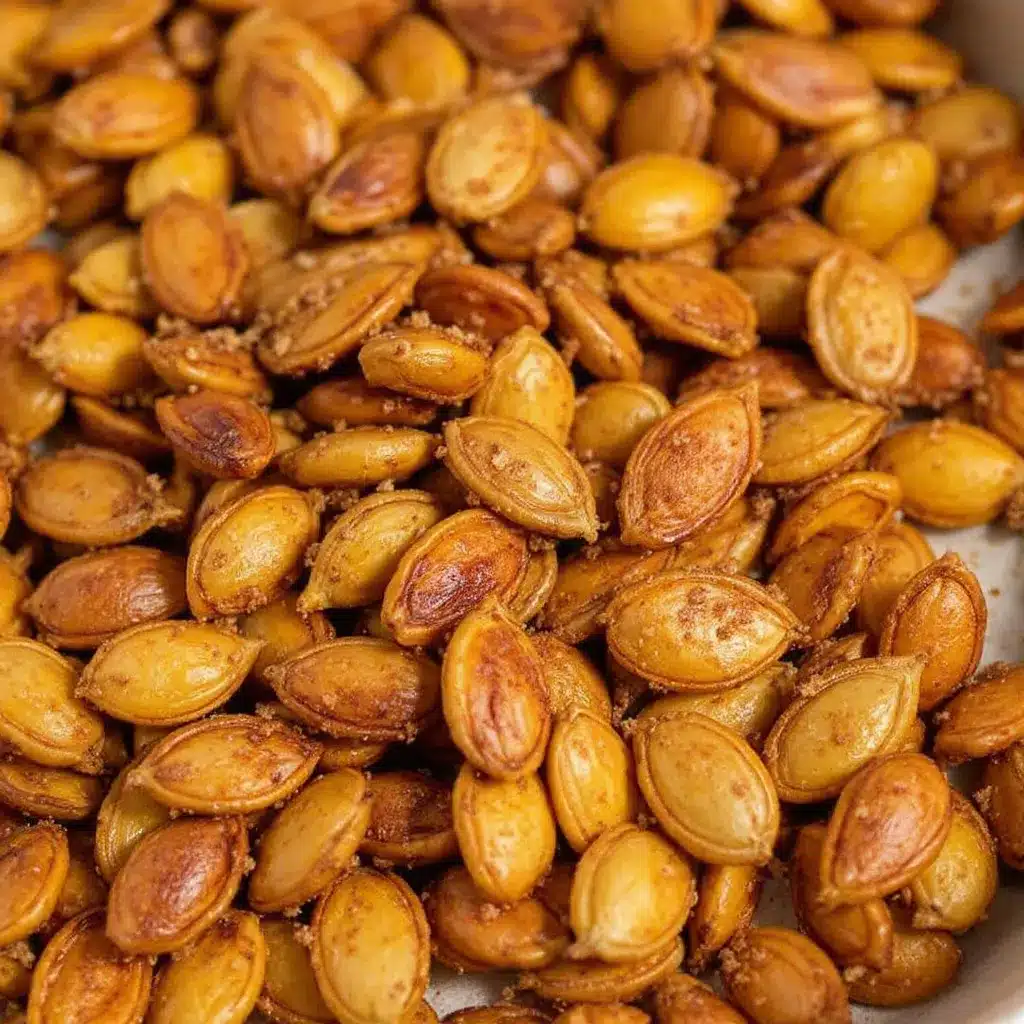
You don’t need a lot of fancy gear for this, but having the right tools makes the process smoother.
* **Large Mixing Bowls:** You need one big bowl for rinsing and one medium bowl for tossing the seeds in butter and spices. A wide bowl helps you spread the seeds out evenly.
* **Baking Sheets:** Two rimmed baking sheets are ideal. This allows you to roast a larger batch without overcrowding. Crowding is the enemy of crunch. If you only have one sheet, roast in two batches.
* **Parchment Paper:** Line your baking sheets with parchment paper. This prevents the sugar from burning onto the metal and makes cleanup a breeze. It also helps the seeds roast evenly.
* **Silicone Spatula:** For mixing the seeds in the butter and sugar. It’s easier to clean than a metal spoon and won’t scratch your bowl.
* **Cooling Rack (Optional but Recommended):** Transferring the hot seeds to a wire rack helps them cool evenly and stay crisp. If you leave them on the hot pan, residual heat might continue cooking them and make them too dark.
Budget-Friendly Alternatives
If you don’t have parchment paper, you can use aluminum foil, but grease it lightly to prevent sticking. A wire rack can be substituted with a second cooling rack or just letting them sit on the counter, but you must stir them occasionally to prevent sticking.
Preparation Method
Follow these steps carefully to ensure your seeds are perfectly crispy and not burnt. Timing is everything here.
1. **Prep and Clean the Seeds (15 Minutes):**
Start by cutting open your pumpkin. Scoop out the insides into a large bowl. Separate the seeds from the pulp. This can be messy, so just go for it. Put the seeds in a fine-mesh sieve and rinse under cold water. Rub them between your fingers to remove all the stringy bits. You want clean, white seeds. Pat them dry with a clean kitchen towel or paper towels. Removing excess moisture is crucial for crunch.
2. **Preheat the Oven (5 Minutes):**
Preheat your oven to 350°F (175°C). Make sure the oven is fully heated before you put the seeds in. An oven that isn’t hot enough will dry out the seeds slowly, making them tough instead of crisp.
3. **Toss with Butter and Oil (2 Minutes):**
In a large mixing bowl, combine the dried seeds with the melted butter and oil (if using). Toss them until every single seed is coated. You want a glossy sheen on each seed. If some seeds are sticking together, break them apart with your fingers.
4. **Add Sugar and Cinnamon (1 Minute):**
Sprinkle the granulated sugar, cinnamon, and salt over the buttered seeds. Toss again until the coating is even. The mixture should look sandy and wet, not clumpy. If you see dry spots, add a tiny bit more butter.
5. **Spread on Baking Sheets (2 Minutes):**
Line two baking sheets with parchment paper. Spread the seeds in a single layer. Do not overlap them. If they are piled on top of each other, they will steam and become chewy. Give the pan a little shake to ensure an even layer.
6. **Roast the Seeds (15-20 Minutes):**
Place the sheets in the oven. Roast for 15 to 20 minutes. You must stir the seeds every 5 minutes. This is the most important step. Stirring ensures even browning and prevents the sugar from burning in spots. Watch them closely in the last 5 minutes. They will turn from pale yellow to golden brown.
7. **Cool Completely (20-30 Minutes):**
Remove the trays from the oven. The seeds will still feel soft when they come out. This is normal. Let them cool completely on the tray or transfer to a wire rack. As they cool, the sugar hardens, and they become crispy. Do not taste test them while they are hot; you won’t know if they are done until they cool.
Troubleshooting Common Issues
* **Seeds are too dark:** Your oven might be running hot. Check them at 12 minutes. Dark brown seeds will taste bitter. Aim for a light golden color.
* **Seeds are chewy:** They weren’t dry enough before roasting, or they were overcrowded on the pan. Make sure to pat them dry and use two pans.
* **Sugar burned:** You didn’t stir enough. The sugar melts and can burn quickly. Constant stirring is key.
Cooking Tips & Techniques
Getting the perfect crunch takes a little practice, but once you nail it, it’s easy. Here are some professional tips to help you avoid common pitfalls.
* **Dry is Better:** The drier the seeds are before they hit the oven, the crispier they will be. If you’re short on time, you can spread them on a towel and use a fan to blow on them. This speeds up the drying process.
* **Low and Slow vs. High and Fast:** Some recipes call for low temperatures (250°F) for a long time. I prefer 350°F for a shorter time. It creates a faster caramelization of the sugar, which gives that hard, glass-like shell. If you roast too low, the seeds can become rubbery.
* **Stirring is Non-Negotiable:** I cannot stress this enough. You have to stir every 5 minutes. The sugar melts and pools at the bottom of the pan. If you don’t stir, those pooled sugars will burn and stick to the seeds, creating bitter black bits.
* **Cooling is Part of Cooking:** When you take them out, they are still soft. They only crisp up as they cool. If you try to store them while they are warm, the steam will make them soggy. Wait until they are completely room temperature before putting them in an airtight container.
* **Don’t Overcrowd:** This is the most common mistake. Give the seeds space. Air needs to circulate around each seed to evaporate moisture. If they are touching, they will steam each other.
Variations & Adaptations
While the cinnamon sugar version is my favorite, these seeds are a blank canvas. Here are a few ways to change up the flavor profile.
* **Spicy Chili Lime:** Skip the sugar and cinnamon. Toss the seeds with chili powder, cumin, lime zest, and salt. This is a great savory option that pairs well with the fresh cowboy caviar for a party platter.
* **Garlic Parmesan:** Use olive oil instead of butter. Toss with minced garlic powder, onion powder, and grated parmesan cheese. Roast until the cheese is golden and crispy. This is a great snack for watching sports.
* **Maple Pecan Style:** Swap the white sugar for maple sugar or maple syrup. Add a pinch of nutmeg and allspice. This tastes like autumn in a handful.
* **Dairy-Free Option:** Simply swap the butter for coconut oil or a plant-based butter alternative. The technique remains the same.
* **Gluten-Free:** This recipe is naturally gluten-free, but always check your spice blends to ensure they haven’t been cross-contaminated in the factory.
I once tried a honey-glazed version, but the honey burned too easily. The granulated sugar is more stable and gives a better crunch. Stick to white sugar for the best results.
Serving & Storage Suggestions
These seeds are best served at room temperature. They lose their crunch if you reheat them, so keep them out of the microwave.
* **Presentation:** Serve them in a small bowl on a coffee table or in mason jars for a rustic look. They are colorful and inviting.
* **Pairings:** They go well with a glass of red wine or a cup of coffee. For a more substantial snack, pair them with a cheese board or the elegant brie and fig jam crostini.
* **Storage:** Store in an airtight container at room temperature for up to 2 weeks. Do not refrigerate, as the humidity will make them soft.
* **Freezing:** You can freeze them for up to 3 months. Thaw at room temperature before eating.
* **Flavor Development:** The flavors actually deepen after a day or two. The sugar continues to harden slightly, making them even crunchier.
Nutritional Information & Benefits
Pumpkin seeds are a nutritional powerhouse. They are rich in magnesium, zinc, and healthy fats. A one-ounce serving provides about 5 grams of protein and 2 grams of fiber. They are also a good source of iron and manganese.
* **Heart Health:** The magnesium in pumpkin seeds helps regulate blood pressure and supports heart health.
* **Sleep Aid:** They contain tryptophan, an amino acid that helps regulate sleep. Eating a small handful before bed might help you relax.
* **Dietary Notes:** This recipe is gluten-free and can be made dairy-free. However, the added sugar and butter do increase the calorie count. Enjoy in moderation as a treat, not a meal replacement.
Conclusion
Making crispy cinnamon sugar roasted pumpkin seeds is easier than you think. It turns a potential waste product into a delicious, crunchy snack that everyone loves. It’s a great way to use up that pumpkin you bought for decoration, or just to have a healthy treat on hand.
I hope you try this recipe. It’s become a staple in my kitchen, especially during the fall. Feel free to experiment with different spices and flavors. Let me know how they turn out for you in the comments below. Did you add chili powder? Did you use maple syrup? I’d love to hear your variations.
Happy roasting!
Frequently Asked Questions
Can I use seeds from a carving pumpkin?
Yes, but they are smaller and harder to clean. You may need to spend more time rubbing off the pulp. They still taste good, but the crunch might be slightly less pronounced than with sugar pumpkins.
Why are my seeds still soft after cooling?
They likely weren’t dry enough before roasting, or they were overcrowded on the pan. Make sure to pat them thoroughly dry and use two baking sheets to ensure air circulation.
Can I make this in an air fryer?
Yes, you can. Cook at 325°F for 8-10 minutes, shaking the basket every 2-3 minutes. Watch them closely, as air fryers can burn sugar quickly.
How do I store them to keep them crispy?
Store them in an airtight container at room temperature. Do not refrigerate or freeze, as moisture will make them soft. They will stay crisp for up to 2 weeks.
Can I reduce the sugar?
Yes, you can reduce the sugar to 1 tablespoon or omit it entirely for a savory version. Just add extra salt and spices. The crunch will still be there, but without the sweet glaze.
Pin This Recipe!
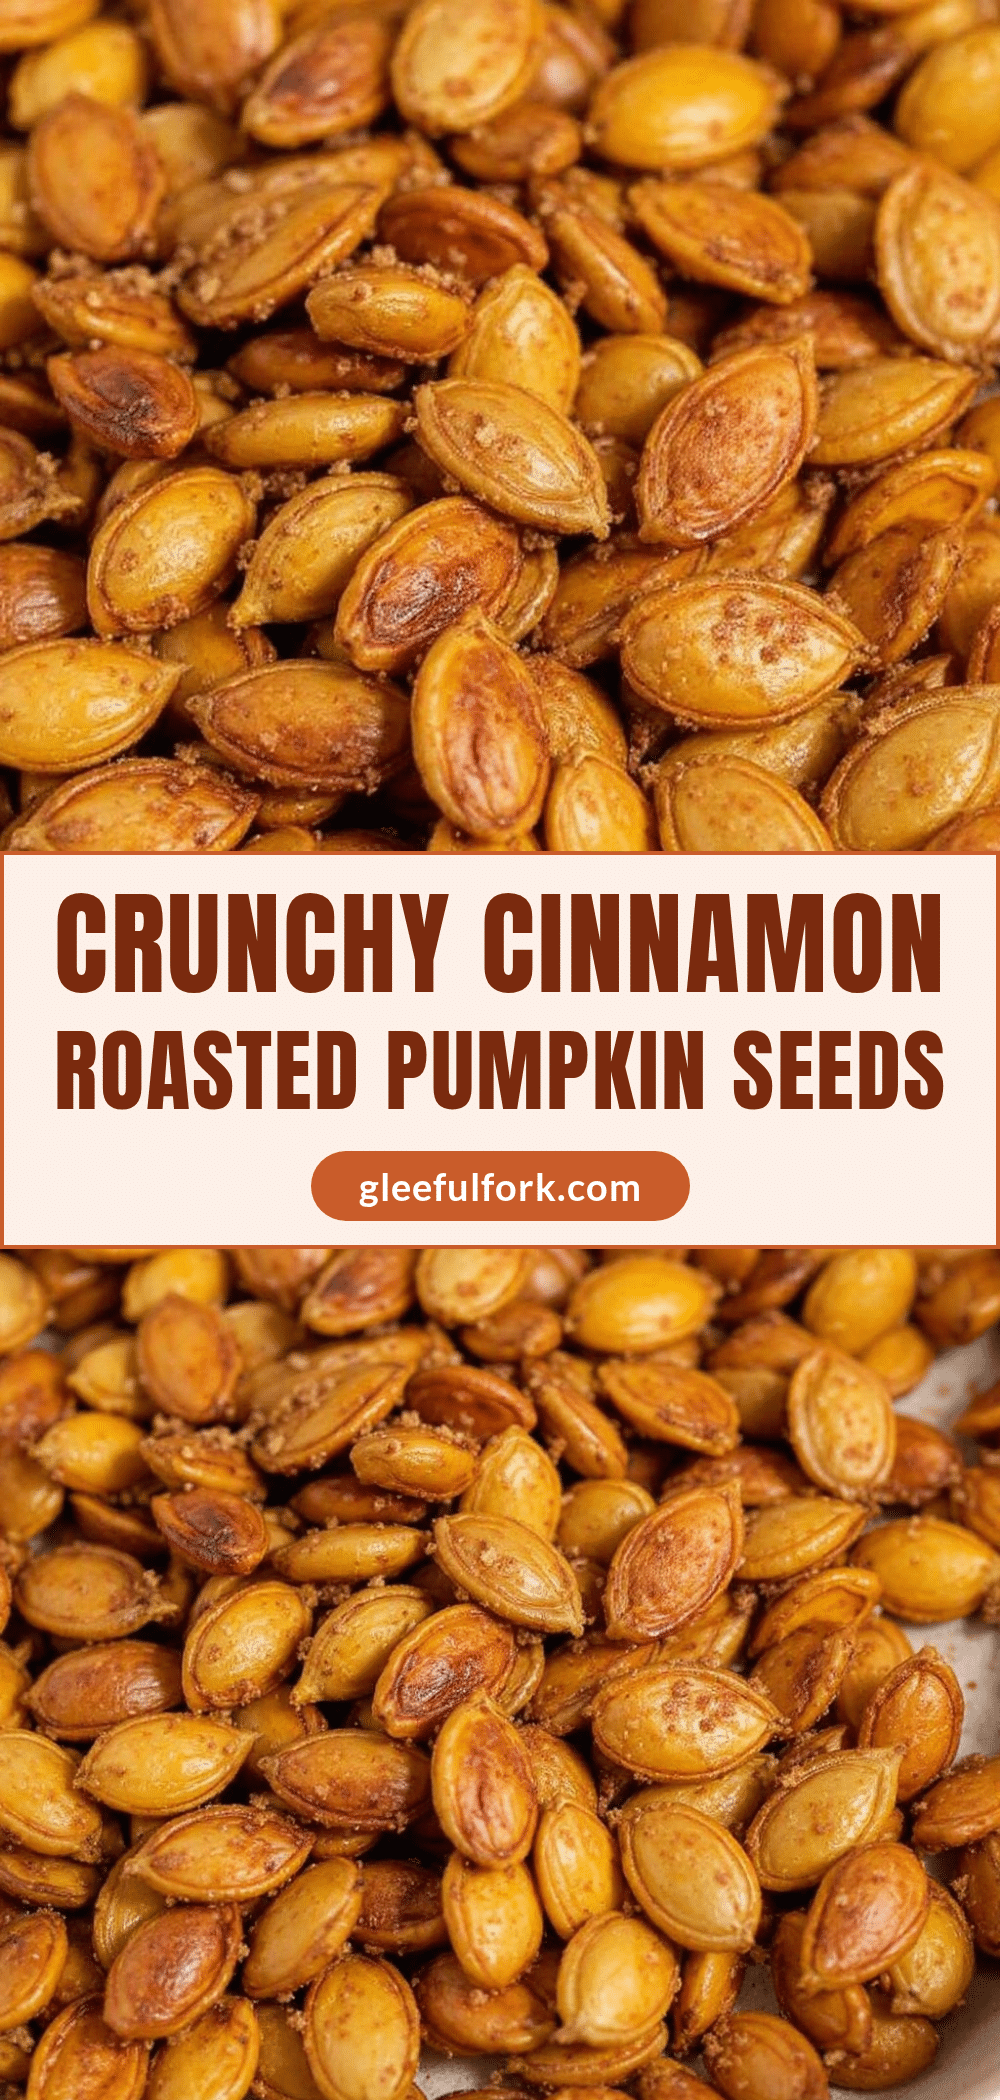
Crispy Cinnamon Sugar Roasted Pumpkin Seeds: Easy Snack
Transform fresh pumpkin seeds into an addictive, shatteringly crisp snack coated in a sweet cinnamon-sugar glaze. This easy, pantry-friendly recipe is perfect for autumn entertaining or a last-minute treat.
- Prep Time: 15 minutes
- Cook Time: 20 minutes
- Total Time: 45 minutes
- Yield: 4 servings 1x
- Category: Snack
- Cuisine: American
Ingredients
- 2 cups raw, peeled pumpkin seeds
- 3 tablespoons unsalted butter, melted
- 1 tablespoon neutral oil (optional, such as avocado or grapeseed)
- 2 tablespoons granulated white sugar
- 1 to 1.5 teaspoons ground cinnamon
- 1/2 teaspoon fine sea salt
Instructions
- Preheat oven to 350°F (175°C).
- Clean seeds: Rinse fresh pumpkin seeds under cold water, rubbing between fingers to remove all pulp and stringy bits. Pat completely dry with a towel.
- Toss seeds: In a large bowl, combine dried seeds with melted butter and oil (if using) until evenly coated.
- Season: Sprinkle sugar, cinnamon, and salt over the seeds. Toss until the mixture looks sandy and wet, ensuring no dry spots remain.
- Spread: Line two baking sheets with parchment paper. Spread seeds in a single layer without overlapping.
- Roast: Bake for 15-20 minutes, stirring every 5 minutes to ensure even browning and prevent burning. Seeds should turn golden brown.
- Cool: Remove from oven. Seeds will feel soft while hot. Let cool completely on a wire rack or tray until the sugar hardens and they become crispy.
Notes
Ensure seeds are completely dry before roasting to achieve maximum crunch. Stirring every 5 minutes is crucial to prevent the sugar from burning. Seeds will soften while hot but crisp up as they cool completely. Store in an airtight container at room temperature for up to 2 weeks.
Nutrition
- Serving Size: 1 ounce (approx. 1/4
- Calories: 180
- Sugar: 10
- Sodium: 200
- Fat: 12
- Saturated Fat: 5
- Carbohydrates: 15
- Fiber: 2
- Protein: 5
Keywords: pumpkin seeds, cinnamon sugar, roasted seeds, fall snack, gluten-free, healthy snack, autumn recipes, easy appetizer


