Love this? Save it for later!
Share the inspiration with your friends
“Is that meat or just a pile of red stuff?”
My brother-in-law Dave pointed at the slow cooker with a plastic spoon hovering mid-air. It was 2015, and the tailgate lot behind the stadium was already a sea of folding chairs and cooler vents. I was standing there, wearing a jersey that was two sizes too small, trying to explain that the smell wafting from the pot wasn’t just burnt plastic. It was ground beef, seasoned to perfection, simmering in a rich, spicy tomato base.
I hadn’t planned on cooking. I usually just buy the pre-packaged chips and hope for the best. But that year, my kitchen sink had backed up, and I was stuck making everything in a single pot on the patio. I threw in some extra cumin, a dash of chili powder, and a handful of shredded cheese because I was feeling generous.
Dave took a bite. He didn’t say anything at first. He just chewed, looked at the asphalt, then looked back at the pot. Then he nodded. That nod was all it took.
We spent the next three hours scooping that mixture onto tortilla chips. It wasn’t just dinner; it was the main event. The heat from the food kept us warm when the wind picked up. The mess on our hands made us feel like we were part of the game, not just watching it. That night, I realized that the best game day food isn’t about fancy presentation. It’s about comfort, heat, and sharing a messy plate with people you love.
This Ultimate Loaded Tailgate Nachos with Ground Beef & Queso recipe was born from that exact moment. It’s not just a snack; it’s a memory of cold air and warm food. I’ve tested this recipe dozens of times since then, tweaking the spice levels and the cheese blend, to make sure it holds up under the best conditions. Whether you’re in a stadium parking lot or your own living room, this dish brings that same communal warmth. You don’t need a stadium to feel the excitement. You just need a hot oven and a big tray.
Why You’ll Love This Recipe
Let’s be honest for a second. Most nacho recipes online are just chips with cheese. They get soggy. They taste flat. They leave you wanting more but never satisfied. This recipe is different because it treats the nachos like a proper meal component, not an afterthought. I’ve spent years testing cheese melts and meat textures, and I can tell you that the secret lies in the layering.
Here is why this specific combination works so well:
- Quick & Easy Prep: The ground beef cooks in about 15 minutes, and the assembly takes another 10. That’s it. You have a full meal ready before the kickoff starts. It’s perfect for busy weeknights or last-minute cravings when you don’t have time to cook a roast.
- Simple Ingredients: You likely have everything in your kitchen right now. Ground beef, onions, garlic, canned tomatoes, and a few spices. No fancy grocery trips needed. You don’t need to hunt down exotic peppers or rare cheeses.
- Perfect for Game Day: This is the ultimate crowd-pleaser. It’s great for brunch, potlucks, cozy dinners, or holiday mornings. The bold flavors cut through the noise of a crowded room.
- Crowd-Pleaser Status: I’ve served this to picky eaters and gourmet chefs alike. Kids love the melted cheese, and adults appreciate the savory depth of the seasoned beef. It always gets rave reviews.
- Unbelievably Delicious: The texture is next-level comfort food. You get the crunch of the chip, the creaminess of the queso, and the hearty chew of the beef. It’s the kind of bite that makes you close your eyes and forget about the score on the screen.
What makes this recipe stand out from the rest is the queso layer. Most people just use shredded cheese, but I recommend adding a little cream cheese and a splash of milk to create a sauce that actually coats the chips. It prevents the dreaded dry chip. Plus, the beef is seasoned with a homemade spice blend that adds a smoky heat without being overwhelming. This isn’t just another version of nachos. It’s my best version. It’s comfort food reimagined—satisfying, fast, but with the same soul-soothing satisfaction as a slow-cooked stew. It’s perfect for impressing guests without stress, or turning a simple meal into something memorable.
What Ingredients You Will Need
This recipe uses simple, wholesome ingredients to deliver bold flavor and satisfying texture without the fuss. The key is quality over quantity. You don’t need a pantry full of weird items, but you do need the right basics. Here is what you’ll need to make this work, grouped by how they function in the dish.
For the Spiced Beef Base
- Ground Beef: Use 1.5 lbs of 80/20 ground beef. The fat content is crucial for flavor. Lean beef will be dry and crumbly. (I prefer grass-fed for a richer taste, but standard works fine.)
- Yellow Onion: One medium onion, finely diced. This provides the sweet base for the savory meat.
- Garlic: 4 cloves, minced. Fresh garlic is non-negotiable here. Powdered garlic just doesn’t have the punch.
- Chili Powder: 2 tablespoons. This is the backbone of the flavor. Use a good quality brand like McCormick or a local blend.
- Ground Cumin: 1 tablespoon. Adds that earthy, warm note that defines Mexican-inspired dishes.
- Smoked Paprika: 1 teaspoon. This gives it a subtle smokiness that mimics grilling, even if you’re baking indoors.
- Tomato Sauce: One 15-ounce can. Low-sodium is best so you can control the salt. This adds moisture and body to the beef.
- Tomato Paste: Two tablespoons. This concentrates the tomato flavor and helps thicken the sauce so it isn’t watery.
For the Queso & Toppings
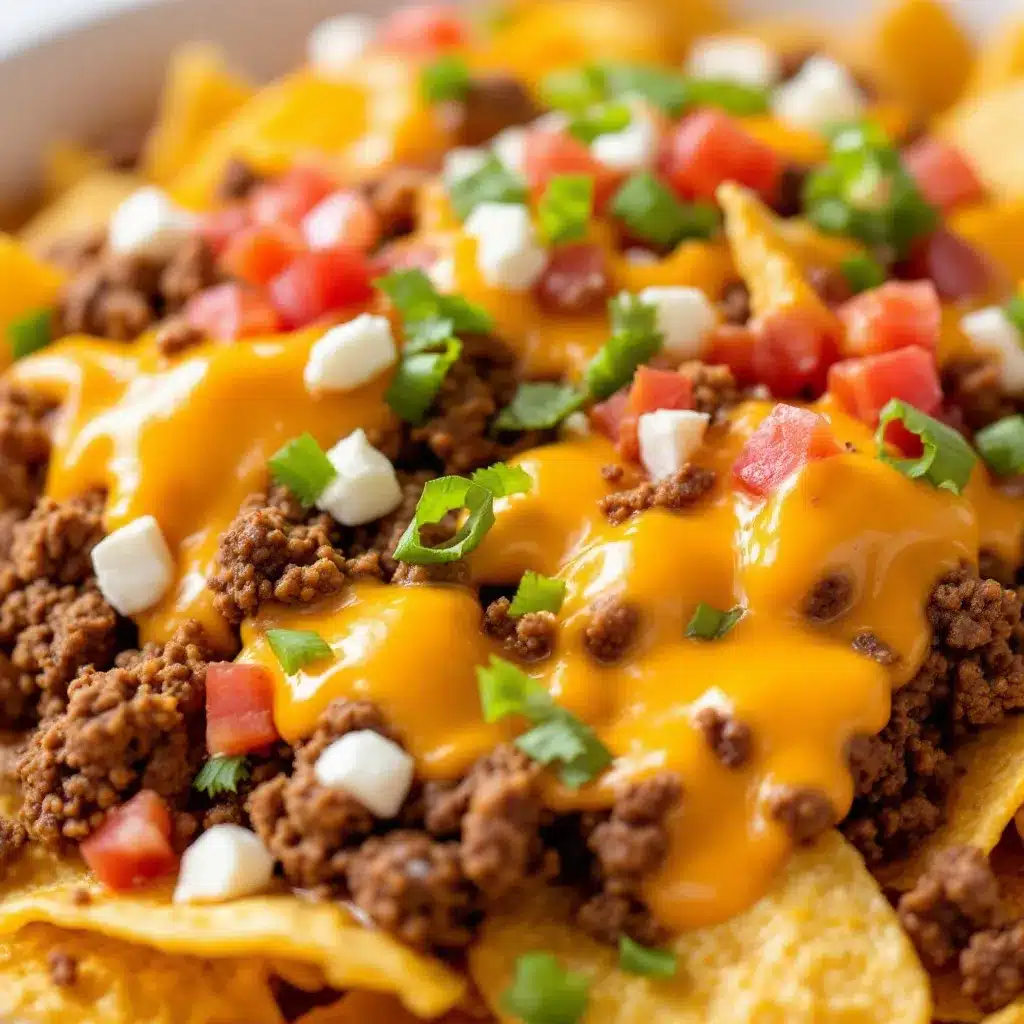
- Tortilla Chips: Two 13-ounce bags. Look for thick, sturdy chips that won’t break under the weight of the toppings. Restaurant-style chips are ideal.
- Monterey Jack Cheese: Two cups, shredded. This melts beautifully. Avoid pre-shredded cheese if possible, as the anti-caking agents can prevent smooth melting.
- Cheddar Cheese: One cup, shredded. Sharp cheddar adds a nice tang to balance the mild jack.
- Cream Cheese: One 8-ounce block, softened. This is the secret ingredient for a creamy queso texture.
- Heavy Cream: Half a cup. Helps loosen the cream cheese and creates a pourable consistency.
- Jalapeños: One cup, sliced. Fresh is best for brightness, but pickled works if you want more tang.
- Black Beans: One 15-ounce can, rinsed and drained. Adds protein and fiber, plus a nice texture contrast.
- Cilantro: Half a cup, chopped. Fresh cilantro adds a pop of color and freshness at the end.
- Sour Cream: Half a cup, for serving. Adds a cool contrast to the hot, spicy beef.
Substitutions & Tips
If you are watching your sodium, look for no-salt-added canned tomatoes and beans. For a gluten-free option, ensure your tortilla chips are certified gluten-free, as some are processed on shared equipment with wheat. You can swap the ground beef for ground turkey if you prefer a leaner option, but you’ll need to add a little extra olive oil to keep it moist. In summer, you might swap the heavy cream for a light coconut yogurt for a dairy-free queso, though the texture will be slightly different.
Equipment Needed
You don’t need a fancy kitchen to make this, but having the right tools makes the process smoother. The most important piece of equipment is a large, heavy-bottomed skillet or Dutch oven. I recommend a cast-iron skillet because it distributes heat evenly, preventing the beef from burning while you brown it. If you don’t have one, a stainless steel pan works well, just keep the heat medium.
You’ll also need two large rimmed baking sheets. Standard cookie sheets without rims are a disaster waiting to happen because the cheese and juices will spill over. Look for half-sheet pans, the kind you see in professional kitchens. They hold enough chips for a crowd.
For mixing the queso, a small saucepan is helpful. You can do it in the microwave, but a saucepan gives you more control over the melting process. A whisk is useful here to break up the cream cheese smoothly. Finally, have a large bowl ready for tossing the chips with the initial layer of cheese. It sounds like extra work, but it ensures every chip gets coated.
If you are buying new pans, don’t feel pressured to spend a fortune. A good mid-range cast-iron skillet from a hardware store will last a lifetime. Just remember to season it occasionally with vegetable oil to keep it rust-free. For the baking sheets, any brand is fine as long as they are sturdy. Thin, flimsy pans can warp in the high heat, leading to uneven cooking.
Preparation Method
Getting this right is about timing and layering. Follow these steps closely to avoid soggy chips or under-seasoned meat.
Step 1: Brown the Beef (15 Minutes)
Start by heating your large skillet over medium-high heat. Add the ground beef, breaking it up with a wooden spoon as it cooks. You want small, crumbly pieces, not large chunks. This usually takes about 8-10 minutes. Once the beef is no longer pink, drain any excess fat if you want a less greasy result, but leave a little bit for flavor.
Step 2: Build the Flavor Base (5 Minutes)
Add the diced onion to the beef. Cook for 3-4 minutes until the onion becomes translucent. Then, add the minced garlic, chili powder, cumin, and smoked paprika. Stir constantly for one minute. This “blooms” the spices, releasing their essential oils and creating a deeper aroma. If your pan looks dry, add a splash of water or broth.
Step 3: Simmer the Sauce (10 Minutes)
Stir in the tomato paste, cooking it for another minute to caramelize slightly. This removes the raw tomato taste. Next, pour in the tomato sauce. Mix well. Reduce the heat to low and let it simmer for about 10 minutes. The sauce should thicken enough to coat the back of a spoon. It shouldn’t be runny. Stir in the rinsed black beans at the very end, just to heat them through. Remove from heat and set aside.
Step 4: Prepare the Queso (5 Minutes)
While the beef simmers, make the cheese sauce. In a small saucepan over low heat, combine the softened cream cheese and heavy cream. Whisk gently until the cream cheese is fully melted and smooth. Do not let this boil. Once smooth, remove from heat and stir in the shredded Monterey Jack and Cheddar cheese. The residual heat will melt the cheese. If it’s too thick, add a tablespoon of milk at a time. You want a dip-like consistency.
Step 5: Layer the Nachos (10 Minutes)
Preheat your oven to 400°F (200°C). Line your two baking sheets with parchment paper. Spread half of the tortilla chips on each sheet. Do not overlap the chips too much; they need space for the heat to circulate. Sprinkle half of the shredded cheese (save some for the top) over the chips. Then, spoon half of the beef mixture evenly over the cheese. Top with the remaining cheese. Repeat with the second tray.
Step 6: Bake and Broil (10-12 Minutes)
Place the trays in the oven. Bake for 8-10 minutes, or until the cheese is bubbling and slightly golden. Keep a close eye on them. You want the cheese melted and the edges of the chips slightly crisp, not burnt. If your oven runs hot, check them at 8 minutes. For a final touch, you can broil for 1-2 minutes to get those crispy, browned spots on the cheese. Watch closely so it doesn’t burn.
Step 7: Final Assembly
Remove from the oven. Immediately top with sliced jalapeños, fresh cilantro, and a dollop of sour cream. Serve hot. The chips will continue to soften as they sit, so get them to the table quickly.
Cooking Tips & Techniques
I’ve made a few mistakes in my time making nachos, mostly involving soggy bottoms. Here is how to avoid them. The biggest issue is moisture. If your beef mixture is too watery, it will soak into the chips before they have a chance to crisp up in the oven. That is why simmering the sauce is critical. Let it reduce until it is thick and hearty. If it looks thin, cook it longer.
Another common mistake is overcrowding the pan. If you pile the chips too high, the bottom layer will steam instead of bake. Spread them out in a single layer. It might take two batches, but it’s worth it for the texture.
When melting the cheese for the queso, low and slow is the rule. High heat can cause the cheese to separate, leaving you with oily, grainy sauce. If you see oil separating, whisk in a teaspoon of cornstarch mixed with cold water to help emulsify it back together.
For efficiency, prep all your ingredients before you start cooking the beef. Have your onions diced, garlic minced, and cheese shredded. This is called *mise en place*, and it saves you from burning the garlic while you’re looking for the cumin.
Also, taste your beef mixture before you assemble. Add salt and pepper to your liking. The cheese and chips are salty, but the beef needs its own seasoning profile. If it tastes bland at this stage, it will taste bland in the final dish.
Variations & Adaptations
This recipe is a canvas for your own creativity. Here are a few ways to change it up.
For a **Turkey Version**, swap the ground beef for ground turkey. Since turkey is leaner, add a tablespoon of olive oil to the pan when browning. You might also want to add a splash of apple cider vinegar to the sauce for brightness.
For a **Vegetarian Option**, omit the beef and use a can of drained corn and extra black beans. You can add diced bell peppers or zucchini to the onion mixture for added veggies. The queso sauce remains the same.
For a **Spicy Kick**, add a diced chipotle pepper in adobo sauce to the beef mixture. This adds a deep, smoky heat. You can also use pepper jack cheese instead of Monterey Jack.
For a **Gluten-Free Twist**, ensure your chips are certified gluten-free. Some corn chips are processed in facilities with wheat. Also, check your spice blends, as some contain anti-caking agents with gluten.
I personally love adding a layer of refried beans between the chips and the beef. It adds a creamy texture that complements the chunky beef well. It’s a bit heavier, but very satisfying.
Serving & Storage Suggestions
Serve these nachos straight from the oven. They are best enjoyed hot and crispy. Pair them with a cold beer or a margarita for the full tailgate experience. If you are serving a large crowd, consider adding a side of fresh fruit salad or a light green salad to balance the richness of the cheese and meat.
Leftovers can be stored in an airtight container in the refrigerator for up to 3 days. However, the chips will lose their crunch. To reheat, spread them on a baking sheet and warm in the oven at 350°F for 10 minutes. The microwave will make them soggy, so avoid it if you can.
You can also freeze the beef mixture separately from the chips. Freeze it in portion-sized containers for quick meals later. When ready to eat, reheat the beef, assemble fresh chips, and bake. This is a great strategy for meal prepping.
The flavors develop over time, but the texture is best fresh. Don’t let them sit out for more than two hours, as the cheese will congeal and the chips will turn tough.
Nutritional Information & Benefits
This dish is hearty and indulgent, so enjoy it in moderation. A typical serving contains approximately 450-500 calories, depending on the chip size and cheese amount. The ground beef provides a good source of protein and iron. The black beans add fiber, which aids in digestion. The cheese offers calcium and vitamin D.
For those watching sodium, use low-sodium tomato sauce and beans. You can also reduce the amount of cheese by using a strong-flavored aged cheddar, which allows you to use less while still getting great taste.
This recipe is not inherently gluten-free unless you use certified chips. It is also not suitable for vegans due to the dairy and meat. However, it can be adapted easily for those needs, as mentioned in the variations section.
From a wellness perspective, this is a great way to incorporate vegetables like onions, peppers, and beans into a fun meal. It’s comfort food that doesn’t feel completely guilty if you balance it with healthier sides.
Conclusion
This Ultimate Loaded Tailgate Nachos with Ground Beef & Queso is more than just a recipe. It’s a way to bring people together. Whether you are cheering for your team or just watching the game with friends, these nachos provide the perfect backdrop. They are easy to make, delicious to eat, and satisfying to share.
I encourage you to make this your own. Add your favorite toppings, adjust the spice level, or try a different cheese blend. The best recipes are the ones that evolve with you.
I love this recipe because it reminds me of those cold nights in the parking lot, sharing food with people who matter. It’s simple, honest, and deeply comforting.
Please try it out and let me know how it turns out. Share your photos or tell me your favorite topping in the comments below. I’d love to hear your adaptations. Enjoy the game, and enjoy the food.
FAQs
Can I make these nachos ahead of time?
It’s best to assemble them just before baking. If you prepare the beef and queso ahead of time, store them separately. Assemble and bake right before serving to ensure the chips stay crisp.
How do I keep the chips from getting soggy?
The key is to use a thick beef mixture that isn’t watery. Also, avoid overcrowding the baking sheet. Give each chip room to breathe in the oven.
Can I use pre-shredded cheese?
You can, but it’s not recommended. Pre-shredded cheese contains cellulose, which prevents it from melting smoothly. You might end up with a grainy texture. Shred your own cheese for the best results.
What is the best type of tortilla chip to use?
Thick, restaurant-style tortilla chips are ideal. They are sturdy enough to hold the heavy toppings without breaking. Avoid thin, delicate chips.
Can I freeze the leftover beef mixture?
Yes, the seasoned beef mixture freezes well for up to 3 months. Thaw it in the refrigerator overnight and reheat before assembling fresh nachos.
Pin This Recipe!
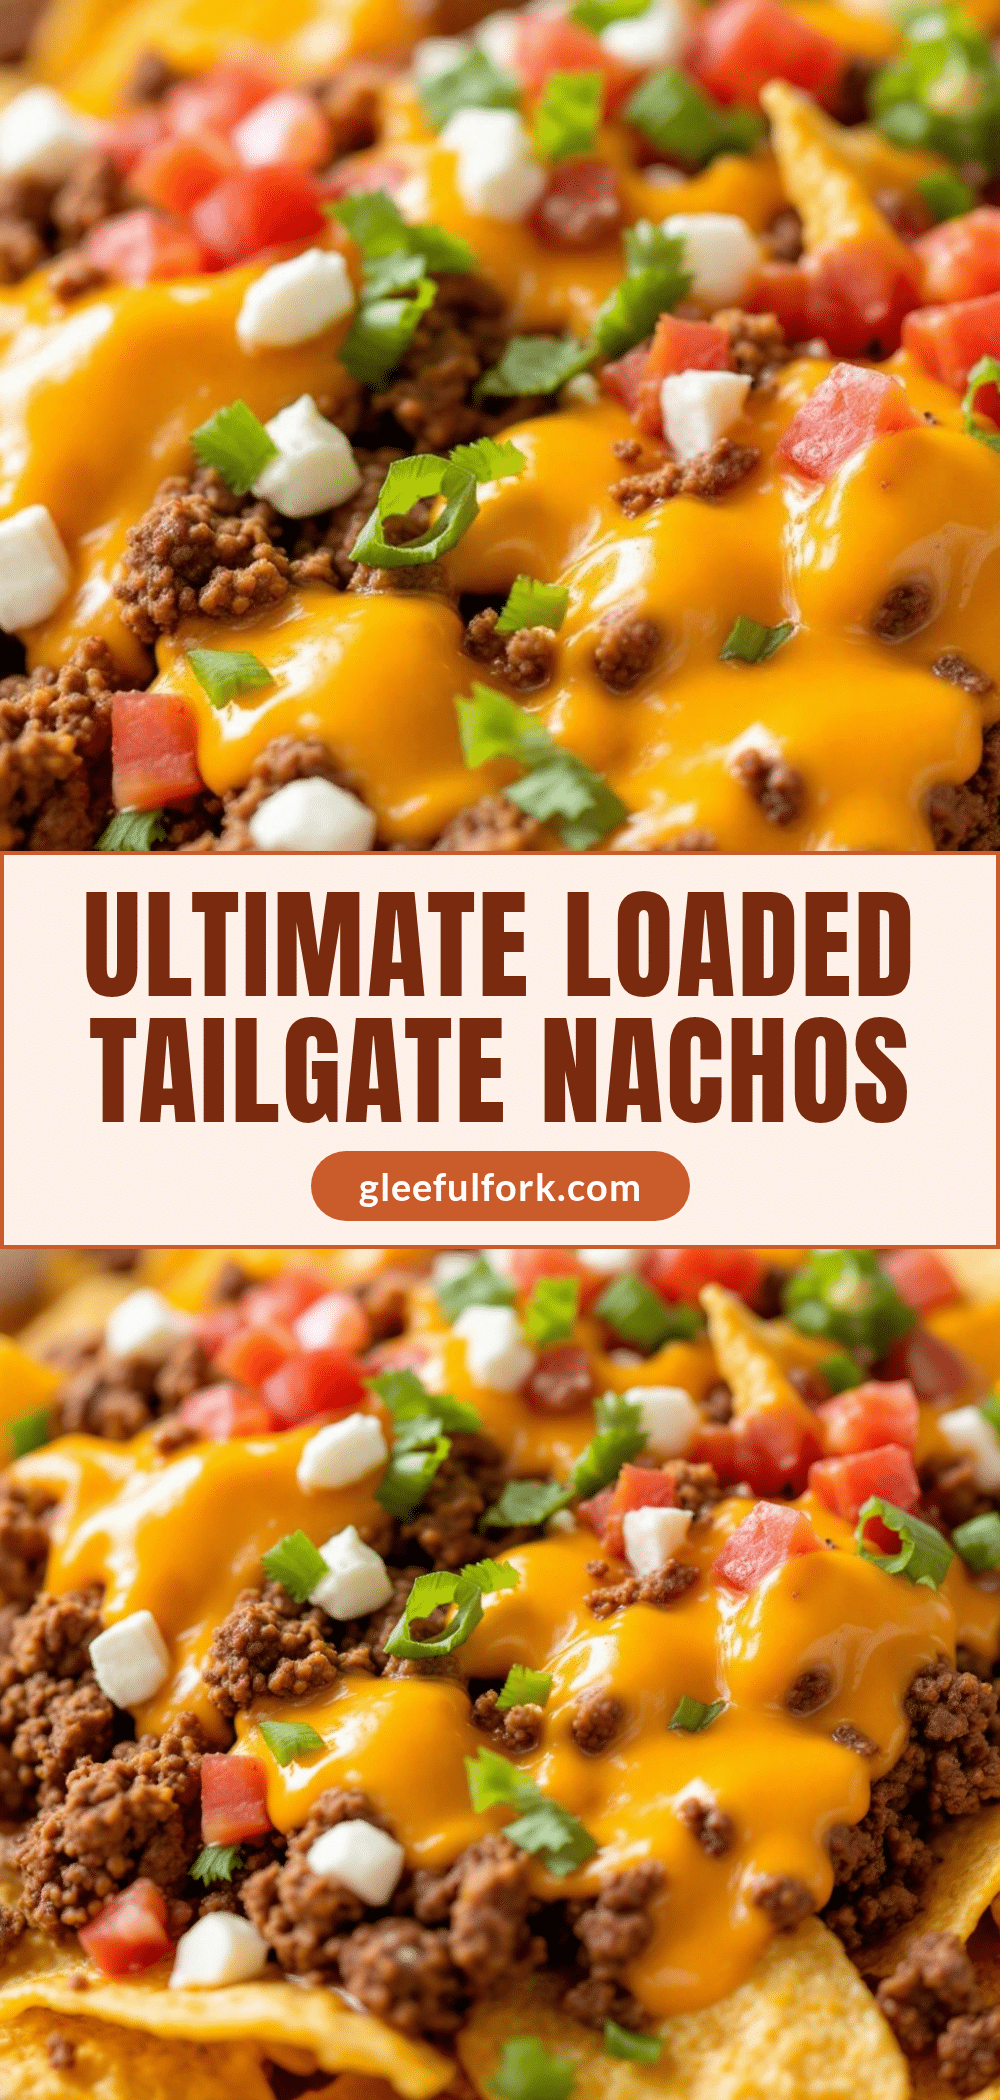
Ultimate Loaded Tailgate Nachos with Ground Beef & Queso
A hearty, crowd-pleasing game day dish featuring seasoned ground beef, a creamy homemade queso sauce, and melted cheese baked on sturdy tortilla chips.
- Prep Time: 25 minutes
- Cook Time: 30 minutes
- Total Time: 55 minutes
- Yield: 8 servings 1x
- Category: Appetizer
- Cuisine: Mexican-American
Ingredients
- 1.5 lbs 80/20 ground beef
- 1 medium yellow onion, finely diced
- 4 cloves garlic, minced
- 2 tablespoons chili powder
- 1 tablespoon ground cumin
- 1 teaspoon smoked paprika
- 1 (15-ounce) can tomato sauce (low-sodium)
- 2 tablespoons tomato paste
- 1 (15-ounce) can black beans, rinsed and drained
- 2 (13-ounce) bags thick tortilla chips
- 2 cups Monterey Jack cheese, shredded
- 1 cup sharp cheddar cheese, shredded
- 1 (8-ounce) block cream cheese, softened
- 1/2 cup heavy cream
- 1 cup sliced jalapeños
- 1/2 cup fresh cilantro, chopped
- 1/2 cup sour cream, for serving
Instructions
- Heat a large skillet over medium-high heat. Add ground beef and break into small crumbles, cooking for 8-10 minutes until no longer pink. Drain excess fat if desired, leaving some for flavor.
- Add diced onion to the beef and cook for 3-4 minutes until translucent. Add minced garlic, chili powder, cumin, and smoked paprika. Stir constantly for 1 minute to bloom the spices.
- Stir in tomato paste and cook for 1 minute. Pour in tomato sauce, mix well, and reduce heat to low. Simmer for 10 minutes until the sauce thickens. Stir in black beans and remove from heat.
- In a small saucepan over low heat, whisk cream cheese and heavy cream until smooth. Remove from heat and stir in Monterey Jack and cheddar cheese until melted. Adjust consistency with milk if needed.
- Preheat oven to 400°F (200°C). Line two large rimmed baking sheets with parchment paper. Spread half the chips on each sheet.
- Sprinkle half the shredded cheese over the chips, then spoon half the beef mixture evenly over the cheese. Top with remaining cheese. Repeat with the second tray.
- Bake for 8-10 minutes until cheese is bubbling and slightly golden. Broil for 1-2 minutes for crispy spots if desired.
- Remove from oven and immediately top with jalapeños, cilantro, and dollops of sour cream. Serve hot.
Notes
Ensure the beef sauce is thick and not watery to prevent soggy chips. Use thick, sturdy tortilla chips. Do not overcrowd the baking sheets; spread chips in a single layer. For a vegetarian option, substitute beef with extra black beans and corn. For gluten-free, use certified GF chips.
Nutrition
- Serving Size: Approximately 1/8 of
- Calories: 475
- Sugar: 4
- Sodium: 650
- Fat: 28
- Saturated Fat: 14
- Carbohydrates: 35
- Fiber: 4
- Protein: 22
Keywords: tailgate nachos, game day food, ground beef nachos, queso dip, easy appetizer, crowd pleaser, oven baked nachos


