Love this? Save it for later!
Share the inspiration with your friends
“Why not just roll the cake crumbs by hand instead of using a mold?” my niece asked one chilly October evening, her eyes wide with the kind of curiosity only kids have. I started to explain why that wouldn’t work — then stopped. Honestly, her suggestion made more sense than the fancy cake pop sticks and molds I’d been fussing over for an hour.
That night, I tossed aside my usual perfectionist approach and let her lead the way. We shaped those spooky no bake monster eyeball cake pops with our hands, a little messy, a lot fun, and somehow, the results were better than I’d imagined. The imperfections gave each eyeball its own character — some a little lopsided, others with oversized “veins” of red icing creeping out. I hadn’t realized how much charm came from embracing a bit of chaos in the kitchen.
Maybe you’ve been there: gearing up for Halloween treats that look too complicated to pull off, only to be saved by a simple, no-fuss trick. These cake pops became our go-to for party snacks, and honestly, I keep making them because they’re a hit every single time — spooky, sweet, and just the right amount of creepy without the stress.
Why You’ll Love This Recipe
Spooky no bake monster eyeball cake pops are more than just a Halloween novelty — they’re a fun project and a guaranteed crowd-pleaser. Here’s why you’ll want to have this recipe bookmarked:
- Quick & Easy: Comes together in under 30 minutes, perfect for busy October nights or last-minute party ideas.
- Simple Ingredients: No weird specialty items needed; most ingredients are pantry staples or easy to find at any grocery store.
- Perfect for Halloween Parties: These eyeball cake pops add the perfect creepy vibe to any spooky gathering.
- Crowd-Pleaser: Kids love them for the fun factor, adults appreciate the nostalgic cake-and-frosting combo.
- Unbelievably Delicious: Moist cake crumbs mixed with creamy frosting create a luscious bite that’s as tasty as it looks chilling.
This isn’t just another cake pop recipe. Instead of fiddly baking and decorating, these use a simple no bake technique and playful decorating tricks, like drawing “bloodshot” veins with red icing and creating monster-like irises with colorful candy. Honestly, the way the frosting blends with the cake crumbs gives a velvety texture that’s almost addictive.
Whether you’re making treats for a classroom party, a last-minute Halloween get-together, or just to satisfy your sweet tooth, these spooky no bake monster eyeball cake pops hit the spot every time.
What Ingredients You Will Need
This recipe uses simple, wholesome ingredients to deliver bold flavor and a fun texture without any baking fuss. Most are pantry staples, and there are easy swaps if you want to get creative.
- For the Cake Pop Base:
- 1 box of chocolate or red velvet cake mix (or about 4 cups of homemade cake crumbs)
- 1 cup (240 ml) cream cheese frosting or any thick buttercream (store-bought works great)
- For Decoration:
- White candy melts or white chocolate, about 8 oz (227 g) (I like Wilton brand for smooth melting)
- Black edible food marker or black gel icing for the pupil
- Red gel icing or piping gel for the “bloodshot veins”
- Optional: green or blue candy melts for colorful irises
- Additional Supplies:
- Mini paper cupcake liners or Styrofoam block for drying
- Optional: sprinkles or edible glitter for extra monster flair
You don’t need fancy or hard-to-find ingredients. If you want a dairy-free version, swap cream cheese frosting for coconut milk-based frosting and use dairy-free candy melts. For a gluten-free option, choose a gluten-free cake mix or use almond flour-based crumbs.
Using a dense frosting is key — it helps bind the cake crumbs so your eyeballs hold their shape. If your frosting feels too runny, add a bit more cake crumbs until you get a moldable mix.
Equipment Needed
You don’t need much gear for these spooky no bake monster eyeball cake pops — which is part of what makes them so approachable.
- Mixing Bowls: At least two — one for cake crumbs, one for frosting.
- Spoons and Spatulas: For mixing and folding ingredients.
- Baking Sheet or Tray: To place the cake pops while they set.
- Wax Paper or Parchment: Line your tray to keep things tidy.
- Microwave-safe Bowl: For melting candy melts or chocolate.
- Styrofoam Block or Cake Pop Stand (Optional): Helps keep your eyeballs upright while drying, but you can also use mini cupcake liners to rest them if you don’t have a stand.
I once tried using a silicone mold for shaping but found rolling by hand was quicker and gave more character to each eyeball — plus, less clean-up! If you don’t have a microwave, a double boiler works just fine for melting candy melts, just watch the heat so the chocolate doesn’t seize.
Preparation Method
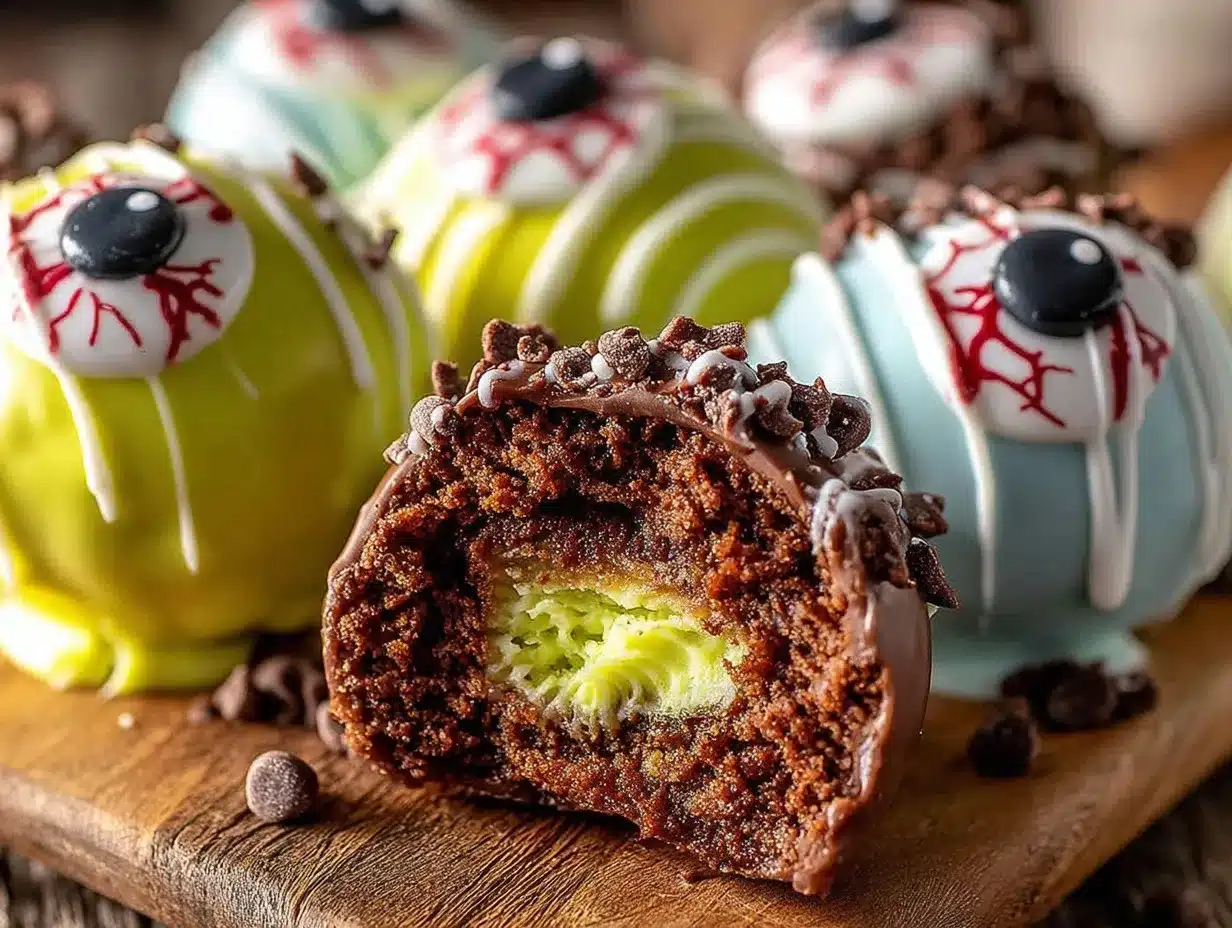
- Prepare the Cake Crumbs: If using a boxed cake mix, bake according to package instructions and let cool completely. Crumble the cake finely using your hands or a food processor (about 4 cups/400 g). If using leftover cake, just crumble it up well.
- Mix the Cake and Frosting: In a large bowl, combine the cake crumbs with 1 cup (240 ml) of cream cheese frosting. Stir and then knead with your hands until the mixture sticks together like playdough. Add more frosting if too dry, or more crumbs if too wet. (This step takes about 5 minutes.)
- Shape the Eyeballs: Roll the mixture into 1 ½-inch (4 cm) balls. Don’t worry if they aren’t perfectly round—those little flaws add to the creepy effect. Place them on a wax-paper-lined tray and chill in the fridge for at least 30 minutes to firm up.
- Melt the Candy Coating: In a microwave-safe bowl, melt 8 oz (227 g) of white candy melts in 30-second intervals, stirring between each until smooth. Be careful not to overheat. (About 3-4 minutes total.)
- Coat the Cake Pops: Using a spoon or fork, dip each eyeball into the melted candy, coating completely. Let excess drip off before placing back on the lined tray or into mini cupcake liners. Chill again for 15 minutes to set the coating.
- Decorate the Eyeballs: Use black edible markers or gel icing to draw the pupil in the center. Add a ring of colored candy melts around the pupil for the iris. Finally, pipe red gel icing to create bloodshot veins extending outward. Add any extra sprinkles or edible glitter now.
- Let the Decorations Set: Return the pops to the fridge for another 10-15 minutes so the decorations firm up. Then, serve or store as you like!
Tip: If the candy coating thickens while you’re dipping, gently reheat it in short bursts to keep it smooth. Also, avoid dipping cake pops straight from the fridge to prevent cracking—the coating sticks better if the cake balls are just cold, not frozen.
Cooking Tips & Techniques
Making spooky no bake monster eyeball cake pops is fun and forgiving, but here are some tips I’ve picked up along the way:
- Crumb size matters: Fine crumbs mix better with frosting and help your eyeballs stay smooth. If your cake has big chunks, bust them up more.
- Chill time is your friend: Don’t rush the chilling steps. Letting the balls firm up prevents them from falling apart during dipping.
- Melting candy melts: Use short bursts in the microwave and stir often to avoid overheating, which can cause thickening or burning.
- Handling cake pops: If you don’t have sticks, rolling by hand works just as well. Just be gentle when dipping to avoid dents.
- Drawing details: Use a steady hand for the pupil and veins. If you mess up, a quick wipe with a damp cotton swab can fix small errors before setting.
I once tried using regular chocolate instead of candy melts, but it was too thick and wouldn’t coat smoothly. Candy melts give you that perfect coating that dries hard and shiny, which is essential for the “eyeball” look.
Variations & Adaptations
Feel free to switch things up with these spooky no bake monster eyeball cake pops to suit your taste or dietary needs:
- Flavor Swaps: Use fun cake flavors like pumpkin spice, funfetti, or even peppermint for a holiday twist.
- Colorful Irises: Instead of classic white, dip in colored candy melts like green or purple for a truly monstrous look.
- Vegan/Dairy-Free: Use dairy-free frosting and coconut-based candy melts. There are great brands like Enjoy Life that work well.
- Gluten-Free: Choose gluten-free cake mixes or substitute with almond or coconut flour-based cakes.
- Alternative Shapes: Try shaping into monster mouths or tiny pumpkins for variety at your Halloween spread.
One time, I mixed crushed peppermint candies into the cake crumbs for a minty surprise that was so unexpected but delicious. It’s fun to get creative and make these your own.
Serving & Storage Suggestions
Serve these spooky no bake monster eyeball cake pops chilled or at room temperature for the best texture. They look great arranged on a dark platter or nestled in a bowl of candy corn for a festive presentation.
Pair them with hot apple cider or a creamy pumpkin spice latte for a cozy fall snack. They’re perfect finger foods for parties, classrooms, or handing out to trick-or-treaters (wrapped individually, of course!).
To store, keep the cake pops in an airtight container in the fridge for up to 5 days. For longer storage, you can freeze them wrapped tightly in plastic wrap and placed in a freezer bag for up to 2 months. Thaw in the fridge overnight before serving.
Reheat at room temperature for about 20 minutes before serving; this softens the cake slightly without melting the candy coating. Flavors tend to deepen after a day, so making them a day ahead often improves the taste.
Nutritional Information & Benefits
Estimated per eyeball cake pop (based on 12 servings): about 180 calories, 8g fat, 25g carbohydrates, 2g protein.
While definitely a treat, the recipe can be adapted with healthier frosting options or gluten-free cakes to suit your needs. The cream cheese frosting adds a bit of protein and calcium, and using whole-food ingredients can cut down on artificial additives.
Perfect for festive occasions, these cake pops are an indulgence best enjoyed in moderation, but the joy and creativity involved in making them definitely contribute to your overall well-being!
Conclusion
Spooky no bake monster eyeball cake pops are a wickedly fun treat that anyone can make, no baking skills required. They bring a playful, eerie vibe to Halloween without the stress of complicated recipes or fancy tools.
Whether you stick to the classic decoration or get wild with colors and flavors, this recipe invites you to experiment and enjoy the process. I love it because it reminds me that sometimes the best results come from being a little messy and a lot adventurous in the kitchen.
Give these a try for your next Halloween bash, and share your own monster creations — I’d love to hear how you’ve made these cake pops your own!
FAQs
Can I use homemade cake instead of boxed mix?
Absolutely! Homemade cake works perfectly. Just make sure it’s fully cooled and crumbled finely for best texture.
Do I need cake pop sticks for this recipe?
Nope. This recipe works great without sticks. Rolling the cake mixture into balls by hand is part of the fun and looks spookier too.
How do I prevent the candy coating from cracking?
Don’t dip cake balls straight from the freezer. Chill them in the fridge first to avoid temperature shock, which causes cracking.
What if I don’t have candy melts?
You can use white chocolate, but it’s a bit trickier to work with and may not set as hard. Candy melts are designed for smooth melting and firm setting.
Can I prepare these in advance?
Yes! Make the cake pops a day ahead and store in the fridge. They taste even better after flavors meld overnight, and they keep well for several days.
Pin This Recipe!
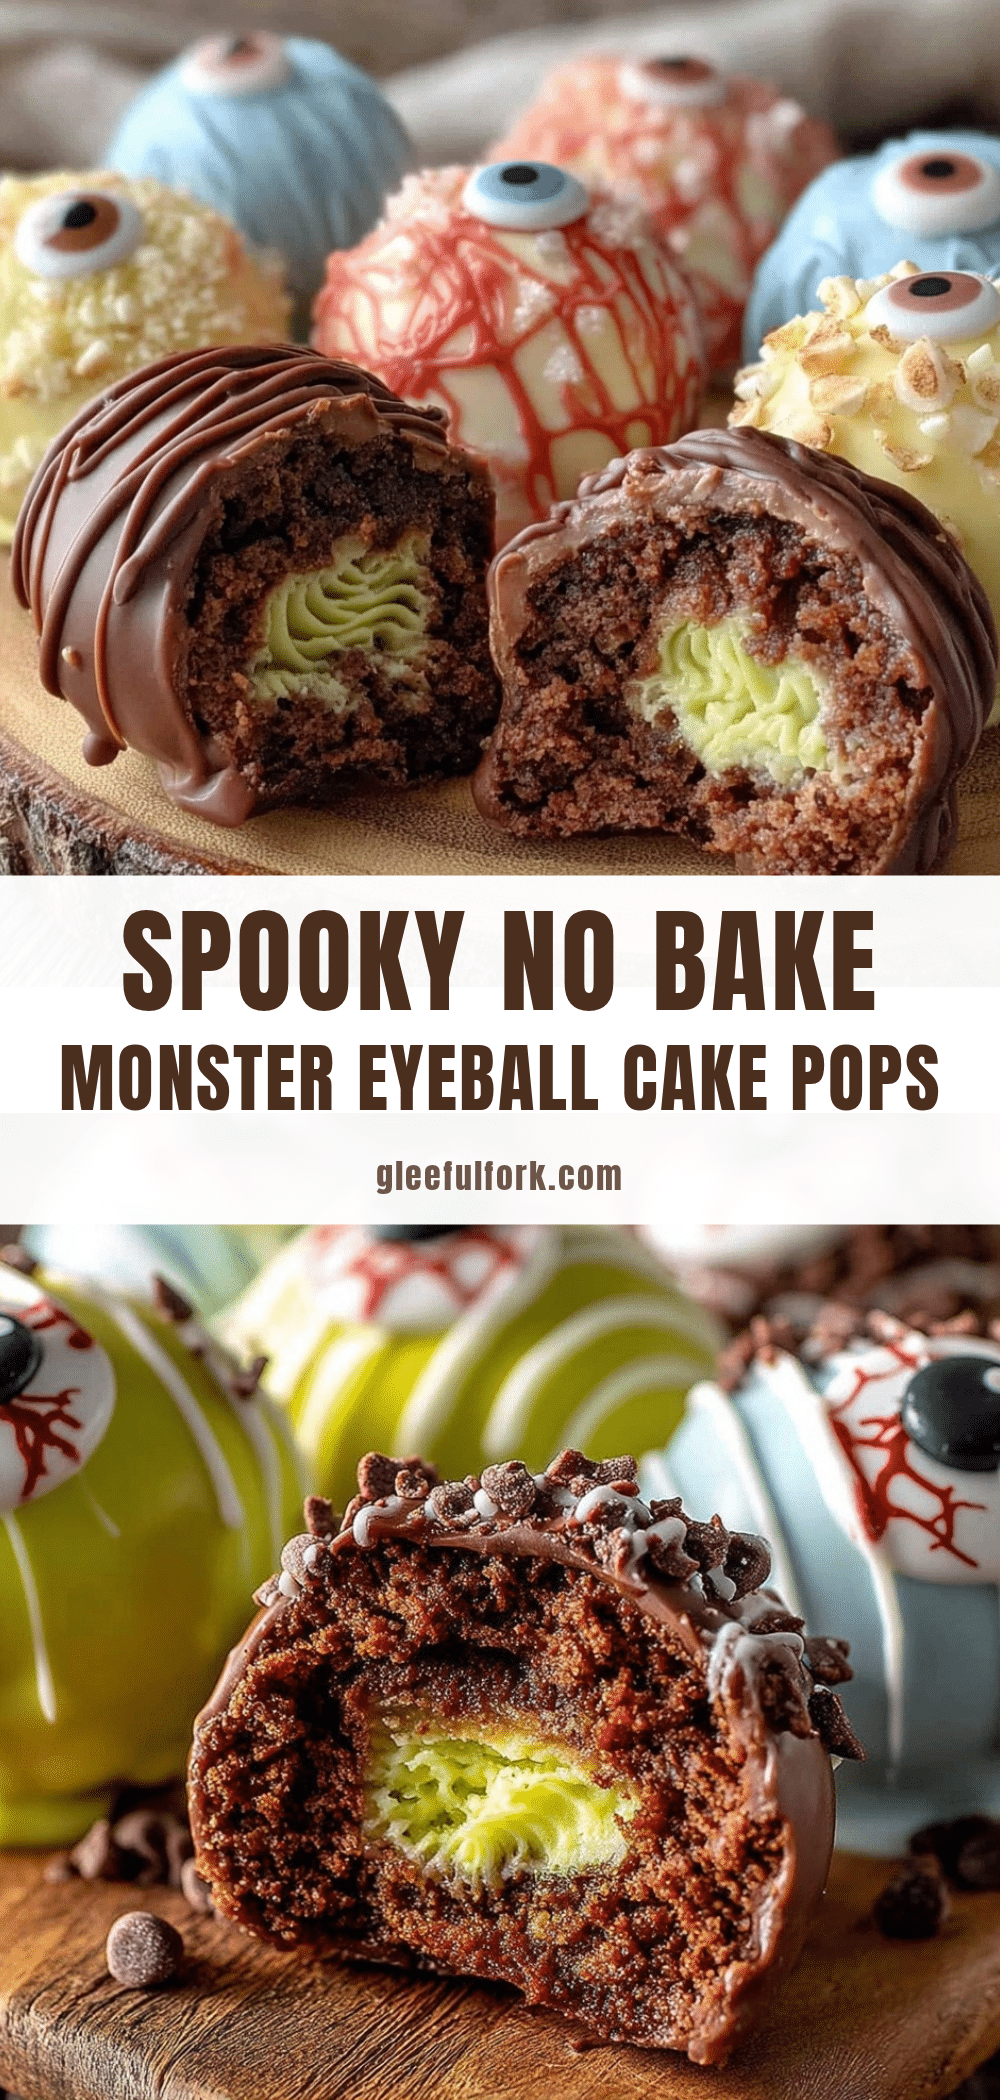
Spooky No Bake Monster Eyeball Cake Pops
These spooky no bake monster eyeball cake pops are a fun, easy Halloween treat that requires no baking and delivers a creepy, delicious snack perfect for parties and gatherings.
- Prep Time: 15 minutes
- Cook Time: 15 minutes
- Total Time: 30 minutes
- Yield: 12 servings 1x
- Category: Dessert
- Cuisine: American
Ingredients
- 1 box of chocolate or red velvet cake mix (or about 4 cups of homemade cake crumbs)
- 1 cup (240 ml) cream cheese frosting or any thick buttercream (store-bought works great)
- 8 oz (227 g) white candy melts or white chocolate
- Black edible food marker or black gel icing for the pupil
- Red gel icing or piping gel for the bloodshot veins
- Optional: green or blue candy melts for colorful irises
- Mini paper cupcake liners or Styrofoam block for drying
- Optional: sprinkles or edible glitter for extra monster flair
Instructions
- Prepare the cake crumbs: bake cake according to package instructions and let cool completely. Crumble finely using hands or food processor (about 4 cups/400 g).
- Mix the cake and frosting: combine cake crumbs with 1 cup (240 ml) cream cheese frosting in a large bowl. Stir and knead with hands until mixture sticks like playdough. Adjust frosting or crumbs as needed.
- Shape the eyeballs: roll mixture into 1 ½-inch (4 cm) balls. Place on wax-paper-lined tray and chill in fridge for at least 30 minutes to firm up.
- Melt the candy coating: melt 8 oz (227 g) white candy melts in microwave-safe bowl in 30-second intervals, stirring until smooth (about 3-4 minutes).
- Coat the cake pops: dip each eyeball into melted candy coating, let excess drip off, place back on lined tray or in mini cupcake liners. Chill for 15 minutes to set coating.
- Decorate the eyeballs: use black edible marker or gel icing to draw pupil, add colored candy melts ring for iris, pipe red gel icing for bloodshot veins, add sprinkles or edible glitter if desired.
- Let decorations set: chill pops in fridge for another 10-15 minutes before serving or storing.
Notes
Use dense frosting to bind crumbs well. Chill cake balls before dipping to prevent cracking. Reheat candy melts gently if thickened. Rolling by hand adds character and reduces cleanup. For dairy-free, use coconut-based frosting and candy melts. For gluten-free, use gluten-free cake mix or almond flour crumbs.
Nutrition
- Serving Size: 1 cake pop
- Calories: 180
- Fat: 8
- Carbohydrates: 25
- Protein: 2
Keywords: Halloween, cake pops, no bake, monster eyeball, spooky treats, easy dessert, party snacks


