Love this? Save it for later!
Share the inspiration with your friends
I was standing in the middle of a hardware store parking lot, holding a bag of mulch and staring at my phone. The man who had just sold me the mulch—a retired firefighter named Frank who runs the garden center every Saturday—was telling me about his wife’s pumpkin cheesecake bars. I hadn’t asked. I was just trying to buy landscaping supplies. But Frank had this look, the kind of look that says “you’re going to listen to this, and you’re going to be glad you did.” And honestly? He was right.
Frank told me his wife, Linda, had been making these bars for thirty years. Every Thanksgiving, every fall potluck, every time someone in the neighborhood had a baby or a birthday. He described them with such detail—the way the pumpkin layer sits perfectly on top of the cheesecake, the little crackles on top, the way the salted caramel drips down the sides when you cut them warm. I wrote the recipe on the back of a receipt while balancing my mulch bag on my hip. Maybe you’ve been there—getting the best recipe of your life from the most random person at the most random moment.
I went home, made the bars that same afternoon, and let me tell you, Frank was not exaggerating. These Perfect Salted Caramel Pumpkin Cheesecake Bars have become my go-to fall dessert. I’ve tweaked Linda’s original just a little—added a bit more salt to the caramel, swapped in a graham cracker crust with a touch of cinnamon—but the soul of the recipe is still hers. Every time I make them, I think about that parking lot conversation and how the best things sometimes come from the most unexpected places.
Why You’ll Love This Recipe
I have tested this recipe more times than I care to admit. The first batch came out runny. The second had a crust that crumbled into a thousand pieces. By the third attempt, I had Frank on speed dial (okay, I texted Linda through him), and by the fifth, I knew I had something special. These bars are the kind of dessert that makes people close their eyes after the first bite. I’ve seen it happen at dinner parties, at family gatherings, even at a casual Tuesday night where I was just testing the recipe again for “research.”
- Quick & Easy: These bars come together in about 45 minutes of active prep time. The oven does the rest. Perfect for busy fall weekends when you want something impressive without spending all day in the kitchen.
- Simple Ingredients: Nothing fancy here. You probably already have most of these in your pantry—canned pumpkin, cream cheese, graham crackers, butter, sugar, and eggs. The caramel is made from scratch but uses just sugar, butter, and cream.
- Perfect for Fall Gatherings: Thanksgiving, Friendsgiving, Halloween parties, or just a cozy Sunday afternoon. These bars disappear fast, and people always ask for the recipe.
- Crowd-Pleaser: I’ve served these to kids, grandparents, picky eaters, and dessert snobs. Everyone loves them. The combination of pumpkin and cheesecake is already a winner, but the salted caramel takes it to another level.
- Unbelievably Delicious: The texture is what gets me every time. The creamy cheesecake layer, the smooth pumpkin layer, the crunchy crust, and that gooey caramel on top. It’s a symphony of textures and flavors that just works.
What makes these bars different from every other pumpkin cheesecake recipe out there? It’s the balance. The pumpkin isn’t too heavy, the cheesecake isn’t too sweet, and the caramel has just enough salt to cut through the richness. I’ve spent hours adjusting the ratios, and this version is the one I keep coming back to. It’s comfort food reimagined—familiar but somehow better than you remember.
What Ingredients You Will Need
This recipe uses simple, wholesome ingredients to deliver bold flavor and satisfying texture without the fuss. Most of these are pantry staples, especially during fall. I’ve included notes on substitutions where they work well.
For the Crust
- 1 ½ cups graham cracker crumbs (about 12 full sheets, crushed finely—I use a food processor for consistency)
- ¼ cup granulated sugar
- ½ teaspoon ground cinnamon (adds warmth that pairs beautifully with the pumpkin)
- 6 tablespoons unsalted butter, melted (use salted butter if that’s all you have, just reduce the added salt elsewhere)
For the Cheesecake Layer
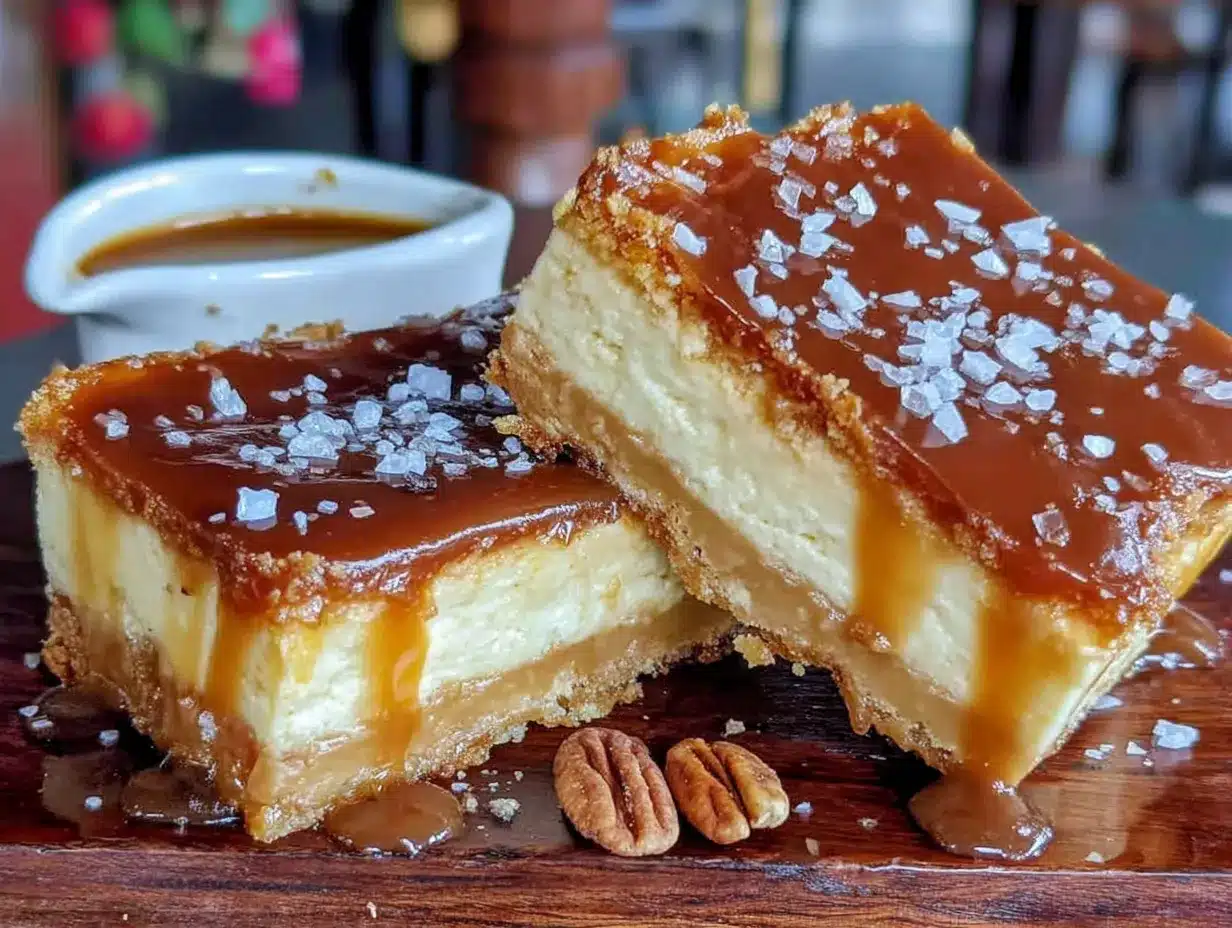
- 16 ounces cream cheese, softened to room temperature (I recommend Philadelphia for the smoothest texture—trust me on this one)
- ½ cup granulated sugar
- 2 large eggs, room temperature (cold eggs can make the batter lumpy)
- 1 teaspoon vanilla extract
- 2 tablespoons all-purpose flour (helps stabilize the cheesecake and prevents cracking)
For the Pumpkin Layer
- 1 cup canned pumpkin puree (not pumpkin pie filling—make sure it’s 100% pure pumpkin)
- ¼ cup granulated sugar
- ¼ cup packed light brown sugar
- 1 large egg
- 1 teaspoon pumpkin pie spice (or make your own with ½ tsp cinnamon, ¼ tsp ginger, ¼ tsp nutmeg, and a pinch of cloves)
- ½ teaspoon ground cinnamon
- 2 tablespoons heavy cream (adds richness and a silky texture)
For the Salted Caramel Sauce
- 1 cup granulated sugar
- 6 tablespoons unsalted butter, cut into pieces
- ½ cup heavy cream, room temperature (cold cream can cause the caramel to seize)
- 1 teaspoon flaky sea salt (plus more for sprinkling on top—I use Maldon, but any flaky salt works)
For the Topping (Optional but Recommended)
- Flaky sea salt for sprinkling just before serving
- Whipped cream for serving (optional, but honestly, why wouldn’t you?)
Equipment Needed
You don’t need a professional kitchen to make these bars, but having the right tools makes the process smoother. Here’s what I use:
- 9×9-inch baking pan (an 8×8 works too, but your bars will be slightly thicker and may need a few extra minutes of baking time)
- Parchment paper (non-negotiable for easy removal—leave overhang on two sides for handles)
- Food processor (for crushing graham crackers, though a zip-top bag and rolling pin work in a pinch)
- Stand mixer or hand mixer (for the cheesecake and pumpkin layers—a whisk and strong arm can work, but it’s harder to get that silky smooth texture)
- Saucepan (for the caramel—use a light-colored one so you can see the color change)
- Candy thermometer (helpful for the caramel but not essential—I’ve made it without plenty of times)
- Spatula (for scraping every last bit of batter—waste not, want not)
- Measuring cups and spoons
I bought my 9×9 pan at a thrift store for three dollars, and it’s my favorite baking pan. You don’t need expensive equipment. What matters is that your pan is sturdy and has straight sides for clean cuts.
Preparation Method
Step 1: Prepare the Crust (10 minutes + 10 minutes baking)
Preheat your oven to 350°F (175°C). Line your 9×9 baking pan with parchment paper, leaving overhang on two opposite sides. This will make lifting the bars out later so much easier—I learned this the hard way after destroying my first batch trying to dig them out.
In a food processor, pulse the graham crackers until they become fine crumbs. You should have about 1 ½ cups. Transfer to a medium bowl, add the sugar and cinnamon, and stir to combine. Pour in the melted butter and mix with a fork until the crumbs are evenly moistened. They should look like wet sand and hold together when pressed between your fingers.
Press the mixture firmly into the bottom of your prepared pan. I use the bottom of a measuring cup to get it even and compact. Bake for 10 minutes until fragrant and lightly golden. Set aside to cool while you make the fillings.
Step 2: Make the Cheesecake Layer (10 minutes)
In a large bowl, beat the softened cream cheese with an electric mixer on medium speed until smooth and creamy, about 2 minutes. Scrape down the sides and bottom of the bowl. Add the sugar and beat for another minute until well combined.
Add the eggs one at a time, beating on low speed after each addition just until incorporated. Overmixing at this stage can incorporate too much air and cause cracks later. Add the vanilla and flour, and mix on low until just combined. The batter should be smooth and silky—if it looks lumpy, your cream cheese wasn’t soft enough. Don’t panic, just keep mixing on low until it smooths out.
Pour the cheesecake batter over the cooled crust and spread it into an even layer. Set aside while you make the pumpkin layer.
Step 3: Make the Pumpkin Layer (5 minutes)
In a separate bowl, whisk together the pumpkin puree, granulated sugar, and brown sugar until smooth. Add the egg, pumpkin pie spice, cinnamon, and heavy cream. Whisk until everything is well combined. The mixture should be thick but pourable, like a smoothie.
Gently spoon the pumpkin mixture over the cheesecake layer. Use a spatula to spread it evenly, being careful not to disturb the cheesecake layer underneath. You can also dollop it in spoonfuls and then gently spread—this is less likely to mix the layers together.
Step 4: Bake the Bars (45-50 minutes)
Place the pan in the preheated oven and bake for 45-50 minutes. The edges should be set and slightly puffed, but the center should still jiggle slightly when you gently shake the pan. This is normal—it will continue to set as it cools.
Here’s the tricky part: if you overbake, the cheesecake can crack. If you underbake, it won’t set properly. I look for the edges to be golden and the center to have a slight wobble, like Jell-O. Turn off the oven, crack the door open, and let the bars sit in the cooling oven for 10 minutes. This gentle cooling helps prevent cracks.
Step 5: Cool and Chill (4 hours minimum, overnight is better)
Remove the pan from the oven and place it on a wire rack to cool completely at room temperature, about 1 hour. Once cooled, cover the pan with plastic wrap and refrigerate for at least 4 hours, preferably overnight. This is the hardest part—I know you want to dig in—but the bars need this time to set properly. Cutting them too early will result in a messy, gooey disaster. I speak from experience.
Step 6: Make the Salted Caramel (15 minutes)
While the bars are chilling, make the caramel. Place the sugar in a light-colored saucepan over medium heat. Stir constantly with a wooden spoon or heat-safe spatula. The sugar will clump first, then melt into a golden amber liquid. This takes about 6-8 minutes. Watch carefully—sugar can burn quickly once it starts to color.
Once the sugar is fully melted and has a deep amber color (think the color of a penny), remove the pan from heat. Immediately add the butter pieces and stir vigorously. The mixture will bubble up—don’t panic, this is normal. Keep stirring until the butter is fully melted and incorporated.
Slowly pour in the heavy cream while stirring. The mixture will bubble again. Stir until smooth. If you have lumps, return the pan to low heat and stir until they dissolve. Remove from heat and stir in the flaky sea salt. Let the caramel cool to room temperature—it will thicken as it cools.
Step 7: Assemble and Serve (5 minutes)
Once the bars are fully chilled and set, use the parchment overhang to lift them out of the pan. Place on a cutting board. Use a sharp knife to cut into 16 squares (4 rows by 4 rows). For clean cuts, wipe the knife clean between each cut with a damp paper towel.
Drizzle the salted caramel over the bars just before serving. Sprinkle with additional flaky sea salt if you like that sweet-salty contrast. Serve cold or at room temperature—both are delicious.
Cooking Tips & Techniques
I have made more mistakes with this recipe than I care to count, and each one taught me something valuable. Here are the lessons I learned so you don’t have to repeat them.
Room temperature ingredients matter. I know, I know, everyone says this. But with cheesecake, it’s not just advice—it’s the difference between a silky smooth texture and a lumpy mess. Cold cream cheese doesn’t incorporate properly, and cold eggs can cause the batter to curdle. Take everything out of the fridge at least 30 minutes before you start. Set a timer if you need to—I’ve forgotten more times than I remember.
Don’t overmix the cheesecake batter. This was my biggest mistake early on. I wanted it perfectly smooth, so I kept beating it. All that extra air created bubbles that expanded in the oven and then collapsed, leaving cracks all over the surface. Mix just until each ingredient is incorporated. A few small lumps are better than a cracked cheesecake.
The water bath debate. Some recipes call for a water bath to prevent cracking. I’ve tried it both ways, and for these bars, I skip it. The shallow pan and shorter baking time mean cracks are less likely. If you’re nervous, you can place a pan of hot water on the oven rack below the bars to add moisture to the oven. But honestly, the caramel covers any imperfections anyway.
Patience with the caramel. Making caramel from scratch feels intimidating the first time, but it’s really just watching sugar melt. The key is to not walk away. Sugar can go from perfectly amber to burnt black in seconds. I keep a bowl of ice water nearby in case I need to stop the cooking quickly, but I’ve never actually needed it. Just stay at the stove and watch.
Multitasking strategy. Here’s how I time everything: While the crust bakes, I make the cheesecake batter. While the cheesecake cools slightly, I make the pumpkin layer. While the bars bake, I clean up the kitchen. While the bars chill, I make the caramel. This way, nothing sits around too long, and I’m not overwhelmed at the end.
Variations & Adaptations
One of the things I love about this recipe is how adaptable it is. I’ve tried several variations over the years, and here are my favorites.
Gluten-Free Version: Swap the graham cracker crust for gluten-free graham crackers or use crushed gluten-free shortbread cookies. The cheesecake and pumpkin layers are naturally gluten-free, so you just need to adjust the crust. I’ve used both options, and the shortbread version is actually my preferred crust now—it’s buttery and holds together beautifully.
Dairy-Free Adaptation: Use dairy-free cream cheese (I like Kite Hill or Miyoko’s) and coconut cream instead of heavy cream. The texture will be slightly different—a bit softer—but the flavor is still fantastic. Use vegan butter in the crust and caramel. I tested this for a friend with dairy allergies, and while it’s not exactly the same, it’s still delicious.
Spice It Up: Add a pinch of cayenne pepper or chipotle powder to the pumpkin layer for a subtle heat that pairs beautifully with the caramel. I tried this on a whim one year and it was a hit at a Halloween party. Start with ⅛ teaspoon and adjust from there.
Chocolate Lover’s Version: Add a layer of melted dark chocolate between the crust and cheesecake layer. Spread about ½ cup of melted chocolate over the baked crust and let it set before adding the cheesecake. The chocolate adds a richness that complements the pumpkin and caramel perfectly.
Individual Servings: Use a muffin tin lined with paper liners instead of a 9×9 pan. Press about 2 tablespoons of crust into each cup, then fill with cheesecake and pumpkin mixtures. Bake for 18-20 minutes. These are perfect for parties or portion control—though I can’t promise you’ll stop at one.
Serving & Storage Suggestions
These bars are versatile when it comes to serving. Here’s what I’ve learned about getting the best experience out of them.
Serving Temperature: I prefer these bars cold, straight from the refrigerator. The cheesecake is firm and creamy, and the caramel is thick and gooey. But they’re also wonderful at room temperature—the flavors are more pronounced, and the texture is softer. Try both and see which you prefer. I won’t judge either way.
Presentation: Drizzle the caramel over the bars just before serving, not before storing. If you add it too early, the caramel can soak into the bars and make them soggy. I like to arrange the bars on a platter, drizzle with caramel, and sprinkle with a little extra flaky sea salt. A dollop of whipped cream on each bar makes them look extra special.
What to Serve With Them: A cup of coffee or hot tea is perfect. The bitterness balances the sweetness. For a dessert spread, I pair these with a simple apple crisp or a plate of fresh fruit. They also go surprisingly well with a glass of cold milk—trust me on this one.
Storage: Store the bars in an airtight container in the refrigerator for up to 5 days. Keep the caramel separate and add it just before serving. If you’ve already added the caramel, they’ll still be good for 2-3 days, but the crust might soften slightly.
Freezing: These bars freeze beautifully. Cut them into squares, place them on a baking sheet lined with parchment paper, and freeze until solid (about 2 hours). Transfer to a freezer-safe container or bag, separating layers with parchment paper. They’ll keep for up to 3 months. Thaw in the refrigerator overnight before serving. Don’t add the caramel until after thawing.
How Flavors Develop: Honestly, these bars taste even better the next day. The flavors meld together, the texture becomes more cohesive, and everything just comes together. If you can wait 24 hours, you’ll be rewarded with a better dessert. I know that’s hard, but it’s worth it.
Nutritional Information & Benefits
Let’s be real—these are not health food. But they’re made from real ingredients, and there’s something to be said for that. Here’s the estimated nutritional breakdown per bar (based on 16 servings):
- Calories: 320
- Fat: 18g
- Carbohydrates: 38g
- Protein: 5g
- Sugar: 28g
- Sodium: 220mg
Health Highlights: Pumpkin is rich in vitamin A and fiber, which supports eye health and digestion. Cream cheese provides calcium and protein, though it’s also high in saturated fat. The eggs add protein and healthy fats. The graham cracker crust provides a small amount of whole grains if you use whole wheat graham crackers.
Dietary Considerations: This recipe contains gluten (from the graham crackers), dairy (from the cream cheese, butter, and cream), and eggs. For gluten-free and dairy-free options, see the variations section above. This recipe is not suitable for vegans as written, but with substitutions it can be adapted.
My Perspective: I believe in balance. These bars are a treat, something to enjoy on special occasions or when you need a little comfort. I don’t stress about the calories because I’m eating them mindfully—savoring each bite, sharing them with people I love, and not making them an everyday thing. Food is about joy, connection, and pleasure. These bars deliver all three.
Conclusion
These Perfect Salted Caramel Pumpkin Cheesecake Bars are the kind of recipe that becomes a tradition. They’re the dessert you bring to Thanksgiving that everyone asks about. They’re the bars you make on a rainy Sunday just because. They’re the recipe you text to your friends and say “you have to try these.”
I’ve made this recipe dozens of times, and every single time, I’m reminded of that parking lot conversation with Frank. The best recipes come from the most unexpected places, and once you find one, you hold onto it. This is one of those recipes for me, and I hope it becomes one for you too.
Don’t be afraid to make these your own. Add more salt. Use a different crust. Double the caramel (I won’t tell anyone). The best version of this recipe is the one that makes you happy. And if you make them, I’d love to hear about it. Leave a comment below, tag me in your photos, or send me a message. Let’s keep this recipe tradition alive, one batch at a time.
Now go make some bars. Your kitchen is about to smell amazing.
Frequently Asked Questions
Can I use store-bought caramel sauce instead of making my own?
You can, but it won’t be the same. Homemade salted caramel has a deeper, richer flavor that complements the pumpkin and cheesecake perfectly. Store-bought caramel is often too sweet and lacks that complex, buttery taste. If you’re short on time, look for a high-quality jarred caramel and add a pinch of flaky salt to it. It’s not ideal, but it works in a pinch.
Why did my cheesecake layer crack?
Cracking usually happens for one of three reasons: overmixing the batter (which incorporates too much air), overbaking (which dries out the cheesecake), or sudden temperature changes (like taking it straight from the oven to the counter). To prevent cracks, mix gently, bake until the center is just slightly jiggly, and let the bars cool slowly in the oven with the door cracked open. And remember—the caramel covers cracks beautifully, so don’t stress too much.
Can I make these bars ahead of time for a party?
Absolutely. In fact, I recommend it. These bars taste better after a day in the refrigerator because the flavors have time to meld together. Make them up to two days in advance, keep them covered in the fridge, and add the caramel just before serving. They’re the perfect make-ahead dessert for holidays and gatherings.
Can I use fresh pumpkin instead of canned?
You can, but you’ll need to roast and puree the pumpkin first, then strain it to remove excess water. Fresh pumpkin has more water content than canned, which can make the pumpkin layer too loose. If you use fresh pumpkin, reduce the heavy cream by one tablespoon and be prepared for a slightly softer set. Canned pumpkin is actually preferred here for consistency and convenience.
How do I get clean cuts when slicing the bars?
Use a sharp knife and wipe it clean with a damp paper towel between each cut. For the cleanest slices, chill the bars thoroughly—at least 4 hours, but overnight is better. If the caramel is already on top, it can make cutting messy, so I recommend adding the caramel after slicing. Run the knife under hot water and dry it before each cut for even cleaner results.
Pin This Recipe!
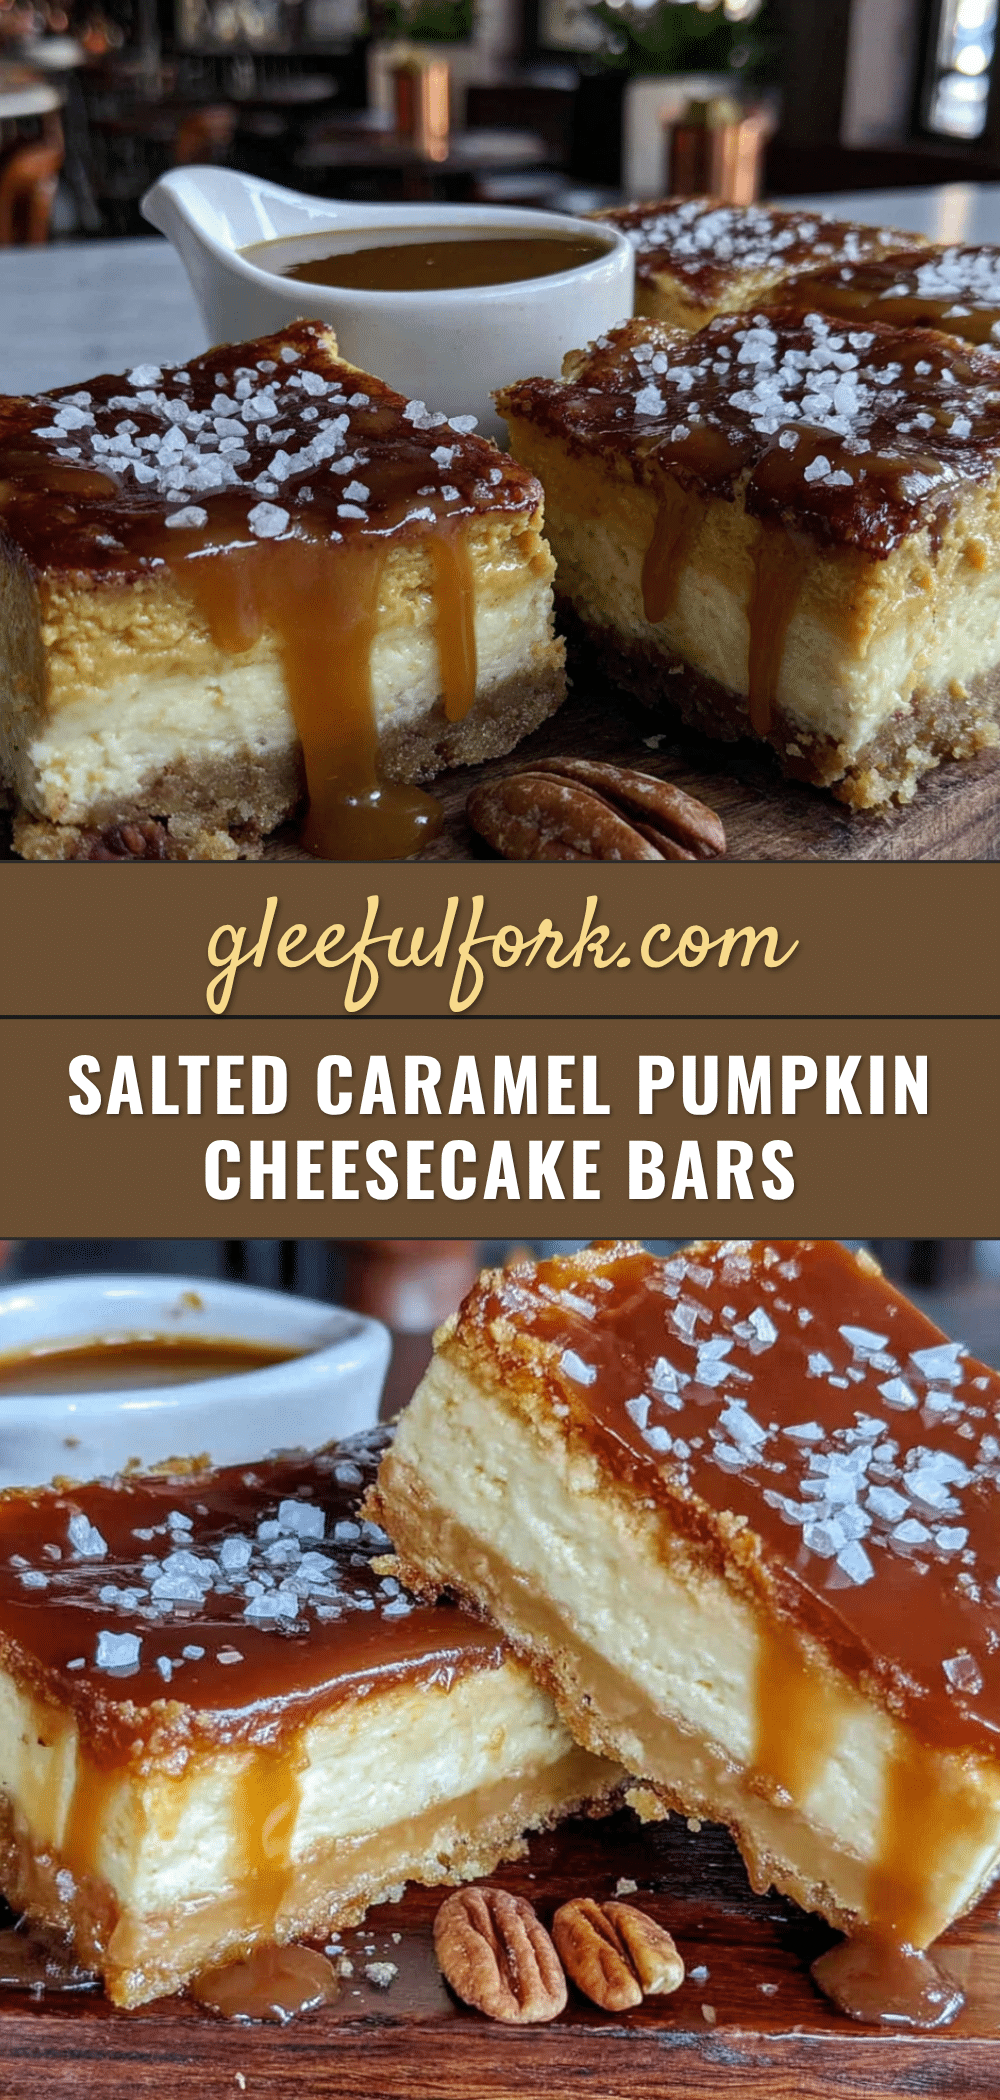
Perfect Salted Caramel Pumpkin Cheesecake Bars: Easy Fall Dessert
These Perfect Salted Caramel Pumpkin Cheesecake Bars are the ultimate fall dessert, featuring a creamy cheesecake layer, smooth pumpkin layer, crunchy graham cracker crust, and gooey salted caramel. They’re quick to make, use simple ingredients, and are perfect for Thanksgiving, Friendsgiving, or any fall gathering.
- Prep Time: 45 minutes
- Cook Time: 50 minutes
- Total Time: 5 hours 35 minutes (includes chilling)
- Yield: 16 servings 1x
- Category: Dessert
- Cuisine: American
Ingredients
- 1 ½ cups graham cracker crumbs (about 12 full sheets)
- ¼ cup granulated sugar
- ½ teaspoon ground cinnamon
- 6 tablespoons unsalted butter, melted
- 16 ounces cream cheese, softened to room temperature
- ½ cup granulated sugar
- 2 large eggs, room temperature
- 1 teaspoon vanilla extract
- 2 tablespoons all-purpose flour
- 1 cup canned pumpkin puree (not pumpkin pie filling)
- ¼ cup granulated sugar
- ¼ cup packed light brown sugar
- 1 large egg
- 1 teaspoon pumpkin pie spice
- ½ teaspoon ground cinnamon
- 2 tablespoons heavy cream
- 1 cup granulated sugar
- 6 tablespoons unsalted butter, cut into pieces
- ½ cup heavy cream, room temperature
- 1 teaspoon flaky sea salt
- Flaky sea salt for sprinkling (optional)
- Whipped cream for serving (optional)
Instructions
- Preheat oven to 350°F (175°C). Line a 9×9-inch baking pan with parchment paper, leaving overhang on two opposite sides.
- In a food processor, pulse graham crackers into fine crumbs. Transfer to a medium bowl, add ¼ cup sugar and ½ teaspoon cinnamon, and stir. Pour in melted butter and mix until crumbs are evenly moistened.
- Press the mixture firmly into the bottom of the prepared pan. Bake for 10 minutes until fragrant and lightly golden. Set aside to cool.
- In a large bowl, beat softened cream cheese with an electric mixer on medium speed until smooth, about 2 minutes. Add ½ cup sugar and beat for another minute.
- Add eggs one at a time, beating on low speed after each addition just until incorporated. Add vanilla and flour, mix on low until just combined.
- Pour cheesecake batter over cooled crust and spread into an even layer.
- In a separate bowl, whisk together pumpkin puree, ¼ cup granulated sugar, brown sugar, 1 egg, pumpkin pie spice, ½ teaspoon cinnamon, and 2 tablespoons heavy cream until smooth.
- Gently spoon pumpkin mixture over cheesecake layer and spread evenly.
- Bake for 45-50 minutes. Edges should be set and slightly puffed, center should jiggle slightly. Turn off oven, crack door open, and let bars sit in cooling oven for 10 minutes.
- Remove pan from oven and cool completely on a wire rack, about 1 hour. Cover with plastic wrap and refrigerate for at least 4 hours, preferably overnight.
- To make caramel: Place 1 cup sugar in a light-colored saucepan over medium heat. Stir constantly until sugar melts into a deep amber color, about 6-8 minutes.
- Remove from heat. Immediately add butter pieces and stir vigorously until melted and incorporated.
- Slowly pour in ½ cup heavy cream while stirring. Stir until smooth. Remove from heat and stir in 1 teaspoon flaky sea salt. Let cool to room temperature.
- Once bars are fully chilled, use parchment overhang to lift them out of pan. Cut into 16 squares.
- Drizzle salted caramel over bars just before serving. Sprinkle with additional flaky sea salt if desired. Serve cold or at room temperature.
Notes
Room temperature ingredients are crucial for a smooth cheesecake. Don’t overmix the cheesecake batter to avoid cracks. The water bath is optional; for these bars, it’s not necessary. Make caramel from scratch for best flavor; store-bought can be used in a pinch. Bars taste even better the next day. Store in refrigerator for up to 5 days; freeze for up to 3 months.
Nutrition
- Serving Size: 1 bar
- Calories: 320
- Sugar: 28
- Sodium: 220
- Fat: 18
- Saturated Fat: 10
- Carbohydrates: 38
- Fiber: 1
- Protein: 5
Keywords: pumpkin cheesecake bars, salted caramel, fall dessert, Thanksgiving dessert, cheesecake bars, pumpkin dessert


