Love this? Save it for later!
Share the inspiration with your friends
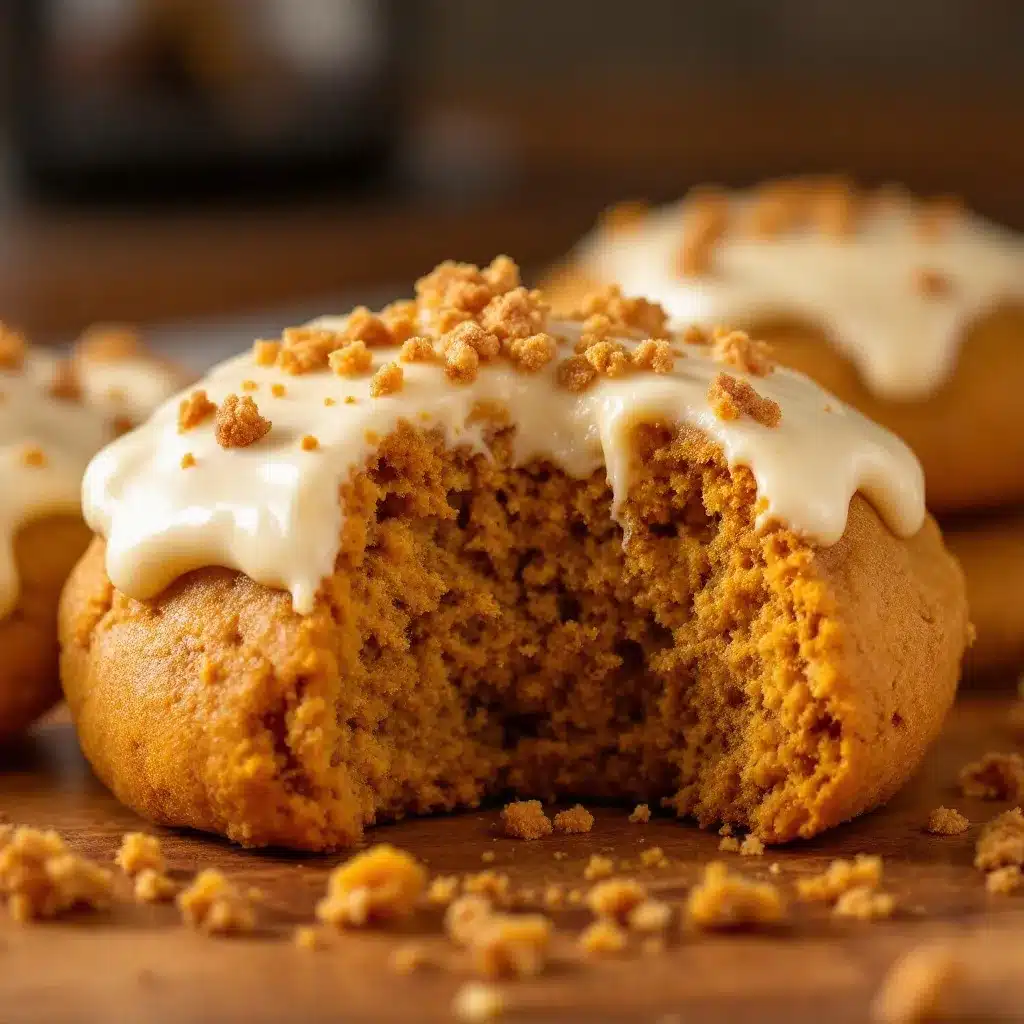
The crumb. That’s what I was after. Not the pumpkin spice aroma that would eventually fill my kitchen, not the tangy-sweet cream cheese drizzle – just the crumb. I wanted that soft, almost pillowy give when you press a finger gently into the top of a cookie, the way the surface yields just slightly before springing back. I’d been chasing this texture for weeks, testing batch after batch of pumpkin cookies that came out either too cakey (which is fine for a muffin, not a cookie) or too dense (which is just sad). The problem with most pumpkin cookies is that the moisture from the pumpkin puree turns them into little hockey pucks or, worse, spongy discs that taste more like bread than a treat. But this batch, with its cream cheese icing pooling in the cracks, finally had the crumb I was dreaming about. It felt like a small victory, honestly – the kind you celebrate by eating three cookies before the icing has fully set.
I think what makes these Perfect Pumpkin Cookies with Cream Cheese Icing so special is that they don’t pretend to be something they’re not. They’re not trying to be a crisp, snappy sugar cookie. They’re soft, almost tender, with that gentle pumpkin flavor that tastes like fall without screaming it. And the icing – well, the icing is the real reason we’re all here, isn’t it? It’s thick and tangy and just sweet enough to balance the earthy pumpkin. I’ve made these for Thanksgiving, for random October afternoons when the air gets that crisp bite, and even for a friend’s fall-themed birthday party. They disappear fast. Every. Single. Time.
So if you’ve been burned by dry, flavorless pumpkin cookies before, trust me – I’ve been there too. These are the ones that finally got it right. They’re the ones that made me stop testing and start enjoying.
Why You’ll Love This Recipe
Let me just tell you straight up – these are not your average pumpkin cookies. I’ve spent years developing recipes for my blog and testing them on everyone from my picky nephew to my grandmother who claims she “doesn’t like pumpkin.” She ate three of these. Three. That’s when I knew I had something worth sharing.
- Perfectly Soft Texture : The crumb is soft and tender without being cakey. It holds together beautifully and melts in your mouth.
- Simple Pantry Ingredients : You probably already have most of what you need. No weird specialty flours or hard-to-find extracts.
- Easy Cream Cheese Icing : This isn’t one of those complicated frostings that requires a stand mixer and a degree in pastry arts. It comes together in minutes with a hand mixer.
- Perfect for Fall Gatherings : Whether it’s a Halloween party, Thanksgiving dessert table, or just a cozy weekend baking session, these cookies fit right in.
- Crowd-Pleasing Flavor : The pumpkin is there but it’s not overwhelming. The spices are warm without being aggressive. Kids love them, adults love them.
- Freezer-Friendly : You can make these ahead of time and freeze either the baked cookies or the dough. I’ll explain how later.
What makes this recipe different from the dozens of other pumpkin cookie recipes out there? It’s the technique. Most recipes just dump everything together and hope for the best. I’ve tested the ratio of pumpkin to flour, the temperature of the butter, and the resting time of the dough. The result is a cookie that stays soft for days – if they last that long. And that cream cheese icing? It’s not too runny, not too thick. It’s the Goldilocks of icings. I’ve had readers tell me they’ve made this recipe five times in one month. Five. Times.
These cookies are the kind that make you close your eyes after the first bite. They’re comfort food reimagined – familiar but somehow better than you remembered. Perfect for impressing guests without stress, or turning a simple Tuesday into something memorable.
What Ingredients You Will Need
This recipe uses simple, wholesome ingredients to deliver that perfect soft texture and bold fall flavor. Most of these are pantry staples, which is one of the reasons I make these so often.
For the Pumpkin Cookies
- All-purpose flour – 2 ¼ cups (280g). I use King Arthur Flour for consistent results, but any brand works as long as you spoon and level properly.
- Baking soda – 1 teaspoon. This helps the cookies spread just a little and gives them that soft lift.
- Baking powder – ½ teaspoon. Adds extra lift for that pillowy texture.
- Ground cinnamon – 1 ½ teaspoons. This is the backbone of the spice blend.
- Ground nutmeg – ½ teaspoon. Freshly grated if you have it – it makes a difference.
- Ground ginger – ½ teaspoon. Adds warmth without heat.
- Ground cloves – ¼ teaspoon. Just a pinch – cloves are strong.
- Salt – ½ teaspoon. Balances the sweetness and enhances the pumpkin flavor.
- Unsalted butter – ½ cup (1 stick, 113g), softened to room temperature. Don’t microwave it – let it sit out for an hour.
- Granulated sugar – 1 cup (200g). White sugar gives the cookies structure.
- Brown sugar – ¼ cup (50g), packed. Adds moisture and a hint of molasses flavor.
- Pumpkin puree – ¾ cup (170g). Make sure it’s 100% pure pumpkin, not pumpkin pie filling. Libby’s is my go-to because it’s less watery than some store brands.
- Large egg – 1, at room temperature.
- Vanilla extract – 1 teaspoon. Pure vanilla, not imitation if you can help it.
For the Cream Cheese Icing
- Cream cheese – 4 ounces (113g), softened. Full-fat blocks only – not the spreadable kind in a tub.
- Unsalted butter – 2 tablespoons (28g), softened.
- Powdered sugar – 1 ½ cups (180g), sifted if it’s lumpy.
- Vanilla extract – ½ teaspoon.
- Milk – 1-2 tablespoons, as needed for consistency. Whole milk works best.
Ingredient Selection Tip: When choosing pumpkin puree, look for cans that don’t have a lot of liquid sloshing around when you shake them. Some brands are more watery than others. If your pumpkin puree seems thin, you can blot it with a paper towel before using. I learned this the hard way after a batch of cookies that spread into flat, sad discs.
Substitution Guidance: For a dairy-free version, use plant-based butter and a dairy-free cream cheese alternative. I’ve tested this with Miyoko’s brand and it works well. For a gluten-free option, swap the all-purpose flour with a 1:1 gluten-free baking flour blend. Do not use coconut flour or almond flour alone – they will change the texture completely.
Equipment Needed
You don’t need a lot of fancy equipment for these cookies, which is part of their charm. Here’s what you’ll need:
- Large mixing bowl – For the dry ingredients.
- Medium mixing bowl – For the wet ingredients.
- Hand mixer or stand mixer – A hand mixer works perfectly. I use my KitchenAid stand mixer with the paddle attachment when I’m making a double batch.
- Baking sheets – Two standard half-sheet pans. If you only have one, let it cool completely between batches.
- Parchment paper or silicone baking mats – Silpat mats are great, but parchment paper works just as well and is cheaper.
- Cookie scoop – A 1.5-tablespoon scoop gives you consistent cookies. I’ve used a regular spoon in a pinch, but the scoop makes them look more professional.
- Cooling rack – Wire racks let the cookies cool evenly so the icing doesn’t melt off.
- Small bowl and whisk – For the icing. You can use the hand mixer for this too.
- Spatula – For scraping down the bowl and spreading the icing.
Budget-Friendly Tip: If you don’t have a cooling rack, you can cool the cookies on a clean kitchen towel placed on the counter. It’s not ideal, but it works. And if you don’t have a cookie scoop, use two spoons – one to scoop and one to scrape the dough onto the baking sheet.
Preparation Method
Alright, let’s get to the good part. I’ve broken this down into clear steps so you don’t miss anything. Trust me on the resting time – it matters.
- Preheat your oven to 350°F (175°C). Line two baking sheets with parchment paper or silicone mats. This is non-negotiable – the cookies will stick without it.
- Whisk the dry ingredients together. In a medium bowl, combine the flour, baking soda, baking powder, cinnamon, nutmeg, ginger, cloves, and salt. Whisk until everything is evenly distributed. Set aside.
- Cream the butter and sugars. In a large bowl, beat the softened butter, granulated sugar, and brown sugar together with a hand mixer on medium speed for about 2 minutes. You want it light and fluffy – it should look paler than when you started. Scrape down the sides of the bowl with a spatula.
- Add the wet ingredients. Beat in the pumpkin puree, egg, and vanilla extract until combined. Don’t overmix here – just until the egg is incorporated. The mixture might look a little curdled or separated, but that’s normal. Pumpkin is weird like that.
- Combine wet and dry. Gradually add the dry ingredients to the wet mixture, mixing on low speed until just combined. Stop when you don’t see any more streaks of flour. Overmixing at this stage will make the cookies tough – and nobody wants tough pumpkin cookies.
- Chill the dough. This is the step most people skip, and it’s the biggest mistake you can make. Cover the bowl with plastic wrap and refrigerate the dough for at least 30 minutes. An hour is better. The dough will be sticky when you first make it, and chilling firms up the butter so the cookies don’t spread into flat pancakes. I once skipped this step because I was in a hurry, and the cookies spread so much they merged into one giant cookie sheet. Delicious? Yes. Pretty? No.
- Portion the cookies. Use your cookie scoop to portion the dough into 1.5-tablespoon balls. Place them 2 inches apart on the prepared baking sheets. The cookies won’t spread much, so you can fit about 12 per sheet.
- Bake for 10-12 minutes. The cookies are done when the edges are set and just starting to turn golden. The centers will look slightly underdone and puffy – that’s exactly what you want. They’ll continue to set as they cool. If you overbake them, they’ll be dry. I’ve done it. It’s sad.
- Cool completely. Let the cookies cool on the baking sheet for 5 minutes, then transfer them to a wire rack to cool completely. Do not – I repeat, do not – ice them while they’re still warm. The icing will melt into a puddle and slide right off. I learned this the hard way and ended up with a sticky mess.
- Make the icing. While the cookies are cooling, make the cream cheese icing. Beat the softened cream cheese and butter together until smooth and creamy. Add the powdered sugar and vanilla extract, then beat on low speed until combined. Add milk one tablespoon at a time until the icing reaches a spreadable consistency. You want it thick enough to hold its shape but thin enough to spread easily.
- Ice the cookies. Once the cookies are completely cool, spread a generous amount of icing on each one. I use a small offset spatula, but a butter knife works fine. You can also pipe the icing if you want it to look fancy.
- Let the icing set. Let the iced cookies sit at room temperature for about 15-20 minutes so the icing firms up slightly. Then serve, or store in an airtight container.
Sensory Cue: When you’re creaming the butter and sugar, listen for the sound – it should change from a slapping sound to a softer, whooshing sound as it becomes fluffy. When you’re mixing the dough, it should feel soft and slightly tacky but not sticky. If it’s sticking to your fingers like glue, chill it longer.
Cooking Tips & Techniques
I’ve made this recipe more times than I can count, and I’ve made every mistake in the book so you don’t have to. Here are the things I wish someone had told me:
Don’t overmix the dough. I know I said this already, but it’s worth repeating. Overmixing develops the gluten in the flour, which makes the cookies tough and bread-like. Mix until the flour disappears, then stop. A few streaks of flour are better than a tough cookie.
Room temperature ingredients matter. Cold butter doesn’t cream properly. Cold egg can make the butter seize up. Cold cream cheese makes lumpy icing. Set everything out on the counter an hour before you start baking. I know it’s annoying, but it makes a real difference.
Use a cookie scoop for even sizing. Cookies that are the same size bake evenly. I use a 1.5-tablespoon scoop and get exactly 24 cookies every time. If you use a bigger scoop, adjust the baking time by a minute or two.
Chill the dough. I cannot stress this enough. The first time I made these, I was impatient and skipped the chilling step. The cookies spread into thin, crispy discs that looked nothing like the soft, puffy cookies I wanted. Chilling the dough solidifies the butter, which means the cookies hold their shape better in the oven. It also gives the flavors time to meld – the cookies actually taste better after resting.
Test your baking soda and powder. If your baking soda or powder is old, your cookies won’t rise properly. To test baking soda, add a little to some vinegar – it should fizz vigorously. To test baking powder, add it to hot water – it should bubble. If nothing happens, buy new ones.
Don’t overbake. The cookies should look slightly underdone when you pull them out of the oven. They’ll continue to bake on the hot baking sheet as they cool. If you wait until they look fully done in the oven, they’ll be dry and crumbly when they cool.
Let the cookies cool completely before icing. I know it’s tempting to rush this part, but warm cookies will melt the cream cheese icing into a puddle. You’ll end up with a sticky mess and sad, bare patches on your cookies. Trust me on this one.
Variations & Adaptations
One of the best things about this recipe is how adaptable it is. Here are some variations I’ve tried and loved:
Spiced Pumpkin Cookies with Brown Butter Icing. Instead of cream cheese icing, brown 2 tablespoons of butter in a small saucepan until it smells nutty and turns golden brown. Let it cool slightly, then whisk it into the powdered sugar with a splash of milk and a pinch of cinnamon. The nutty flavor pairs beautifully with the pumpkin.
Pumpkin Chocolate Chip Cookies. Fold 1 cup of semi-sweet chocolate chips into the dough before chilling. The chocolate adds a rich contrast to the warm pumpkin spices. I’ve also used white chocolate chips, which gives it a more dessert-like feel.
Vegan Pumpkin Cookies. Replace the butter with vegan butter (I like Earth Balance), use a flax egg (1 tablespoon ground flaxseed mixed with 3 tablespoons water, let sit for 5 minutes), and use dairy-free cream cheese for the icing. The texture is slightly different – a bit more dense – but still delicious.
Gluten-Free Pumpkin Cookies. Use a 1:1 gluten-free baking flour blend. I’ve tested this with Bob’s Red Mill and King Arthur’s gluten-free blends, and both work well. The cookies will be a little more crumbly, so handle them gently. Add an extra tablespoon of pumpkin puree if the dough seems too dry.
Pumpkin Cookies with Maple Glaze. If you’re not a fan of cream cheese (though I don’t know how you couldn’t be), make a simple maple glaze instead. Whisk together 1 cup powdered sugar, 2 tablespoons maple syrup, and 1-2 tablespoons milk until smooth. Drizzle over the cooled cookies.
Add-ins and Toppings. Try folding in ½ cup of chopped pecans or walnuts for crunch. Or sprinkle a little flaky sea salt on top of the icing before it sets – the salty-sweet combination is incredible. I’ve also added dried cranberries for a tart pop of flavor.
Serving & Storage Suggestions
These cookies are best served at room temperature, but honestly, I’ve eaten them straight from the fridge and they’re still amazing. The cream cheese icing firms up when chilled, which gives the cookies a different texture – almost like a little pumpkin cheesecake bite.
Serving Suggestions: Arrange the cookies on a pretty platter and dust with a little cinnamon or nutmeg for presentation. They pair beautifully with a hot cup of coffee, a chai latte, or a glass of cold milk. For a fall dessert board, arrange them alongside fresh apple slices, caramel dip, and some decadent whiskey caramel bread pudding for a truly indulgent spread.
Storage: Store the cookies in an airtight container at room temperature for up to 3 days. If you stack them, place a piece of parchment paper between the layers to prevent the icing from sticking. For longer storage, refrigerate them for up to a week – the cold actually helps the flavors meld together.
Freezing Instructions: You can freeze either the baked cookies or the dough. To freeze baked cookies, place them on a baking sheet in the freezer for an hour until firm, then transfer to a freezer-safe bag. They’ll keep for up to 3 months. Thaw at room temperature for about 30 minutes before serving. To freeze the dough, scoop it into balls, place them on a baking sheet, and freeze until solid. Transfer to a freezer bag and bake directly from frozen, adding 1-2 minutes to the baking time.
Reheating Tip: If you want that fresh-from-the-oven taste, pop a cookie in the microwave for 10 seconds. The icing will get slightly warm and gooey, and the cookie will soften up beautifully.
Flavor Development: These cookies actually taste better the next day. The pumpkin and spices have time to meld, and the icing sets into a creamy layer that’s just perfect. So don’t be afraid to make them a day ahead – your future self will thank you.
Nutritional Information & Benefits
Let’s be real – these are cookies. They’re a treat. But that doesn’t mean they can’t have some redeeming qualities. Pumpkin is packed with vitamin A, fiber, and antioxidants. It’s good for your eyes, your skin, and your immune system. So technically, you’re eating a health food. That’s my story and I’m sticking to it.
Estimated Nutritional Values (per cookie, with icing):
| Nutrient | Amount |
|---|---|
| Calories | 185 |
| Total Fat | 8g |
| Saturated Fat | 5g |
| Cholesterol | 30mg |
| Sodium | 135mg |
| Total Carbohydrates | 27g |
| Dietary Fiber | 1g |
| Sugars | 18g |
| Protein | 2g |
Dietary Considerations: These cookies contain gluten, dairy, and eggs. For a gluten-free version, see the variations section above. For a dairy-free version, use plant-based alternatives. They are not low-carb or keto-friendly due to the sugar content.
Allergen Note: If you’re serving these at a party or gathering, be aware that they contain common allergens. I always label my baked goods when I bring them to events, just to be safe.
Personal Wellness Perspective: I believe in balance. I eat salads and I eat cookies. These pumpkin cookies make me happy, and happiness is good for your health. So I say enjoy them without guilt – just maybe don’t eat the whole batch in one sitting. (I’ve done that too, and it’s not my finest moment.)
Conclusion
These Perfect Pumpkin Cookies with Cream Cheese Icing are everything I want in a fall dessert – soft, spiced, tangy, and sweet. They’re the kind of cookies that make you slow down and actually taste what you’re eating. The kind that make your kitchen smell like autumn and your heart feel full.
I’ve tested this recipe more times than I can count, and I genuinely believe this is the best version. The crumb is perfect. The icing is perfect. The balance of pumpkin and spice is perfect. And the best part? They’re easy enough for a beginner baker but impressive enough to bring to any gathering.
So go ahead – preheat that oven, pull out your mixing bowls, and make a batch. Or two. I won’t judge. And when you do, come back and tell me how they turned out. Did you add chocolate chips? Did you try the brown butter icing? Did your family fight over the last cookie? I want to hear all about it. Leave a comment below, share your photos, and let’s make this fall the season of perfect pumpkin cookies.
Happy baking, friends. You’ve got this.
Frequently Asked Questions
Can I use pumpkin pie filling instead of pumpkin puree?
No, please don’t. Pumpkin pie filling is already sweetened and spiced, which will throw off the entire recipe. Your cookies will be too sweet, too wet, and the spice blend will be all wrong. Stick with 100% pure pumpkin puree for the best results.
Why did my cookies turn out flat?
This usually happens for one of three reasons: the dough wasn’t chilled long enough, the butter was too soft, or your baking soda is old. Make sure to chill the dough for at least 30 minutes, use room temperature butter (not melted), and check that your baking soda is still active.
Can I make the dough ahead of time?
Absolutely. You can refrigerate the dough for up to 3 days before baking. Just wrap it tightly in plastic wrap so it doesn’t dry out. You can also freeze the dough balls for up to 3 months – just bake from frozen, adding an extra minute or two to the baking time.
How do I get the icing to set properly?
Make sure your cookies are completely cool before icing them. If the cookies are even slightly warm, the icing will melt. Also, don’t add too much milk to the icing – it should be thick and spreadable, not runny. If your icing is too thin, add more powdered sugar a tablespoon at a time until it thickens up.
Can I double this recipe?
Yes, this recipe doubles beautifully. I often make a double batch for holiday parties. Just make sure you have enough baking sheets and space in your fridge to chill all the dough. You might need to bake in batches, but that’s fine – the dough will keep in the fridge while you work.
If you’re looking for more fall-inspired treats, you might also enjoy these tender strawberry shortcake stuffed cookies for a fruity twist, or these festive M&M chocolate chip cookies for a colorful option. And if you’re in the mood for something completely different, this refreshing blueberry lavender lemonade is the perfect drink to pair with your cookies.
Pin This Recipe!
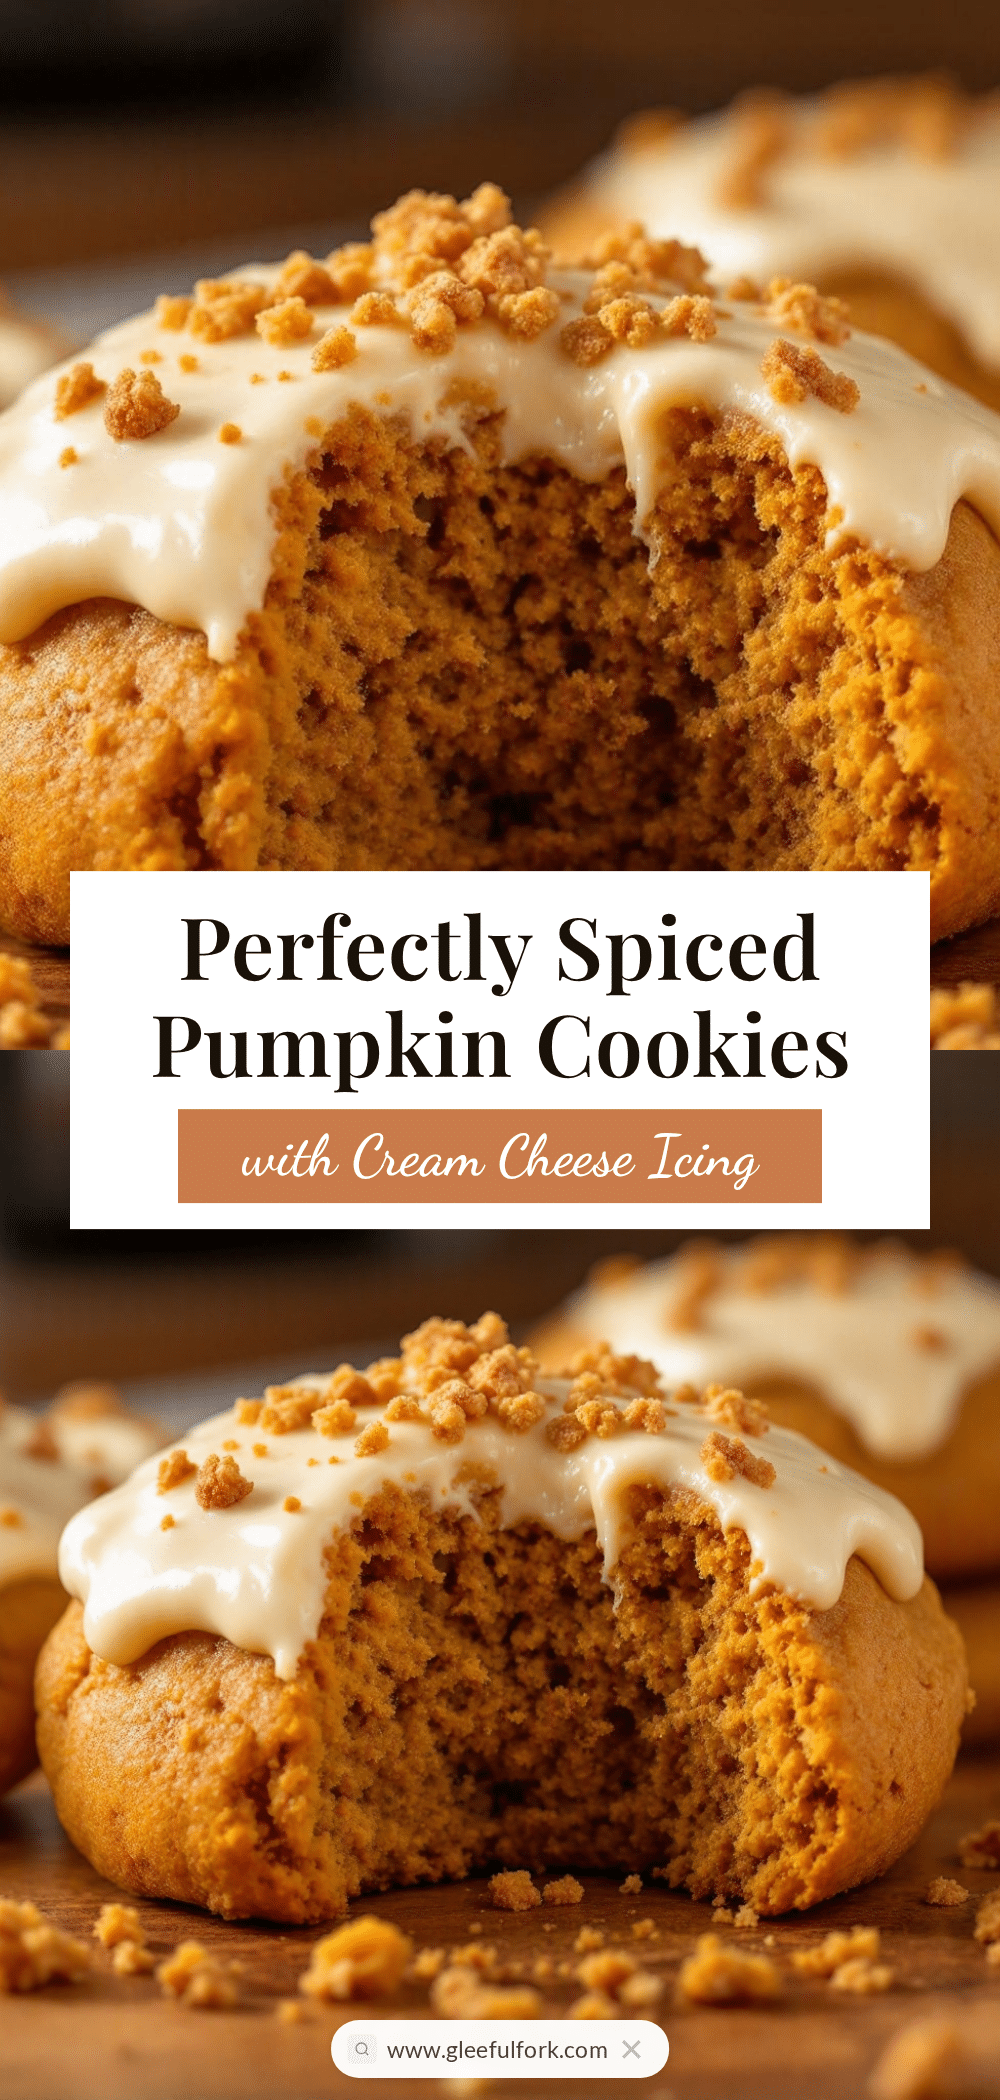
Perfect Pumpkin Cookies with Cream Cheese Icing: Easy Fall Recipe

These soft, tender pumpkin cookies with tangy cream cheese icing are the perfect fall treat. Easy to make with simple pantry ingredients, they’re a crowd-pleasing dessert for any autumn gathering.
- Prep Time: 15 minutes
- Cook Time: 12 minutes
- Total Time: 1 hour 27 minutes (including chilling and cooling)
- Yield: 24 servings 1x
- Category: Dessert
- Cuisine: American
Ingredients
- 2 ¼ cups (280g) all-purpose flour
- 1 teaspoon baking soda
- ½ teaspoon baking powder
- 1 ½ teaspoons ground cinnamon
- ½ teaspoon ground nutmeg
- ½ teaspoon ground ginger
- ¼ teaspoon ground cloves
- ½ teaspoon salt
- ½ cup (1 stick, 113g) unsalted butter, softened
- 1 cup (200g) granulated sugar
- ¼ cup (50g) packed brown sugar
- ¾ cup (170g) pumpkin puree (100% pure pumpkin)
- 1 large egg, at room temperature
- 1 teaspoon vanilla extract
- 4 ounces (113g) cream cheese, softened
- 2 tablespoons (28g) unsalted butter, softened
- 1 ½ cups (180g) powdered sugar, sifted if lumpy
- ½ teaspoon vanilla extract
- 1–2 tablespoons milk (whole milk preferred)
Instructions
- Preheat your oven to 350°F (175°C). Line two baking sheets with parchment paper or silicone mats.
- Whisk the dry ingredients together: In a medium bowl, combine the flour, baking soda, baking powder, cinnamon, nutmeg, ginger, cloves, and salt. Whisk until evenly distributed. Set aside.
- Cream the butter and sugars: In a large bowl, beat the softened butter, granulated sugar, and brown sugar together with a hand mixer on medium speed for about 2 minutes until light and fluffy. Scrape down the sides of the bowl.
- Add the wet ingredients: Beat in the pumpkin puree, egg, and vanilla extract until combined. Do not overmix.
- Combine wet and dry: Gradually add the dry ingredients to the wet mixture, mixing on low speed until just combined. Stop when no streaks of flour remain.
- Chill the dough: Cover the bowl with plastic wrap and refrigerate for at least 30 minutes (1 hour is better).
- Portion the cookies: Use a 1.5-tablespoon cookie scoop to portion the dough into balls. Place them 2 inches apart on the prepared baking sheets.
- Bake for 10-12 minutes, until the edges are set and just starting to turn golden. The centers will look slightly underdone and puffy.
- Cool completely: Let the cookies cool on the baking sheet for 5 minutes, then transfer to a wire rack to cool completely.
- Make the icing: Beat the softened cream cheese and butter together until smooth and creamy. Add the powdered sugar and vanilla extract, then beat on low speed until combined. Add milk one tablespoon at a time until the icing reaches a spreadable consistency.
- Ice the cookies: Once the cookies are completely cool, spread a generous amount of icing on each one.
- Let the icing set: Let the iced cookies sit at room temperature for about 15-20 minutes so the icing firms up slightly.
Notes
Chill the dough for at least 30 minutes to prevent spreading. Do not overmix the dough. Let cookies cool completely before icing. For best results, use room temperature ingredients. Cookies can be stored in an airtight container at room temperature for up to 3 days or refrigerated for up to a week. Freeze baked cookies or dough for up to 3 months.
Nutrition
- Serving Size: 1 cookie
- Calories: 185
- Sugar: 18
- Sodium: 135
- Fat: 8
- Saturated Fat: 5
- Carbohydrates: 27
- Fiber: 1
- Protein: 2
Keywords: pumpkin cookies, cream cheese icing, fall cookies, soft pumpkin cookies, easy pumpkin cookies


