Love this? Save it for later!
Share the inspiration with your friends
My niece took one bite, paused, and then very seriously asked if she could have the rest of the ghost’s face. I had brought a batch of these crispy ghost-shaped meringue cookies to a Halloween get-together, honestly not sure if anyone would even try them. Kids can be brutally honest about food, and adults sometimes just grab the store-bought stuff. But she sat there, quietly nibbling the edges off a little meringue ghost, and then reached for another. Then her brother noticed. By the time I left, the container was nearly empty, and my sister-in-law was texting me for the recipe before I even got home.
That’s the thing about these cookies—they look like a decoration, something too pretty to eat. But the moment you bite into one, that light, airy crunch with a hint of vanilla sweetness just melts on your tongue. They’re not overly sugary, not sticky, just perfectly crisp little clouds that happen to look like adorable ghosts. I started making them years ago for a Halloween party and never stopped. They’ve become my unexpected signature treat, the one people ask for even when October is months away.
There’s something satisfying about watching someone’s surprise when they realize these ghost-shaped meringue cookies taste even better than they look. And honestly, they’re so simple to make that I almost feel guilty getting so much praise for them. Almost.
Why You’ll Love This Recipe
I’ve tested this recipe more times than I can count, tweaking the oven temperature, the sugar ratio, and the piping technique until I got that perfect balance of structure and melt-in-your-mouth texture. Let me tell you what makes these ghost-shaped meringue cookies stand out from every other meringue recipe out there.
- Quick & Easy : The active prep time is only about 15 minutes. The oven does most of the work, and you can walk away while they bake.
- Simple Ingredients : You need exactly four ingredients—egg whites, sugar, cream of tartar, and vanilla extract. That’s it. No specialty flours, no food coloring, no complicated shopping lists.
- Perfect for Halloween : These little ghosts are the star of any spooky spread. They work for classroom parties, office gatherings, or just a fun afternoon baking with kids.
- Crowd-Pleaser : I’ve served these to kids, adults, and even picky eaters who “don’t like sweets.” They always disappear first.
- Unbelievably Delicious : The outside is crisp and fragile, the inside is light and airy, and the vanilla flavor is just right—not overpowering, but definitely there.
What makes my version different? It’s the technique. I use a low-and-slow baking method that gives you perfectly dry, crunchy meringues without any cracking or browning. No sticky centers, no weeping, no collapsed ghosts. Just consistent, adorable results every single time. I’ve also figured out the exact piping method that gives you those cute ghost shapes without the tails falling over during baking.
These aren’t just another meringue cookie. They’re the kind that makes people text you for the recipe before the party ends. And honestly, that never gets old.
What Ingredients You Will Need
This recipe uses simple, pantry-friendly ingredients that work together to create that signature light-as-air texture. Each one plays a specific role, so here’s what you need and why it matters.
- 3 large egg whites, room temperature (the colder your eggs, the harder it is to get stiff peaks—let them sit out for 30 minutes before starting)
- 3/4 cup (150g) granulated sugar (regular white sugar works best; avoid powdered sugar as it changes the texture)
- 1/4 teaspoon cream of tartar (this stabilizes the egg whites and helps them hold their shape—don’t skip it)
- 1/2 teaspoon vanilla extract (pure vanilla extract gives the best flavor, but imitation works in a pinch)
- Mini chocolate chips or black gel food coloring for the ghost faces (optional, but highly recommended for the cute factor)
I prefer using organic cane sugar when I can find it—it dissolves more evenly and gives a slightly cleaner flavor. For the vanilla, I’ve tried a few brands, and Nielsen-Massey is my go-to for pure vanilla extract. It’s pricier, but the flavor difference is noticeable in such a simple recipe.
If you’re out of cream of tartar, you can substitute 1 teaspoon of lemon juice or white vinegar per 1/4 teaspoon. It works, but cream of tartar gives more reliable results, especially if you’re new to making meringues.
For the ghost faces, I’ve done both methods. Mini chocolate chips are easier and give a cute, slightly goofy look. Black gel food coloring lets you paint on more expressive faces, but it takes a steady hand. My niece prefers the chocolate chip version because she says the ghosts look “happier.”
One note on egg whites—make sure absolutely no yolk gets in the bowl. Even a tiny bit of fat can prevent your egg whites from whipping properly. I separate each egg into a small bowl first, then add the whites to the mixing bowl one at a time. It saves you from ruining a whole batch if one yolk breaks.
Equipment Needed
You don’t need fancy equipment for these ghost-shaped meringue cookies, but a few key tools make the process much smoother.
- Electric stand mixer or hand mixer (whipping egg whites by hand is possible but exhausting—trust me, I tried once and regretted it)
- Large mixing bowl (glass or metal works best; plastic can retain oils that affect whipping)
- Piping bag with a large round tip (I use a Wilton 1A tip for the perfect ghost shape)
- Baking sheets lined with parchment paper (silicone mats work too, but parchment gives crisper bottoms)
- Small offset spatula (for smoothing any rough edges on your ghosts)
- Toothpicks (for popping air bubbles and adjusting faces)
If you don’t have a piping bag, a sturdy zip-top bag with the corner snipped off works fine. Just be careful not to cut too big of an opening. I’ve used this method in a pinch, and while the ghosts aren’t as perfectly shaped, they still taste exactly the same.
I recommend investing in a good set of baking sheets that don’t warp in the oven. Thin, flimsy sheets can cause uneven baking and lead to cracked meringues. My favorite are the Nordic Ware aluminum half-sheets—they’re affordable and last forever.
Preparation Method
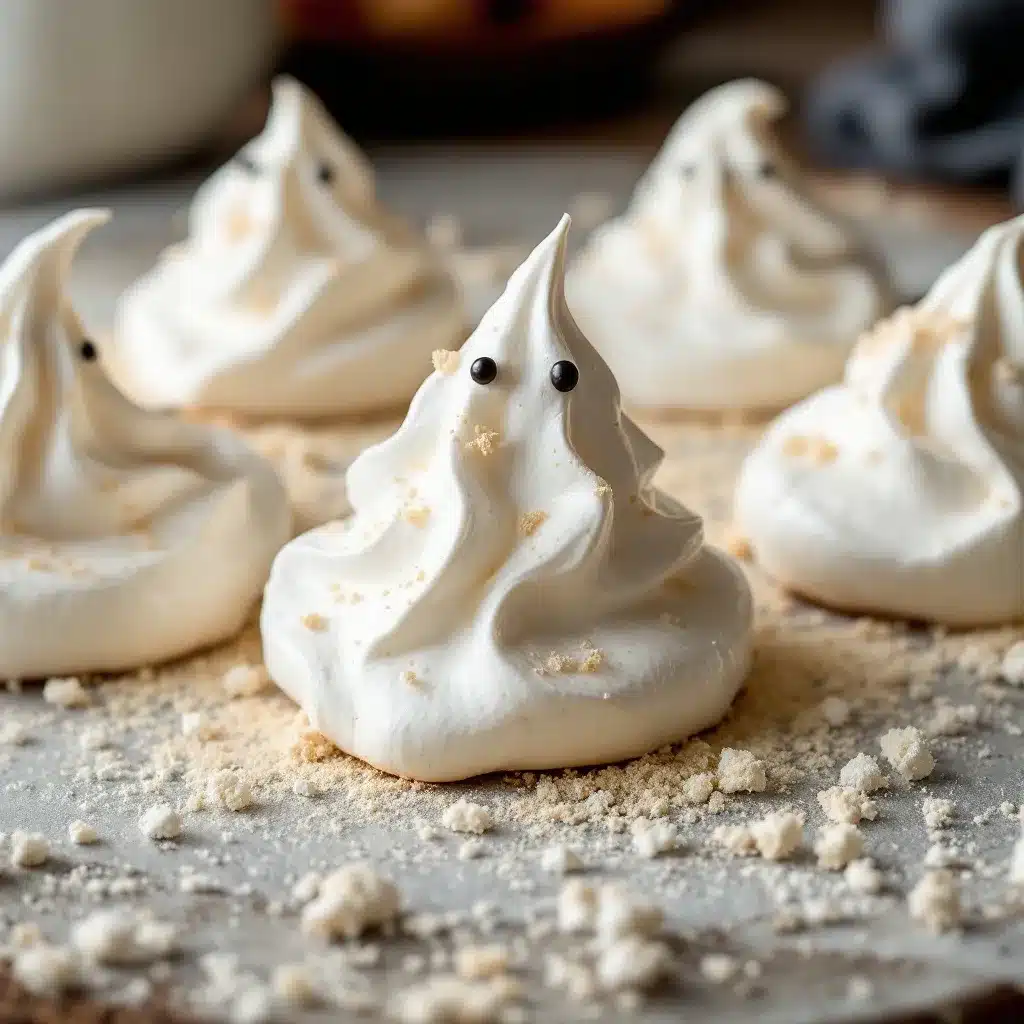
Follow these steps carefully, and you’ll have perfect ghost-shaped meringue cookies every time. I’ve included all the little details I wish someone had told me when I first started making these.
- Preheat your oven to 200°F (93°C). Yes, this is very low. We’re drying the meringues, not baking them. Line two baking sheets with parchment paper and set them aside.
- Make sure your mixing bowl is completely clean and dry. Any grease or moisture will ruin your meringue. Wipe the bowl and whisk attachment with a little lemon juice or vinegar on a paper towel if you’re worried about residue.
- Add the egg whites and cream of tartar to the bowl. Start mixing on medium speed until the egg whites become foamy and slightly opaque, about 1-2 minutes. You should see small bubbles forming.
- Increase speed to medium-high and slowly add the sugar. Add it one tablespoon at a time, letting each addition incorporate before adding the next. This takes about 3-4 minutes total. Rushing this step can cause your meringue to collapse later.
- Add the vanilla extract and continue beating on high speed. The mixture will start to look glossy and thick. Keep beating until stiff peaks form—when you lift the whisk, the meringue should stand up straight without drooping. This usually takes 5-7 minutes total from when you started adding sugar.
- Test if the sugar is fully dissolved. Rub a tiny bit of meringue between your fingers. If it feels gritty, keep beating. If it feels smooth, you’re done. Undissolved sugar can cause weeping (those sticky brown droplets) during baking.
- Transfer the meringue to your piping bag. Twist the top of the bag to seal it, and snip off the tip if you’re using a disposable bag. Hold the bag straight up and down, not at an angle.
- Pipe the ghost shapes. Start with a small dollop at the base, then lift the bag straight up while squeezing gently. As you reach the top, release pressure and pull up slightly to create a little peak. Each ghost should be about 1.5-2 inches tall. Space them about 1 inch apart on the baking sheet—they don’t spread much.
- Add the faces immediately. If using mini chocolate chips, gently press two for eyes and a few for a mouth. If using gel food coloring, paint on faces with a toothpick. Work quickly before the meringue starts to form a skin.
- Bake for 60-75 minutes. The meringues are done when they peel easily off the parchment paper and feel completely dry and crisp. They shouldn’t be sticky or chewy. If they still feel soft, give them another 10 minutes.
- Turn off the oven and let the meringues cool inside with the door slightly open (prop it open with a wooden spoon). This prevents cracking from sudden temperature changes. Let them sit for at least 30 minutes.
- Let them cool completely on the baking sheets before moving them to an airtight container. They’re very fragile when warm.
A few things I’ve learned the hard way—don’t make these on a humid day. Meringue absorbs moisture from the air and won’t crisp up properly. Also, if your oven runs hot, your ghosts might brown slightly. That’s why the low temperature is crucial. My first batch came out looking like toasted marshmallows, not ghosts.
One more tip—if you notice tiny cracks forming on your ghosts during baking, don’t panic. That’s usually a sign the oven is slightly too hot or the meringue was overmixed. They’ll still taste perfect, just maybe a little less photogenic.
Cooking Tips & Techniques
After dozens of batches (and plenty of failures), I’ve gathered some insider tricks that make these ghost-shaped meringue cookies foolproof.
Room temperature eggs are non-negotiable. I know it’s tempting to use cold eggs straight from the fridge, but cold egg whites don’t whip as high or as stable. Set your eggs out on the counter for at least 30 minutes before starting. If you forget, place them in a bowl of warm water for 5 minutes.
Don’t overmix once you reach stiff peaks. This was my biggest mistake early on. Once the meringue is glossy and holds its shape, stop mixing. Overwhipped meringue becomes dry and grainy, and it won’t pipe smoothly. You’ll see it start to look a little curdled—that’s your cue to stop immediately.
Pipe with confidence. Hesitation leads to wobbly ghosts. Hold the piping bag straight and squeeze firmly. If your first few ghosts look lopsided, just scrape them back into the bag and try again. The meringue can be re-piped as long as it hasn’t started to set.
Use the oven light to check progress. Don’t open the oven door during the first 45 minutes of baking. The rush of cool air can cause your meringues to crack or collapse. Use the oven light to peek through the window instead.
Store them properly. Meringue is hygroscopic, meaning it absorbs moisture from the air. Once completely cool, store these cookies in an airtight container at room temperature. If you live in a humid climate, add a silica gel packet to the container to keep them crisp. They’ll stay fresh for up to two weeks—if they last that long.
I once left a batch out uncovered overnight after a party, and by morning they were sticky and chewy. Not ruined, but definitely not as good. So don’t skip the airtight container step.
Variations & Adaptations
These ghost-shaped meringue cookies are surprisingly versatile. Here are some variations I’ve tried and loved.
Chocolate Ghosts : Substitute 1 tablespoon of the granulated sugar with unsweetened cocoa powder. Sift it together with the sugar before adding to the egg whites. You get a subtle chocolate flavor and a spooky grayish color that’s perfect for Halloween.
Peppermint Ghosts : Replace the vanilla extract with 1/2 teaspoon peppermint extract. Crush a few candy canes and sprinkle the pieces on the ghosts before baking. The red and white flecks look festive and taste amazing.
Vegan Meringue Ghosts : Use aquafaba (the liquid from a can of chickpeas) instead of egg whites. 3 tablespoons of aquafaba equals roughly one egg white. Whip it the same way, but expect it to take a few minutes longer to reach stiff peaks. The texture is slightly less crisp but still delicious.
Pumpkin Spice Ghosts : Add 1/2 teaspoon pumpkin pie spice to the sugar before whipping. The warm spices complement the vanilla beautifully and make these perfect for fall gatherings beyond Halloween.
Mini Ghost Bites : Instead of piping tall ghosts, pipe small dollops about the size of a quarter. Reduce baking time to 30-40 minutes. These are perfect for snacking or topping cupcakes.
My personal favorite variation is the peppermint version. I made a batch for a Christmas party last year, and people kept asking if they were supposed to be snow ghosts. I just went with it. They disappeared faster than the actual Christmas cookies.
Serving & Storage Suggestions
These ghost-shaped meringue cookies are best served at room temperature. They’re delicate, so handle them gently when arranging on a platter. I like to display them on a dark plate or tray to make the white ghosts pop.
For Halloween parties, arrange them around a bowl of punch or scatter them on a dessert table with other spooky treats. They pair beautifully with hot chocolate, coffee, or a glass of cold milk. If you’re serving them at a kids’ party, try stacking them in a clear jar tied with a ribbon—they look adorable and stay protected.
For storage, place the cooled meringues in an airtight container with a tight-fitting lid. Layer them between sheets of parchment paper to prevent sticking and breakage. Keep the container in a cool, dry place away from direct sunlight. Do not refrigerate—the moisture will ruin the texture.
These cookies freeze beautifully. Place them in a single layer in a freezer-safe container with parchment between layers. They’ll keep for up to three months. To thaw, let them sit at room temperature for 10-15 minutes. Don’t unwrap them while frozen, as condensation can make them sticky.
One thing I’ve noticed—the flavor actually improves after a day or two. The vanilla seems to deepen, and the texture becomes even more delicate. So don’t hesitate to make these a day or two ahead of your event.
Nutritional Information & Benefits
These ghost-shaped meringue cookies are surprisingly light compared to most cookies. Each ghost (without chocolate chips) contains approximately:
- Calories: 15-20
- Carbohydrates: 4g
- Sugar: 4g
- Protein: 0.5g
- Fat: 0g
- Sodium: 5mg
Because they’re made almost entirely of egg whites and sugar, these cookies are naturally fat-free and very low in calories. Egg whites are a good source of protein and contain no cholesterol. They’re also naturally gluten-free, making them a safe option for those with gluten sensitivities.
If you’re watching your sugar intake, you can reduce the sugar slightly (try 2/3 cup instead of 3/4 cup), but keep in mind that sugar is essential for structure in meringues. Too little sugar, and your ghosts won’t hold their shape.
For those with dietary restrictions, these cookies are vegetarian, gluten-free, and can be made vegan using the aquafaba substitution mentioned earlier. Always check your chocolate chips for dairy if that’s a concern—many dark chocolate chips are dairy-free.
I personally love that these are a treat I can feel good about serving. They satisfy that sweet craving without being heavy or greasy. Plus, portion control is easy when each ghost is so small and light.
Conclusion
These ghost-shaped meringue cookies have become a staple in my kitchen, and I hope they become one in yours too. They’re simple enough for a beginner baker but impressive enough to steal the show at any Halloween gathering. The ingredients are basic, the technique is forgiving, and the result is genuinely delightful.
I love that you can customize them endlessly—different flavors, different faces, different sizes. They’re a blank canvas for your creativity, and they always bring a smile to people’s faces. My niece still asks for them year-round, and I’ve started making them for other holidays too with different shapes and colors.
If you try this recipe, I’d love to hear how it goes. Leave a comment below and let me know if your ghosts turned out cute or if you came up with a fun variation I haven’t tried yet. Share a photo on social media and tag me—I always love seeing your creations.
Happy baking, and may your ghosts be crisp, your faces be friendly, and your kitchen smell like vanilla and joy.
Frequently Asked Questions
Can I make these ghost-shaped meringue cookies without a piping bag?
Absolutely. You can use a sturdy zip-top bag with the corner snipped off, or even a spoon to dollop the meringue into rough ghost shapes. They won’t look as polished, but they’ll taste exactly the same. I’ve done the spoon method when I was camping and forgot my piping bag—the ghosts were more “abstract art” than “cute,” but nobody complained.
Why did my meringue cookies turn out sticky or chewy?
This usually happens for two reasons—either they weren’t baked long enough to dry out completely, or they were stored in a humid environment. Make sure your meringues peel easily off the parchment before you turn off the oven. If they stick, give them more time. For storage, always use an airtight container and keep them in a dry place.
Can I use liquid egg whites from a carton?
I don’t recommend it. Carton egg whites are pasteurized and often contain stabilizers that prevent them from whipping to stiff peaks. They also tend to be more watery. Fresh egg whites give you the best volume and texture. If you must use carton egg whites, look for ones labeled “whippable” and expect them to take longer to reach stiff peaks.
How do I prevent my ghosts from cracking during baking?
Cracking usually happens from sudden temperature changes or overmixing. Make sure your oven temperature is accurate (use an oven thermometer if you’re unsure). Don’t open the oven door during baking, and let the meringues cool slowly in the turned-off oven with the door cracked open. Also, avoid making meringues on rainy or humid days—the extra moisture in the air can cause cracking.
Can I double this recipe?
Yes, but be careful not to overcrowd your mixer. If you double the recipe, use a stand mixer rather than a hand mixer. The egg whites need room to expand as they whip. You’ll also need to bake in batches or use multiple oven racks. If using multiple racks, rotate the pans halfway through baking for even drying.
Pin This Recipe!
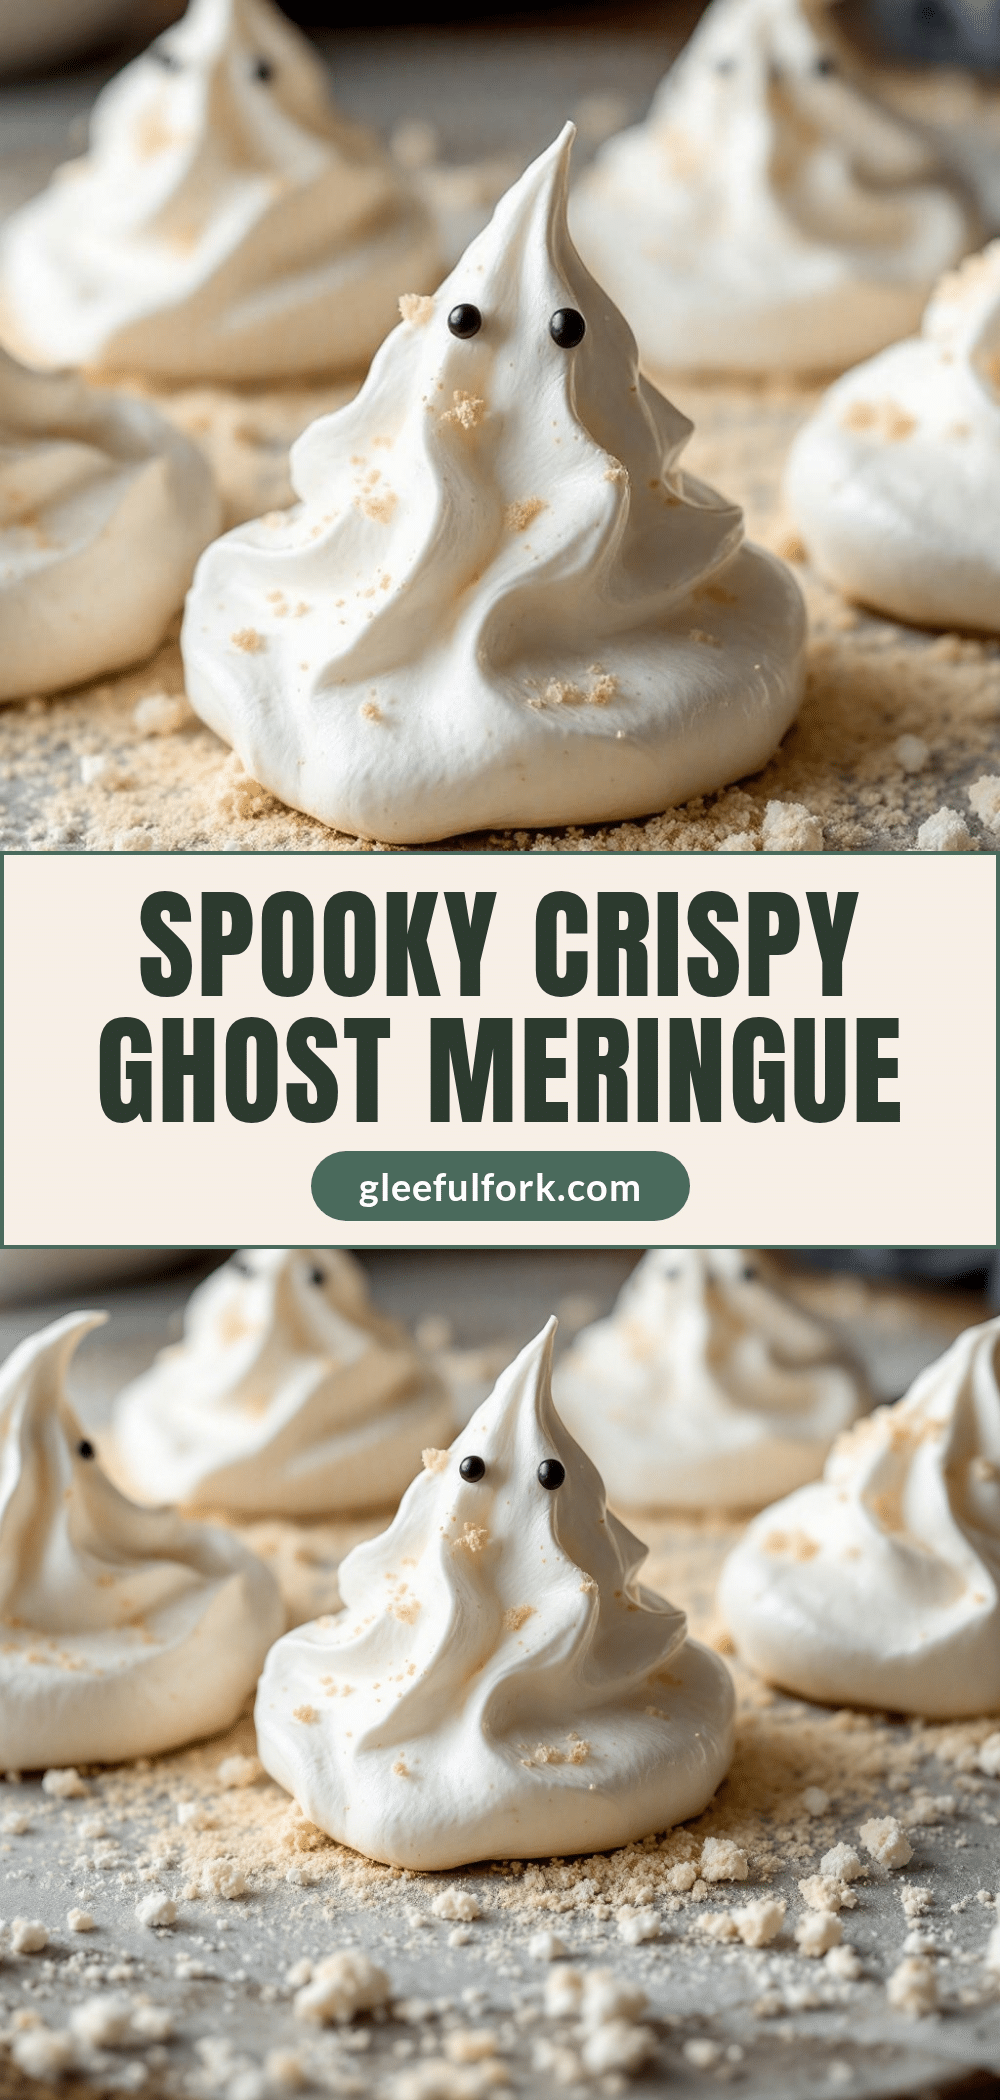
Perfect Ghost-Shaped Meringue Cookies: Easy Crispy Recipe
These light, airy, and crispy ghost-shaped meringue cookies are perfect for Halloween. Made with just four simple ingredients, they are quick to prepare and always a crowd-pleaser.
- Prep Time: 15 minutes
- Cook Time: 60-75 minutes
- Total Time: 1 hour 30 minutes to 1 hour 45 minutes
- Yield: 24 servings 1x
- Category: Dessert
- Cuisine: American
Ingredients
- 3 large egg whites, room temperature
- 3/4 cup (150g) granulated sugar
- 1/4 teaspoon cream of tartar
- 1/2 teaspoon vanilla extract
- Mini chocolate chips or black gel food coloring for the ghost faces (optional)
Instructions
- Preheat your oven to 200°F (93°C). Line two baking sheets with parchment paper.
- Make sure your mixing bowl is completely clean and dry. Wipe the bowl and whisk attachment with a little lemon juice or vinegar on a paper towel if needed.
- Add the egg whites and cream of tartar to the bowl. Start mixing on medium speed until foamy and slightly opaque, about 1-2 minutes.
- Increase speed to medium-high and slowly add the sugar, one tablespoon at a time, letting each addition incorporate before adding the next (about 3-4 minutes total).
- Add the vanilla extract and continue beating on high speed until stiff peaks form (5-7 minutes total from when you started adding sugar).
- Test if the sugar is fully dissolved by rubbing a tiny bit of meringue between your fingers. If it feels smooth, you’re done.
- Transfer the meringue to a piping bag fitted with a large round tip (e.g., Wilton 1A).
- Pipe ghost shapes: start with a small dollop at the base, then lift the bag straight up while squeezing gently. Release pressure at the top and pull up slightly to create a little peak. Space ghosts about 1 inch apart.
- Add faces immediately using mini chocolate chips or black gel food coloring.
- Bake for 60-75 minutes, until the meringues peel easily off the parchment and feel completely dry and crisp.
- Turn off the oven and let the meringues cool inside with the door slightly open (prop with a wooden spoon) for at least 30 minutes.
- Let them cool completely on the baking sheets before moving to an airtight container.
Notes
Do not make on a humid day. Ensure egg whites are at room temperature. Do not open the oven door during the first 45 minutes of baking. Store in an airtight container at room temperature for up to two weeks. For vegan version, use aquafaba (3 tablespoons per egg white).
Nutrition
- Serving Size: 1 ghost cookie
- Calories: 1520
- Sugar: 4
- Sodium: 5
- Carbohydrates: 4
- Protein: 0.5
Keywords: ghost-shaped meringue cookies, Halloween cookies, meringue cookies, easy meringue recipe, crispy meringue, ghost cookies, Halloween dessert


