Love this? Save it for later!
Share the inspiration with your friends
There used to be a tiny, dimly-lit diner on the corner of 7th and Elm—the kind with cracked vinyl booths and a jukebox that only played seventies soul—that made a skillet cookie I still dream about. When they closed suddenly two summers ago, I felt a little pang of loss that honestly surprised me. I mean, it was just a cookie, right? Wrong. It was the cookie. The one with the impossibly crisp edges, a molten center that stayed gooey for the entire meal, and this nutty, almost caramel-like depth I couldn’t quite place.
After twelve tries—twelve!—I finally got it. The secret, as it turns out, wasn’t some fancy chocolate or a secret ingredient from a far-off land. It was browning the butter. That one simple step transforms a standard chocolate chip cookie into something deeply, almost absurdly flavorful. The first time I pulled my cast iron skillet out of the oven and saw that golden, puffed-up dome, I nearly cried. Maybe you’ve been there, chasing a flavor memory from a place that no longer exists. Let me tell you, the hunt is worth it.
This recipe is my love letter to that little diner. It’s the dessert you make when you want to impress without the stress, the one that fills your kitchen with a scent so warm and inviting, everyone just gravitates toward the stove. I keep making it because it’s more than a recipe—it’s a feeling. It’s pulling a hot, bubbling skillet out of the oven, grabbing a couple of spoons, and sharing something utterly, ridiculously delicious with the people you love.
Why You’ll Love This Recipe
This Gooey Brown Butter Chocolate Chip Skillet Cookie isn’t just another dessert recipe—it’s a game-changer. I’ve tested this more times than I care to admit, tweaking the flour ratio and the chill time until every single batch came out perfect. Here is why this version is the one you’ll bookmark:
- Quick & Easy : From start to finish, this is a 30-minute dessert. No complicated techniques, no hours of chilling dough. It’s the perfect last-minute sweet treat for a weeknight or an unexpected guest.
- Simple Ingredients : You likely have everything in your pantry right now. Butter, sugar, eggs, flour, chocolate chips. The magic is in the method, not a long grocery list.
- Perfect for Sharing : This is the ultimate crowd-pleaser. Serve it straight from the skillet with a scoop of vanilla ice cream and watch it disappear. It’s great for parties, date nights, or a cozy night in.
- Unbelievably Delicious : The brown butter adds a nutty, toffee-like flavor that you just can’t get from regular melted butter. The edges are perfectly crisp and chewy, while the center stays gloriously soft and gooey.
- One-Skillet Wonder : Minimal cleanup is a beautiful thing. You mix, bake, and serve all in the same cast iron skillet. It doesn’t get much easier than that.
This isn’t just another version of a skillet cookie—it’s your best version. The brown butter technique is the key that unlocks a depth of flavor that feels fancy but is incredibly simple to do. It’s the kind of dessert that makes you close your eyes after the first bite. Honestly, it’s comfort food reimagined—faster, richer, and with the same soul-soothing satisfaction that only a warm, gooey cookie can provide.
What Ingredients You Will Need
This recipe relies on a handful of pantry staples to create something truly special. Each ingredient plays a crucial role in building that perfect texture and deep, nutty flavor. Here is what you will need and why it matters.
- Unsalted Butter (1 cup / 2 sticks): This is the star of the show. We use unsalted butter so we can control the salt level. You will brown it, which is the simple process of cooking it until the milk solids turn golden and smell nutty. I recommend using a good quality butter like Kerrygold for the best flavor, but any brand works great.
- Brown Sugar (¾ cup, packed): Brown sugar adds moisture, a slight chewiness, and a deep molasses flavor that pairs beautifully with the brown butter. Light or dark brown sugar both work; dark will give you a richer, more intense flavor.
- Granulated Sugar (¼ cup): A little white sugar helps the cookie spread just enough and adds a touch of sweetness without making it overly sugary.
- Large Egg (1): The egg binds everything together and provides structure. Make sure it’s at room temperature so it emulsifies smoothly into the warm butter mixture.
- Vanilla Extract (1 teaspoon): Pure vanilla extract enhances all the other flavors. Avoid imitation vanilla if you can—the real stuff makes a noticeable difference here.
- All-Purpose Flour (1 ½ cups): Standard all-purpose flour gives the cookie the perfect structure—crisp on the outside, tender on the inside. For a gluten-free option, you can use a 1:1 gluten-free baking flour blend.
- Baking Soda (½ teaspoon): This is our leavening agent. It helps the cookie rise slightly and gives it that soft, tender crumb.
- Salt (½ teaspoon): A generous pinch of salt is non-negotiable. It balances the sweetness and makes the brown butter flavor pop. I like to use a flaky sea salt for sprinkling on top at the end.
- Semi-Sweet Chocolate Chips (1 ½ cups): Semi-sweet is my go-to because it is not too sweet and not too bitter. You can use dark chocolate chips, milk chocolate chips, or even chopped chocolate bars for those beautiful pools of melted chocolate. I often use a mix of chips and chunks for texture.
Ingredient Selection Tips: For the best results, use a good quality chocolate. I am partial to Ghirardelli or Guittard chips. Also, don’t skip the flaky salt at the end—it is a small step that makes a huge difference in balancing the sweetness.
Equipment Needed
You don’t need a lot of fancy gear for this recipe, which is part of its beauty. Here is what you will need to make this Gooey Brown Butter Chocolate Chip Skillet Cookie a reality.
- 10-inch Cast Iron Skillet: This is the ideal vessel. Cast iron heats evenly and retains heat beautifully, giving you those perfect crispy edges while keeping the center gooey. If you don’t have one, you can use a 9-inch or 10-inch oven-safe non-stick skillet.
- Medium Saucepan or Skillet: You will need a light-colored pan (stainless steel is perfect) to brown the butter. A dark pan makes it hard to see the milk solids turning golden, which can lead to burnt butter.
- Mixing Bowls: One large bowl for the wet ingredients and one medium bowl for the dry ingredients.
- Whisk and Rubber Spatula: A whisk for combining the dry ingredients and a rubber spatula for folding everything together.
- Measuring Cups and Spoons: For accurate measurements, which are important in baking.
- Cooling Rack: Optional, but helpful for letting the skillet cool slightly before serving.
Personal Note on Equipment: I have a well-seasoned cast iron skillet that I have had for years, and it makes everything taste better. If your skillet is new, just make sure it’s well-greased so the cookie doesn’t stick. And honestly, if you only have a 12-inch skillet, the cookie will just be a bit thinner and bake a few minutes faster—still delicious!
Preparation Method
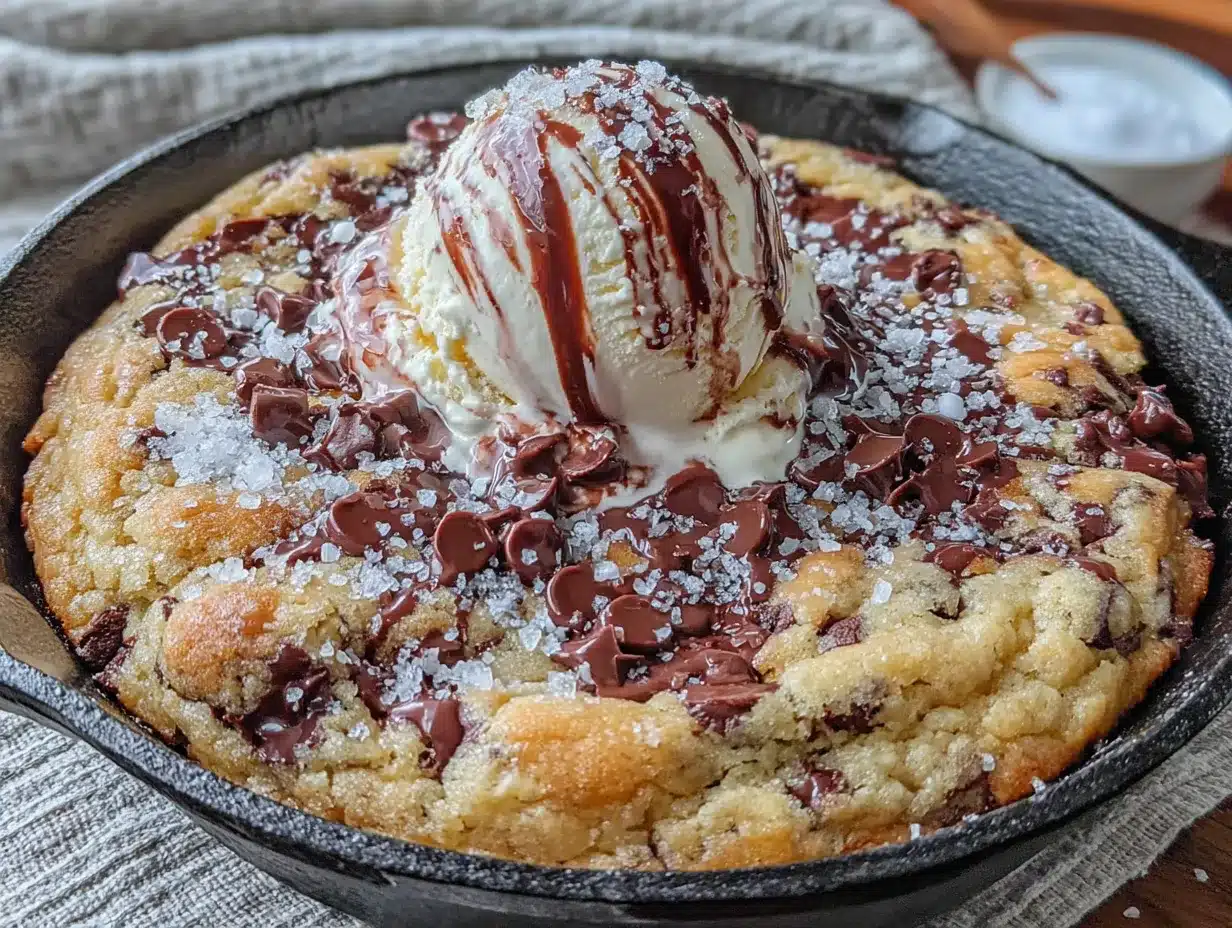
Alright, let’s get baking. This process is straightforward, but the key is paying attention to the butter. Follow these steps, and you will have a skillet cookie that rivals any diner’s.
- Brown the Butter: Place the 1 cup of unsalted butter in your light-colored saucepan over medium heat. Let it melt completely, then continue cooking, swirling the pan occasionally. The butter will foam up, then subside. Watch closely—you will see little brown specks form on the bottom of the pan, and it will smell wonderfully nutty. This takes about 5-7 minutes. Once it’s golden brown, immediately pour it into a large mixing bowl to stop it from burning. Let it cool for 5 minutes.
- Preheat and Prep: While the butter cools, preheat your oven to 350°F (175°C). Place your 10-inch cast iron skillet in the oven to heat up for about 5 minutes. This step helps create those crisp, golden edges. Carefully remove the hot skillet and add 1 tablespoon of butter (from your measured sticks) to it, swirling to coat the bottom and sides.
- Mix the Wet Ingredients: To the bowl with the cooled brown butter, add ¾ cup packed brown sugar and ¼ cup granulated sugar. Whisk vigorously until the mixture is smooth and well combined. It will look a bit like wet sand. Add 1 large egg and 1 teaspoon of vanilla extract, and whisk again until smooth and glossy.
- Combine the Dry Ingredients: In a separate medium bowl, whisk together 1 ½ cups all-purpose flour, ½ teaspoon baking soda, and ½ teaspoon salt. This ensures the leavening agents are evenly distributed.
- Bring It All Together: Pour the dry ingredients into the wet ingredients. Use your rubber spatula to fold everything together gently. Mix just until you no longer see streaks of flour—overmixing will make the cookie tough. Fold in 1 ½ cups of semi-sweet chocolate chips, reserving a handful to press on top later.
- Bake the Cookie: Transfer the cookie dough to your prepared hot skillet. It will be thick, so use your spatula to press it into an even layer. Press the reserved chocolate chips onto the top of the dough—this makes it look beautiful. Bake for 18-22 minutes. The edges should be golden brown and set, but the center will still look slightly soft and puffy. It will continue to cook from the residual heat of the skillet.
- Cool and Serve: Remove the skillet from the oven and place it on a cooling rack. Let it cool for at least 10-15 minutes. This is the hardest part! The cooling time allows the center to set up just enough so it’s gooey, not soupy. Sprinkle with a pinch of flaky sea salt, scoop in some vanilla ice cream, and dig in with spoons.
Troubleshooting Tip: If the center sinks a bit after cooling, don’t worry—that’s totally normal and just means it’s extra gooey! If your cookie is browning too quickly on the edges but the center is still raw, tent the skillet loosely with aluminum foil for the last 5 minutes of baking.
Cooking Tips & Techniques
Over the course of my twelve test batches, I learned a few things the hard way so you don’t have to. Here are my best tips for nailing this Gooey Brown Butter Chocolate Chip Skillet Cookie every single time.
- Don’t Walk Away from the Butter: Browning butter is a quick process, and it can go from perfect to burnt in seconds. The moment you see those brown specks and smell that nutty aroma, pull it off the heat. I once got distracted by a phone call, and my butter turned black. It was a sad, smoky mess.
- Let the Brown Butter Cool: This is crucial. If you add the egg and sugar to piping hot butter, you will scramble the egg. Let it cool for at least 5 minutes. It should be warm, not hot, to the touch.
- Preheat the Skillet: This is my secret weapon. Heating the skillet before adding the dough gives you those beautifully browned, crispy edges from the very start. Just be careful when handling it—it’s hot!
- Underbake Slightly: The best skillet cookies are pulled out of the oven when they look slightly underdone in the center. The residual heat of the cast iron will finish the cooking process. If you wait until the center looks fully set, it will be overbaked and cakey.
- Use a Cookie Scoop for Uniformity: If you’re making individual skillet cookies in smaller pans, use a cookie scoop to ensure each one is the same size and bakes evenly.
Variations & Adaptations
One of the best things about this skillet cookie is how easy it is to make it your own. Here are a few of my favorite variations that I have tested and loved.
- Chocolate Lover’s Dream: Swap ½ cup of the semi-sweet chips for dark chocolate chunks and add 2 tablespoons of unsweetened cocoa powder to the flour mixture. It’s intensely chocolatey and absolutely divine.
- Nutty Brown Butter: Add ½ cup of toasted, chopped pecans or walnuts along with the chocolate chips. The crunch of the nuts against the gooey cookie is a textural dream. I love using pecans—they feel so Southern and cozy.
- Sea Salt & Caramel: After pressing the dough into the skillet, drizzle ¼ cup of good quality caramel sauce over the top and swirl it in with a knife. Bake as directed, then finish with flaky sea salt. The salty-sweet combo is irresistible.
- Gluten-Free Option: Substitute the all-purpose flour with a high-quality 1:1 gluten-free baking blend that contains xanthan gum. I have had great success with the Bob’s Red Mill brand. The texture is slightly more tender, but still perfectly gooey.
- Vegan Adaptation: Use a vegan butter stick (like Miyoko’s) and a flax egg (1 tablespoon ground flaxseed + 3 tablespoons water, let sit for 5 minutes). The flavor will be slightly different, but the brown butter technique still works beautifully with plant-based butter.
Serving & Storage Suggestions
This skillet cookie is best enjoyed warm, fresh from the oven. The contrast between the warm, gooey cookie and a cold scoop of vanilla ice cream is pure magic. Here is how to serve and store it for the best experience.
- Serving Temperature: Serve it warm, but let it rest for at least 10-15 minutes after baking. This allows the center to set up into that perfect gooey consistency. If you serve it too soon, it might be a little soupy.
- Presentation: Place the hot skillet on a wooden board or a trivet in the center of the table. Provide a few spoons and let everyone dig in family-style. It’s a wonderfully communal dessert. A scoop of vanilla bean ice cream is the classic pairing, but a drizzle of heavy cream or a dollop of whipped cream works beautifully too.
- Storage: If you have leftovers (unlikely, but possible!), let the cookie cool completely in the skillet. Cover the skillet tightly with plastic wrap or aluminum foil and store it at room temperature for up to 2 days. The texture will soften over time, but it will still be delicious.
- Reheating: To bring back that warm, gooey texture, place the skillet in a 300°F (150°C) oven for 5-7 minutes. You can also microwave individual portions for 15-20 seconds. The center will become soft and melty again.
Nutritional Information & Benefits
Let’s be real—this is a dessert, and it is meant to be enjoyed as a treat. However, there are a few bright spots in this indulgent recipe. The nutritional information below is an estimate for one serving (about ⅛ of the skillet cookie).
Estimated Nutritional Values (per serving):
- Calories: 420
- Fat: 24g
- Carbohydrates: 52g
- Fiber: 2g
- Sugar: 35g
- Protein: 5g
Health Highlights: While this is not a health food, the dark chocolate chips contain antioxidants and can be a source of magnesium. The brown butter, while rich, is a fantastic way to maximize flavor without needing extra sugar or artificial ingredients. Using a high-quality butter and good chocolate means you are getting a more satisfying dessert with ingredients you can feel good about.
Dietary Considerations: This recipe contains gluten, dairy, and eggs. For a gluten-free version, check out the variations section above. For a dairy-free version, use a high-quality vegan butter and dairy-free chocolate chips.
Conclusion
This Gooey Brown Butter Chocolate Chip Skillet Cookie is more than just a dessert—it is an experience. It’s the smell of nutty brown butter filling your kitchen, the anticipation of watching it puff up in the oven, and the pure joy of digging into a warm, gooey skillet with the people you love. It is simple enough for a Tuesday night and impressive enough for a dinner party.
I hope you make this recipe your own. Maybe you add a sprinkle of sea salt, a handful of pecans, or a drizzle of caramel. Whatever you do, don’t skip the brown butter—it is the soul of this cookie. I would love to hear how it turns out for you. Drop a comment below and let me know if this brought back any food memories of your own. Happy baking!
Frequently Asked Questions
Can I use salted butter instead of unsalted?
Yes, you can! Just reduce the added salt in the recipe to ¼ teaspoon to avoid the cookie being too salty. The flavor will be slightly different, but it will still be delicious.
Why did my cookie turn out cakey instead of gooey?
This usually happens if the cookie is overbaked. Remember to pull it out when the edges are set but the center still looks a bit soft and puffy. The residual heat from the skillet will finish cooking the center to a perfect gooey consistency.
Can I make the dough ahead of time?
Absolutely! You can prepare the dough, press it into the skillet, cover it tightly, and refrigerate for up to 24 hours. When you are ready to bake, just add a few extra minutes to the baking time since you are starting with a cold skillet.
My brown butter burned. What did I do wrong?
Burning happens quickly if you walk away or if the heat is too high. Always use medium heat and keep a close eye on the pan. The moment you see the brown specks and smell the nutty aroma, pour the butter into a cool bowl to stop the cooking process immediately.
Can I use a different size skillet?
Yes, you can. If you use a 12-inch skillet, the cookie will be thinner and will bake in about 15-17 minutes. If you use an 8-inch skillet, it will be thicker and may need 22-25 minutes. Just keep an eye on it and look for those golden edges.
Pin This Recipe!
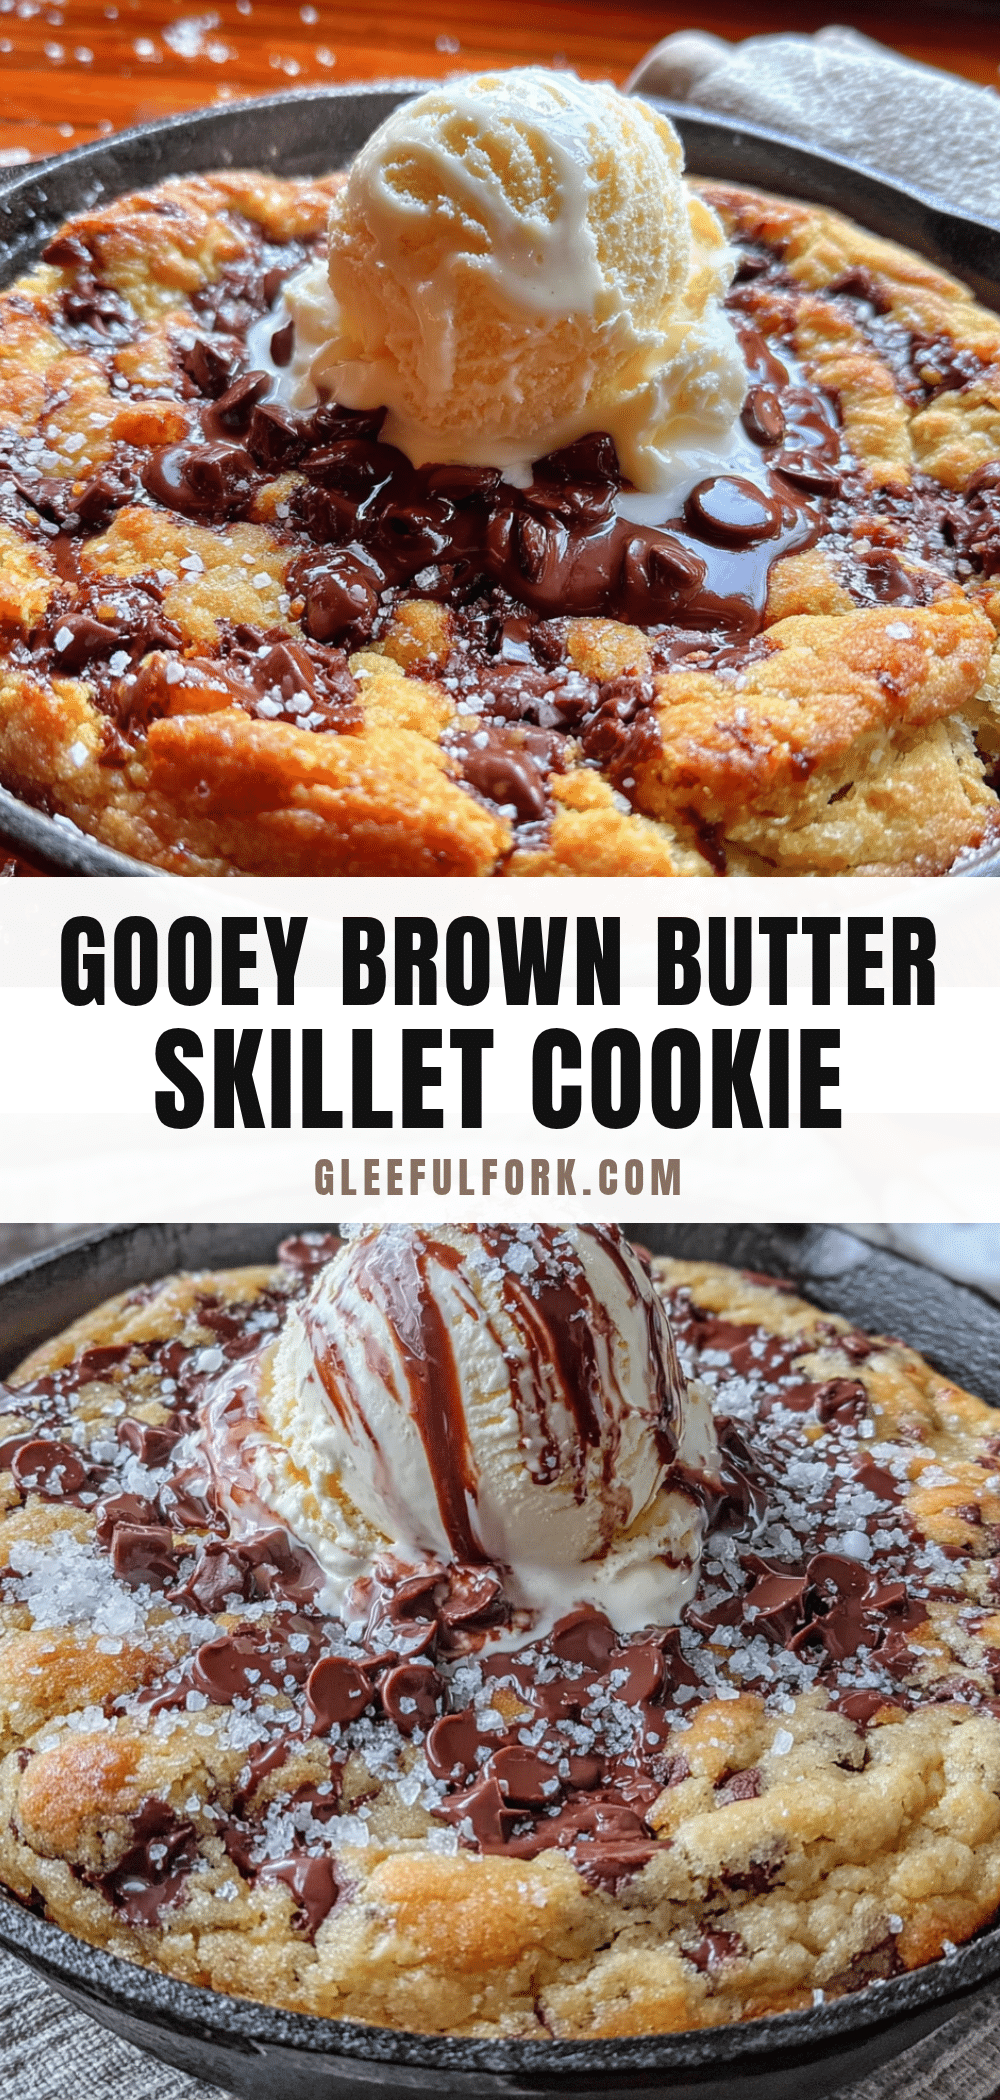
Gooey Brown Butter Chocolate Chip Skillet Cookie – Easy 30-Minute Dessert
This Gooey Brown Butter Chocolate Chip Skillet Cookie is a quick and easy 30-minute dessert with crisp edges and a molten, gooey center. The secret is browning the butter, which adds a nutty, caramel-like depth that transforms a classic cookie into something extraordinary.
- Prep Time: 10 minutes
- Cook Time: 20 minutes
- Total Time: 30 minutes
- Yield: 8 servings 1x
- Category: Dessert
- Cuisine: American
Ingredients
- 1 cup (2 sticks) unsalted butter
- ¾ cup packed brown sugar
- ¼ cup granulated sugar
- 1 large egg, at room temperature
- 1 teaspoon vanilla extract
- 1 ½ cups all-purpose flour
- ½ teaspoon baking soda
- ½ teaspoon salt
- 1 ½ cups semi-sweet chocolate chips
- Flaky sea salt, for sprinkling (optional)
Instructions
- Brown the butter: Place 1 cup unsalted butter in a light-colored saucepan over medium heat. Melt completely, then continue cooking, swirling occasionally, until the butter foams, subsides, and turns golden brown with a nutty aroma (about 5-7 minutes). Immediately pour into a large mixing bowl to stop cooking. Let cool for 5 minutes.
- Preheat and prep: Preheat oven to 350°F (175°C). Place a 10-inch cast iron skillet in the oven to heat for 5 minutes. Carefully remove the hot skillet and add 1 tablespoon of butter (from the measured sticks), swirling to coat the bottom and sides.
- Mix wet ingredients: To the bowl with cooled brown butter, add ¾ cup packed brown sugar and ¼ cup granulated sugar. Whisk vigorously until smooth and well combined. Add 1 large egg and 1 teaspoon vanilla extract, whisking until smooth and glossy.
- Combine dry ingredients: In a separate medium bowl, whisk together 1 ½ cups all-purpose flour, ½ teaspoon baking soda, and ½ teaspoon salt.
- Bring it together: Pour dry ingredients into wet ingredients. Fold gently with a rubber spatula until just combined (do not overmix). Fold in 1 ½ cups semi-sweet chocolate chips, reserving a handful to press on top.
- Bake: Transfer dough to the prepared hot skillet, pressing into an even layer. Press reserved chocolate chips on top. Bake for 18-22 minutes, until edges are golden brown and set, but the center still looks slightly soft and puffy.
- Cool and serve: Remove from oven and place on a cooling rack. Let cool for at least 10-15 minutes. Sprinkle with flaky sea salt, add a scoop of vanilla ice cream, and serve with spoons.
Notes
Don’t walk away from the butter while browning—it can burn quickly. Let the brown butter cool for at least 5 minutes before adding the egg to avoid scrambling. Preheat the skillet for crispier edges. Underbake slightly; the residual heat from the skillet will finish cooking the center. If the center sinks after cooling, it’s normal and means it’s extra gooey. If edges brown too quickly, tent with foil for the last 5 minutes.
Nutrition
- Serving Size: 1/8 of skillet cooki
- Calories: 420
- Sugar: 35
- Fat: 24
- Carbohydrates: 52
- Fiber: 2
- Protein: 5
Keywords: skillet cookie, brown butter, chocolate chip cookie, easy dessert, 30-minute dessert, cast iron cookie, gooey cookie


