Love this? Save it for later!
Share the inspiration with your friends
I burned the first batch of pumpkin cookies I ever made so badly that the smoke alarm went off, my dog hid under the bed, and I had to open every window in the house in mid-October. That was seven years ago, and honestly? I’m kind of glad it happened. Because that disaster forced me to actually figure out what makes a pumpkin cookie work — not just turn out okay, but turn out fluffy, tender, and worthy of a thick layer of cream cheese icing. Turns out, most recipes get the moisture balance wrong. Too much pumpkin and you’re baking what basically amounts to a wet pancake. Too little and you lose that unmistakable fall flavor.
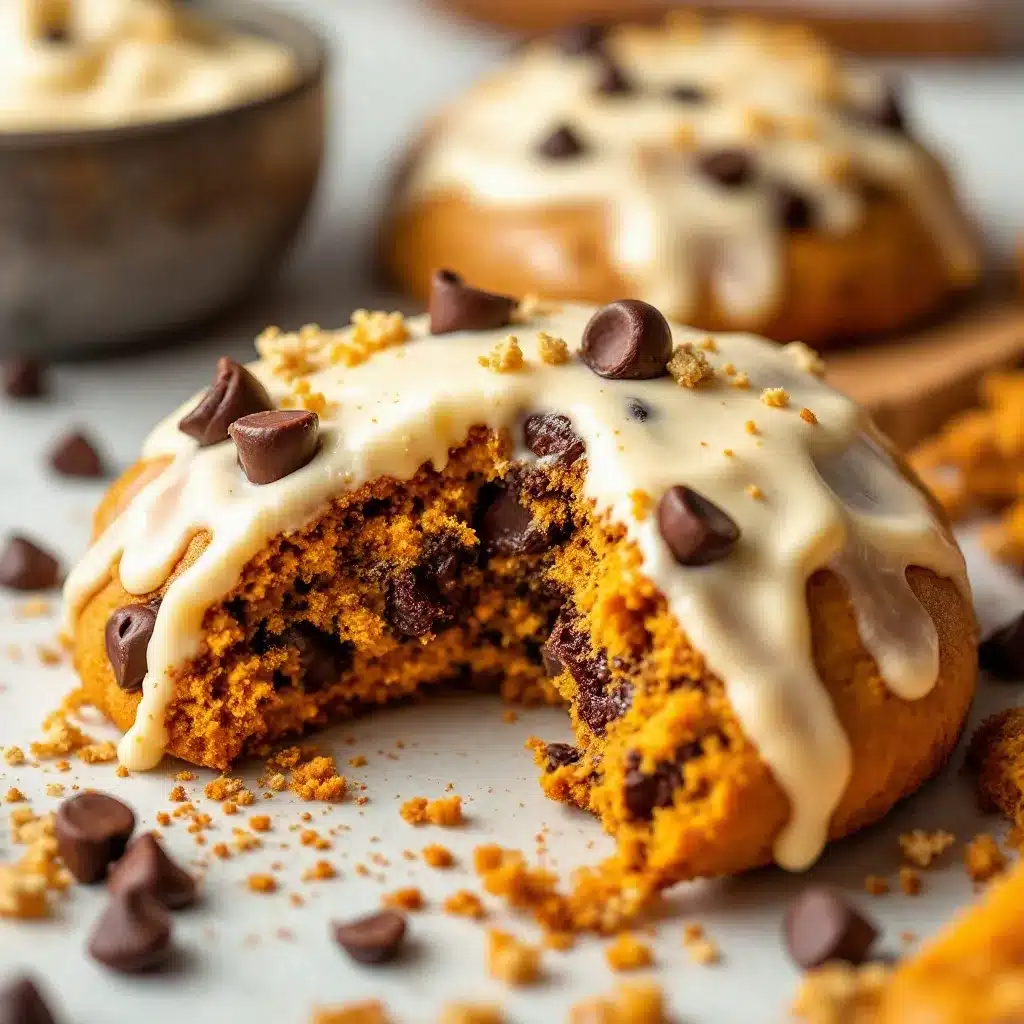
I spent the next three autumns testing batches — some good, some weird, one that my husband politely called “interesting” before reaching for a second one anyway. This version right here? This is the one that finally made me stop tweaking. The cookies come out soft and cake-like, almost like a little pumpkin cloud, with pockets of melted chocolate in every bite. And the icing — well, let’s just say I’ve been known to eat it straight from the bowl with a spoon when nobody’s watching.
These cookies have become my unofficial kickoff to fall baking season every single year. They’re the recipe I bring to Friendsgiving, the one my neighbor texts me about in late September asking if I’m “making those pumpkin things again.” And now I’m handing it over to you, with all the little notes I’ve scribbled in the margins over the years. Because you deserve a pumpkin cookie that actually delivers on its promises.
Why You’ll Love This Recipe
Let me tell you why this particular recipe has earned a permanent spot in my fall baking rotation — and why I think it’ll earn one in yours too.
- Perfectly Fluffy Texture : These cookies come out soft and tender every single time, thanks to a careful balance of pumpkin puree and the right leavening agents. No dense, gummy discs here.
- Simple Pantry Ingredients : You probably already have most of what you need in your kitchen right now. No weird specialty flours or hard-to-find extracts.
- Quick & Easy : From start to finish, you’re looking at about 30 minutes of active work. The dough comes together in one bowl, and the icing takes maybe 2 minutes to whip up.
- Crowd-Pleaser Combo : Pumpkin and chocolate is an underrated pairing, and the tangy cream cheese icing ties everything together beautifully. Kids love the chocolate chips, adults love the sophisticated flavor.
- Perfect for Fall Gatherings : Whether you’re bringing dessert to a potluck, hosting a cozy weekend brunch, or just want something special with your afternoon coffee, these cookies fit the bill.
What makes this recipe different from the dozens of pumpkin cookie recipes floating around the internet? It’s the technique. Most recipes dump everything in a bowl and hope for the best. I’ve tested the moisture ratios, the chilling times, the exact temperature of your butter — and I’m sharing every single detail so you don’t have to learn the hard way like I did.
There’s something about biting into one of these cookies that just feels right. The soft crumb, the melty chocolate, that tangy-sweet icing on top. It’s the kind of cookie that makes you slow down and actually enjoy the moment.
What Ingredients You Will Need
This recipe uses straightforward ingredients that come together to create something genuinely special. Here’s everything you’ll need, along with a few notes from my years of testing.
For the Cookies
- 1 cup (226g) unsalted butter, softened to room temperature — I prefer using Land O’Lakes for consistent results, but any good-quality butter works. Make sure it’s truly softened, not melted.
- 1 cup (200g) granulated sugar — regular white sugar gives these cookies the right structure and sweetness.
- 1/2 cup (100g) packed light brown sugar — this adds moisture and a hint of molasses flavor that plays beautifully with the pumpkin.
- 1 cup (240g) pumpkin puree — make sure you’re using pure pumpkin, not pumpkin pie filling. Libby’s is my go-to brand. Pat the puree with a paper towel to remove excess moisture if you have time.
- 1 large egg, room temperature
- 2 teaspoons vanilla extract — pure vanilla extract makes a difference here, but imitation works fine in a pinch.
- 2 1/2 cups (312g) all-purpose flour — spoon and level your flour for accurate measuring. Scooping directly from the bag packs in too much flour.
- 1 teaspoon baking soda
- 1/2 teaspoon baking powder
- 1/2 teaspoon salt
- 2 teaspoons pumpkin pie spice — or make your own with 1 teaspoon cinnamon, 1/2 teaspoon ginger, 1/4 teaspoon nutmeg, 1/4 teaspoon cloves.
- 1 1/2 cups (270g) semi-sweet chocolate chips — I like Ghirardelli for the deep flavor, but any brand works. You can also use dark chocolate chips for a less sweet cookie.
For the Cream Cheese Icing
- 4 ounces (113g) cream cheese, softened to room temperature — full-fat cream cheese gives the best texture and tang.
- 1/4 cup (57g) unsalted butter, softened
- 1 1/2 cups (180g) powdered sugar, sifted if you want extra smooth icing
- 1 teaspoon vanilla extract
- 1-2 tablespoons milk — use as needed to reach your desired consistency. Whole milk or 2% works best.
Equipment Needed
You don’t need a fancy bakery setup for these cookies. Here’s what I use in my own kitchen.
- Baking sheets — two large rimmed baking sheets. I use Nordic Ware because they distribute heat evenly and don’t warp.
- Parchment paper or silicone baking mats — parchment is cheaper and disposable; silicone mats are reusable and work just as well.
- Electric hand mixer or stand mixer — either works. A hand mixer is actually easier for the small batch of icing.
- Large mixing bowls — one for the wet ingredients, one for the dry.
- Whisk — for combining dry ingredients evenly.
- Rubber spatula — for folding in chocolate chips and scraping down the bowl.
- Cookie scoop — a 1.5-tablespoon scoop gives you perfectly uniform cookies. I’ve used the same OXO scoop for years and it’s never let me down.
- Wire cooling rack — essential for letting the icing set properly.
- Piping bag or zip-top bag — for drizzling the icing neatly. A zip-top bag with the corner snipped off works perfectly if you don’t have a piping bag.
Preparation Method
Let me walk you through this step by step. I’ve included every little detail I wish someone had told me the first time around.
Step 1: Prep Your Ingredients
Take your butter, cream cheese, and egg out of the refrigerator about 30-45 minutes before you start baking. Room temperature ingredients cream together much more smoothly and create a better texture in the finished cookies. While you wait, line your baking sheets with parchment paper and preheat your oven to 350°F (175°C).
Step 2: Cream the Butter and Sugars
In a large mixing bowl, beat the softened butter, granulated sugar, and brown sugar together on medium speed until light and fluffy — about 2-3 minutes. You’ll see the mixture turn pale and increase slightly in volume. Scrape down the sides of the bowl with your rubber spatula at least once to make sure everything incorporates evenly.
Step 3: Add the Wet Ingredients
Add the pumpkin puree, egg, and vanilla extract to the butter mixture. Beat on medium speed until everything is well combined. The mixture will look slightly curdled or separated at this point — that’s totally normal. Don’t panic. The flour will bring everything together in the next step.
Step 4: Combine the Dry Ingredients
In a separate medium bowl, whisk together the flour, baking soda, baking powder, salt, and pumpkin pie spice. Whisking ensures the leavening agents and spices are evenly distributed throughout the flour. Nobody wants a cookie with a pocket of baking soda in it.
Step 5: Mix Wet and Dry
Gradually add the dry ingredients to the wet mixture, mixing on low speed until just combined. Stop as soon as you can’t see any more streaks of flour. Overmixing at this stage develops gluten and will make your cookies tough instead of tender. Use your spatula to give the dough a few final folds from the bottom up.
Step 6: Fold in the Chocolate Chips
Gently fold the chocolate chips into the dough with your spatula. Make sure they’re distributed evenly throughout the dough, but don’t overwork it. If you want a few chocolate chips to show on top of your cookies for visual appeal, reserve about 2 tablespoons and press them onto the dough balls after scooping.
Step 7: Chill the Dough
This step is non-negotiable, I promise. Cover the bowl with plastic wrap and refrigerate the dough for at least 30 minutes, or up to 24 hours. Chilling prevents the cookies from spreading too much in the oven and gives you that perfect fluffy texture. I learned this the hard way after making flat, sad pancakes for years.
Step 8: Scoop and Bake
Once the dough is chilled, use your cookie scoop to portion out rounded tablespoons of dough. Place them about 2 inches apart on your prepared baking sheets. Bake for 10-12 minutes, or until the edges are set and lightly golden. The centers will still look slightly soft and underdone — that’s exactly what you want. They’ll continue to set as they cool on the baking sheet.
Step 9: Cool Completely
Let the cookies cool on the baking sheet for 5 minutes, then transfer them to a wire cooling rack. Let them cool completely before icing. If you ice them while they’re still warm, the cream cheese icing will melt into a puddle. Trust me, I’ve made that mistake more times than I’d like to admit.
Step 10: Make the Icing
While the cookies cool, beat the softened cream cheese and butter together in a medium bowl until smooth and creamy — about 1-2 minutes. Add the powdered sugar and vanilla extract, then beat on low speed until combined. Increase the speed to medium and beat for another minute until the icing is light and fluffy. Add milk 1 tablespoon at a time until you reach a drizzling consistency. You want it thick enough to hold its shape slightly but thin enough to drizzle smoothly.
Step 11: Ice the Cookies
Spoon the icing into a piping bag or a zip-top bag with a tiny corner snipped off. Drizzle the icing back and forth over the cooled cookies in a zigzag pattern. Let the icing set for about 15-20 minutes before serving or storing.
Cooking Tips & Techniques
Over the years, I’ve collected a few tricks that make these cookies turn out consistently perfect. Here are the ones that matter most.
Pat your pumpkin puree dry. Pumpkin contains a surprising amount of water, which can make your cookies dense and gummy. Before adding it to the batter, spread the puree on a paper towel-lined plate, cover with another paper towel, and gently press to absorb excess moisture. You’ll be shocked at how much liquid comes out.
Don’t skip the chill time. I know it’s tempting to skip straight to scooping and baking, but that 30 minutes in the fridge makes a massive difference. Chilled dough spreads less, bakes up thicker, and gives you that signature fluffy texture. If you’re in a hurry, pop the scooped dough balls in the freezer for 15 minutes instead.
Use a cookie scoop for uniform size. Cookies that are all the same size bake evenly, which means no more burnt edges or underdone centers. A 1.5-tablespoon scoop is the sweet spot for these cookies.
Rotate your baking sheets halfway through. Halfway through the baking time, swap the top rack sheet with the bottom rack sheet and rotate each one 180 degrees. This ensures even browning even if your oven has hot spots.
Let the icing set properly. I know you want to eat one immediately. I get it. But if you stack or store the cookies before the icing sets, you’ll end up with a sticky, smeared mess. Give it a full 20 minutes.
Variations & Adaptations
One of the best things about this recipe is how easy it is to adapt. Here are a few variations I’ve tried and loved.
Gluten-Free Version : Substitute the all-purpose flour with a 1:1 gluten-free baking flour blend. I’ve had great results with King Arthur Measure for Measure. The texture will be slightly more delicate, but still delicious. Add an extra tablespoon of flour to compensate for the lack of gluten structure.
Dairy-Free Version : Use vegan butter and dairy-free cream cheese. I recommend Miyoko’s for the butter and Kite Hill for the cream cheese. The cookies will still be fluffy and flavorful, though the icing will have a slightly different tang profile.
White Chocolate Macadamia Version : Swap the semi-sweet chocolate chips for white chocolate chips and add 1/2 cup of roughly chopped macadamia nuts. This variation is absolutely divine and feels a little more elegant for holiday gatherings.
Spiced Pumpkin Cookies : If you want the pumpkin flavor to really shine, skip the chocolate chips altogether and add an extra teaspoon of pumpkin pie spice plus 1/2 cup of dried cranberries or chopped pecans. These are perfect for a more traditional fall cookie.
Maple Cream Cheese Icing : Replace the vanilla extract in the icing with 1 tablespoon of pure maple syrup and 1/2 teaspoon of maple extract. The maple flavor pairs beautifully with the pumpkin and chocolate.
Serving & Storage Suggestions
These cookies are best served at room temperature, with the icing fully set. I like to arrange them on a pretty platter or cake stand for fall gatherings — they look gorgeous with the white icing drizzled over the golden cookies.
For a cozy fall dessert, serve these cookies alongside a warm mug of spiced apple cider or a pumpkin spice latte. If you’re feeling indulgent, warm a cookie in the microwave for 10 seconds and top it with a scoop of vanilla ice cream. The warm cookie with the cold ice cream is next-level good.
Storage Instructions : Store the iced cookies in an airtight container in the refrigerator for up to 5 days. The cream cheese icing needs to stay refrigerated. Let them sit at room temperature for about 15 minutes before serving to take the chill off.
Freezer Instructions : You can freeze the un-iced cookies for up to 3 months. Place them in a single layer on a baking sheet and freeze until solid, then transfer to a freezer-safe bag or container. When you’re ready to serve, thaw them at room temperature and make a fresh batch of icing. The cookies themselves freeze beautifully, but the icing doesn’t hold up as well to freezing and thawing.
Flavor Development : Honestly, these cookies taste even better on day two. The pumpkin flavor deepens and melds with the spices overnight. If you can resist eating them all on day one, you’ll be rewarded with even more flavorful cookies the next day.
Nutritional Information & Benefits
Here’s the estimated nutritional breakdown for one cookie (based on 36 cookies per batch):
| Nutrient | Amount Per Cookie |
|---|---|
| Calories | 165 |
| Total Fat | 9g |
| Saturated Fat | 5g |
| Cholesterol | 25mg |
| Sodium | 95mg |
| Total Carbohydrates | 21g |
| Dietary Fiber | 1g |
| Sugars | 14g |
| Protein | 2g |
Pumpkin is packed with vitamin A, fiber, and antioxidants, which makes these cookies a slightly more nutritious option than your average dessert. The cream cheese adds calcium and protein, while the dark chocolate provides a small dose of magnesium and antioxidants. Of course, these are still cookies — they’re meant to be enjoyed as a treat, not a health food. But it’s nice to know you’re getting a little something extra with every bite.
These cookies are not gluten-free, dairy-free, or vegan in their standard form, but I’ve included substitution options above for those with dietary restrictions. They do contain wheat, dairy, and eggs, so keep that in mind if you’re baking for someone with allergies.
Conclusion
These fluffy chocolate chip pumpkin cookies with cream cheese icing have become my go-to fall recipe for a reason. They’re forgiving enough for beginner bakers, impressive enough for holiday cookie exchanges, and delicious enough that I’ve never had leftovers — not once, not ever.
I love that this recipe lets the pumpkin flavor shine without being overpowering, and the chocolate chips add just enough richness to keep things interesting. The cream cheese icing is the perfect finishing touch — tangy, sweet, and creamy all at once. It’s the kind of cookie that makes you close your eyes after the first bite.
I’d love to hear how these turn out for you. Did you try one of the variations? Add your own twist? Burn the first batch like I did? Drop a comment below and let me know — I read every single one and I answer questions too. And if you’re looking for more fall baking inspiration, you might enjoy my strawberry shortcake stuffed cookies for a different take on stuffed cookies, or these patriotic sugar cookie bites when you want something festive with royal icing.
Happy baking, friend. May your cookies be fluffy, your icing be thick, and your kitchen smell like autumn.
Frequently Asked Questions
Can I use pumpkin pie filling instead of pumpkin puree?
No, please don’t. Pumpkin pie filling is pre-sweetened and spiced, which will throw off the sugar and spice balance in this recipe. Always use 100% pure pumpkin puree for baking.
Why did my cookies turn out flat?
The most common reasons are not chilling the dough, using butter that was too soft or melted, or overmixing the batter. Make sure you chill the dough for at least 30 minutes and use properly softened butter — not melted butter.
Can I make the dough ahead of time?
Absolutely. You can refrigerate the dough for up to 24 hours before baking. In fact, the flavors develop even more overnight. You can also freeze the scooped dough balls on a baking sheet, then transfer them to a freezer bag and bake directly from frozen — just add 2-3 minutes to the baking time.
How do I know when the cookies are done baking?
The edges should be set and lightly golden, but the centers will still look slightly soft and underdone. That’s exactly what you want. They’ll continue to bake on the hot baking sheet as they cool, giving you that perfect fluffy texture.
Can I skip the cream cheese icing?
You can, but I wouldn’t. The icing really makes these cookies special. If you need a dairy-free option, try a simple powdered sugar glaze made with powdered sugar, vanilla extract, and a dairy-free milk alternative. It won’t be as tangy, but it’ll still be delicious.
Pin This Recipe!

Fluffy Chocolate Chip Pumpkin Cookies with Easy Cream Cheese Icing

These soft, cake-like pumpkin cookies are packed with chocolate chips and topped with a tangy cream cheese icing. They’re the perfect fall treat that’s easy to make and always a crowd-pleaser.
- Prep Time: 30 minutes
- Cook Time: 12 minutes
- Total Time: 1 hour 15 minutes
- Yield: 36 cookies 1x
- Category: Dessert
- Cuisine: American
Ingredients
- 1 cup (226g) unsalted butter, softened
- 1 cup (200g) granulated sugar
- 1/2 cup (100g) packed light brown sugar
- 1 cup (240g) pumpkin puree
- 1 large egg, room temperature
- 2 teaspoons vanilla extract
- 2 1/2 cups (312g) all-purpose flour
- 1 teaspoon baking soda
- 1/2 teaspoon baking powder
- 1/2 teaspoon salt
- 2 teaspoons pumpkin pie spice
- 1 1/2 cups (270g) semi-sweet chocolate chips
- 4 ounces (113g) cream cheese, softened
- 1/4 cup (57g) unsalted butter, softened
- 1 1/2 cups (180g) powdered sugar
- 1 teaspoon vanilla extract
- 1–2 tablespoons milk
Instructions
- Prep your ingredients: Take butter, cream cheese, and egg out of the refrigerator 30-45 minutes before baking. Line baking sheets with parchment paper and preheat oven to 350°F (175°C).
- Cream the butter and sugars: In a large bowl, beat softened butter, granulated sugar, and brown sugar on medium speed until light and fluffy, about 2-3 minutes. Scrape down the sides.
- Add the wet ingredients: Add pumpkin puree, egg, and vanilla extract to the butter mixture. Beat on medium speed until well combined. The mixture may look slightly curdled.
- Combine the dry ingredients: In a separate bowl, whisk together flour, baking soda, baking powder, salt, and pumpkin pie spice.
- Mix wet and dry: Gradually add dry ingredients to wet mixture, mixing on low speed until just combined. Do not overmix.
- Fold in chocolate chips: Gently fold chocolate chips into the dough with a spatula. Reserve 2 tablespoons for topping if desired.
- Chill the dough: Cover the bowl with plastic wrap and refrigerate for at least 30 minutes, or up to 24 hours.
- Scoop and bake: Use a cookie scoop to portion rounded tablespoons of dough. Place 2 inches apart on prepared baking sheets. Bake for 10-12 minutes, until edges are set and lightly golden. Centers will look soft.
- Cool completely: Let cookies cool on baking sheet for 5 minutes, then transfer to a wire rack to cool completely before icing.
- Make the icing: Beat softened cream cheese and butter together until smooth. Add powdered sugar and vanilla extract, beat until combined. Add milk 1 tablespoon at a time until drizzling consistency.
- Ice the cookies: Spoon icing into a piping bag or zip-top bag with a snipped corner. Drizzle over cooled cookies in a zigzag pattern. Let set for 15-20 minutes.
Notes
Pat pumpkin puree dry with paper towels to remove excess moisture. Chilling the dough is essential for fluffy cookies. For best flavor, make the dough a day ahead. Store iced cookies in the refrigerator for up to 5 days. Un-iced cookies can be frozen for up to 3 months.
Nutrition
- Serving Size: 1 cookie
- Calories: 165
- Sugar: 14
- Sodium: 95
- Fat: 9
- Saturated Fat: 5
- Carbohydrates: 21
- Fiber: 1
- Protein: 2
Keywords: pumpkin cookies, chocolate chip, cream cheese icing, fall baking, soft cookies


