Love this? Save it for later!
Share the inspiration with your friends
My niece asked for these spiderweb cookies three weekends in a row before I even realized I had made them. That is not an exaggeration—she literally showed up at my door on a Saturday morning, looked at me with those big eyes, and said, “Auntie, can we make the spider cookies again?” I had to scroll back through my text messages to figure out which batch she was talking about. Turns out, it was the ones I threw together in a panic for her Halloween party, using a piping tip I found buried in the back of my utensil drawer and a batch of sugar cookie dough I had stashed in the freezer. She didn’t care about the fancy decorations or the elaborate setups I usually attempt. She just wanted the ones with the messy, imperfect webs that looked like a spider actually crawled across them. And honestly? That is exactly the kind of baking I live for.
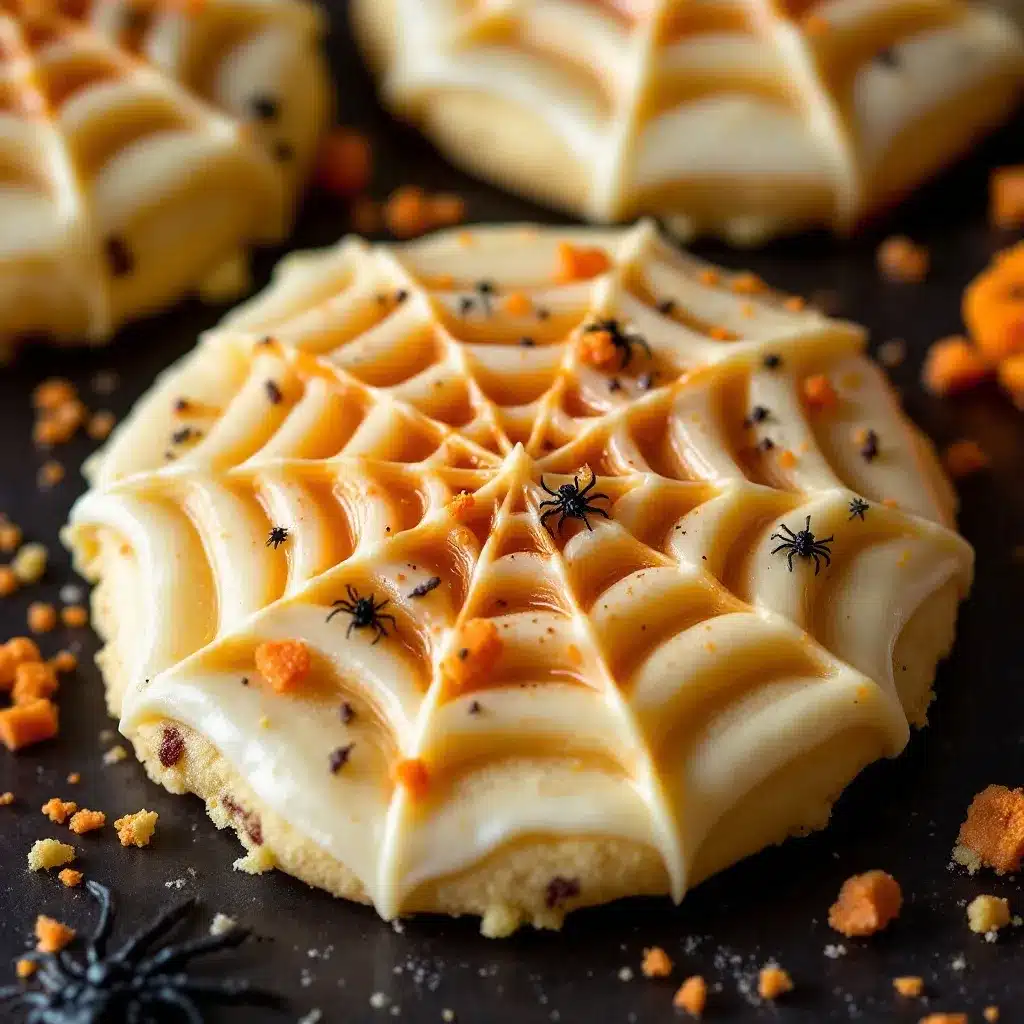
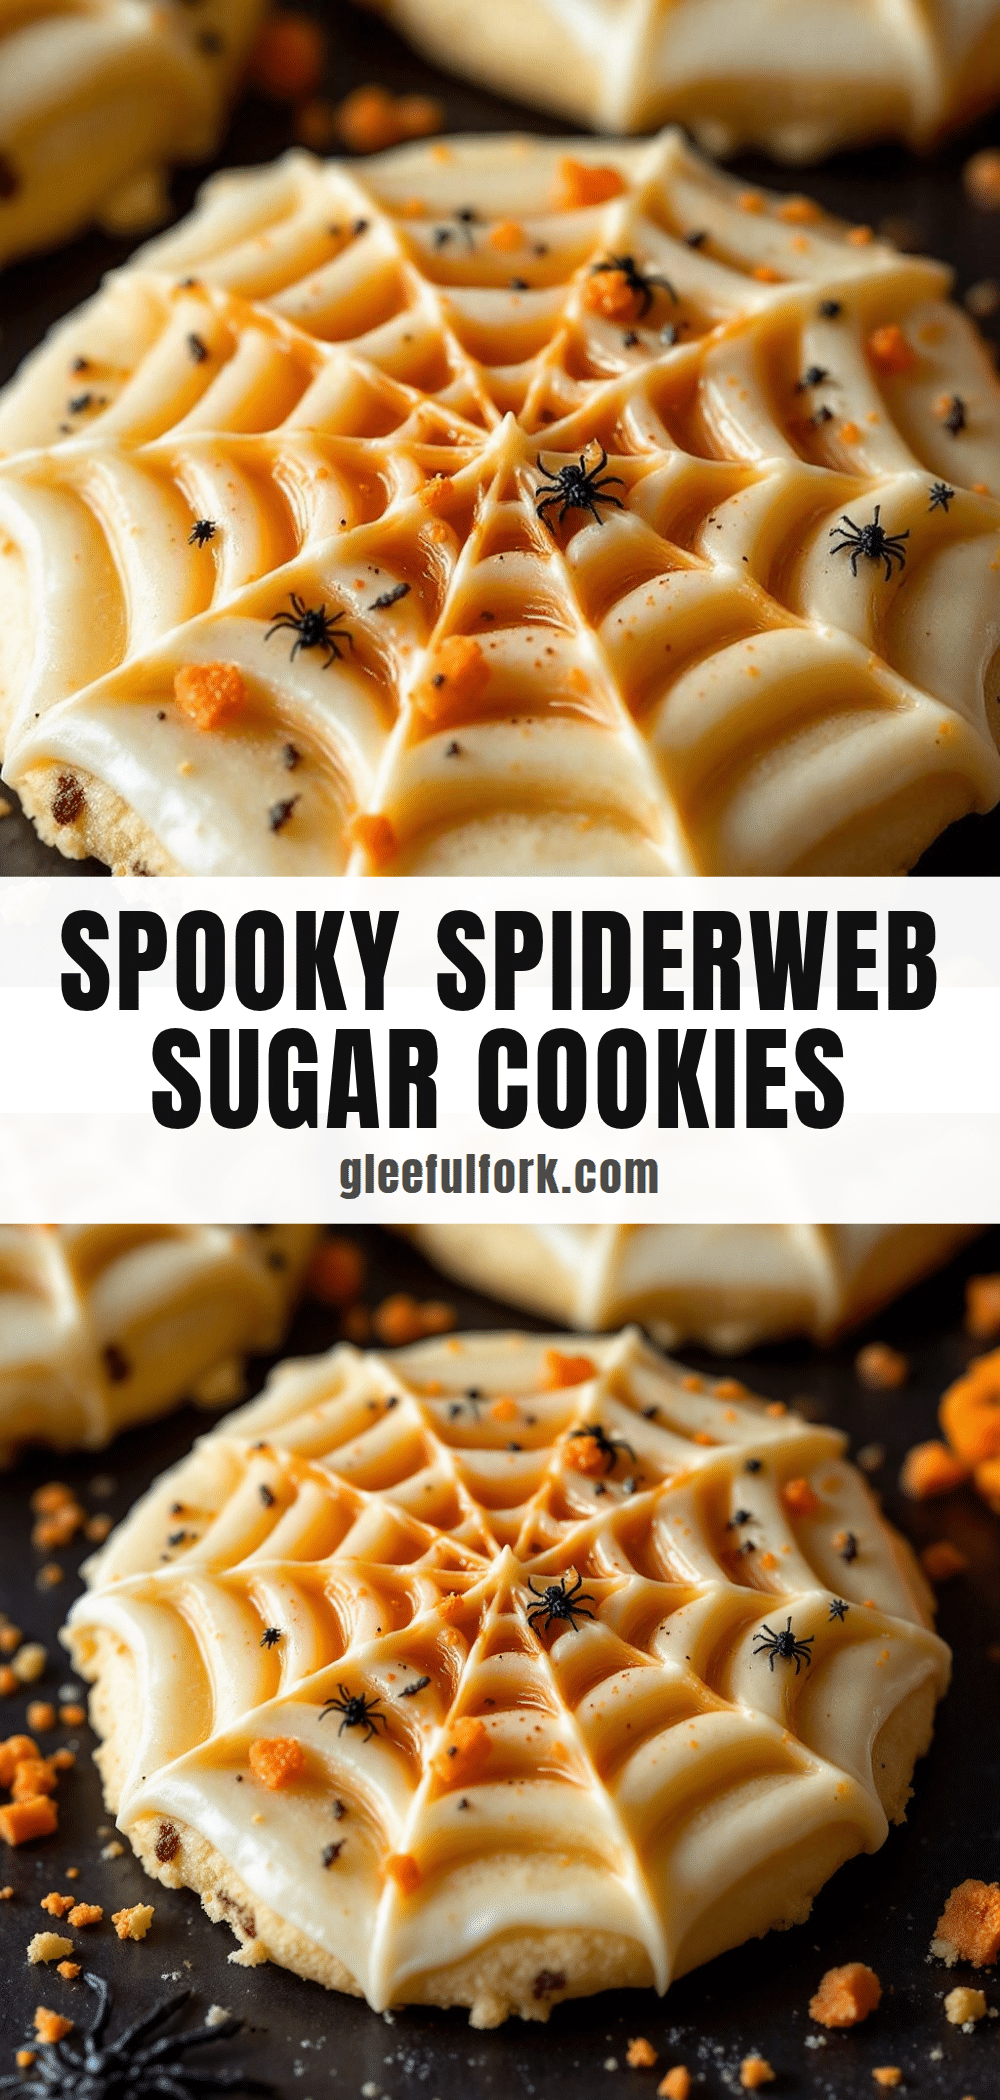
These Easy Spiderweb Halloween Sugar Cookies are the definition of low-effort, high-reward baking. They start with a soft, buttery sugar cookie base—the kind that holds its shape but still has that tender crumb you want with a glass of cold milk. The magic happens when you flood the cookies with a simple powdered sugar glaze and then drag a toothpick through it to create those iconic web patterns. No special tools required, no artistic talent necessary. I have made these with kids who normally get bored after two minutes of decorating, and they stayed focused for the entire batch. There is something about watching the glaze spread and the lines transform into a web that feels almost like a science experiment. It is predictable but still surprising every single time.
The best part about this recipe is how forgiving it is. If your lines wobble or your glaze runs a little too thin, it just looks more authentic. Real spiderwebs are not perfect anyway. So if you are looking for a Halloween treat that actually tastes as good as it looks and does not require a steady hand or a pastry degree, you are in the right place. These cookies have become the official unofficial starter for our Halloween baking season, and I have a feeling they are about to become yours too.
Why You’ll Love This Recipe
These cookies check all the boxes for a holiday treat that actually delivers. Here is why they keep showing up in my kitchen year after year:
- Quick & Easy: From start to finish, you are looking at about 45 minutes of active time. The dough comes together in one bowl, and the decorating takes maybe ten minutes per batch. Perfect for a last-minute Halloween party or a lazy Sunday baking session.
- Simple Ingredients: Butter, sugar, flour, eggs, vanilla, and powdered sugar. That is basically it. You probably have everything in your pantry right now, except maybe the gel food coloring. And even that is optional—you can use regular liquid coloring if that is what you have.
- Perfect for Halloween Parties: These cookies are the star of any spooky spread. They work for classroom treats, office parties, or just a fun afternoon activity with the kids. I have brought them to potlucks and watched adults fight over the last one.
- Crowd-Pleaser: Kids love the design, adults love the taste, and everyone loves how approachable they look. There is no intimidation factor here. These cookies say, “I made these with love and a little bit of chaos,” and people appreciate that.
- Unbelievably Delicious: The cookie itself is soft but sturdy, with a buttery vanilla flavor that pairs perfectly with the sweet glaze. It is not too sugary, not too dense—just a solid, reliable sugar cookie that happens to look like a spiderweb.
What makes this recipe different from the dozens of other spiderweb cookies out there is the technique. Most recipes call for flooding the cookie with royal icing, which is finicky and requires precise consistency. My method uses a simple confectioners’ sugar glaze that spreads beautifully on its own. You just pipe a spiral, drag lines through it, and watch the web appear. It is almost foolproof. I have tested this with beginner bakers and experienced cookie decorators, and everyone gets the same result: a beautiful, spooky spiderweb that looks like it took way more effort than it actually did.
Honestly, this is the kind of recipe that makes you feel like a baking genius without actually doing anything complicated. It is comfort food with a spooky twist—familiar enough to be satisfying, but different enough to feel special for the season.
What Ingredients You Will Need
This recipe relies on basic baking staples to create a sugar cookie that holds its shape and tastes incredible. Here is everything you need, broken down by component.
For the Sugar Cookies
- Unsalted butter, softened (1 cup / 2 sticks / 226g) — I use Land O’Lakes for consistent results. Make sure it is truly softened, not melted. You want it to be cool to the touch but pliable enough to leave an indent when pressed.
- Granulated sugar (1 cup / 200g) — Standard white sugar. Do not substitute with brown sugar here; it will change the texture and color of the cookies.
- Large egg (1, room temperature) — Cold eggs can seize the butter mixture. Let it sit on the counter for 15 minutes before starting.
- Vanilla extract (2 teaspoons) — Pure vanilla extract gives the best flavor, but imitation vanilla works in a pinch. I have used both and honestly, in a decorated cookie, the difference is subtle.
- All-purpose flour (2 cups / 250g) — Spoon and level your flour. Scooping directly from the bag packs in too much flour and makes dry cookies.
- Baking powder (1/2 teaspoon) — This gives the cookies a slight lift without making them puffy. You want them to spread just a little.
- Salt (1/4 teaspoon) — Balances the sweetness. I use fine sea salt.
For the Spiderweb Glaze
- Powdered sugar (1 1/2 cups / 180g) — Also called confectioners’ sugar. Sift it if it is lumpy; nobody wants clumps in their glaze.
- Milk or heavy cream (2–3 tablespoons) — Heavy cream makes a richer, glossier glaze. Milk works fine too, but the glaze will be slightly thinner. Start with 2 tablespoons and add more as needed.
- Vanilla extract (1/2 teaspoon) — Optional but adds a nice depth of flavor.
- Black gel food coloring — Gel coloring is key here. Liquid food coloring will thin out the glaze too much and make the webs runny. I use AmeriColor Super Black.
Ingredient Substitution Notes: If you need a dairy-free version, use plant-based butter and a non-dairy milk like oat or almond. The texture will be slightly different—vegan butter tends to spread more—but the cookies will still be delicious. For a gluten-free option, swap the all-purpose flour with a 1:1 gluten-free baking flour blend. I have tested this with Bob’s Red Mill, and the cookies come out a bit more tender but still hold their shape. Just be careful not to overbake them.
If you want to get creative with colors, you can make purple or orange spiderwebs instead of black. Just swap the black gel coloring for your preferred shade. I have made neon green webs for a monster-themed party, and they were a huge hit.
Equipment Needed
You do not need a lot of fancy tools for this recipe, which is part of why I love it. Here is what you will need:
- Mixing bowls — One medium bowl for dry ingredients, one large bowl for the wet mixture. Glass or stainless steel works best.
- Electric hand mixer or stand mixer — A hand mixer is perfectly fine. I have made these cookies with a wooden spoon when my mixer was broken, and it worked, but your arm will get tired.
- Baking sheets — Two standard half-sheet pans. Line them with parchment paper or a silicone baking mat. I prefer parchment because it is easy to clean up.
- Round cookie cutter — 2.5 to 3 inches in diameter. You can use the rim of a drinking glass in a pinch, but a cookie cutter gives cleaner edges.
- Rolling pin — A standard rolling pin with thickness guides is helpful, but not essential. You just want the dough to be an even 1/4 inch thick.
- Piping bag or zip-top bag — For the black glaze. A small piping bag with a #2 or #3 round tip works best, but a zip-top bag with a tiny corner snipped off does the job perfectly. I have used both, and honestly, the zip-top bag is easier to clean.
- Toothpicks — The most important tool. You will use these to drag the black glaze through the white glaze to create the web pattern. Have at least five or six on hand because they get sticky.
- Wire cooling rack — Essential for letting the glaze set properly. If you try to set the cookies on a flat surface, the bottoms will get sticky.
If you do not have a cookie cutter, do not stress. You can roll the dough into balls, flatten them slightly, and they will spread into rough circles. They will not be perfectly round, but the spiderweb pattern looks great on any shape. I have made heart-shaped spiderwebs for a Halloween-themed wedding shower, and they were adorable.
Preparation Method
Let me walk you through this step by step. I have included all the little details that make the difference between a good cookie and a great one.
- Make the cookie dough. In a large bowl, beat the softened butter and granulated sugar together until light and fluffy, about 2-3 minutes. You want the mixture to look pale and airy. Scrape down the sides of the bowl halfway through. Add the egg and vanilla extract, then beat until fully combined. The mixture might look slightly curdled at this point—that is normal, do not panic.
- Mix the dry ingredients. In a separate medium bowl, whisk together the all-purpose flour, baking powder, and salt. Gradually add the dry mixture to the wet mixture, mixing on low speed until just combined. Do not overmix. The dough should come together into a soft, slightly sticky ball. If it feels too sticky to handle, wrap it in plastic wrap and refrigerate for 20 minutes.
- Chill the dough. This step is non-negotiable, I learned this the hard way. Wrap the dough in plastic wrap and flatten it into a disc. Refrigerate for at least 30 minutes, or up to 2 days. Chilling the dough prevents the cookies from spreading too much in the oven and helps them hold their shape. If you skip this step, your cookies will turn into flat, misshapen blobs.
- Preheat and prepare. Preheat your oven to 350°F (175°C). Line two baking sheets with parchment paper or silicone baking mats.
- Roll and cut. On a lightly floured surface, roll the chilled dough to 1/4 inch thickness. Use a round cookie cutter to cut out as many circles as you can. Gather the scraps, re-roll them, and cut out more circles. You should get about 24 cookies, depending on the size of your cutter. Place the cookies about 2 inches apart on the prepared baking sheets.
- Bake. Bake for 8-10 minutes, or until the edges are just barely golden. The centers will look slightly underdone—that is exactly what you want. Overbaked cookies will be dry and crumbly. Let the cookies cool on the baking sheet for 5 minutes, then transfer them to a wire cooling rack to cool completely. Do not even think about decorating them while they are warm. The glaze will slide right off.
- Make the white glaze. In a small bowl, whisk together the powdered sugar, 2 tablespoons of milk or heavy cream, and the vanilla extract. The glaze should be thick but pourable, like the consistency of honey. If it is too thick, add a tiny splash more milk. If it is too thin, add a little more powdered sugar. You want it to spread slowly when dropped from a spoon but not run off the cookie.
- Flood the cookies. Using a small spoon or an offset spatula, spread a thin, even layer of the white glaze over each cooled cookie. Let the glaze settle for about 30 seconds. This is important because it gives the glaze a chance to smooth out before you add the web pattern. You want the surface to be slightly tacky but not wet.
- Prepare the black glaze. In a separate small bowl, mix about 1/4 cup of the white glaze with black gel food coloring. Stir until the color is fully incorporated and the glaze is a deep, dark black. Transfer the black glaze to a piping bag or a small zip-top bag. If using a zip-top bag, snip a tiny corner off—you want a very small opening, about the size of a toothpick tip.
- Create the spiderweb pattern. Pipe a small dot of black glaze in the center of each flooded cookie. Then, pipe a spiral outward from the center, working your way to the edge. The spiral does not need to be perfect. In fact, imperfect spirals look more like real spiderwebs. Immediately after piping the spiral, use a toothpick to drag lines from the center outward to the edge, like spokes on a wheel. Space the lines about 1/2 inch apart. Then, drag the toothpick in a curved motion between the spokes to create the web pattern. Wipe the toothpick clean after each drag to keep the lines sharp.
- Let the glaze set. Allow the cookies to sit at room temperature for at least 1-2 hours, or until the glaze is completely dry and hard to the touch. Do not stack them until the glaze is fully set, or you will smudge the webs.
Cooking Tips & Techniques
I have made these cookies more times than I care to count, and I have definitely made my share of mistakes along the way. Here is what I have learned so you do not have to repeat my failures.
The biggest mistake I see people make is overworking the dough. When you overmix the dough after adding the flour, you develop gluten, which makes the cookies tough and dense. Mix just until the flour disappears. A few streaks of flour are fine; they will incorporate when you roll the dough out. I once made a batch where I let my stand mixer run while I answered the phone, and the cookies came out like hockey pucks. Learn from my distraction.
Temperature control is everything. If your dough is too warm when it goes into the oven, the cookies will spread into thin, crispy disks. If your glaze is too warm or too thin, it will run off the cookies and pool on the cooling rack. Work in a cool kitchen if possible. I have made these on a hot summer day, and the glaze was so thin that the webs looked like abstract art rather than spiderwebs. Still delicious, but not as impressive.
Use a light hand with the black glaze. You do not need a lot of black glaze to create the web pattern. A tiny dot in the center and a thin spiral is enough. If you pipe too much, the black glaze will bleed into the white glaze and make everything look muddy. Trust me, less is more here. I have had batches where I got carried away with the piping, and the cookies looked like they had been attacked by an ink spill.
Work in small batches. Do not flood all 24 cookies at once and then try to pipe the webs. Glaze only 4-6 cookies at a time, then pipe the spiral and drag the lines. The white glaze needs to be slightly tacky for the web pattern to work properly. If it dries completely, the black glaze will sit on top instead of spreading. If it is too wet, the lines will blur. You have about 1-2 minutes of working time per cookie after flooding, so batch your work accordingly.
Multitasking strategy: While the cookies are cooling, make the white glaze and let it sit. While the white glaze is setting on the first batch, prepare the black glaze. This way, you are not scrambling to mix colors while the glaze is drying. I usually flood one baking sheet, pipe the webs, move on to the next sheet, and then go back to add the webs on the first sheet if I missed any. It sounds chaotic, but it works.
Variations & Adaptations
One of the best things about this recipe is how easy it is to adapt. Here are some variations I have tried and loved:
- Chocolate Spiderweb Cookies: Replace 1/4 cup of the all-purpose flour with unsweetened cocoa powder. The chocolate base looks amazing with the white and black web pattern. I made these for a Halloween party, and they were gone before the regular ones. The cocoa adds a rich, fudgy undertone that pairs perfectly with the sweet glaze.
- Gluten-Free Version: Use a 1:1 gluten-free baking flour blend. I have tested this with Bob’s Red Mill, and the cookies are a bit more tender but still hold their shape. Add an extra tablespoon of milk to the dough if it feels too dry. The glaze stays the same.
- Vegan Adaptation: Substitute the butter with plant-based butter, the egg with a flax egg (1 tablespoon ground flaxseed + 3 tablespoons water), and use non-dairy milk in the glaze. The cookies will be slightly denser, but the flavor is still great. I have made these for a vegan friend’s Halloween party, and nobody could tell the difference.
- Different Shapes: Use Halloween-themed cookie cutters like bats, ghosts, or pumpkins. The spiderweb pattern works on any shape. Just make sure the surface area is large enough to hold the pattern. Small shapes like bats might only fit one or two web lines, and that is fine.
- Color Variations: Swap the black gel food coloring for purple, orange, or neon green. You can also make the base glaze a different color by adding a few drops of food coloring. I have made orange webs on a white base for a non-scary Halloween party, and they looked like sunset spiderwebs.
If you want to add a little extra texture, sprinkle some edible glitter or sanding sugar over the wet glaze. The glitter catches the light and makes the webs look magical. I did this for a Halloween photoshoot, and the cookies looked like they belonged in a fairy tale.
Serving & Storage Suggestions
These cookies are best served at room temperature, with the glaze fully set and firm to the touch. I like to arrange them on a platter with some fake spiderwebs and plastic spiders for a fun presentation. They also look great stacked on a cake stand or arranged in a decorative tin for gifting.
Storage: Store the cookies in an airtight container at room temperature for up to 5 days. Separate layers with parchment paper to prevent the glaze from sticking. Do not refrigerate them; the moisture in the fridge can make the glaze sticky and cause the webs to smudge.
Freezing: You can freeze the undecorated cookies for up to 3 months. Bake and cool the cookies completely, then place them in a freezer-safe bag or container. When you are ready to decorate, thaw them at room temperature, then flood and pipe the webs. The cookies will taste just as fresh. I have done this for holiday prep, and it saves so much time.
Reheating: These cookies do not need reheating, but if you want a warm cookie, pop one in the microwave for 5-10 seconds. The glaze will soften slightly, but the web pattern will stay intact. Just do not overdo it, or the glaze will melt.
How flavors develop: Interestingly, these cookies taste even better the next day. The flavors meld together, and the cookie softens slightly from the moisture in the glaze. If you can resist eating them all on day one, you will be rewarded with an even more tender, flavorful cookie on day two.
If you are serving these at a party, consider pairing them with a glass of cold milk, a warm cup of apple cider, or a pumpkin spice latte. The sweetness of the cookies balances nicely with the tartness of cider or the bitterness of coffee. I have also served them alongside a refreshing blueberry lavender lemonade for a non-alcoholic Halloween mocktail option.
Nutritional Information & Benefits
Let us be real—these are sugar cookies with a sugar glaze. They are a treat, not a health food. But here is the estimated nutritional breakdown for one cookie (based on 24 servings):
- Calories: 145
- Fat: 7g
- Carbohydrates: 20g
- Sugar: 12g
- Protein: 2g
Health benefits: The butter provides a small amount of vitamin A, and the egg adds a bit of protein. But honestly, the real benefit here is the joy of baking and sharing something delicious with the people you love. Baking has been shown to reduce stress and boost mood, and decorating cookies is a great mindfulness activity. So while these cookies are not going to win any nutrition awards, they are good for the soul.
Dietary considerations: These cookies contain gluten, dairy, and eggs. For a gluten-free version, use a 1:1 gluten-free flour blend. For a dairy-free version, use plant-based butter and non-dairy milk. For an egg-free version, use a flax egg. The texture will vary slightly, but the cookies will still be delicious.
If you are looking for a healthier option, you can reduce the sugar in the cookie dough by 1/4 cup, but the cookies will be less tender. The glaze is harder to reduce because it provides the structure for the web pattern. I have experimented with using coconut sugar in the dough, and while the cookies were tasty, they were darker in color and the flavor was more caramel-like. Not bad, just different.
Conclusion
These Easy Spiderweb Halloween Sugar Cookies have become a staple in my fall baking rotation for a reason. They are simple enough to make with kids, impressive enough to bring to a party, and delicious enough to eat straight off the cooling rack before the glaze even sets. I have made them for Halloween parties, classroom treats, and even a spooky-themed bridal shower, and they always get the same reaction: “Wait, you made these? They look so professional!” And then people take one bite and realize they taste even better than they look.
The best part is that you can make them your own. Change the colors, switch up the shapes, or add some edible glitter for extra sparkle. The base recipe is forgiving and versatile, so do not be afraid to experiment. I have already started planning a version with orange glaze and black webs for a fall harvest party, and I am thinking about a neon green version for a monster-themed birthday.
If you make these cookies, I would love to hear how they turned out. Drop a comment below and let me know if your spiderwebs looked like elegant lace or chaotic art—both are valid and both are delicious. Share a photo on social media and tag me so I can see your creations. And if you are looking for more Halloween baking ideas, check out my festive red, white, and blue M&M cookies for a non-spooky treat, or my perfect patriotic sugar cookie bites for another decorating technique.
Happy baking, and may your spiderwebs be spooky, your cookies be soft, and your Halloween be full of sweet moments.
Frequently Asked Questions
Can I use store-bought sugar cookie dough for this recipe?
Absolutely. If you are short on time, grab a tube of refrigerated sugar cookie dough from the store. Roll it out, cut it into circles, and bake according to the package instructions. The glaze and spiderweb technique work exactly the same way. I have done this for last-minute Halloween parties, and nobody knew the difference. Just make sure the cookies are completely cool before you start decorating.
Why did my spiderweb pattern turn into a blurry mess?
This usually happens when the white glaze is too wet when you add the black glaze. The black glaze spreads too much and creates a muddy, undefined pattern. To fix this, let the white glaze sit for 30-60 seconds after flooding before you pipe the black spiral. The glaze should be slightly tacky, not wet. If your kitchen is humid, you might need to wait a little longer. Also, make sure your black glaze is thick enough—if it is too thin, it will run and blur the lines.
Can I make these cookies ahead of time?
Yes, you can make the dough up to 2 days in advance and keep it wrapped in the refrigerator. You can also bake the cookies up to a week ahead and store them in an airtight container. Decorate them the day you plan to serve them for the best results. The glaze stays fresh for about 5 days, but the cookies are most impressive on day one or two.
How do I get the black glaze to be truly black?
Use gel food coloring, not liquid. Liquid food coloring will thin out your glaze and make it watery. Gel coloring is concentrated and gives you a deep, dark black without changing the consistency. Start with a small amount and add more until you reach the desired shade. I use about 1/4 teaspoon of black gel coloring for 1/4 cup of white glaze. If the glaze starts to taste bitter from too much coloring, you have added too much.
Can I use royal icing instead of the glaze?
Yes, you can use royal icing if you prefer. The technique is the same: flood the cookie with white royal icing, let it set for a few minutes, pipe a black spiral, and drag lines with a toothpick. Royal icing dries harder than the glaze, which makes the cookies easier to stack and store. However, royal icing is more finicky to work with because it dries quickly and requires precise consistency. I prefer the glaze method because it is more forgiving and takes less time to prepare.
Pin This Recipe!
Easy Spiderweb Halloween Sugar Cookies
These Easy Spiderweb Halloween Sugar Cookies are the definition of low-effort, high-reward baking. They start with a soft, buttery sugar cookie base and are decorated with a simple powdered sugar glaze and a toothpick-dragged spiderweb pattern.
- Prep Time: 45 minutes
- Cook Time: 10 minutes
- Total Time: 55 minutes
- Yield: 24 servings 1x
- Category: Dessert
- Cuisine: American
Ingredients
- 1 cup (2 sticks / 226g) unsalted butter, softened
- 1 cup (200g) granulated sugar
- 1 large egg, room temperature
- 2 teaspoons vanilla extract
- 2 cups (250g) all-purpose flour
- 1/2 teaspoon baking powder
- 1/4 teaspoon salt
- 1 1/2 cups (180g) powdered sugar
- 2–3 tablespoons milk or heavy cream
- 1/2 teaspoon vanilla extract (optional)
- Black gel food coloring
Instructions
- Make the cookie dough: In a large bowl, beat the softened butter and granulated sugar together until light and fluffy, about 2-3 minutes. Scrape down the sides. Add the egg and vanilla extract, then beat until fully combined.
- Mix the dry ingredients: In a separate medium bowl, whisk together the all-purpose flour, baking powder, and salt. Gradually add the dry mixture to the wet mixture, mixing on low speed until just combined. Do not overmix.
- Chill the dough: Wrap the dough in plastic wrap and flatten it into a disc. Refrigerate for at least 30 minutes, or up to 2 days.
- Preheat and prepare: Preheat your oven to 350°F (175°C). Line two baking sheets with parchment paper or silicone baking mats.
- Roll and cut: On a lightly floured surface, roll the chilled dough to 1/4 inch thickness. Use a round cookie cutter to cut out circles. Gather scraps, re-roll, and cut more. Place cookies about 2 inches apart on prepared baking sheets.
- Bake: Bake for 8-10 minutes, until edges are just barely golden. Let cool on baking sheet for 5 minutes, then transfer to a wire cooling rack to cool completely.
- Make the white glaze: In a small bowl, whisk together the powdered sugar, 2 tablespoons of milk or heavy cream, and the vanilla extract. The glaze should be thick but pourable, like honey. Adjust consistency as needed.
- Flood the cookies: Using a small spoon or offset spatula, spread a thin, even layer of white glaze over each cooled cookie. Let settle for about 30 seconds.
- Prepare the black glaze: In a separate small bowl, mix about 1/4 cup of the white glaze with black gel food coloring until deep black. Transfer to a piping bag or small zip-top bag with a tiny corner snipped off.
- Create the spiderweb pattern: Pipe a small dot of black glaze in the center of each flooded cookie, then pipe a spiral outward. Immediately use a toothpick to drag lines from the center outward to the edge, like spokes. Then drag the toothpick in curved motions between spokes to create the web. Wipe toothpick clean after each drag.
- Let the glaze set: Allow cookies to sit at room temperature for at least 1-2 hours, until glaze is completely dry and hard to the touch.
Notes
The biggest mistake is overworking the dough. Mix just until flour disappears. Temperature control is key: work in a cool kitchen. Use a light hand with black glaze. Work in small batches—glaze 4-6 cookies at a time. For best results, let cookies cool completely before decorating.
Nutrition
- Serving Size: 1 cookie
- Calories: 145
- Sugar: 12
- Sodium: 60
- Fat: 7
- Saturated Fat: 4
- Carbohydrates: 20
- Protein: 2
Keywords: Halloween cookies, spiderweb cookies, sugar cookies, easy Halloween treats, decorated cookies


