Love this? Save it for later!
Share the inspiration with your friends
I need a Halloween dessert that looks impressive but doesn’t make me want to cry into a mixing bowl. That’s the honest thought running through my head every October when I see those elaborate cake pops and fondant-covered cupcakes on Pinterest. I want the spooky aesthetic without the all-night kitchen marathon. And honestly? I want something that tastes like a candy bar but feels slightly more intentional than just unwrapping a Reese’s. So I started staring at my pantry, willing ingredients to assemble themselves into something festive. Peanut butter. Chocolate chips. A bag of pretzels I bought for a snack attack I never had. And then it hit me—spider webs are just concentric circles dragged through with a toothpick. I can do that. I’ve doodled enough in boring meetings to know I can handle a toothpick. This Easy Spider Web Chocolate Peanut Butter Bark was born from that exact moment of lazy inspiration, and it’s become my go-to for every Halloween party, movie night, or just a Tuesday when I want to pretend I’m festive. It’s the kind of recipe that makes you look like you tried really hard, but you and I will know the truth.
Why You’ll Love This Recipe
Let me tell you why this bark has earned a permanent spot in my Halloween rotation. I’ve tested this through three different Octobers, and I’ve learned what works and what doesn’t so you don’t have to.
- 5 Simple Ingredients: You probably have most of these in your pantry right now. No fancy baking chocolate or obscure extracts. Just real, recognizable ingredients that come together fast.
- No-Bake & Foolproof: This is a no-bake recipe, which means no oven timers, no worrying about burning, and no heating up your kitchen. Perfect for those warm fall days when you still want a seasonal treat.
- Visually Stunning: The spider web design looks like you spent hours on it. I’ve brought this to parties and people genuinely thought I bought it from a bakery. The secret is embarrassingly simple.
- Customizable for Any Occasion: While I’m sharing the Halloween version, you can easily adapt the design for other holidays. More on that later.
- Kid-Friendly: My niece helped me make this last year, and she was obsessed with the toothpick dragging part. It’s a great way to get little hands involved in the kitchen without the stress of hot ovens or sharp knives.
This isn’t just another chocolate bark recipe. The combination of creamy peanut butter, rich chocolate, and salty pretzels creates that sweet-and-salty balance that hits every craving. And the spider web design? It’s the kind of detail that makes people say “wow” without you having to break a sweat. It’s comfort food dressed up for a party.
What Ingredients You Will Need
This recipe uses simple, everyday ingredients to deliver maximum flavor with minimum fuss. Here’s what you need and why each one matters.
- 12 ounces semi-sweet chocolate chips (I prefer Ghirardelli for smooth melting, but any quality brand works. You can also use dark chocolate if you prefer a less sweet bark.)
- 1 cup creamy peanut butter (Natural peanut butter works, but make sure it’s well-stirred. I’ve found Skippy or Jif gives the smoothest swirl. Avoid the kind with added sugar or palm oil that separates weirdly.)
- 1 cup white chocolate chips (For the spider web design. Make sure they’re good quality—cheap white chocolate can seize up when melted. Ghirardelli or Guittard are my go-to choices.)
- 1/2 cup crushed pretzels (For that salty crunch. I like to use mini pretzel twists and crush them by hand so I get varying sizes. You can also use pretzel sticks for a more uniform look.)
- 1 tablespoon coconut oil (Divided. This helps the chocolate and white chocolate melt smoothly and gives the bark a nice snap when you break it. You can substitute vegetable oil in a pinch.)
Optional additions: A sprinkle of flaky sea salt on top really elevates the flavor. I also sometimes add mini marshmallows or crushed candy corn for extra Halloween flair. If you’re feeling extra festive, a few orange sprinkles on the white chocolate web look adorable.
Ingredient tips from my kitchen: Always melt your chocolate slowly. I’ve ruined plenty of batches by rushing the process. And if you’re using natural peanut butter, warm it slightly before drizzling—it’ll swirl much easier into the chocolate without clumping.
Equipment Needed
You don’t need a fancy kitchen to make this bark. Here’s what you’ll need:
- Baking sheet (Standard 13×18 inch. Line it with parchment paper—don’t skip this step or you’ll be scraping chocolate off the pan.)
- Parchment paper (The non-stick kind is best. Wax paper won’t work here—it melts.)
- Small microwave-safe bowls (One for the chocolate, one for the white chocolate. Glass or ceramic works best.)
- Rubber spatula (For spreading the chocolate evenly. A silicone spatula is ideal because it won’t scratch your bowls.)
- Toothpick or wooden skewer (For creating the spider web design. A toothpick gives a finer line, while a skewer creates a bolder web.)
- Piping bag or small zip-top bag (For drizzling the white chocolate. A zip-top bag with a tiny corner snipped off works perfectly.)
- Measuring cups and spoons (Standard set. I prefer metal or glass for accuracy.)
I’ve made this bark with just a microwave and a fork before, and it still turned out great. Don’t let a lack of fancy equipment stop you. If you don’t have a piping bag, a small spoon works fine for drizzling—just be patient and go slow.
Preparation Method
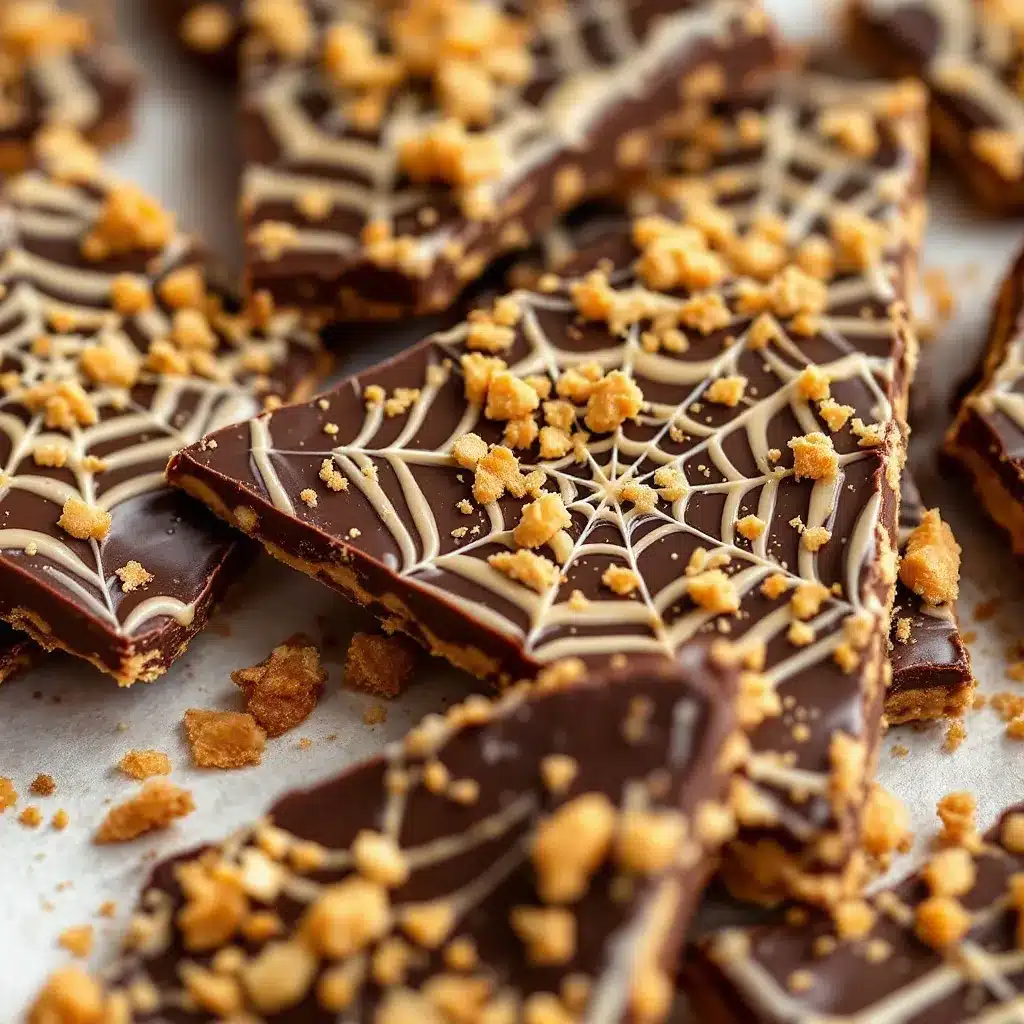
Let me walk you through this step by step. I’ve made this bark more times than I can count, and I’ve learned a few tricks along the way.
Step 1: Prepare Your Baking Sheet
Line your baking sheet with parchment paper. Make sure the paper extends slightly over the edges—this gives you handles to lift the bark out later. Smooth out any wrinkles in the paper so your bark has an even surface.
Step 2: Melt the Semi-Sweet Chocolate
Place 12 ounces of semi-sweet chocolate chips in a microwave-safe bowl. Add 1/2 tablespoon of coconut oil. Microwave in 30-second intervals, stirring well after each interval. The chocolate might look like it’s not melting at first—keep stirring. It usually takes about 90 seconds total, but microwaves vary. Stop heating when most of the chips are melted and stir until smooth. The residual heat will melt the rest. Warning: Don’t overheat or your chocolate will seize up and turn grainy. If that happens, you’ll need to start over.
Step 3: Spread the Chocolate Base
Pour the melted semi-sweet chocolate onto your prepared baking sheet. Use a rubber spatula to spread it into an even layer about 1/4 inch thick. Don’t worry about making it perfect—the bark is supposed to look rustic. If the chocolate starts to set before you’re done spreading, pop it in the microwave for 10 seconds to soften it up again.
Step 4: Add the Pretzel Crunch
While the chocolate is still wet, sprinkle the crushed pretzels evenly over the surface. Press them down gently with your fingers so they stick into the chocolate. I like to leave some pretzel pieces poking up for texture contrast. If you’re adding flaky sea salt, sprinkle it on now.
Step 5: Melt the Peanut Butter
In a small microwave-safe bowl, warm 1 cup of creamy peanut butter for about 20-30 seconds until it’s pourable but not hot. You want it thin enough to drizzle but thick enough to hold its shape when swirled. If it’s too thick, add a teaspoon of coconut oil and stir.
Step 6: Create the Peanut Butter Swirl
Using a spoon, drizzle the warm peanut butter over the chocolate in random lines and blobs. Don’t overthink this part—you’re just creating a base for the spider web design. Use a toothpick or skewer to drag through the peanut butter and chocolate, creating swirls and marbled patterns. This is where the magic happens.
Step 7: Melt the White Chocolate
Place 1 cup of white chocolate chips in a microwave-safe bowl with the remaining 1/2 tablespoon of coconut oil. Microwave in 20-second intervals, stirring after each. White chocolate burns faster than dark chocolate, so watch it carefully. It should be smooth and glossy when done.
Step 8: Create the Spider Web Design
Transfer the melted white chocolate to a piping bag or a small zip-top bag with a tiny corner snipped off. Pipe concentric circles starting from the center of the bark outward. Space them about 1 inch apart. Then, using a toothpick, drag from the center outward through all the circles to create the web effect. Wipe the toothpick clean after each drag to keep the lines sharp. Repeat this process in a few different spots across the bark for multiple spider webs.
Step 9: Set the Bark
Place the baking sheet in the refrigerator for at least 30 minutes, or until the chocolate is completely firm and set. Don’t rush this step—if the bark isn’t fully set, it will be messy when you break it. For best results, let it chill for a full hour.
Step 10: Break and Serve
Once set, lift the parchment paper to remove the bark from the baking sheet. Place it on a cutting board and break it into irregular pieces with your hands. The jagged edges are part of the charm. Serve immediately or store for later.
Cooking Tips & Techniques
I’ve learned a few things the hard way so you don’t have to. Here are my best tips for perfect bark every time.
Temperature control is everything. I once tried to rush the melting process by cranking the microwave to full power, and I ended up with a grainy, burnt mess. Low and slow is the way to go. Chocolate is temperamental—treat it gently and it will reward you with a smooth, glossy finish.
The toothpick trick. When creating the spider web, wipe your toothpick clean after each drag. If you don’t, the colors will muddy together and you’ll lose that crisp web effect. I keep a paper towel handy and wipe between each line. It makes a huge difference in the final look.
Don’t skip the coconut oil. I know it seems like an extra step, but it’s crucial for texture. The oil helps the chocolate melt smoothly and gives the bark a nice snap when you break it. Without it, the chocolate can be too thick and brittle.
Work quickly but calmly. Once you start the spider web design, you have a limited window before the chocolate sets. Have all your tools ready before you begin. I lay out my toothpicks, paper towels, and piping bag before I even melt the chocolate. This saves me from frantic scrambling mid-design.
Use room temperature ingredients. If your peanut butter or chocolate chips are cold from the fridge, they’ll take longer to melt and might not incorporate smoothly. Let everything come to room temperature before you start. It’s a small detail that makes a big difference.
Variations & Adaptations
This recipe is endlessly adaptable. Here are some of my favorite variations.
Halloween Spider Web Bark
The classic version I’ve shared above. Add candy eyes on top of the spider webs for a fun touch. I’ve also sprinkled orange and black sprinkles for extra festive flair. My niece loves helping place the candy eyes—it’s her favorite part.
Peppermint Holiday Bark
Swap the pretzels for crushed candy canes and use dark chocolate instead of semi-sweet. Create snowflake patterns instead of spider webs by piping white chocolate in a snowflake design. This is my go-to for Christmas cookie exchanges. I’ve brought this to multiple holiday parties and it disappears faster than anything else on the dessert table.
Vegan & Dairy-Free Version
Use dairy-free chocolate chips and vegan white chocolate (it exists, and it’s surprisingly good). Substitute the peanut butter with sunflower seed butter or almond butter for a nut-free option. The coconut oil is already vegan, so you’re good there. I’ve made this for a friend with dairy allergies, and she couldn’t tell the difference.
Spicy Mexican Chocolate Bark
Add 1/2 teaspoon of cinnamon and a pinch of cayenne pepper to the melted semi-sweet chocolate. The heat pairs beautifully with the peanut butter and creates a complex flavor profile. This version is perfect for adult gatherings or when you want something a little unexpected.
Nut-Free Alternative
Replace the peanut butter with sunflower seed butter or WowButter (a soy-based peanut butter alternative). Make sure to check all your chocolate labels for cross-contamination warnings if you’re serving someone with severe allergies. I’ve tested this with sunflower seed butter, and the swirl effect works just as well.
Serving & Storage Suggestions
This bark is best served cold or at room temperature, depending on your preference. I like it straight from the fridge because the chocolate has that satisfying snap. If you prefer a softer texture, let it sit at room temperature for 5-10 minutes before serving.
Presentation ideas: Arrange the broken pieces on a festive platter or in a decorative jar. For Halloween parties, I serve it on a black platter with plastic spiders scattered around. It looks spooky and fun. For a more elegant presentation, arrange the pieces in a single layer on a white cake stand.
Storage: Store the bark in an airtight container in the refrigerator for up to 2 weeks. Layer the pieces between sheets of parchment paper to prevent sticking. If you’re stacking multiple layers, make sure the pieces are completely set before stacking.
Freezer instructions: This bark freezes beautifully. Place the pieces in a single layer on a baking sheet and freeze for 1 hour, then transfer to a freezer-safe bag or container. It will keep for up to 3 months. Thaw in the refrigerator overnight before serving. I always keep a batch in my freezer for unexpected guests or last-minute Halloween parties.
Flavor development: The flavors actually meld together and improve after a day or two in the fridge. The pretzels soften slightly, and the peanut butter and chocolate marry into a more cohesive flavor. If you can resist eating it all immediately, it’s even better the next day.
Nutritional Information & Benefits
While this is definitely a treat, it does offer some surprising benefits. Here’s a rough breakdown per serving (about 1 ounce of bark):
- Calories: 180-200
- Fat: 12-14g (mostly from healthy peanut butter and chocolate fats)
- Protein: 4-5g (thanks to the peanut butter)
- Carbohydrates: 16-18g
- Sugar: 12-14g
- Fiber: 2-3g
Health benefits of key ingredients: Dark chocolate is rich in antioxidants and can support heart health when consumed in moderation. Peanut butter provides plant-based protein and healthy monounsaturated fats that keep you satisfied. Pretzels add a bit of sodium for electrolyte balance—hey, it’s something!
Dietary considerations: This recipe is naturally vegetarian. For vegan, dairy-free, or nut-free options, check the variations section above. It contains common allergens including peanuts, dairy, and gluten (from pretzels).
My personal take: I believe in balance. This bark is a treat, not a health food, and that’s okay. Enjoy it mindfully, savor every bite, and don’t feel guilty about it. Life is too short for boring desserts.
Frequently Asked Questions
Can I use milk chocolate instead of semi-sweet?
Absolutely. Milk chocolate will make the bark sweeter and creamier. I recommend using a good quality milk chocolate like Ghirardelli or Lindt for the best texture. Just keep in mind that the final result will be much sweeter overall.
Why did my white chocolate seize up?
White chocolate is notoriously finicky. It seizes when it comes into contact with even a tiny amount of water or if it’s overheated. Make sure your bowl is completely dry, and always melt white chocolate at 50% power or less. If it does seize, you can try adding a teaspoon of coconut oil and stirring vigorously to save it.
How do I make the spider web design look professional?
The key is patience and clean tools. Wipe your toothpick after each drag. Start with small, tight circles in the center and gradually make them larger as you move outward. Practice on a piece of parchment paper first if you’re nervous. And remember—imperfect webs look more authentic and spider-like anyway.
Can I make this bark ahead of time?
Yes, and I actually recommend it. The flavors develop and meld together after a day in the fridge. You can make it up to 2 weeks in advance and store it in an airtight container in the refrigerator. It’s perfect for Halloween parties or holiday gifting.
What’s the best way to break the bark into pieces?
Use your hands for the most organic, rustic look. If you want more uniform pieces, use a sharp chef’s knife to cut it into squares or triangles. For clean cuts, let the bark come to room temperature slightly, then cut with a warm knife. Wipe the blade clean between cuts.
Conclusion
This Easy Spider Web Chocolate Peanut Butter Bark has become my secret weapon for Halloween entertaining. It looks like it took hours of effort, but you and I know the truth—it’s five ingredients and maybe twenty minutes of actual work. The spider web design is forgiving, the flavor combination is crowd-pleasing, and the whole thing feels like a celebration.
I love this recipe because it reminds me that you don’t need to be a pastry chef to create something beautiful. You just need a little creativity, a toothpick, and the willingness to try. Every time I make this bark, I think about that first batch I created out of pure laziness, and I smile. Sometimes the best recipes come from the most unassuming moments.
I’d love to hear how your spider web bark turns out! Drop a comment below and let me know if you tried any variations or added your own twist. Tag me in your photos on social media—I always love seeing your creations. And if you’re looking for more easy, impressive recipes, check out my decadent peanut butter cup brownie cheesecake bars or these perfect patriotic sugar cookie bites for more festive treats. Happy haunting, and happy snacking!
Pin This Recipe!
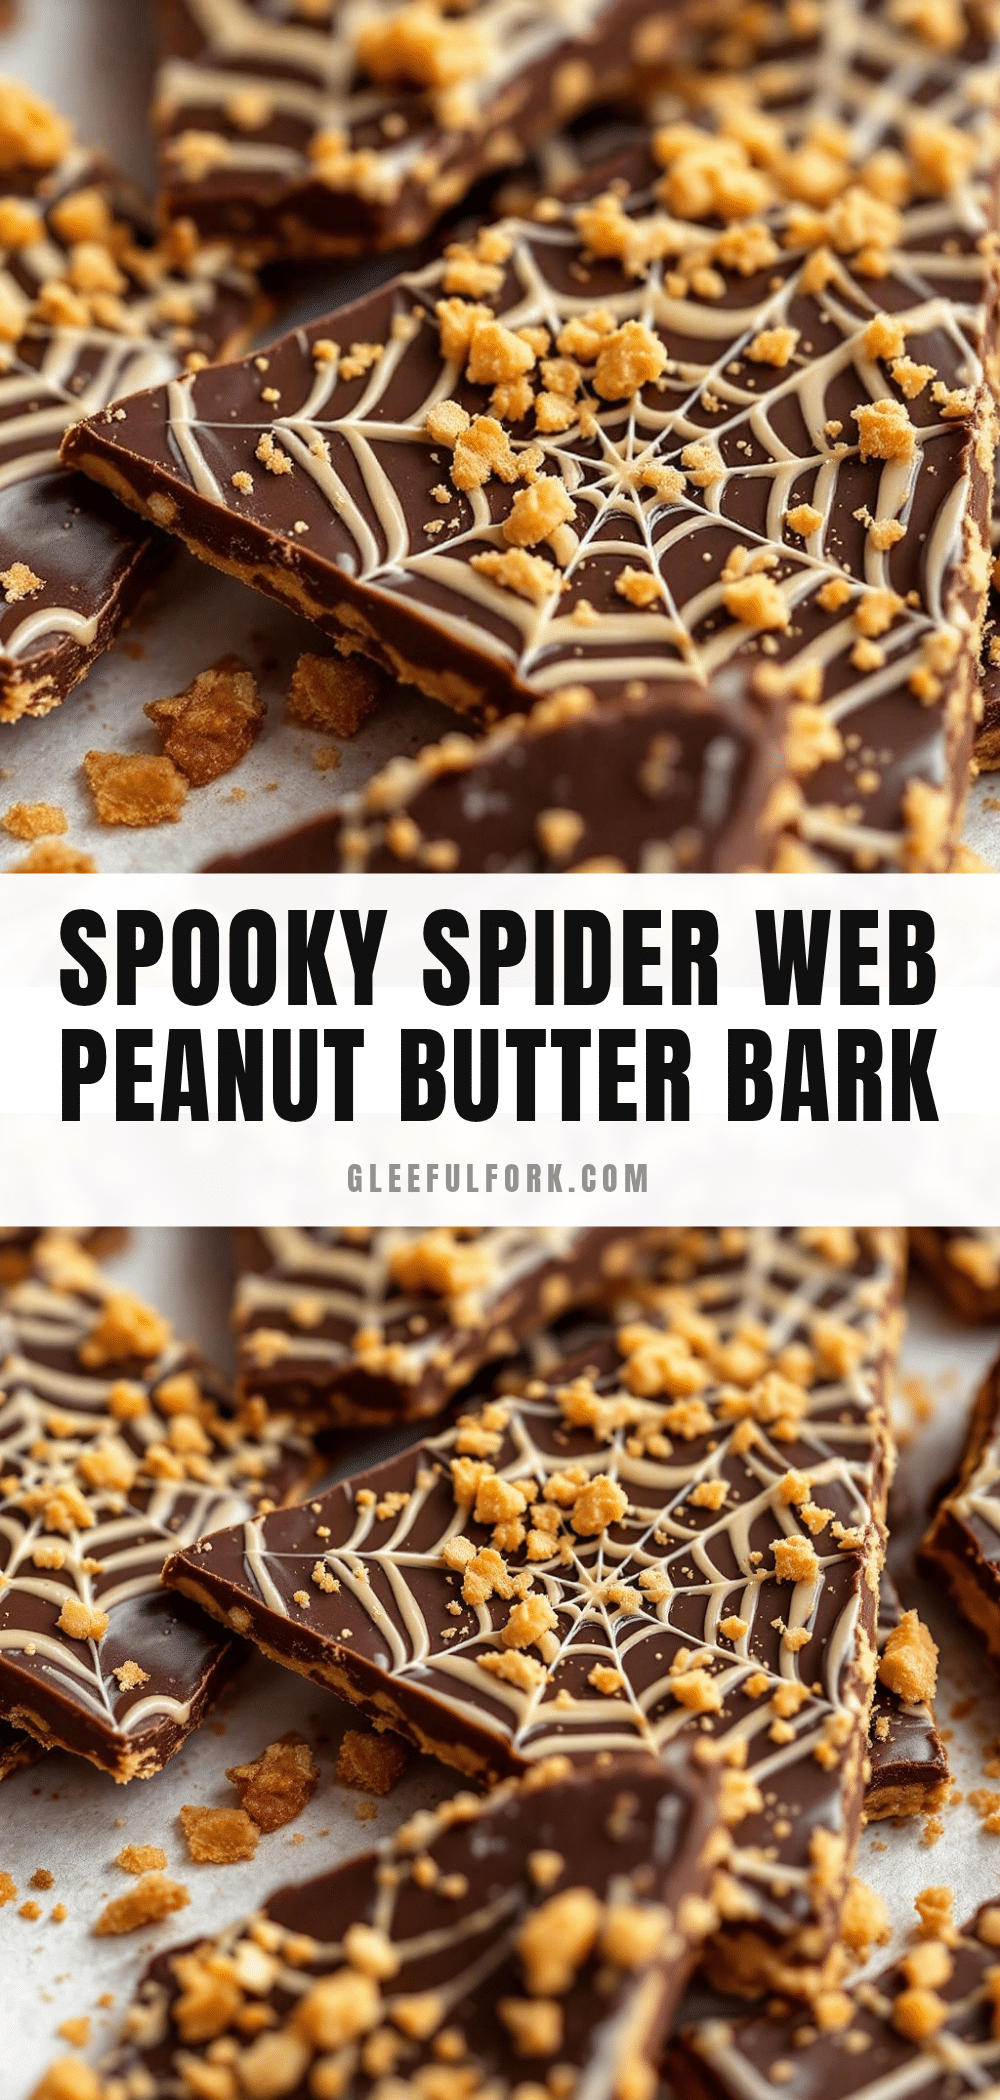
Easy Spider Web Chocolate Peanut Butter Bark
A no-bake Halloween dessert that looks impressive but is incredibly easy to make. This 5-ingredient bark combines rich chocolate, creamy peanut butter, and salty pretzels with a stunning spider web design.
- Prep Time: 15 minutes
- Cook Time: 0 minutes
- Total Time: 45 minutes (including chilling)
- Yield: 12 servings 1x
- Category: Dessert
- Cuisine: American
Ingredients
- 12 ounces semi-sweet chocolate chips
- 1 cup creamy peanut butter
- 1 cup white chocolate chips
- 1/2 cup crushed pretzels
- 1 tablespoon coconut oil, divided
- Optional: flaky sea salt, mini marshmallows, crushed candy corn, orange sprinkles
Instructions
- Line a baking sheet with parchment paper, extending slightly over the edges.
- Place 12 ounces semi-sweet chocolate chips and 1/2 tablespoon coconut oil in a microwave-safe bowl. Microwave in 30-second intervals, stirring well after each, until smooth (about 90 seconds total).
- Pour melted chocolate onto prepared baking sheet and spread into an even layer about 1/4 inch thick.
- Sprinkle crushed pretzels evenly over the wet chocolate, pressing gently to adhere.
- Warm 1 cup creamy peanut butter in a microwave-safe bowl for 20-30 seconds until pourable.
- Drizzle warm peanut butter over the chocolate in random lines and blobs. Use a toothpick to create swirls and marbled patterns.
- Place 1 cup white chocolate chips and remaining 1/2 tablespoon coconut oil in a microwave-safe bowl. Microwave in 20-second intervals, stirring after each, until smooth.
- Transfer melted white chocolate to a piping bag or zip-top bag with a tiny corner snipped off. Pipe concentric circles on the bark, then drag a toothpick from the center outward through the circles to create a spider web effect. Repeat in several spots.
- Refrigerate for at least 30 minutes, or until completely firm (1 hour recommended).
- Lift parchment paper to remove bark, place on a cutting board, and break into irregular pieces with your hands.
Notes
Temperature control is crucial—melt chocolate slowly to avoid seizing. Wipe toothpick clean after each drag for sharp web lines. Don’t skip coconut oil; it ensures smooth melting and a nice snap. Work quickly once you start the web design. Use room temperature ingredients for best results. Bark can be stored in an airtight container in the refrigerator for up to 2 weeks, or frozen for up to 3 months.
Nutrition
- Serving Size: 1 ounce
- Calories: 190
- Sugar: 13
- Sodium: 120
- Fat: 13
- Saturated Fat: 6
- Carbohydrates: 17
- Fiber: 2
- Protein: 4
Keywords: Halloween dessert, spider web bark, chocolate peanut butter bark, no-bake dessert, easy Halloween treat, 5-ingredient recipe


