Love this? Save it for later!
Share the inspiration with your friends
My dad claimed he hated green beans for thirty-seven years. No exaggeration—I remember him pushing them to the side of his plate at every holiday dinner, mumbling something about them being “slimy little things.” Then last August, I showed up at his place with a jar of these quick pickled dilly beans I’d thrown together on a whim. He grabbed one out of the jar, just to be polite I figured, and I watched him eat six more in a row without saying a word. I caught him sneaking another handful when he thought I wasn’t looking.
This recipe started as a way to use up the mountain of green beans from my neighbor Carol’s overachieving garden. She showed up at my door with a paper bag full of them on a Tuesday, and I honestly panicked for a second—what was I supposed to do with all these beans? I’d never pickled anything in my life. But I had vinegar, dill, and garlic in the pantry, and I figured, how bad could it be? The first batch was admittedly a little too salty, but the second one? That was the one that got my dad to finally admit he’d been wrong about green beans his whole life. Maybe you’ve been there—staring at a pile of produce thinking there’s no way you’ll get through it all before it goes bad.
These pickled dilly beans have a satisfying crunch, a tangy kick from the vinegar, and that unmistakable dill flavor that makes you want to eat them straight from the jar. They’re nothing like the sad, mushy green beans my dad swore off for decades. I keep making them because they turn anyone who tries them into a convert—even people who think they hate pickles, or beans, or both. There’s something deeply satisfying about watching someone’s face change after that first bite.
Why You’ll Love This Recipe
Let me tell you why these quick pickled dilly beans have earned a permanent spot in my fridge rotation. I’ve tested this recipe at least a dozen times, tweaking the vinegar ratio and the salt level until it hit that perfect balance. My neighbor Carol, who’s been canning for thirty years, gave it her official seal of approval—and she’s not easy to impress.
- Ready in 20 minutes: No waiting weeks for these to pickle. You can eat them within an hour, though they get even better after a day in the fridge. Perfect for those “I need a snack right now” emergencies.
- Simple ingredients: You probably have most of these in your kitchen already. Vinegar, salt, sugar, garlic, dill—that’s it. No trips to specialty stores or ordering weird ingredients online.
- Perfect for snacking: These dilly beans make the best refrigerator pickles for munching straight from the jar. They’re also incredible on charcuterie boards, next to sandwiches, or chopped up in potato salad.
- Crowd-pleaser: I’ve brought these to three different potlucks and never brought any home. People who swear they don’t like pickled things end up asking for the recipe.
- Unbelievably crunchy: The texture is what gets everyone. No limp, sad beans here—just snappy, crisp dilly beans that actually make that satisfying crunch sound when you bite into them.
What makes this recipe different from all the other pickled green bean recipes out there? It’s the ratio of vinegar to water, which I spent way too much time perfecting. Most recipes make them either too sour or too watery, but this one hits that sweet spot where the brine complements the beans without overpowering them. Plus, the quick pickling method means you get that amazing flavor without any complicated canning equipment or sterilizing procedures.
This recipe isn’t just good—it’s the kind that makes you close your eyes after the first bite. It’s comfort food in pickle form, somehow. Perfect for impressing guests without any stress, or turning a simple afternoon snack into something you’ll crave for days.
What Ingredients You Will Need
This recipe uses simple, everyday ingredients to create dilly beans that pack serious flavor without any complicated techniques. Most of these are pantry staples, which makes this perfect for those spontaneous pickling urges.
For the Brine
- 1 cup white vinegar (distilled white vinegar works best, but apple cider vinegar adds a nice fruity note if you want to experiment)
- 1 cup water (filtered water if you can, but tap water works fine)
- 1 tablespoon kosher salt (I use Diamond Crystal—it dissolves cleaner than table salt and doesn’t leave that metallic aftertaste)
- 1 tablespoon granulated sugar (just enough to balance the acidity, not enough to make them sweet)
For the Beans and Aromatics
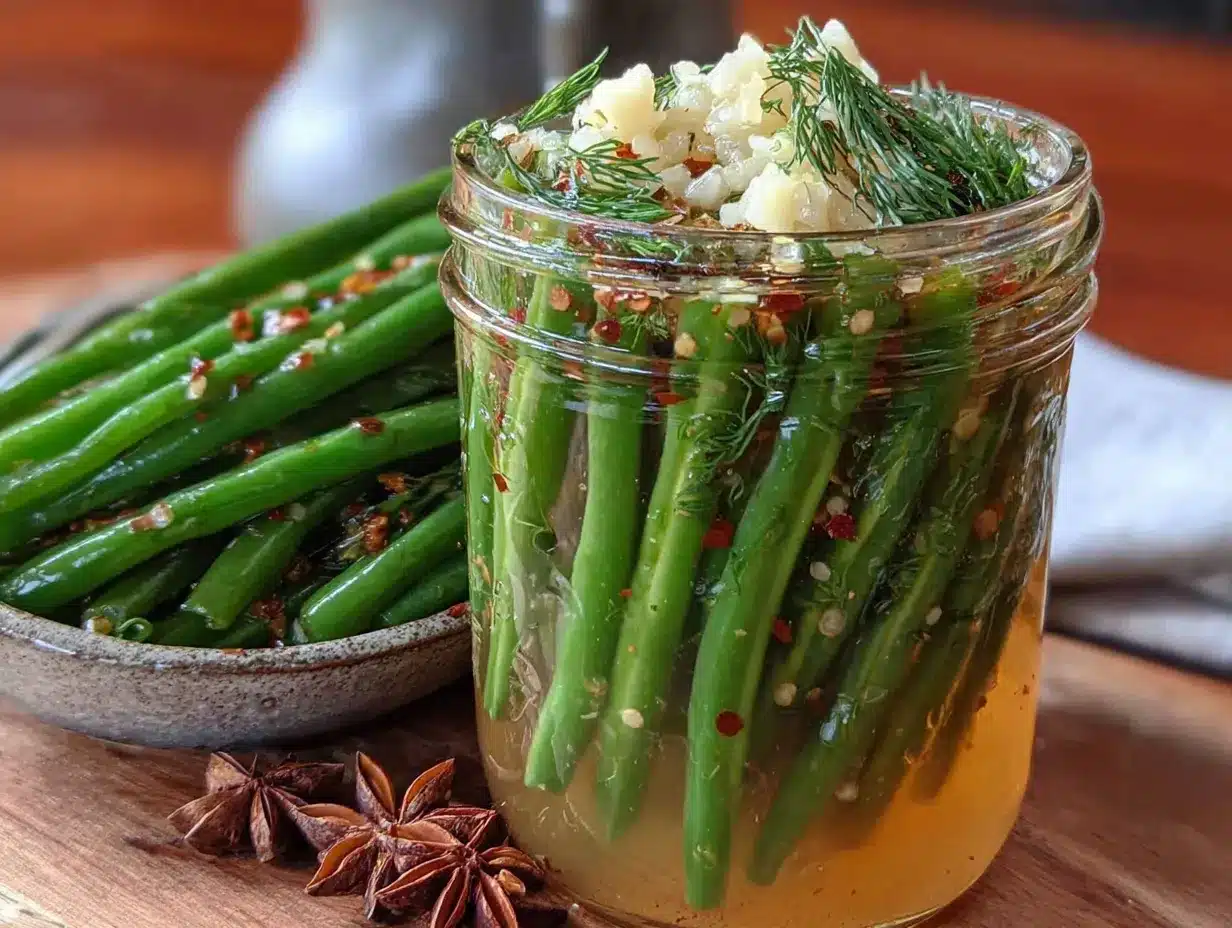
- 1 pound fresh green beans (look for firm, bright green beans that snap when you bend them—avoid any that look limp or have brown spots)
- 4 cloves garlic (smashed, not minced—smashed cloves release more flavor without making the brine cloudy)
- 2 teaspoons whole black peppercorns (adds a subtle warmth that plays nicely with the dill)
- 1 teaspoon red pepper flakes (optional, but I love the little kick they add—reduce to 1/2 teaspoon if you’re spice-sensitive)
- 2 tablespoons fresh dill (or 1 tablespoon dried dill weed if that’s what you have—fresh is better for that bright, grassy flavor)
- 1 teaspoon mustard seeds (optional, but they add a nice pop of texture and a mild tang)
Ingredient Notes and Swaps
For the green beans, I recommend buying them from a farmers market if you can—they’re usually fresher and snappier than grocery store beans. If you’re using store-bought, look for the “petite” or “haricots verts” variety if available. They’re thinner and more tender.
You can swap the white vinegar for apple cider vinegar if you want a slightly fruitier flavor, but keep in mind it’ll change the color of your dilly beans slightly. Rice vinegar also works in a pinch, but it’s milder so you might need to use a bit more.
For a low-sodium version, you can reduce the salt to 1 1/2 teaspoons, but the texture won’t be quite as firm. Salt helps maintain that crunch in pickling.
Equipment Needed
The beauty of this quick pickled dilly beans recipe is that you don’t need any fancy equipment. No canning pot, no sterilizing jars, no specialized tools.
- 1 quart-sized mason jar (or two pint-sized jars—any glass jar with a tight-fitting lid works, even an old pasta sauce jar cleaned well)
- Small saucepan (for heating the brine—any pot will do)
- Cutting board and knife (for trimming the green beans)
- Measuring cups and spoons (I’ve made these without measuring, but it’s riskier than I’d recommend)
- Optional: wide-mouth funnel (makes pouring the brine into the jar way less messy, but you can pour carefully without one)
I’ve made these dilly beans using everything from a fancy Le Creuset pot to a beat-up saucepan I found at a thrift store. They turned out exactly the same. Don’t let equipment hold you back.
Preparation Method
- Wash and trim the green beans (5 minutes). Rinse your pound of green beans under cold water and pat them dry. Trim off the stem ends—just the tough little tip, not the whole bean. You can leave the tail ends on for that classic look, or trim both ends if you’re feeling particular about it. I leave the tails on because it looks prettier in the jar.
- Prepare your jar and aromatics (3 minutes). Smash your garlic cloves with the flat side of your knife—this releases their oils without turning them into a paste. Drop the smashed garlic, dill, peppercorns, red pepper flakes, and mustard seeds into your clean jar. Layer them at the bottom so they distribute evenly when you add the beans.
- Pack the green beans into the jar (5 minutes). Stand the trimmed green beans upright in the jar, packing them as tightly as you can without crushing them. You want them snug so they stay submerged in the brine. If you’re using pint jars, you might need to cut some beans in half to fit them better. Don’t stress about perfection—I’ve made jars where the beans were all jumbled and they tasted just as good.
- Make the brine (5 minutes). In your small saucepan, combine the white vinegar, water, kosher salt, and sugar. Bring this to a boil over medium-high heat, stirring occasionally to help the salt and sugar dissolve. You’ll know it’s ready when the liquid is clear and you can’t see any grains at the bottom of the pot. Take it off the heat as soon as it boils—you don’t want to boil off too much vinegar.
- Pour the brine over the beans (2 minutes). Carefully pour the hot brine into the jar, covering the green beans completely. Leave about 1/2 inch of headspace at the top. If some beans are sticking up above the brine, use a clean spoon to gently push them down. The hot liquid will soften them slightly, helping them settle.
- Cool and seal (2 minutes). Let the jar cool on your counter for about 15-20 minutes—you’ll hear the lid pop as it seals slightly from the heat. Once it’s cool enough to handle, screw the lid on tightly and give the jar a gentle shake to distribute the aromatics.
- Refrigerate and wait (the hard part). Pop the jar in the fridge. You can technically eat these dilly beans after an hour, but they’re way better after 24 hours when the flavors have had time to mingle. The longer they sit, the more the dill and garlic infuse into the beans.
Pro tip: If you’re in a hurry, you can speed up the flavor development by letting the jar sit on the counter for an hour before refrigerating. The warmth helps the brine penetrate the beans faster. Just don’t leave them out longer than two hours for food safety reasons.
Cooking Tips & Techniques
I learned most of these tips the hard way—through batches that were too salty, too soggy, or just plain disappointing. Let me save you some trouble.
Don’t overcook the brine. I made this mistake my first time. I let the brine boil for several minutes thinking it would help the flavors meld, but it just concentrated the vinegar and made everything way too sharp. Bring it to a boil, then immediately remove it from heat. That’s all you need.
Use the freshest green beans you can find. This is non-negotiable for crunchy dilly beans. Fresh beans snap when you bend them. If they bend without breaking, they’re too old and will turn out limp. I once used beans that had been sitting in my fridge for a week, and the texture was honestly sad. Learn from my mistake.
Pack the jar tightly but not too tightly. You want the beans snug enough that they stay submerged, but not so tight that you can’t get them out later. I packed a jar too tight once and had to use chopsticks to fish out individual beans—not my finest moment.
Let them rest. I know it’s tempting to dig in right away, but these dilly beans really do get better with time. The difference between one hour and 24 hours is dramatic. At one hour, they taste like green beans with a hint of vinegar. At 24 hours, they taste like actual pickles. At 48 hours, they’re magic.
Keep them submerged. If any beans are poking above the brine line, they’ll turn brown and mushy. Use a clean spoon or a smaller jar as a weight to keep everything under the liquid. Or just make sure you pack them tightly enough that they stay put.
Variations & Adaptations
This recipe is super flexible, and I’ve tried quite a few variations over the months. Here are some of my favorites:
- Spicy version: Double the red pepper flakes and add a sliced jalapeño or two to the jar. These are great for people who like their pickles with some heat. I made a batch with habaneros once and could only eat one bean at a time—but some people loved them.
- Garlic-lover’s version: Use 6-8 garlic cloves instead of 4. I did this accidentally when I wasn’t paying attention and ended up with the best batch of dilly beans I’ve ever made. The garlic mellows as it pickles, so it doesn’t get overpowering.
- Low-sodium version: Cut the salt to 1 1/2 teaspoons. The texture won’t be quite as firm, but the flavor is still excellent. I make this version for my mom who’s watching her sodium intake.
- Herb swap: Try using fresh tarragon or thyme instead of dill for a completely different flavor profile. Tarragon gives it an almost licorice-like note that’s surprisingly good with the vinegar.
- Yellow bean version: Use yellow wax beans instead of green beans for a colorful twist. They have a slightly milder flavor but work exactly the same way.
I once made a batch with added sliced onions and bell peppers, and it turned into a full-on pickled vegetable medley. That one disappeared fast at a barbecue.
Serving & Storage Suggestions
These dilly beans are incredibly versatile. I serve them straight from the fridge as a snack, but they also shine in other ways.
Serving temperature: Cold or room temperature—both work great. If you’re serving them at a party, take them out of the fridge about 15 minutes beforehand so they’re not ice-cold.
Ways to use them: Chop them up and add them to potato salad for a tangy crunch. Serve them alongside sandwiches or burgers instead of regular pickles. Add them to charcuterie boards—they’re always the first thing to disappear. Use them in Bloody Marys as a garnish instead of celery. I’ve even chopped them fine and added them to tuna salad for extra zing.
Storage instructions: Keep these dilly beans in the refrigerator at all times. They’ll stay good for up to 3-4 weeks, though they rarely last that long in my house. The flavor actually continues to develop over the first week, so they get better and better.
Reheating: Don’t. These are meant to be eaten cold or at room temperature. Heating them destroys the crunch and changes the flavor completely.
Flavor development over time: The first day, they taste like fresh green beans with a vinegary kick. By day three, the dill and garlic have really infused, and they taste like proper pickles. By week two, they’re fully developed and incredibly flavorful. After three weeks, they start to soften slightly, so I try to finish them before then.
Nutritional Information & Benefits
These quick pickled dilly beans are surprisingly healthy for something that tastes so indulgent. Here’s the breakdown per serving (about 1/4 cup of beans):
- Calories: approximately 25
- Carbohydrates: 5g
- Fiber: 2g
- Sugar: 2g
- Sodium: varies based on salt used (about 300mg with 1 tablespoon kosher salt)
- Vitamin K: 15% of daily value
- Vitamin C: 10% of daily value
Green beans are packed with vitamin K, which supports bone health, and vitamin C for immune function. The fermentation process (even quick pickling) creates beneficial probiotics that support gut health—though the vinegar-based method doesn’t produce as many as fermented pickles do.
These dilly beans are naturally gluten-free, vegan, and dairy-free. If you’re watching your sodium, just reduce the salt as mentioned above. They’re also low in calories, making them a great snack for anyone trying to eat lighter without sacrificing flavor.
I personally love that I can snack on these without any guilt. They satisfy that craving for something crunchy and tangy without any of the processed stuff you get in store-bought pickles.
Conclusion
These quick pickled dilly beans have honestly changed how I think about pickling. I used to think it was this complicated process that required special equipment and hours of work, but this recipe proves otherwise. Twenty minutes, a few pantry staples, and you’ve got a jar of crunchy, tangy, addictive beans that will convert even the most stubborn green bean skeptics.
I love that this recipe is flexible enough to adapt to whatever you have on hand. Don’t have fresh dill? Use dried. Want more heat? Add extra pepper flakes. The base recipe is forgiving, which makes it perfect for beginners and fun for experienced cooks to play with.
I’d love to hear how these turn out for you! Did you add any fun variations? Did your family fight over the last bean like mine does? Drop a comment below and let me know. And if you really love them, share this recipe with a friend who needs a little pickling inspiration. Happy snacking!
Frequently Asked Questions
How long do these pickled dilly beans last in the fridge?
They’ll stay good for 3-4 weeks in the refrigerator. The flavor actually improves over the first week, so don’t be afraid to let them sit. Just make sure the beans stay submerged in the brine to prevent spoilage.
Can I use frozen green beans instead of fresh?
I wouldn’t recommend it. Frozen green beans have already been blanched, which means they’ll turn out mushy instead of crunchy. Fresh beans are really the way to go for that satisfying snap.
Do I need to sterilize the jar before making these?
Since these are refrigerator pickles and not shelf-stable canned goods, you don’t need to sterilize the jar. Just make sure it’s clean—wash it with hot soapy water and rinse well. That’s plenty for this recipe.
Why are my pickled dilly beans soft instead of crunchy?
This usually happens for one of three reasons: your green beans were too old when you started, you boiled the brine too long, or you let them sit at room temperature too long before refrigerating. Fresh beans and a quick brine boil are key for crunch.
Can I reuse the brine for another batch?
Technically yes, but the flavor will be much weaker the second time around since most of the dill and garlic have already infused into the first batch. I’d recommend making fresh brine for each batch to get that full flavor.
Pin This Recipe!
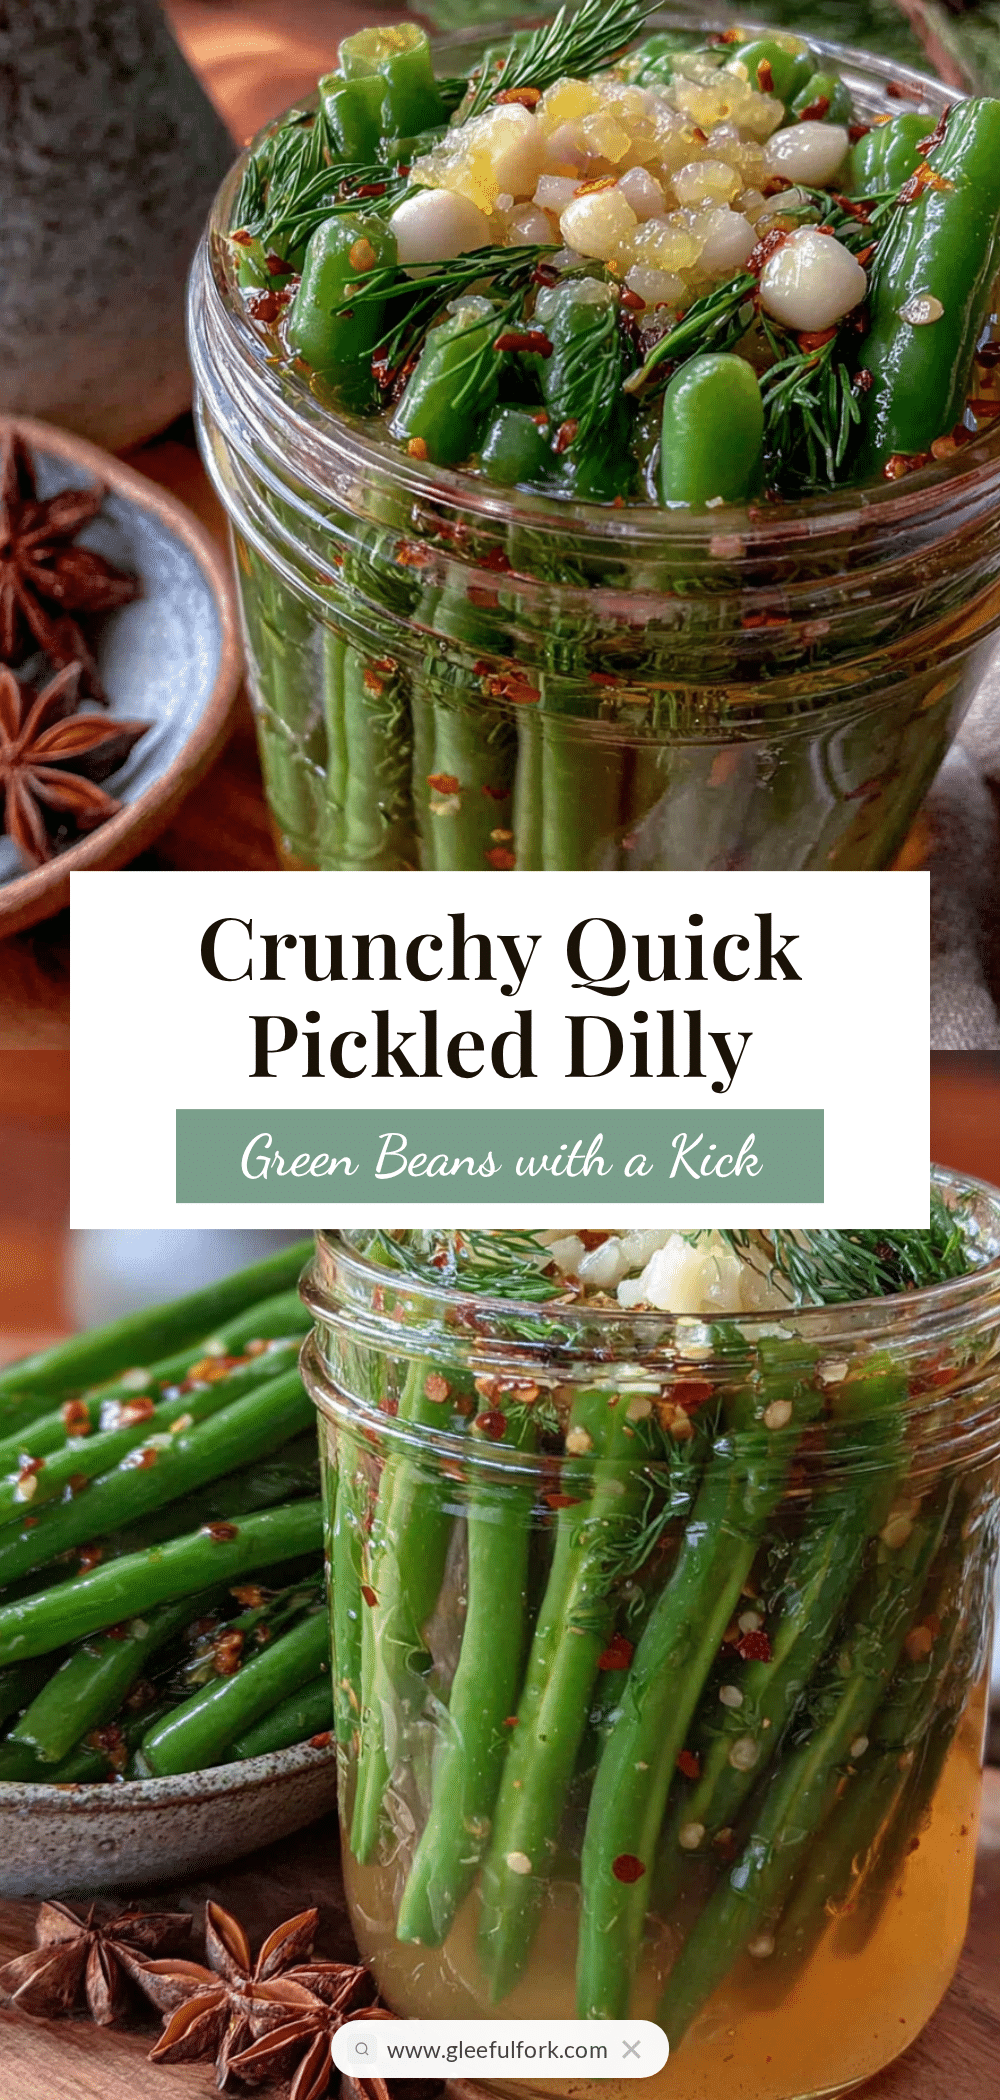
Easy Quick Dilly Green Beans: Best 20-Min Pickled Recipe
These quick pickled dilly beans have a satisfying crunch, a tangy kick from the vinegar, and that unmistakable dill flavor that makes you want to eat them straight from the jar. Ready in just 20 minutes with simple ingredients, they’re perfect for snacking, charcuterie boards, or converting even the most stubborn green bean skeptics.
- Prep Time: 10 minutes
- Cook Time: 5 minutes
- Total Time: 20 minutes (plus cooling and refrigeration time)
- Yield: 4 servings (about 1 quart) 1x
- Category: Appetizer
- Cuisine: American
Ingredients
- 1 cup white vinegar (distilled white vinegar works best, but apple cider vinegar adds a nice fruity note)
- 1 cup water (filtered if possible, but tap water works fine)
- 1 tablespoon kosher salt (Diamond Crystal recommended)
- 1 tablespoon granulated sugar
- 1 pound fresh green beans (firm, bright green beans that snap when bent)
- 4 cloves garlic (smashed, not minced)
- 2 teaspoons whole black peppercorns
- 1 teaspoon red pepper flakes (optional, reduce to 1/2 teaspoon if spice-sensitive)
- 2 tablespoons fresh dill (or 1 tablespoon dried dill weed)
- 1 teaspoon mustard seeds (optional)
Instructions
- Wash and trim the green beans: Rinse 1 pound of green beans under cold water and pat dry. Trim off the stem ends, leaving the tail ends on for a classic look.
- Prepare your jar and aromatics: Smash 4 garlic cloves with the flat side of a knife. Drop the smashed garlic, dill, peppercorns, red pepper flakes, and mustard seeds into a clean quart-sized mason jar.
- Pack the green beans into the jar: Stand the trimmed green beans upright in the jar, packing them as tightly as possible without crushing them. If using pint jars, cut some beans in half to fit.
- Make the brine: In a small saucepan, combine 1 cup white vinegar, 1 cup water, 1 tablespoon kosher salt, and 1 tablespoon granulated sugar. Bring to a boil over medium-high heat, stirring occasionally until salt and sugar dissolve. Remove from heat immediately once boiling.
- Pour the brine over the beans: Carefully pour the hot brine into the jar, covering the green beans completely. Leave about 1/2 inch of headspace at the top. Use a clean spoon to gently push down any beans sticking above the brine.
- Cool and seal: Let the jar cool on the counter for 15-20 minutes. Once cool enough to handle, screw the lid on tightly and give the jar a gentle shake to distribute the aromatics.
- Refrigerate and wait: Place the jar in the refrigerator. For best flavor, wait at least 24 hours before eating, though they can be eaten after 1 hour. The flavor continues to develop over the first week.
Notes
For best crunch, use the freshest green beans possible. Don’t overcook the brine—bring to a boil and remove immediately. Let the beans rest at least 24 hours for optimal flavor. Keep beans submerged in brine to prevent spoilage. Store in refrigerator for up to 3-4 weeks. For a low-sodium version, reduce salt to 1 1/2 teaspoons. To speed up flavor development, let the jar sit on the counter for 1 hour before refrigerating (but no longer than 2 hours for food safety).
Nutrition
- Serving Size: 1/4 cup
- Calories: 25
- Sugar: 2
- Sodium: 300
- Carbohydrates: 5
- Fiber: 2
- Protein: 1
Keywords: quick pickled dilly beans, easy pickled green beans, refrigerator pickles, dilly beans recipe, 20 minute pickles, crunchy pickled beans, homemade pickles


