Love this? Save it for later!
Share the inspiration with your friends
It was 10:47 PM on a random Wednesday, and I was staring into the fridge like it owed me something. The craving hit hard—not for chips or chocolate, but for something chewy, sweet, and actually satisfying. I’d just finished a late workout (don’t ask, my schedule is a mess), and my body was screaming for protein. But here’s the thing—I didn’t have the energy for a full kitchen production. I mean, let’s be real, who does at 11 PM?
I opened the pantry and spotted a jar of peanut butter, some sad-looking oats, and a bag of chocolate chips that was basically calling my name. That’s when the idea arrived—what if I just threw it all together and hoped for the best? No baking, no fuss, no cleanup disaster. I grabbed a bowl, started mixing, and honestly, I was half-expecting to toss it all in the trash. But something about the late hour made me brave. I mean, what’s the worst that could happen?
The first batch was a little sticky—okay, a lot sticky—but the flavor was spot on. I adjusted the ratios the next morning (because I’m a responsible adult who tests things twice), and these Easy No-Bake Protein Energy Balls were born. They’re the perfect small batch snack for those moments when you need something quick but don’t want to commit to a full recipe. Maybe you’ve been there—standing in your kitchen, hungry, tired, and just wanting something good without the effort. This recipe is for you.
Why You’ll Love This Recipe
Let me tell you why these protein energy balls have become my go-to snack. I’ve tested this recipe at least six times (my coworkers were very happy taste testers), and each batch came out better than the last. Here’s what makes them special:
- Quick & Easy: From start to finish, you’re looking at about 15 minutes. No oven, no mixer, no complicated steps. Just a bowl and a spoon.
- Simple Ingredients: You probably have everything in your pantry right now. No weird health food store trips or expensive superfoods required.
- Perfect for Busy Days: These little guys are lifesavers for pre-workout fuel, afternoon slumps, or when you’re running out the door and need something to grab.
- Crowd-Pleaser: I’ve brought these to parties, work events, and family gatherings. Even the non-health-food people go back for seconds.
- Small Batch Magic: This recipe makes exactly 6 balls—enough to satisfy your craving without leaving you with a week’s worth of snacks you’ll get bored of.
What makes these different from every other energy ball recipe out there? It’s the texture. Most recipes turn out either too dry and crumbly or so sticky they’re impossible to roll. I spent time perfecting the ratio of wet to dry ingredients so you get that perfect chewy-but-holds-together consistency every single time. Plus, I swapped in a little secret ingredient that adds creaminess without making everything greasy.
Honestly, this recipe is the kind that makes you close your eyes after the first bite. It’s comfort food that’s actually good for you—protein-packed, naturally sweetened, and satisfying in a way that doesn’t leave you reaching for more ten minutes later. Perfect for impressing yourself on a busy weeknight or turning a simple snack into something you actually look forward to.
What Ingredients You Will Need
This recipe uses simple, wholesome ingredients that come together to create something truly satisfying. No fancy stuff here—just real food that works. Here’s what you’ll need:
- Rolled oats (1 cup / 90g) – Old-fashioned oats work best here. Quick oats can make the texture too mushy, and steel-cut oats won’t soften enough. I prefer Bob’s Red Mill for consistent results.
- Creamy peanut butter (1/2 cup / 130g) – Natural peanut butter with just peanuts and salt is ideal. If you use the sugary kind, the balls will be way too sweet. Trust me on this one.
- Honey (3 tablespoons / 60ml) – Maple syrup works too, but honey gives a better binding texture. Local honey adds a nice floral note if you have it.
- Chocolate chips (1/4 cup / 45g) – Mini chips distribute better, but regular chips work fine. Dark chocolate chips keep the sugar lower and taste amazing.
- Ground flaxseed (2 tablespoons / 15g) – This is my secret ingredient for extra fiber and omega-3s. Plus, it helps with binding without making things sticky.
- Vanilla extract (1 teaspoon / 5ml) – Pure vanilla makes a difference. Skip the imitation stuff if you can.
- Pinch of salt (1/8 teaspoon) – Only if your peanut butter isn’t salted. Salt makes the flavors pop and balances the sweetness.
Ingredient tips from my kitchen: If you’re using a peanut butter that’s been sitting in the fridge and has separated, give it a good stir before measuring. I learned this the hard way—my first batch was oily and wouldn’t hold together because I just scooped from the top. Also, make sure your oats are certified gluten-free if that matters to you. Most oats are processed with wheat, so check the label.
Substitution options: Almond butter or sunflower seed butter work great if you have allergies. For a nut-free version, use tahini or sunflower seed butter. If you want these completely sugar-free, use sugar-free chocolate chips and a monk fruit honey substitute. Just note that texture might change slightly with sugar-free options.
Equipment Needed
The beauty of this recipe is you don’t need much. Here’s what you’ll actually use:
- Mixing bowl – Any medium bowl works. I use a glass one because it’s easy to see when everything is combined.
- Spatula or wooden spoon – For mixing. A rubber spatula makes scraping the sides easier.
- Measuring cups and spoons – Standard set. No need for a kitchen scale unless you’re feeling fancy.
- Baking sheet or plate – For holding the rolled balls while they chill. A small plate lined with parchment paper is perfect.
- Parchment paper (optional) – Makes cleanup easier and prevents sticking.
- Refrigerator – For setting the balls. They need at least 30 minutes to firm up.
That’s it. No food processor, no mixer, no special gadgets. I’ve made these in a tiny apartment kitchen with a single bowl and a fork. If you have hands and a fridge, you’re good to go.
Preparation Method
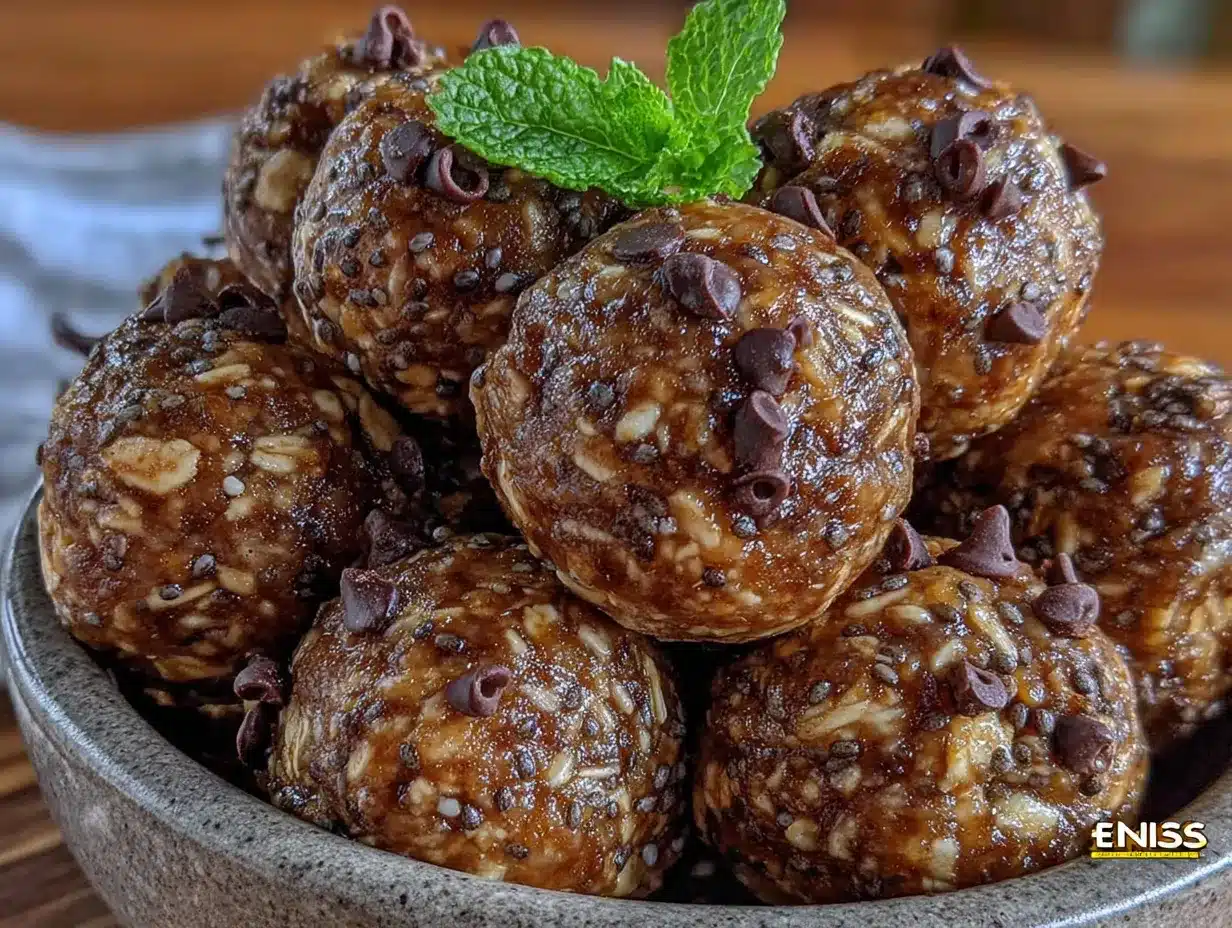
- Gather your ingredients. Take everything out of the pantry and fridge. Measure your oats, peanut butter, honey, chocolate chips, flaxseed, vanilla, and salt. Having everything ready makes the process smooth and prevents sticky hands from digging through cabinets.
- Combine the dry ingredients. In your mixing bowl, add the rolled oats, ground flaxseed, and salt. Give them a quick stir with your spatula. This distributes the flaxseed evenly so you don’t get clumps later. I learned this after my first batch had weird flaxseed pockets—not ideal.
- Add the wet ingredients. Spoon in the peanut butter, drizzle the honey, and add the vanilla extract. Don’t add the chocolate chips yet—they’ll get crushed if you mix too vigorously. Trust me, I’ve made that mistake.
- Mix everything together. Start stirring with your spatula or wooden spoon. Use a folding motion to incorporate the dry ingredients into the wet. At first, it’ll look like a crumbly mess. Keep going. After about 30 seconds of mixing, it should start coming together into a thick, sticky dough. If it’s too dry, add a teaspoon of honey or a splash of water. If it’s too wet, add a tablespoon of oats.
- Fold in the chocolate chips. Once the dough is uniform and holds together when pressed, gently fold in the chocolate chips. Make sure they’re evenly distributed. I like to save a few chips to press onto the tops of the balls for a prettier presentation.
- Chill the dough (optional but recommended). Pop the bowl in the fridge for 10-15 minutes. This makes the dough less sticky and easier to roll. If you’re impatient (like I usually am), you can skip this step—just expect slightly messier hands.
- Roll into balls. Scoop out about 1.5 tablespoons of dough per ball. Roll between your palms gently but firmly. You should get exactly 6 balls from this recipe. If your hands get sticky, lightly wet them with water or rub a tiny bit of oil on your palms.
- Place on a lined plate or baking sheet. Arrange the balls so they’re not touching. If you want, press a few extra chocolate chips on top for looks.
- Refrigerate for at least 30 minutes. This is the hardest part—waiting. The balls need time to firm up and let the flavors meld. They’ll be soft but hold their shape after chilling.
- Enjoy! Grab one (or two, no judgment) and enjoy your creation. Store the rest in the fridge for up to a week.
Cooking Tips & Techniques
After making these protein energy balls more times than I can count, I’ve picked up a few tricks that make a real difference. Let me share what I’ve learned—including the mistakes I made so you don’t have to.
The biggest mistake I made: My first batch was a disaster because I used chunky peanut butter. I thought the extra texture would be nice, but the chunks made the balls fall apart. Stick with creamy peanut butter for the best structure. If you want crunch, add extra chocolate chips or some chopped nuts instead.
Temperature matters. If your kitchen is warm (like mine in summer), the dough will be stickier. Pop it in the fridge for 10 minutes before rolling. If it’s cold, the dough might be stiffer—just roll a bit firmer. I’ve made these in both conditions, and a little adjustment goes a long way.
Don’t overmix. Once the dough comes together, stop mixing. Overworking the oats can make them release starch and turn gummy. You want a cohesive dough, not a paste. I learned this when I got distracted and kept stirring—the texture was off.
Use a cookie scoop for consistency. If you have a small cookie scoop (about 1.5 tablespoons), use it. It ensures all your balls are the same size, which means they’ll chill evenly. If you don’t have one, just eyeball it—close enough is good enough.
Multitasking tip: While the dough chills, clean up your workspace. The mixture can be sticky, and dried dough is harder to clean. A quick rinse of your bowl and spatula saves you scrubbing later.
Texture troubleshooting: If your balls are too dry and crumbly, add a teaspoon of honey or peanut butter next time. If they’re too sticky to roll, add a tablespoon of oats. Keep notes on what works for your specific ingredients—different brands of peanut butter have different moisture levels.
Variations & Adaptations
One of the best things about this recipe is how flexible it is. Here are some variations I’ve tried and loved:
Chocolate Peanut Butter Dream
Add 1 tablespoon of cocoa powder to the dry ingredients. Use white chocolate chips instead of dark for a fun twist. This version tastes like a healthier version of those peanut butter cup candies. I made this for a party and people couldn’t believe they were healthy.
Vegan & Gluten-Free Version
Swap the honey for maple syrup or agave nectar. Use certified gluten-free oats and dairy-free chocolate chips. Everything else stays the same. The texture is slightly different—maple syrup is thinner than honey—but still delicious. I’ve made this for friends with dietary restrictions and it was a hit.
Tropical Coconut Lime
Replace the chocolate chips with unsweetened shredded coconut and add the zest of one lime. Use almond butter instead of peanut butter. The lime adds a bright, fresh flavor that’s perfect for summer. I made this on a whim and now it’s my warm-weather go-to.
Protein-Packed Extra
Add 1 scoop (about 30g) of vanilla or chocolate protein powder. Reduce the oats by 2 tablespoons to keep the texture right. You might need an extra tablespoon of honey to balance the dryness from the protein powder. This version is great post-workout.
Spiced Apple Cinnamon
Add 1/2 teaspoon of cinnamon and 1/4 teaspoon of nutmeg. Replace the chocolate chips with dried apple pieces (chopped small) and raisins. Use almond butter for a milder flavor. This variation tastes like fall in a ball.
Serving & Storage Suggestions
These energy balls are best served cold or at room temperature. I prefer them straight from the fridge—they’re firmer and more satisfying. If you’re packing them for lunch or a snack, they’ll be fine at room temperature for a few hours, but don’t leave them out all day.
How to serve: Place them on a small plate or in a bowl. They’re great on their own, but you can also pair them with fresh fruit, a glass of milk, or your morning coffee. I like to have one with my afternoon tea for a little energy boost.
Storage instructions: Keep them in an airtight container in the refrigerator. They’ll stay fresh for up to 7 days. I use a small glass container with a lid—it keeps them from drying out and prevents them from absorbing fridge odors.
Freezer tips: These freeze beautifully! Place the rolled balls on a baking sheet and freeze for 1 hour, then transfer to a freezer bag. They’ll keep for up to 3 months. To thaw, just leave them in the fridge overnight or at room temperature for 30 minutes. I always make a double batch and freeze half for busy weeks.
Reheating: No need to reheat—they’re meant to be eaten cold or at room temperature. If you want a softer texture, let them sit out for 10 minutes before eating.
Flavor development: The flavors actually get better after a day or two in the fridge. The oats absorb moisture, the chocolate chips firm up, and everything melds together. I always try to save at least one ball for the next day to see how it changes.
Nutritional Information & Benefits
Here’s the approximate nutritional breakdown for one energy ball (based on 6 servings):
| Nutrient | Amount Per Ball |
|---|---|
| Calories | 185 |
| Protein | 7g |
| Carbohydrates | 20g |
| Fiber | 3g |
| Sugar | 10g |
| Fat | 10g |
| Saturated Fat | 2g |
Health benefits: These little balls are packed with good stuff. The oats provide slow-release energy and fiber for digestive health. Peanut butter offers healthy fats and protein to keep you full. Flaxseed adds omega-3 fatty acids and extra fiber. Dark chocolate chips give you antioxidants and a little mood boost. It’s a snack that actually fuels your body instead of just filling you up.
Dietary considerations: This recipe is naturally vegetarian. For a vegan version, use maple syrup instead of honey. For gluten-free, use certified gluten-free oats. For nut-free, use sunflower seed butter or tahini. The recipe is dairy-free as written (check your chocolate chips).
Potential allergens: Contains peanuts (from peanut butter) and oats (which may contain gluten). If you have allergies, check all ingredient labels carefully.
Frequently Asked Questions
Can I make these without peanut butter?
Absolutely! Almond butter, cashew butter, sunflower seed butter, or tahini all work great. Just keep in mind that different nut butters have different moisture levels. If your alternative butter is thinner, you might need to add a tablespoon more oats. If it’s thicker, add a splash of water or extra honey.
Why are my energy balls too dry?
This usually happens if your peanut butter is too thick or you measured the oats generously. Next time, add an extra tablespoon of honey or a teaspoon of water. You can also try using a creamier peanut butter. If they’re already made and dry, you can crumble them over yogurt or oatmeal instead of eating them as balls.
How long do these last at room temperature?
They’re fine for about 4-6 hours at room temperature, especially if you’re taking them to work or on a hike. After that, they might get a little soft or sticky. For longer storage, always keep them in the fridge. I’ve accidentally left them out overnight and they were still okay, but the texture wasn’t as good.
Can I double this recipe?
Yes! This recipe is easy to scale up. Just double all the ingredients and mix in a larger bowl. The rolling takes a bit longer, but the process is the same. I often make a double batch on Sunday and have snacks for the whole week. Just make sure your container is big enough to hold them all.
Can I add protein powder to this recipe?
You can, but you’ll need to adjust the moisture. Start by adding 1 scoop (about 30g) of protein powder and reduce the oats by 2 tablespoons. You might need an extra tablespoon of honey or a splash of milk to bring the dough together. Different protein powders absorb liquid differently, so add slowly and check the texture.
Conclusion
These Easy No-Bake Protein Energy Balls have become a staple in my kitchen for good reason. They’re simple, satisfying, and actually good for you. No complicated steps, no fancy equipment, no stress. Just a handful of ingredients and a few minutes of your time.
I love that this recipe is forgiving—you can tweak it based on what you have in your pantry or what you’re craving. That late-night experiment that started as a desperate attempt to avoid a trip to the store turned into something I genuinely look forward to making. There’s something special about creating a snack that fuels your body and makes you happy at the same time.
I’d love to hear how yours turn out! Did you try a fun variation? Did you discover a new favorite combination? Drop a comment below and share your creation. And if you found this recipe helpful, please share it with a friend who needs a quick, healthy snack idea. Happy rolling, friends!
Pin This Recipe!
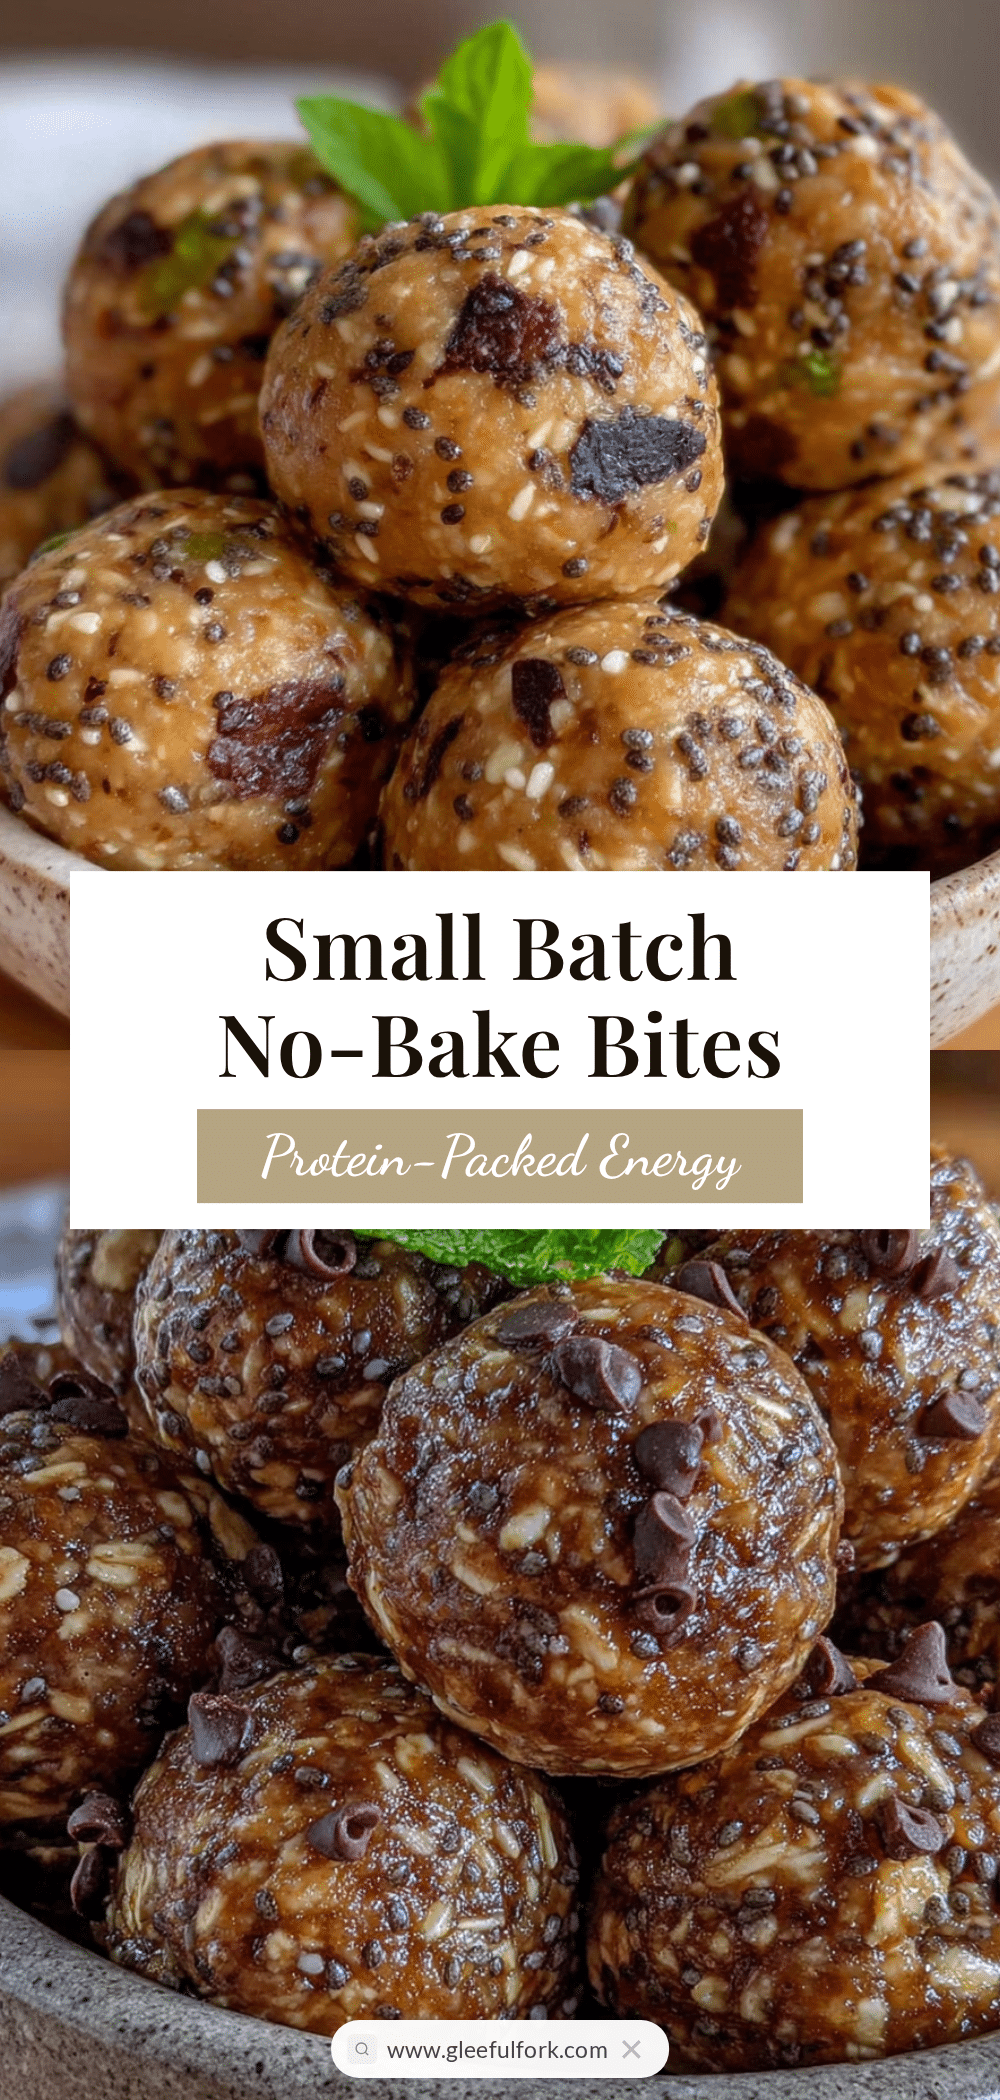
Easy No-Bake Protein Energy Balls: Perfect Small Batch Snack
These no-bake protein energy balls are a quick, healthy snack made with simple pantry ingredients. Perfect for busy days, they come together in 15 minutes and yield 6 satisfying balls.
- Prep Time: 15 minutes
- Cook Time: 0 minutes
- Total Time: 45 minutes
- Yield: 6 servings 1x
- Category: Snack
- Cuisine: American
Ingredients
- 1 cup (90g) rolled oats
- 1/2 cup (130g) creamy peanut butter
- 3 tablespoons (60ml) honey
- 1/4 cup (45g) chocolate chips
- 2 tablespoons (15g) ground flaxseed
- 1 teaspoon (5ml) vanilla extract
- 1/8 teaspoon salt (if peanut butter is unsalted)
Instructions
- Gather your ingredients. Take everything out of the pantry and fridge. Measure your oats, peanut butter, honey, chocolate chips, flaxseed, vanilla, and salt.
- Combine the dry ingredients. In your mixing bowl, add the rolled oats, ground flaxseed, and salt. Give them a quick stir with your spatula.
- Add the wet ingredients. Spoon in the peanut butter, drizzle the honey, and add the vanilla extract. Do not add the chocolate chips yet.
- Mix everything together. Start stirring with your spatula or wooden spoon using a folding motion. After about 30 seconds, it should form a thick, sticky dough. If too dry, add a teaspoon of honey or water; if too wet, add a tablespoon of oats.
- Fold in the chocolate chips. Once the dough is uniform, gently fold in the chocolate chips until evenly distributed.
- Chill the dough (optional but recommended). Pop the bowl in the fridge for 10-15 minutes to make it less sticky.
- Roll into balls. Scoop out about 1.5 tablespoons of dough per ball and roll between your palms. You should get exactly 6 balls.
- Place on a lined plate or baking sheet. Arrange the balls so they’re not touching. Optionally press extra chocolate chips on top.
- Refrigerate for at least 30 minutes. This allows the balls to firm up and flavors to meld.
- Enjoy! Store leftovers in the fridge for up to a week.
Notes
For best texture, use creamy peanut butter. If dough is too sticky, chill before rolling. For a vegan version, substitute honey with maple syrup. For nut-free, use sunflower seed butter or tahini. Store in an airtight container in the fridge for up to 7 days or freeze for up to 3 months.
Nutrition
- Serving Size: 1 ball
- Calories: 185
- Sugar: 10
- Fat: 10
- Saturated Fat: 2
- Carbohydrates: 20
- Fiber: 3
- Protein: 7
Keywords: no-bake protein balls, energy balls, healthy snack, small batch, peanut butter, gluten-free option, vegan option


