Love this? Save it for later!
Share the inspiration with your friends
The neighborhood picnic was in three hours and I’d completely forgotten the pickle situation. Everyone else would be bringing those fancy artisan pickles from the farmer’s market—the ones that cost eight dollars a jar. I had a bag of pickling cucumbers sitting in my fridge, some dill that was starting to look sad, and honestly, not a lot of hope. My neighbor Sarah was already bragging about her fermented garlic dills she’d been babysitting for two weeks.
I mean, I love a good pickle. But I’m not the type to plan that far ahead. So I grabbed the biggest mason jar I could find, threw in some garlic and dill, and made a desperate brine. I didn’t even have time to let them sit overnight—I just poured the hot brine over the cucumbers and prayed. The picnic was at 4 PM. By 2 PM, I was sweating over a jar of pickles that looked way too simple to compete with Sarah’s two-week fermentation project.
Here’s the thing about these crunchy refrigerator dill pickles. They won. Like, actually won. People kept asking me for the recipe, and I had to admit it took me all of fifteen minutes to throw together. Sarah’s pickles were good, sure. But mine had this incredible crunch that hers didn’t—and nobody could believe I’d just made them that morning. Maybe you’ve been there, showing up to something with a dish you threw together in a panic, only to have it be the thing everyone wants.
That’s the magic of this easy homemade crunchy refrigerator dill pickles recipe. No canning, no fermentation, no waiting weeks. Just fresh, crisp pickles that taste like they came from a fancy deli but cost pennies to make. I’ve been making these for three years now, and I still get that little thrill every time I open the fridge and see that jar of golden-green spears waiting for me. Let me tell you, once you start making your own refrigerator pickles, you’ll never go back to store-bought.
Why You’ll Love This Recipe
Listen, I’ve tested a lot of pickle recipes in my time. Some were too salty, some were too soft, and some just didn’t have that satisfying crunch we all crave. After countless batches and a few sad, limp failures, I landed on this version that hits every single note. Here’s why this recipe stands out from the crowd:
- No Canning Required : This is the ultimate lazy cook’s pickle. No water baths, no sterilizing jars, no complicated equipment. Just a jar, some veggies, and a fridge.
- Ready in 24 Hours : While some pickles take weeks, these babies are ready to eat the next day. The flavor keeps developing, but you don’t have to wait long to get your fix.
- Simple Pantry Ingredients : You probably have most of these things already. Vinegar, salt, garlic, dill—that’s the backbone of this whole operation.
- Perfect Crunch Every Time : The secret is in the salt-to-vinegar ratio and the ice bath technique. I’ll share all my tricks so you never end up with a sad, soft pickle.
- Endlessly Customizable : Want spicy pickles? Throw in some red pepper flakes. Prefer sweeter pickles? Add a little sugar. This recipe is a template, not a prison.
What makes this different from all those other refrigerator pickle recipes out there? It’s the balance. I spent months tweaking the vinegar ratio, the salt content, and the chilling method until I got that perfect snap. These aren’t just pickles—they’re the pickles that make people close their eyes after the first bite. The kind that disappear at parties before the chips even get opened. Honestly, it’s comfort food at its simplest: crunchy, tangy, and deeply satisfying without any stress.
What Ingredients You Will Need
This recipe uses simple, wholesome ingredients that work together to create that signature crunch and tangy flavor. Most of these are pantry staples, which makes this recipe perfect for spontaneous pickle cravings.
- Pickling cucumbers (1.5 pounds or about 680g) – Look for small to medium Kirby cucumbers. They’re firmer and have fewer seeds than regular salad cucumbers. I prefer buying them from the farmer’s market when they’re in season, but grocery stores usually carry them too.
- Distilled white vinegar (1 cup or 240ml) – This gives the cleanest, brightest flavor. Apple cider vinegar works in a pinch but will change the color and taste slightly.
- Water (1 cup or 240ml) – Use filtered water if your tap water has a strong chlorine taste. It really does make a difference in the final flavor.
- Kosher salt (2 tablespoons or 36g) – I use Diamond Crystal brand because it dissolves evenly and isn’t too salty. If you’re using table salt, reduce to 1.5 tablespoons since it’s more concentrated.
- Fresh dill (4-6 sprigs, or about 1/4 cup chopped) – Fresh dill is non-negotiable here. Dried dill just doesn’t have the same bright, grassy flavor. I keep a pot of dill growing on my windowsill just for these pickles.
- Garlic cloves (4-5 cloves, smashed) – Smashing the cloves releases more flavor than slicing. I’ve tried both, and smashed garlic gives a more mellow, rounded garlic taste.
- Black peppercorns (1 teaspoon or about 5g) – Whole peppercorns infuse the brine without making it cloudy. Pre-ground pepper just sinks to the bottom and looks sad.
- Red pepper flakes (1/2 teaspoon, optional) – For those who like a little heat. I add these to about half my batches depending on my mood.
- Mustard seeds (1 teaspoon or 5g, optional) – These add a lovely pop of texture and a subtle warmth. Not required, but highly recommended.
- Bay leaf (1 leaf) – Adds an earthy undertone that rounds out the vinegar. I never skip this one.
Substitution notes: If you can’t find pickling cucumbers, Persian cucumbers work well. Avoid English hothouse cucumbers—they’re too watery and will turn mushy. For a low-sodium version, reduce salt to 1 tablespoon, but know that the pickles won’t stay as crunchy as long.
Equipment Needed
The beauty of this recipe is that you don’t need any fancy equipment. Here’s what you’ll need:
- Quart-sized mason jar (32 oz or 1 liter) – Wide-mouth jars are easier to pack with cucumbers. I use Ball or Kerr brand jars that I’ve collected over the years.
- Small saucepan – For making the brine. Any 1-2 quart pot will work.
- Cutting board and knife – For prepping cucumbers and garlic.
- Measuring cups and spoons – Accuracy matters for the brine ratio.
- Large bowl – For the ice bath that helps maintain crunch.
- Funnel (optional but helpful) – Makes pouring brine into the jar much less messy.
If you don’t have a mason jar, any glass container with a tight-fitting lid works. I’ve used repurposed pasta sauce jars before—just make sure they’re thoroughly cleaned. Avoid plastic containers as they can absorb smells and may not seal as well. My favorite budget-friendly tip is to save jars from store-bought pickles and reuse them. They’re already pickle-smelling, so it feels right.
Preparation Method
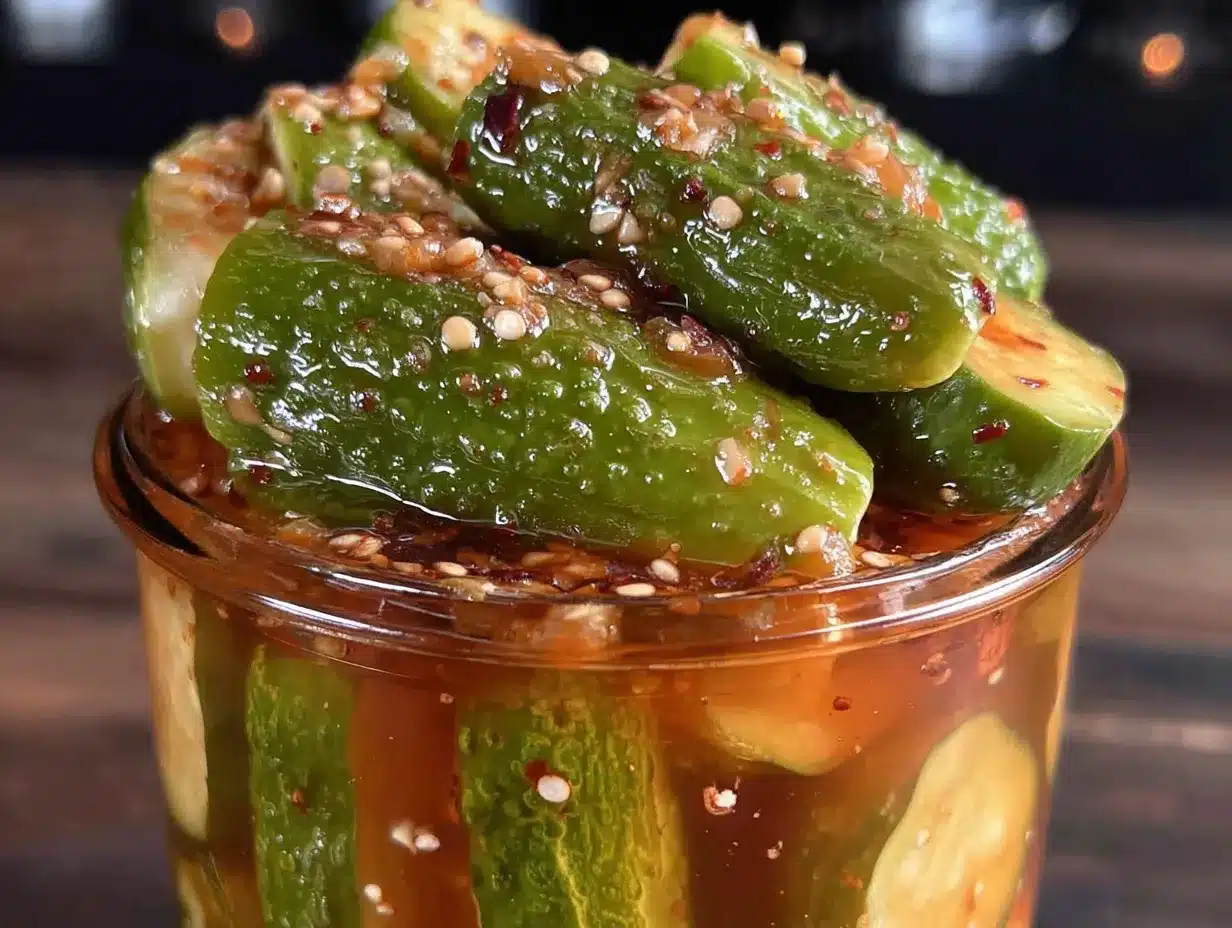
Making these crunchy refrigerator dill pickles is almost embarrassingly easy. Here’s how to do it step by step:
- Prepare the cucumbers. Wash your cucumbers thoroughly and trim off the blossom end (the tip opposite the stem). That little end contains enzymes that can make pickles mushy. Cut your cucumbers into spears—I usually quarter them lengthwise, but you can also slice them into rounds if you prefer. For spears, aim for about 1/2-inch thick pieces.
- Make the ice bath. Fill a large bowl with cold water and plenty of ice. Drop your cucumber spears into the ice bath and let them sit for 20-30 minutes. This is my secret to extra-crunchy pickles. The cold water firms up the cucumber cells, so they stay crisp even after sitting in brine. I learned this trick from my grandmother, and it’s never failed me.
- Prepare the aromatics. While the cucumbers are chilling, smash your garlic cloves with the flat side of your knife. Rinse your dill sprigs and pat them dry. Set out your peppercorns, mustard seeds, and bay leaf.
- Make the brine. In a small saucepan, combine 1 cup water, 1 cup white vinegar, and 2 tablespoons kosher salt. Bring this to a boil over medium-high heat, stirring occasionally to help the salt dissolve. Once it’s boiling, remove it from the heat and let it cool for about 5 minutes. You want the brine hot but not boiling when it hits the cucumbers—boiling brine can start cooking them and ruin the crunch.
- Pack the jar. Drain the cucumbers from their ice bath and pat them dry with a clean kitchen towel. Pack the cucumber spears into your mason jar as tightly as you can without crushing them. Tuck the dill sprigs, smashed garlic cloves, peppercorns, mustard seeds, and bay leaf in between the cucumbers. I like to layer the aromatics throughout the jar so every pickle gets some flavor.
- Pour the brine. Carefully pour the warm brine over the cucumbers, making sure they’re completely submerged. Leave about 1/2 inch of headspace at the top of the jar. If your cucumbers float (they will), you can weigh them down with a small glass ramekin or just press them down with a spoon before sealing.
- Cool and refrigerate. Let the jar cool to room temperature on the counter, about 30-60 minutes. Then screw on the lid and pop the jar into the refrigerator. Here’s the hard part: wait at least 24 hours before tasting. The pickles need time to absorb the brine. I know it’s tempting, but trust me—they get better with patience.
Troubleshooting tip: If your pickles taste too vinegary at first, don’t panic. The flavor mellows significantly after a day or two in the fridge. If they’re too salty, next time reduce the salt by half a tablespoon. The beauty of this recipe is that you can adjust it to your taste with each batch.
Cooking Tips & Techniques
Over the years, I’ve made plenty of pickle mistakes so you don’t have to. Here are my best tips for perfect crunchy refrigerator dill pickles every time:
- Don’t skip the ice bath. I know it seems like an extra step, but this is the single most important thing for crunchy pickles. I once skipped it because I was in a hurry, and my pickles were noticeably softer. Never again.
- Use the right cucumbers. Regular salad cucumbers have thick skins and watery centers that turn mushy. Pickling cucumbers (Kirby or Persian) are denser and stay crunchier. If you can only find English cucumbers, scoop out the seeds before pickling.
- Cut uniform pieces. Try to make your spears roughly the same size so they pickle evenly. Thicker pieces need more time, while thin slices get fully pickled faster. I aim for 1/2-inch thick spears.
- Don’t overheat the brine. Boiling brine can start cooking the cucumbers, which softens them. I bring the brine to a boil, then let it cool for 5 minutes before pouring. Warm brine infuses faster than cold brine without damaging the texture.
- Pat cucumbers dry. After the ice bath, make sure to dry the cucumbers before packing them. Extra water dilutes the brine and can lead to bland pickles.
- Label your jar. I write the date on the lid with a permanent marker so I know when they’re ready. It also helps me keep track of older batches so nothing gets forgotten in the back of the fridge.
One mistake I made early on was using too much garlic. I love garlic, so I threw in like 8 cloves. The pickles ended up with a harsh, almost bitter flavor. Stick to 4-5 smashed cloves—it’s plenty. The flavor mellows and becomes sweet and aromatic rather than sharp.
Variations & Adaptations
Once you’ve mastered the basic recipe, the possibilities are endless. Here are some of my favorite variations:
- Spicy Pickles : Add 1-2 whole dried chilies or an extra teaspoon of red pepper flakes. I also like to throw in a slice of fresh jalapeño for a brighter heat.
- Garlic Dill Pickles : Double the garlic and add a tablespoon of fresh dill seeds along with the dill sprigs. This gives you that classic deli-style pickle flavor.
- Sweet Bread and Butter Style : Add 1/4 cup of sugar to the brine and reduce the salt to 1.5 tablespoons. These are great on burgers or just snacking.
- Herb-Infused Pickles : Try adding a sprig of fresh tarragon, thyme, or rosemary. My favorite combination is dill with a single sprig of fresh tarragon—it adds a subtle anise flavor that’s incredible.
- Quick Pickled Vegetables : Use the same brine for pickled carrots, radishes, or green beans. Just adjust the pickling time based on thickness. Carrots need about 48 hours, while radishes are ready in 12.
I once made a batch with fennel fronds instead of dill because I ran out. It was surprisingly good—like a Mediterranean pickle. Don’t be afraid to experiment. The brine is forgiving, and you might stumble onto something amazing.
Serving & Storage Suggestions
These pickles are best served cold, straight from the fridge. The chill enhances the crunch and makes the flavors pop. Here’s how I like to use them:
- On sandwiches : These are perfect on any sandwich, but they really shine on a classic deli-style reuben or a simple turkey and Swiss.
- As a snack : I eat them straight from the jar like potato chips. They’re my go-to afternoon craving crusher.
- With cheese boards : The tangy crunch pairs beautifully with aged cheddar, creamy brie, or sharp provolone.
- In potato salad : Chop them up and add to your favorite potato salad for extra texture and brightness.
- Bloody Mary garnish : A pickle spear in a Bloody Mary is non-negotiable in my house. These are perfect for that.
Storage: These pickles will keep in the refrigerator for up to 3 months. The flavor continues to develop over the first week, then stabilizes. After about 2 months, the texture starts to soften slightly, but they’re still delicious. Always use a clean fork or tongs to remove pickles from the jar to avoid introducing bacteria. If you see any mold or off smells, toss them immediately (though I’ve never had that happen with this recipe).
Reusing the brine: After you finish a jar of pickles, you can reuse the brine for a second batch! Just add fresh cucumbers and aromatics, and let them sit for 48 hours. The second batch won’t be quite as flavorful, but it’s still good. I usually get two batches out of one brine before it loses its punch.
Nutritional Information & Benefits
These pickles are surprisingly healthy for something so satisfying. Here’s the approximate nutritional breakdown per serving (about 3 spears):
| Nutrient | Amount |
|---|---|
| Calories | 5-10 |
| Sodium | 350-400mg |
| Carbohydrates | 1-2g |
| Sugar | 0.5g |
| Vitamin K | 15% DV |
The main health benefit here is the probiotics from fermentation—wait, these aren’t fermented! But they do contain beneficial bacteria from the raw vegetables, and the vinegar has been linked to blood sugar regulation. Cucumbers are hydrating and provide vitamin K and antioxidants. Plus, pickles are a great low-calorie snack that satisfies that salty, crunchy craving without derailing your diet. Just watch the sodium if you’re salt-sensitive. I make a low-sodium version for my dad by reducing the salt to 1 tablespoon, and they still taste great.
These pickles are naturally gluten-free, dairy-free, and vegan. They’re also keto-friendly and low-carb, with virtually no sugar. If you’re watching your sodium, you can use a salt substitute, but the texture may be slightly different.
Conclusion
These crunchy refrigerator dill pickles have become a staple in my kitchen for good reason. They’re ridiculously easy to make, require no special equipment, and deliver that perfect crunch every single time. Whether you’re a pickle purist who loves classic dill or an adventurous eater who wants to experiment with spices and herbs, this recipe is your starting point.
I love this recipe because it reminds me that good food doesn’t have to be complicated. Sometimes the simplest things—cucumbers, vinegar, dill, garlic—come together to create something truly special. It’s the kind of recipe that makes you feel like a kitchen wizard without actually doing much work. And honestly, isn’t that the best kind of recipe?
I’d love to hear how your pickles turn out! Drop a comment below and let me know what variations you tried, or tag me in your pickle photos on social media. Did you add extra garlic? Throw in some jalapeño? Make a huge batch for a party? I read every comment, and your experiments inspire my next batch. Happy pickling, friend—I promise you’re going to love these.
Frequently Asked Questions
Can I use regular cucumbers instead of pickling cucumbers?
You can, but the texture won’t be the same. Regular salad cucumbers have more water and thinner skins, which leads to softer pickles. If you must use them, scoop out the seeds first and cut them into thicker spears. They’ll still taste good, just not as crunchy.
How long do these pickles last in the fridge?
These pickles stay good for up to 3 months in the refrigerator. The flavor is best between days 2 and 30. After that, the texture gradually softens, but they’re still safe to eat as long as they look and smell fine. Always use clean utensils when removing pickles from the jar.
Can I make these pickles without vinegar?
Vinegar is essential for this recipe because it provides the acidity that preserves the pickles and gives them that tangy flavor. If you want pickles without vinegar, you’d need to use a fermentation method instead, which takes weeks and requires different techniques.
Why are my pickles soft or mushy?
Soft pickles usually happen for one of three reasons: you skipped the ice bath, you used the wrong type of cucumber, or your brine was too hot when you poured it. Make sure to use pickling cucumbers, give them a 20-minute ice bath, and let your brine cool slightly before pouring. Also, make sure you trimmed the blossom end of the cucumbers.
Can I double or halve this recipe?
Absolutely! This recipe scales perfectly. Just maintain the same ratio of vinegar, water, and salt. For a half batch, use a pint-sized jar and halve all ingredients. For a double batch, use a half-gallon jar or two quart jars. The pickling time stays the same regardless of batch size.
Pin This Recipe!
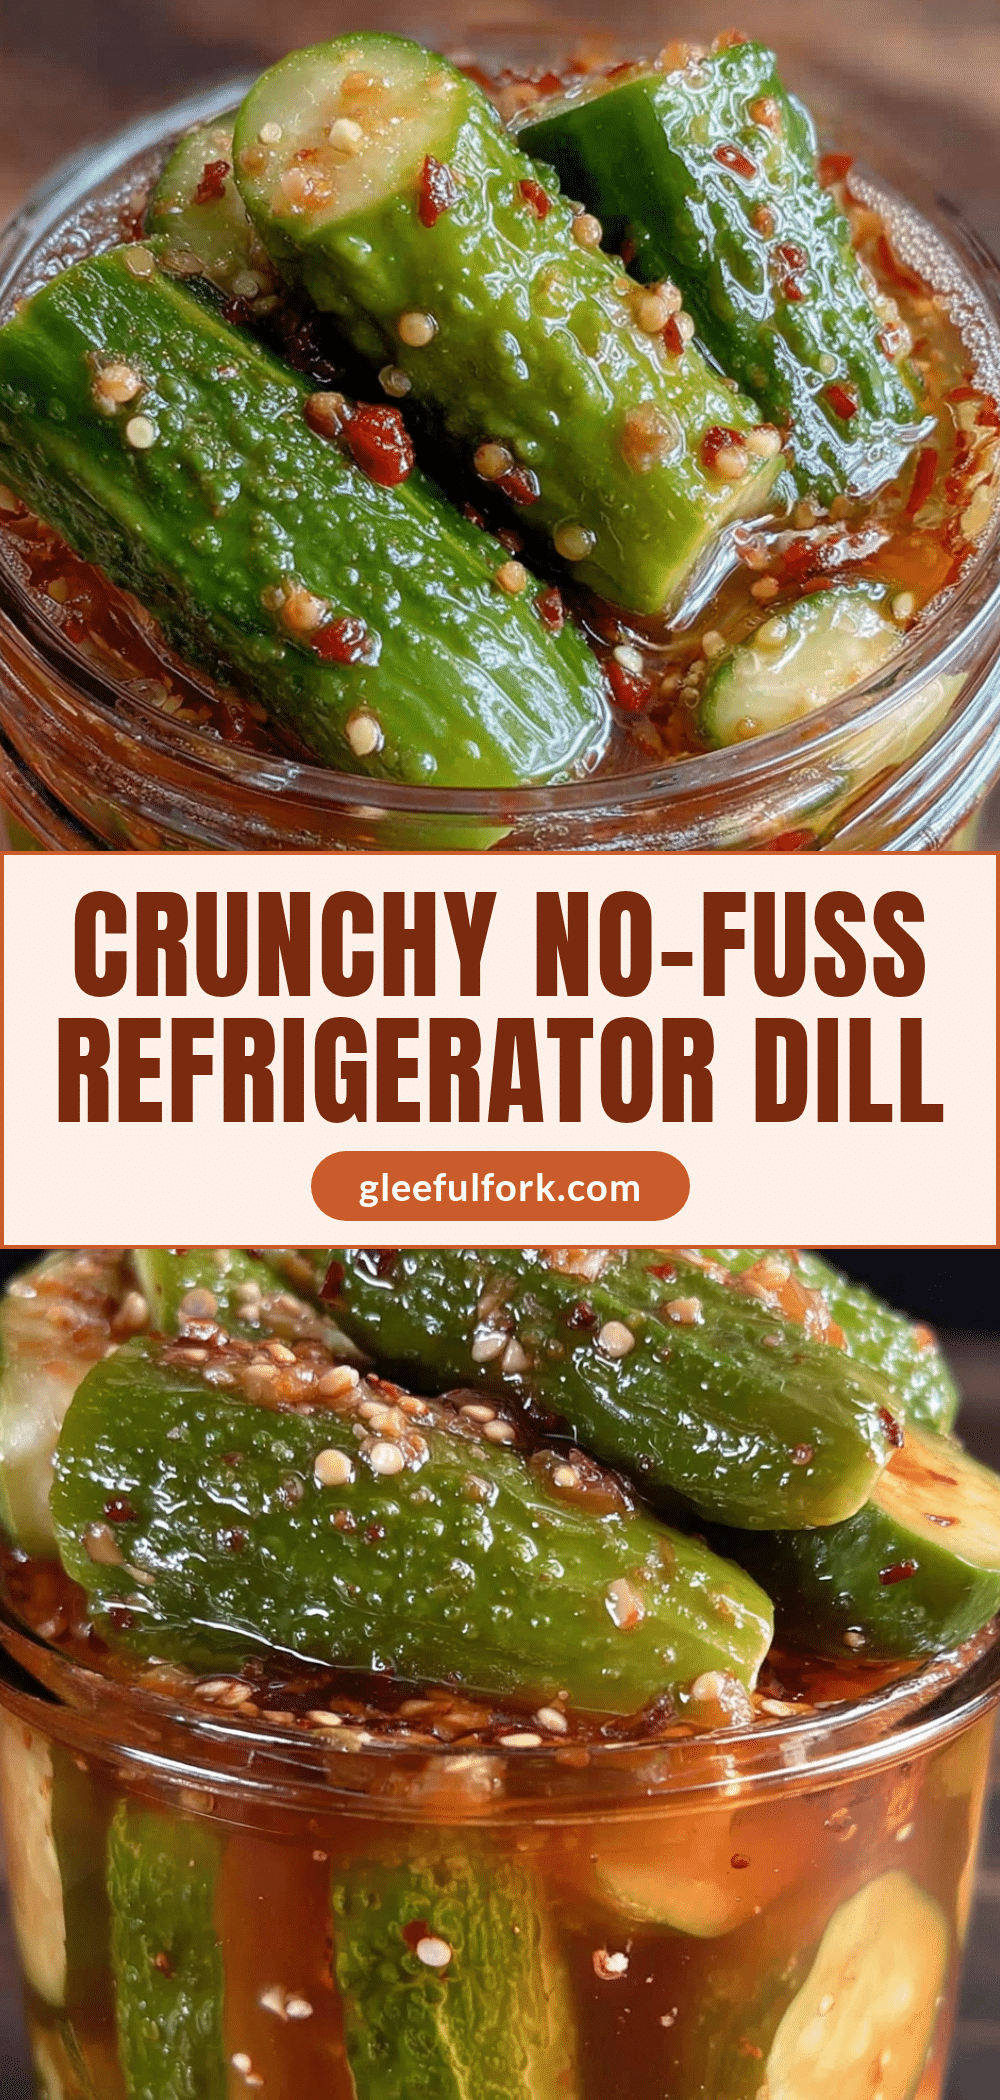
Easy Homemade Crunchy Refrigerator Dill Pickles Recipe
These crunchy refrigerator dill pickles are ready in 24 hours with no canning or fermentation required. Made with simple pantry ingredients, they deliver a perfect crunch and tangy flavor that will make you never go back to store-bought.
- Prep Time: 15 minutes
- Cook Time: 5 minutes
- Total Time: 24 hours 20 minutes (includes cooling and refrigeration time)
- Yield: 4 servings (about 3 spears per serving) 1x
- Category: Appetizer, Snack, Condiment
- Cuisine: American
Ingredients
- 1.5 pounds (about 680g) pickling cucumbers (Kirby or Persian)
- 1 cup (240ml) distilled white vinegar
- 1 cup (240ml) water (filtered if possible)
- 2 tablespoons (36g) kosher salt (Diamond Crystal preferred; reduce to 1.5 tablespoons if using table salt)
- 4–6 sprigs fresh dill (or about 1/4 cup chopped)
- 4–5 garlic cloves, smashed
- 1 teaspoon (about 5g) black peppercorns
- 1/2 teaspoon red pepper flakes (optional)
- 1 teaspoon (5g) mustard seeds (optional)
- 1 bay leaf
Instructions
- Prepare the cucumbers: Wash cucumbers thoroughly and trim off the blossom end (the tip opposite the stem). Cut into spears about 1/2-inch thick (quarter lengthwise) or slice into rounds.
- Make the ice bath: Fill a large bowl with cold water and plenty of ice. Drop cucumber spears into the ice bath and let sit for 20-30 minutes. This helps maintain crunch.
- Prepare the aromatics: While cucumbers chill, smash garlic cloves with the flat side of a knife. Rinse dill sprigs and pat dry. Set out peppercorns, mustard seeds, and bay leaf.
- Make the brine: In a small saucepan, combine 1 cup water, 1 cup white vinegar, and 2 tablespoons kosher salt. Bring to a boil over medium-high heat, stirring occasionally to dissolve salt. Remove from heat and let cool for about 5 minutes (brine should be hot but not boiling when poured).
- Pack the jar: Drain cucumbers from ice bath and pat dry with a clean kitchen towel. Pack cucumber spears tightly into a quart-sized mason jar. Tuck dill sprigs, smashed garlic cloves, peppercorns, mustard seeds, and bay leaf in between the cucumbers.
- Pour the brine: Carefully pour warm brine over cucumbers, ensuring they are completely submerged. Leave about 1/2 inch of headspace at the top. If cucumbers float, weigh them down with a small glass ramekin or press down with a spoon before sealing.
- Cool and refrigerate: Let jar cool to room temperature on the counter (30-60 minutes). Screw on lid and refrigerate. Wait at least 24 hours before tasting for best flavor.
Notes
For extra crunch, don’t skip the ice bath. Use pickling cucumbers (Kirby or Persian) for best texture; avoid English hothouse cucumbers. If pickles taste too vinegary at first, the flavor mellows after a day or two. For low-sodium version, reduce salt to 1 tablespoon. Pickles keep in refrigerator for up to 3 months; use clean utensils when removing from jar. Brine can be reused for a second batch (add fresh cucumbers and aromatics, let sit 48 hours).
Nutrition
- Serving Size: 3 spears
- Calories: 510
- Sugar: 0.5
- Sodium: 350400
- Carbohydrates: 12
Keywords: refrigerator pickles, dill pickles, crunchy pickles, easy pickles, no canning pickles, homemade pickles, quick pickles


