Love this? Save it for later!
Share the inspiration with your friends
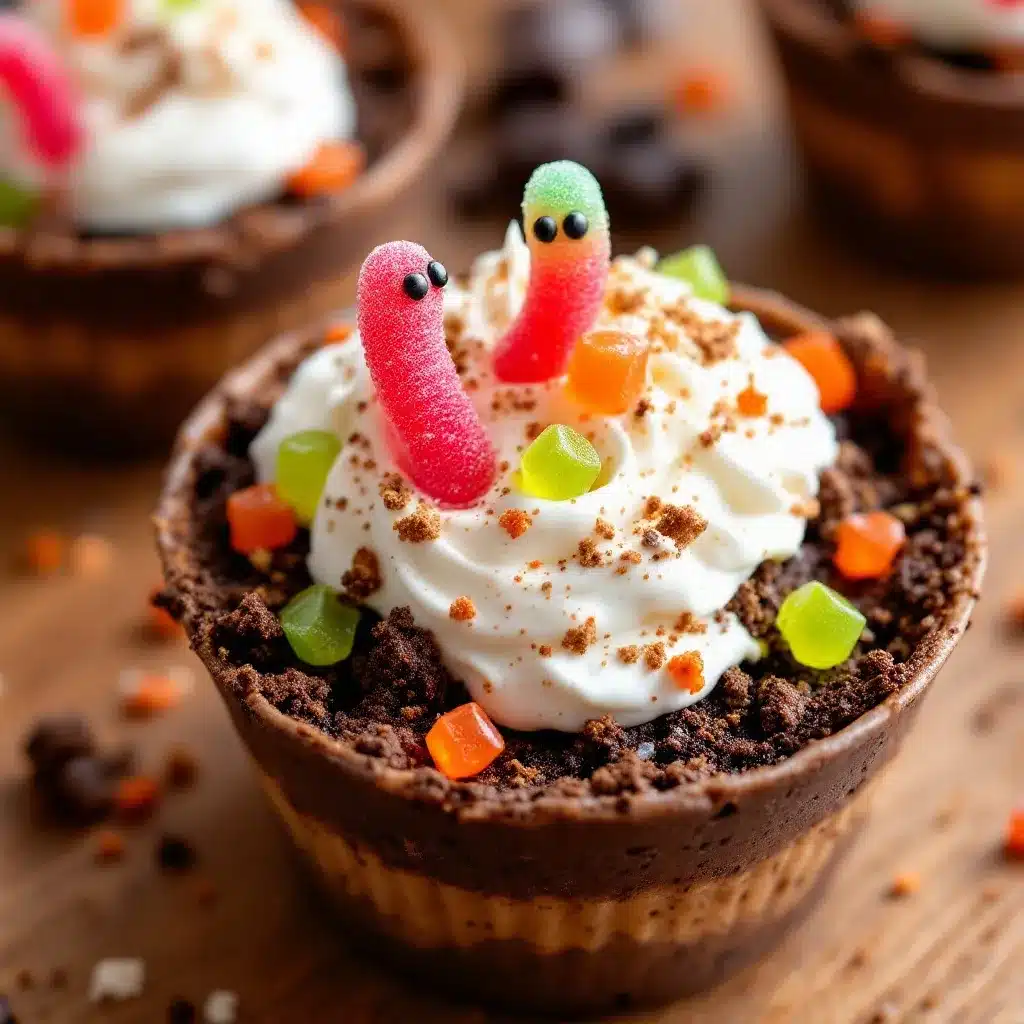
It is 3:15 AM, and the house is dead quiet. The only thing I want is a quiet moment with these Easy Halloween Dirt Cups with Gummy Worms. The streetlights cast long, strange shadows across the kitchen tiles, and the refrigerator hums a low, steady note that feels like the only sound in the world. I am not cooking for an audience. There are no cameras set up, no ring lights reflecting off the stainless steel counter, and definitely no audience waiting for a perfect plating.
I am just a solitary cook in the dark, looking for a little bit of magic before the sun comes up. The kids are asleep upstairs, dreaming about candy corn and costume choices. The adults are likely dreaming of sleep, or bills, or the endless to-do list that never shrinks. But right now, in this quiet hour, I am making dessert that looks like dirt. It is strange, isn’t it? How something so simple can feel so significant when the rest of the world is asleep.
I crush the cookies with a rolling pin, listening to the crunch. It is a satisfying sound, rhythmic and heavy. The smell of chocolate wafts up, mixing with the cool night air coming from the open window. It smells like comfort. It smells like childhood. I remember making these when I was seven, wearing my pajamas over my costume, waiting for the doorbell to ring. The anticipation was better than the candy itself.
Now, I make them for my own children, but the ritual remains the same. It is a small act of rebellion against the rush of daily life. In a world that demands speed and efficiency, taking twenty minutes to layer pudding, crumbs, and worms is a luxury. It is a pause button. It is a way to say, “This moment matters, even if it is just a cup of dirt in a plastic container.”
The worms are placed carefully, just like I did back then. Not too messy, not too perfect. Just right. As I set the last cup on the counter, I realize this isn’t just about Halloween. It is about creating memories in the small, quiet spaces. It is about knowing that tomorrow, those kids will eat this “dirt” and laugh, and for a moment, they won’t have to worry about anything. That is enough for me. That is the whole point.
Why You’ll Love This Recipe
Let’s be honest for a second. We all have those moments where we need a win in the kitchen. Something fast, something cheap, and something that looks like you actually tried. This Easy Halloween Dirt Cups with Gummy Worms recipe is exactly that. It is not complicated. It does not require a culinary degree. It requires patience and a little bit of imagination.
- Quick & Easy : This recipe comes together in under 15 minutes. I have made this on Tuesday nights when I was exhausted, and it saved dinner. You don’t need to turn on the oven. You don’t need to preheat anything. Just assemble and chill.
- Simple Ingredients : You likely already have everything in your kitchen right now. Chocolate pudding, milk, cookies, and gummy worms. No fancy grocery trips needed. No obscure spices sitting at the back of your pantry that you bought in 2019 and forgot about.
- Perfect for Parties : Whether it is a Halloween classroom party, a spooky movie night, or just a Tuesday night snack, these cups are perfect. They are individual portions, which means no fighting over the last slice. Everyone gets their own little world of “dirt.”
- Crowd-Pleaser : Kids love them. Adults love them. I have served these to friends who are usually picky eaters, and they always ask for the recipe. It is hard to say no to chocolate pudding and worms.
- Unbelievably Delicious : The texture combo is next-level comfort food. The cool, smooth pudding against the crunchy cookie crumbs creates a contrast that is surprisingly sophisticated. It is not just sugar; it is a sensory experience.
What makes this recipe different from the rest? Well, honestly, most people just dump the pudding in a bowl and call it a day. But here is the trick: you need to let the pudding thicken slightly before you add the crumbs. It prevents the bottom from becoming a soupy mess. It is a small detail, but it makes a huge difference. Also, using high-quality chocolate cookies makes a world of difference compared to generic store brands. I prefer brands that have a richer cocoa flavor. It elevates the whole thing without adding any effort.
This recipe isn’t just good—it is the kind that makes you close your eyes after the first bite. It is comfort food reimagined for the spooky season. It is healthier than a slice of cake, faster than a pie, and with the same soul-soothing satisfaction. Perfect for impressing guests without stress, or turning a simple meal into something memorable. It is a recipe that sticks with you.
What Ingredients You Will Need
This recipe uses simple, wholesome ingredients to deliver bold flavor and satisfying texture without the fuss. The beauty of this dessert is its reliance on pantry staples. You do not need to go out and buy anything special. If you have chocolate pudding and cookies, you are already halfway there. The ingredients are grouped by function to help you organize your prep, though honestly, you can just grab whatever is closest to you.
For the Dirt Layer
- Chocolate Wafer Cookies : This is the base of your “dirt.” I recommend using Nilla Wafers or a high-quality chocolate cookie like Oreos (without the cream filling for a purer chocolate taste). These provide the necessary crunch. Avoid soft cookies, as they won’t crush well.
- Unsalted Butter : A small amount of melted butter helps the crumbs stick together slightly, mimicking the texture of real soil. It adds a rich mouthfeel. Use about two tablespoons for every cup of crumbs.
For the Pudding Layer
- Instant Chocolate Pudding Mix : Two boxes of instant pudding mix are standard. I trust brands like Jell-O or Kraft for consistency. Their texture is engineered to be smooth, which is exactly what you want for this dessert.
- Milk : Cold whole milk works best. The fat content helps the pudding set properly. If you are dairy-free, you can use a plant-based milk, but the texture might be slightly thinner.
- Heavy Cream : (Optional) For an extra rich texture, you can fold in a little whipped heavy cream. It lightens the pudding and makes it fluffier. This is a chef’s tip that I learned from trial and error.
For the Toppings
- Gummy Worms : The stars of the show. You want the standard red gummy worms. They are sour, sweet, and fun. Look for brands that are not too hard; you want them chewy.
- Mini Chocolate Chips : These add extra texture and look like little rocks or beetles in the dirt. They are optional but highly recommended for that extra crunch.
One thing to note: if you are using Oreos, make sure to scrape the cream filling off first. The cream filling can make the dirt layer too dense and sticky. You want dry, crumbly dirt. Also, for the best results, crush your cookies in a food processor for uniform crumbs. If you use a rolling pin, you might end up with large chunks that are hard to eat. It is a minor inconvenience for a major payoff.
Equipment Needed
You do not need a fancy kitchen to make this. Here is what you will need:
- Food Processor or Blender : This is the best tool for crushing cookies. It gives you uniform, fine crumbs in seconds. If you do not have one, a heavy-duty blender works too.
- Ziploc Bags and Rolling Pin : The budget-friendly alternative. Place cookies in a bag and crush them with a rolling pin. It takes more effort, but it is free. Just be careful not to tear the bag.
- Mixing Bowls : You will need two medium-sized bowls. One for the pudding, one for the crumbs.
- Serving Cups : Clear plastic cups, mason jars, or small glass bowls work best. You want to see the layers. Clear containers are essential for the visual effect.
- Whisk : For mixing the pudding. A whisk ensures there are no lumps.
I personally prefer using mason jars for storage because they seal well. If you are making these ahead of time, mason jars keep the crumbs from getting soggy for longer. Plastic cups are fine for immediate serving, but they can warp if they get too cold. Just a small tip from experience.
Preparation Method
- Prepare the “Dirt” : Take your chocolate cookies and remove any cream filling if using Oreos. Place the cookies in a food processor. Pulse until they are fine crumbs. If using a rolling pin, crush them in a sealed bag until they resemble sand. Transfer the crumbs to a bowl. Stir in the melted butter until the mixture looks like wet sand. Set aside. (Time: 5 minutes)
- Make the Pudding : In a medium bowl, whisk together the instant pudding mix and cold milk. Whisk vigorously for two minutes until the mixture thickens. Do not skip this step; under-mixed pudding will be runny. If you want a fluffier texture, fold in whipped heavy cream now. (Time: 3 minutes)
- Assemble the Cups : Take your serving cups. Start with a layer of the cookie crumb mixture at the bottom. About one inch deep. Press it down lightly with the back of a spoon. This is your first layer of dirt. (Time: 2 minutes)
- Add the Pudding : Spoon the pudding mixture over the crumb layer. Fill the cup about halfway. Smooth the top with a spatula. Be gentle so you do not disturb the bottom layer too much. (Time: 2 minutes)
- Add the Second Dirt Layer : Add another layer of cookie crumbs on top of the pudding. This should be about an inch thick. Press it down gently. Now you have a sandwich of pudding and dirt. (Time: 2 minutes)
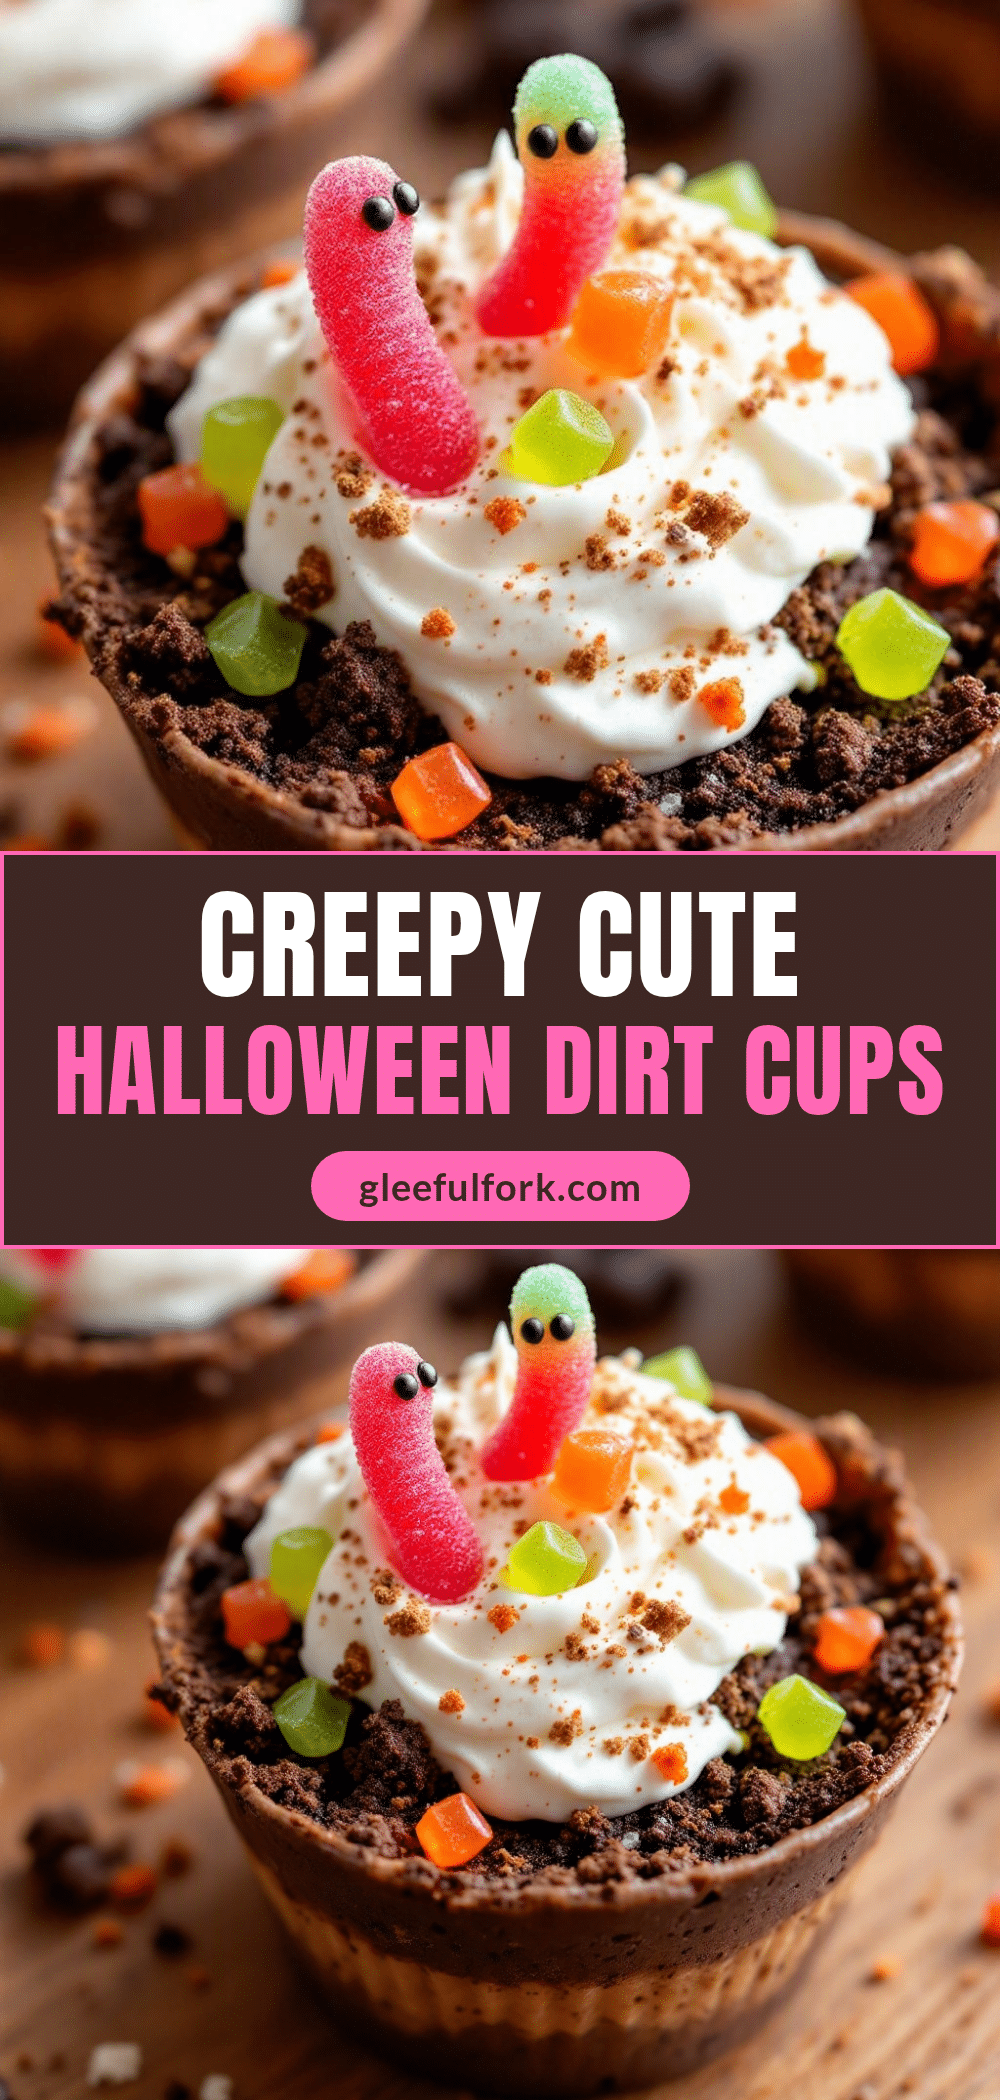
- Top with Worms : Take your gummy worms and arrange them on top. Stick them into the crumbs so they look like they are burrowing out of the dirt. Add mini chocolate chips if you like. (Time: 2 minutes)
- Chill : Place the cups in the refrigerator for at least 30 minutes. This helps the flavors meld and the pudding set. (Time: 30 minutes)
Troubleshooting tip: If your pudding is too runny, add a little more pudding mix. If it is too thick, add a splash more milk. The consistency should be like thick yogurt. If your crumbs are too large, you will have a poor texture. Take the time to crush them finely.
Cooking Tips & Techniques
Here are some professional techniques to make this recipe perfect:
- Don’t Rush the Pudding : Instant pudding needs time to hydrate. Whisk it for the full two minutes. If you rush it, you will get lumps. Lumps are the enemy of smooth dessert.
- Use Cold Ingredients : Keep your milk and pudding mix cold. Warm ingredients can cause the pudding to separate or become watery. This is a common mistake I made early on.
- Layering Technique : When layering, use a spoon to gently place the crumbs. Do not dump them from a height. This prevents the pudding from splashing up and mixing with the dirt. Clean layers look better.
- Worm Placement : Stick the worms in just before serving. If you let them sit in the fridge for hours, they can get slimy or dissolve slightly. Fresh worms are best.
I once tried making this with homemade pudding. It was too loose. The crumbs turned into mush immediately. Stick to instant pudding for this specific recipe. It is engineered for stability. Also, if you are making these for a party, make them the morning of the event. They hold up well in the fridge for up to 24 hours.
Variations & Adaptations
This recipe is very flexible. Here are some ways to change it up:
- Strawberry Dirt Cups : Use strawberry pudding mix and vanilla wafers instead of chocolate cookies. It looks pink and white, like a strawberry field. Add fresh strawberry slices on top.
- Orange Creamsicle : Use orange pudding and vanilla cookies. Top with orange segments. This is a fun twist for fall.
- Gluten-Free Option : Use gluten-free chocolate cookies and gluten-free pudding mix. Many brands offer these options now. The texture is surprisingly similar.
- Vegan Version : Use almond milk and vegan pudding mix. Use vegan cookies. There are many good plant-based options available.
I once tried making this with pumpkin pudding for Thanksgiving. It was a hit. The spice complemented the chocolate well. It is a great way to use up leftover pudding mix. Don’t be afraid to experiment.
Serving & Storage Suggestions
Serve these cold. They taste best chilled. The cold pudding contrasts nicely with the room-temperature cookies. For presentation, use clear cups so the layers are visible. You can add a small plastic spider or a bat on top for extra Halloween flair.
Store leftovers in the refrigerator. Cover the cups with plastic wrap or lids. They will keep for up to 2 days. After that, the crumbs will get too soft. Do not freeze these, as the pudding will separate when thawed. It becomes watery and unappetizing.
If you are making them ahead, keep the worms separate. Add them right before serving. This ensures they stay fresh and chewy. The flavors develop over time, becoming more cohesive. But the texture is best when fresh.
Nutritional Information & Benefits
Each cup contains approximately 250 calories. It is a treat, so enjoy it in moderation. The pudding provides calcium, and the cookies provide some iron. However, it is high in sugar. For a healthier option, use less sugar pudding or add a layer of Greek yogurt. It adds protein and tanginess. I sometimes do a half-and-half mix of pudding and yogurt for a lighter version. It is still delicious, just a bit more nutritious.
Conclusion
This Easy Halloween Dirt Cups with Gummy Worms recipe is more than just a dessert. It is a moment of joy. It is simple, fun, and delicious. I hope you try it and share it with your family. Customize it to your liking. Add your own twists. Make it your own. And please, leave a comment below. I love hearing about your creations. Thank you for cooking with me. Enjoy the spooky season.
FAQs
Can I make these dirt cups ahead of time?
Yes, you can assemble them up to 24 hours in advance. Just keep the gummy worms separate and add them right before serving to prevent them from getting soggy. Store them in the refrigerator in airtight containers.
What can I use instead of chocolate pudding?
You can use vanilla pudding for a different flavor profile, or chocolate mousse for a richer texture. Instant pudding is easiest, but you can also make homemade pudding if you have time. Just ensure it is thick enough to hold its shape.
How do I get fine cookie crumbs?
The best way is to use a food processor. Pulse the cookies until they are fine. If you do not have one, place the cookies in a heavy-duty ziplock bag and crush them with a rolling pin or a heavy pan. Be thorough to avoid large chunks.
Can I use gummy bears instead of worms?
Absolutely. Gummy bears, spiders, or bats work well too. It is all about the fun factor. Just make sure they are small enough to fit in the cup and look good on top.
Are these cups gluten-free?
Standard recipes are not gluten-free due to the cookies and pudding mix. However, you can easily make them gluten-free by using gluten-free cookies and a certified gluten-free pudding mix. Check the labels of all ingredients.
Pin This Recipe!
Easy Halloween Dirt Cups with Gummy Worms
A quick, no-bake Halloween dessert featuring layers of chocolate pudding, crushed chocolate cookie crumbs, and gummy worms. This simple treat is perfect for parties, classroom events, or a spooky late-night snack.
- Prep Time: 15 minutes
- Cook Time: 0 minutes
- Total Time: 45 minutes
- Yield: 4 servings
- Category: Dessert
- Cuisine: American
Ingredients
- Chocolate Wafer Cookies (e.g., Oreos without cream filling)
- Unsalted Butter, melted
- Instant Chocolate Pudding Mix (2 boxes)
- Cold Whole Milk
- Heavy Cream (optional, for fluffier texture)
- Gummy Worms
- Mini Chocolate Chips (optional)
Instructions
- Prepare the ‘Dirt’: Remove cream filling from cookies if using Oreos. Pulse cookies in a food processor until fine crumbs form (or crush in a sealed bag with a rolling pin). Transfer to a bowl and stir in melted butter until resembling wet sand.
- Make the Pudding: In a medium bowl, whisk instant pudding mix and cold milk vigorously for 2 minutes until thickened. If desired, fold in whipped heavy cream.
- Assemble the Cups: Place a 1-inch layer of cookie crumb mixture at the bottom of serving cups and press down lightly.
- Add the Pudding: Spoon pudding mixture over the crumb layer, filling the cup about halfway. Smooth the top gently.
- Add the Second Dirt Layer: Add another 1-inch layer of cookie crumbs on top of the pudding and press down gently.
- Top with Worms: Arrange gummy worms on top, sticking them into the crumbs to look like they are burrowing out. Add mini chocolate chips if desired.
- Chill: Refrigerate for at least 30 minutes to allow flavors to meld and pudding to set.
Notes
Ensure pudding is whisked thoroughly to avoid lumps. Use cold milk for best texture. If using Oreos, scrape off cream filling to prevent dense crumbs. Add gummy worms just before serving to prevent them from becoming slimy. Store leftovers in the refrigerator for up to 2 days; do not freeze.
Nutrition
- Serving Size: 1 cup
- Calories: 250
- Sugar: 24
- Sodium: 180
- Fat: 12
- Saturated Fat: 7
- Carbohydrates: 35
- Fiber: 2
- Protein: 4
Keywords: Halloween dessert, dirt cups, gummy worms, no-bake dessert, easy party snack, chocolate pudding, kid-friendly treats


