Love this? Save it for later!
Share the inspiration with your friends
I was standing in my kitchen last Tuesday, staring into the freezer like it held the secrets to the universe, when the smell of burnt toast drifted in from the other room. My youngest had tried to make his own breakfast again — bless his heart — and the smoke alarm was doing that thing where it chirps weakly instead of blaring. I pulled out a sad bag of frozen vegetables and a half-empty box of cereal, and I thought, there has to be a better way. And honestly, there is. That’s when I remembered the batch of freezer breakfast burritos I’d stashed away two weeks ago during a rare moment of organizational ambition.
The thing about school mornings, you know, is that they have a way of sneaking up on you. One minute it’s summer, the next you’re hunting for matching socks and signing permission slips at 6:45 AM. I’m not a morning person — let’s just get that out there. I’ve tried being one. I bought the fancy alarm clock, I prepped my coffee the night before, I even did that thing where you sleep in your workout clothes. None of it stuck. What did stick was realizing that if I could make breakfast happen in under two minutes with zero brain power required, I might actually survive the school year without living on granola bars.
These easy freezer breakfast burritos became my secret weapon. They’re not fancy, they’re not complicated, and they definitely won’t win any plating awards. But when you’re running late and the bus is coming and someone can’t find their library book, a warm, cheesy, handheld breakfast that tastes like actual food instead of cardboard? That’s magic, my friend. That’s the kind of small win that makes the whole chaotic morning feel manageable. And the best part? You make them once, and they just sit there in your freezer, waiting like a loyal friend who always shows up when you need them most.
Why You’ll Love This Recipe
Let me tell you, I’ve tested a lot of breakfast burrito recipes over the years. Some were too soggy, some fell apart the second you unwrapped them, and some just tasted… sad. These are not those burritos. After about seven batches and a few very honest opinions from my kids (they’re brutal critics), I landed on a version that checks every box.
- Quick & Easy: From freezer to plate in under 3 minutes. Microwave or oven, your choice. No thawing required. I mean it — straight from frozen to breakfast.
- Simple Ingredients: Nothing weird here. Eggs, cheese, tortillas, and your choice of fillings. You probably have most of it in your kitchen right now.
- Perfect for School Mornings: These were literally designed for those 7 AM chaos sessions. Portable, mess-free, and kid-approved.
- Crowd-Pleaser: I’ve made these for my kids, their friends, even my neighbor who swore she didn’t like breakfast burritos. She asked for the recipe.
- Unbelievably Delicious: The secret is in the technique — we’re talking fluffy eggs, perfectly melted cheese, and fillings that stay juicy without making the tortilla soggy. It’s next-level comfort food that happens to be practical.
What makes these different from every other freezer burrito recipe out there? It’s the little things. I blanch the potatoes before adding them so they don’t turn gray. I undercook the eggs just slightly so they reheat perfectly. And I use a specific wrapping method that keeps everything tight and tidy. This isn’t just another version — it’s the one I actually trust on a Tuesday morning when I haven’t had coffee yet.
These burritos are the kind of thing that makes you feel like you’ve got your life together, even when you absolutely don’t. They’re comfort food reimagined for real life — faster, smarter, but with the same soul-soothing satisfaction. Perfect for impressing yourself on a hectic morning, or turning a chaotic breakfast into something that actually works.
What Ingredients You Will Need
This recipe uses straightforward ingredients that come together to create something genuinely satisfying. No fancy grocery trips required — you likely already have most of these in your kitchen. Here’s what you’ll need and why each one matters.
For the Filling
- Large eggs (12): The foundation of any good breakfast burrito. I use large eggs, room temperature if I remember, but straight from the fridge works fine too.
- Whole milk (¼ cup): Just a splash makes the eggs fluffier. You can use any milk you have on hand, even plant-based.
- Unsalted butter (2 tablespoons): For cooking the eggs. I prefer unsalted so I can control the salt level myself.
- Breakfast sausage (1 pound): I like using mild or spicy pork sausage, but turkey sausage works great too. My go-to brand is Johnsonville — it’s consistently good and not too greasy.
- Frozen shredded hash browns (2 cups): The key to texture. Look for the shredded style, not the patties. I’ve tried making my own from scratch, and honestly, frozen works better here — they’re drier and crisp up nicely.
- Shredded cheddar cheese (2 cups): Sharp cheddar adds the most flavor, but mild cheddar or a Mexican blend works too. Shred it yourself if you have time — it melts better.
- Salt and black pepper (to taste): Don’t be shy with the pepper. It wakes everything up.
- Optional add-ins: Diced bell peppers, onions, black beans, or cooked bacon. I sometimes add a handful of chopped spinach because I’m that mom.
For Assembly
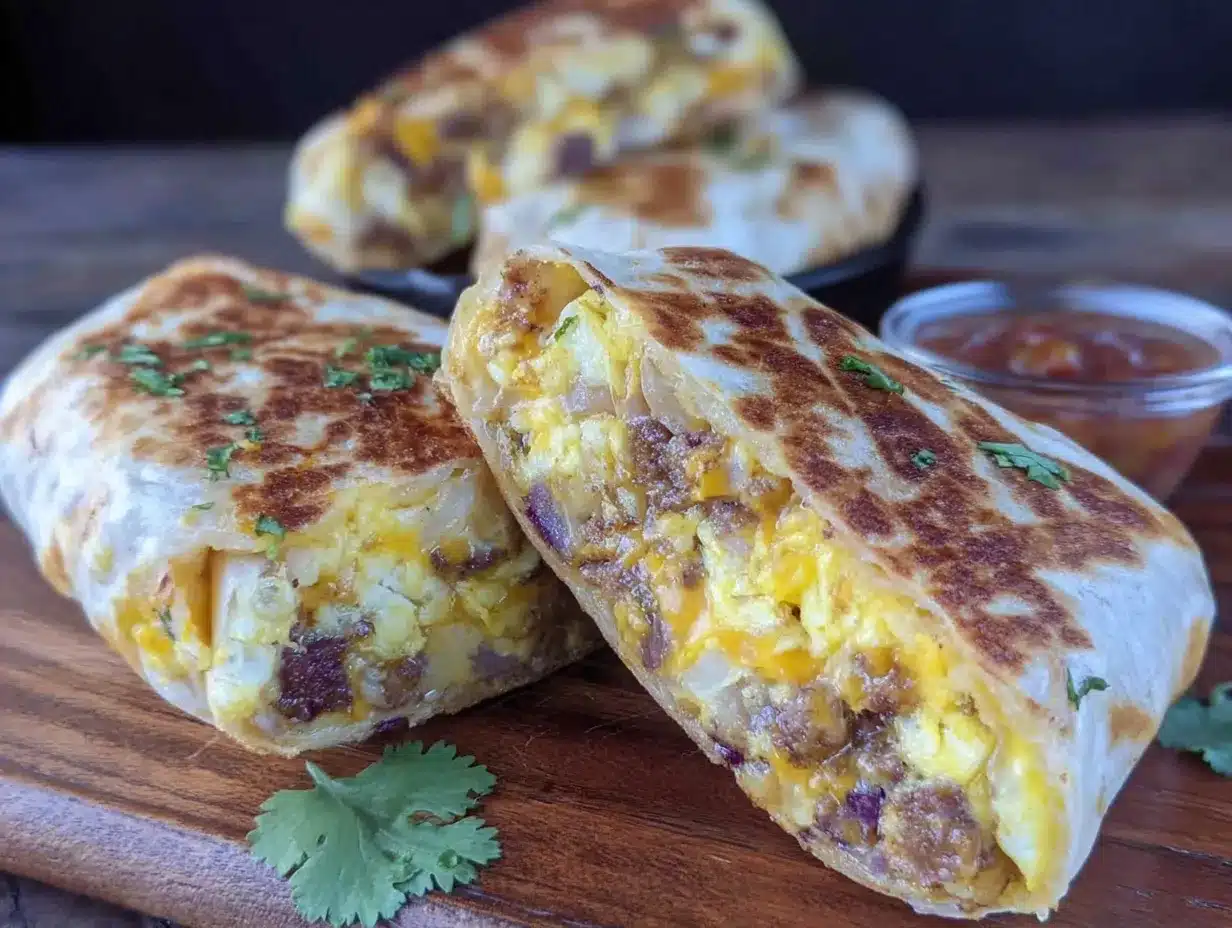
- Large flour tortillas (10-12): Go for the burrito-size ones, about 10 inches. I’ve tried whole wheat and spinach tortillas, and they work fine, but classic flour holds up best in the freezer.
- Freezer-safe zip-top bags: For storing the assembled burritos. Quart-size works for individual wrapping, gallon-size for batch storage.
- Aluminum foil or parchment paper: For wrapping each burrito individually before bagging. Foil is more traditional, but parchment lets you microwave without removing the wrap.
Ingredient Selection Tips
When choosing your tortillas, look for ones that are pliable and fresh. Stiff tortillas crack when you roll them, and nobody wants a burrito that leaks. If your tortillas seem dry, microwave them for 10 seconds wrapped in a damp paper towel — it makes them way more cooperative.
For the cheese, I recommend shredding a block yourself rather than buying pre-shredded. The pre-shredded stuff has anti-caking agents that prevent it from melting smoothly. I learned this the hard way after a batch of sad, grainy burritos. Now I spend the extra three minutes with a grater, and it makes a real difference.
Equipment Needed
You don’t need a professional kitchen to make these burritos, but having the right tools makes the process smoother. Here’s what I use:
- Large non-stick skillet (12-inch): For cooking the sausage and eggs. Non-stick is key here — scrambled eggs have a way of attaching themselves to regular pans.
- Medium skillet or saucepan: For the hash browns. I use a cast iron when I’m feeling fancy, but any pan works.
- Mixing bowl (large): For whisking the eggs and combining everything. I use a glass bowl because it doesn’t hold smells.
- Whisk: For beating the eggs until they’re light and fluffy. A fork works in a pinch, but a whisk is faster.
- Spatula: A silicone one is best — it won’t scratch your non-stick pan.
- Cutting board and knife: For any veggies or add-ins you’re chopping. Nothing fancy needed.
- Baking sheet (optional but helpful): For laying out assembled burritos before freezing. It keeps them from sticking together.
- Parchment paper or wax paper: For wrapping. I prefer parchment because it’s more eco-friendly and doesn’t tear as easily.
- Freezer-safe bags or containers: For storage. I use quart-size zip-top bags and squeeze out as much air as possible before sealing.
If you don’t have a non-stick skillet, you can use a well-seasoned cast iron or stainless steel pan — just add a little extra butter to prevent sticking. And if you’re short on freezer space, these burritos freeze flat in bags and stack beautifully. I’ve stored them in a shoebox-sized container in my tiny freezer and they fit perfectly.
Preparation Method
This is where the magic happens. I’ve broken this down into clear steps so you can follow along without any guesswork. Trust me, the first time you pull one of these out of the freezer on a hectic morning, you’ll thank yourself.
Step 1: Cook the Sausage (10 minutes)
Heat your large non-stick skillet over medium heat. Add the breakfast sausage and cook, breaking it up with a spatula, until it’s browned and cooked through — about 8 to 10 minutes. You want little crumbles, not big chunks. If there’s excess grease, drain it off, but leave a little for flavor. Transfer the cooked sausage to a bowl and let it cool slightly.
Pro tip: If you’re using sausage links instead of bulk sausage, just remove the casings before cooking. I’ve done it both ways, and bulk is definitely easier.
Step 2: Cook the Hash Browns (8 minutes)
In a medium skillet, heat a tablespoon of butter or oil over medium-high heat. Add the frozen shredded hash browns in an even layer. Let them cook without stirring for about 4 minutes, then flip and cook another 3 to 4 minutes until they’re golden and crispy. Season with a pinch of salt and pepper. Transfer to a plate and let cool.
Why this matters: Hash browns add texture and bulk to the burritos. If you skip this step or cook them too quickly, they’ll turn soggy in the freezer. Crispy is the goal here.
Step 3: Scramble the Eggs (5 minutes)
In your mixing bowl, whisk together the 12 eggs and ¼ cup of milk until the mixture is uniform and slightly frothy. Melt the 2 tablespoons of butter in the same skillet you used for the sausage (wipe it out first if needed) over medium-low heat. Pour in the egg mixture and let it sit for about 30 seconds before gently stirring with a silicone spatula. Continue stirring slowly, scraping the bottom and sides, until the eggs are just set but still soft and slightly glossy. This should take about 3 to 4 minutes. Remove from heat immediately — the eggs will continue cooking from residual heat.
Heads up: Undercook the eggs slightly here. They’ll finish cooking when you reheat the burritos, and you want them fluffy, not rubbery. I learned this after a batch of dry, sad burritos that my kids politely refused to eat.
Step 4: Cool Everything Down (10 minutes)
This step is crucial. Spread the cooked sausage, hash browns, and scrambled eggs out on separate plates or baking sheets and let them cool completely — about 10 minutes at room temperature. If you assemble the burritos while the fillings are still hot, they’ll create steam inside the tortilla, which leads to soggy burritos and freezer burn. I know it’s tempting to rush, but don’t.
Step 5: Assemble the Burritos (15 minutes)
Lay a large flour tortilla flat on your work surface. In the center, layer about ¼ cup of scrambled eggs, about 2 tablespoons of cooked sausage, about 2 tablespoons of hash browns, and a generous sprinkle of shredded cheddar cheese. Don’t overfill — you need room to fold.
To roll: Fold the sides of the tortilla inward over the filling. Then fold the bottom edge up and over the filling, tucking it snugly. Roll the burrito away from you, keeping it tight, until the seam is on the bottom. It should look like a neat little package. Repeat with remaining tortillas and filling.
My trick: If your tortillas are being stubborn, warm them in the microwave for 10 seconds before filling. They become way more pliable and less likely to crack.
Step 6: Wrap and Freeze (5 minutes + 2 hours freezing)
Wrap each burrito individually in aluminum foil or parchment paper. Make sure the seam is on the bottom and the wrap is tight. Place the wrapped burritos on a baking sheet in a single layer (don’t stack them yet) and freeze for 2 hours, or until solid. Once frozen, transfer them to a freezer-safe zip-top bag, squeeze out as much air as possible, and seal. Label the bag with the date and contents.
These burritos will keep in the freezer for up to 3 months. I usually make a double batch and we’re set for the entire school term.
Cooking Tips & Techniques
After making these burritos more times than I can count, I’ve picked up a few tricks that make a real difference. Here’s what I wish someone had told me the first time around.
Don’t skip the cooling step. I know I already mentioned this, but it’s worth repeating. Hot fillings create steam, and steam makes soggy tortillas. I once rushed through assembly because the kids were hungry, and the burritos turned into a sad, mushy mess after a week in the freezer. Let everything cool to room temperature before you start rolling.
Use the right tortilla size. Burrito-sized tortillas (10 inches) are non-negotiable. Taco-sized tortillas will leave you with sad, underfilled rolls that fall apart. I learned this when I grabbed the wrong package at the store and ended up with burrito “bites” instead of actual burritos. They were cute but not practical.
Don’t overfill. It’s tempting to pile on the fillings, but less is more here. Overstuffed burritos are hard to roll and tend to burst during reheating. Aim for about ½ cup of filling per burrito total. Your future self will thank you.
Label everything. I write the date and filling type on each foil packet with a permanent marker. It sounds extra, but when you have a freezer full of unmarked foil packets, you’ll be glad you did. I speak from experience — I once reheated what I thought was a breakfast burrito and got a very confused chicken enchilada instead.
Freeze individually first. Don’t just toss wrapped burritos into a bag and call it done. Freezing them on a baking sheet first prevents them from sticking together, so you can grab one at a time without wrestling with a frozen block of burritos. Trust me on this one.
Reheating is key. For the best texture, unwrap the burrito from foil, wrap it in a damp paper towel, and microwave for 2 to 3 minutes, flipping halfway through. Or reheat in a 350°F oven for 15 minutes for a crispier tortilla. The microwave is faster, but the oven gives you that slightly crispy exterior that’s worth the extra time on a weekend.
Variations & Adaptations
One of the best things about this recipe is how customizable it is. I’ve tried several variations over the years, and here are my favorites.
Vegetarian Version
Skip the sausage and add a can of drained and rinsed black beans, plus some sautéed bell peppers and onions. The beans add protein and fiber, and the veggies give you that savory satisfaction. I’ve made this version for my vegetarian sister-in-law and she said it’s better than the original. High praise.
Spicy Southwestern Style
Add ½ cup of drained and rinsed black beans, ¼ cup of diced green chiles, and a sprinkle of cumin and chili powder to the egg mixture. Top with pepper jack cheese instead of cheddar. This version has a nice kick without being overwhelming. My husband requests this one regularly.
Low-Carb Option
Use low-carb tortillas (the ones with about 5 grams of net carbs each) and bulk up the filling with extra veggies and cheese. Skip the hash browns or use cauliflower rice instead. I’ve tested this with both and the cauliflower version is surprisingly good — just make sure to squeeze out the excess moisture before cooking.
Bacon and Potato Version
Swap the sausage for 8 strips of cooked, crumbled bacon. Add an extra ½ cup of hash browns. This is the version I make when I’m feeling indulgent, and honestly, it’s the one my kids fight over. Bacon has a way of making everything better.
Dairy-Free Adaptation
Use dairy-free cheese (I like Daiya or Follow Your Heart) and cook the eggs in olive oil instead of butter. The texture is slightly different, but it still works beautifully. My friend with a dairy allergy tested this version and gave it two thumbs up.
Serving & Storage Suggestions
These burritos are designed for convenience, but a little attention to serving and storage goes a long way.
Serving Temperature: I recommend reheating until the center is steaming hot — about 165°F if you’re using a thermometer. Let the burrito rest for 1 minute after reheating before serving. This prevents burned mouths and lets the fillings settle. Trust me, I’ve learned this the hard way.
Presentation: If you’re serving these for a weekend brunch instead of a school morning, cut them in half diagonally and arrange them on a platter with a side of salsa or sour cream. It looks way more impressive than it should for something that came out of the freezer.
Storage Instructions: Keep the burritos in a freezer-safe bag with as much air removed as possible. They’ll stay good for up to 3 months. I’ve tested one at the 4-month mark and it was still fine, but the texture starts to decline after the 3-month point.
Reheating Methods:
- Microwave: Unwrap from foil, wrap in a damp paper towel, microwave on high for 2 to 3 minutes (flip halfway). This is the fastest method and works great for busy mornings.
- Oven: Unwrap from foil, place on a baking sheet, bake at 350°F for 15 to 18 minutes. The tortilla gets slightly crispy, which I love for weekend mornings.
- Air Fryer: Unwrap and air fry at 350°F for 8 to 10 minutes, flipping halfway. This gives you the crispiest exterior of all three methods.
Flavor Development: The flavors actually meld together nicely after a week or two in the freezer. I’m not sure why this happens, but the burritos seem to taste better after they’ve had some time to hang out in the cold. Something about the ingredients getting to know each other, I guess.
Nutritional Information & Benefits
These burritos are a balanced meal in a portable package. Here’s a rough estimate per burrito (based on the basic version with sausage, eggs, hash browns, and cheddar cheese):
- Calories: Approximately 380-420
- Protein: 22-25 grams
- Carbohydrates: 28-32 grams
- Fat: 18-22 grams
- Fiber: 2-3 grams
- Sugar: 2-3 grams
Health Benefits: The eggs provide high-quality protein and choline, which supports brain health — perfect for growing kids heading to school. The sausage adds iron and B vitamins. The hash browns contribute carbohydrates for energy, and the cheese offers calcium for strong bones. It’s a well-rounded breakfast that keeps you full until lunch.
Dietary Considerations: This recipe can be made gluten-free by using gluten-free tortillas. It’s naturally nut-free and can be adapted to be dairy-free as mentioned above. If you’re watching your sodium, use low-sodium sausage and reduce the added salt.
My Take: I’m not a nutritionist, but I’ve learned that starting the day with protein and complex carbs makes a huge difference in how my kids function at school. These burritos give them sustained energy without the sugar crash that comes from cereal or pastries. Plus, they actually eat them, which is more than I can say for the kale smoothies I tried to push on them once. That was a disaster.
Conclusion
Look, I’m not saying these easy freezer breakfast burritos will solve all your school morning problems. You’ll still have to find lost shoes and sign permission slips and convince someone that no, you cannot wear shorts when it’s snowing. But breakfast? That part is handled. And honestly, when you’re running on four hours of sleep and your coffee hasn’t kicked in yet, having a warm, satisfying breakfast ready in under three minutes feels like a small miracle.
What I love most about this recipe is how forgiving it is. You can swap ingredients, adjust the seasonings, change up the fillings — it all works. It’s not a precious, finicky recipe that demands perfection. It’s a working parent’s recipe. A real life recipe. And it delivers every single time.
So go ahead and make a batch this weekend. Or two batches, if you’re feeling ambitious. Wrap them up, freeze them, and forget about them until the morning when you need them most. And when you pull one out at 7 AM on a Tuesday and take that first warm, cheesy bite? That’s when you’ll know it was worth it.
I’d love to hear how yours turn out. What fillings did you use? Did your kids approve? Drop a comment below and let me know — I read every single one, and your ideas might just inspire my next batch.
Frequently Asked Questions
Can I use egg whites instead of whole eggs?
Absolutely. Use about 1½ cups of liquid egg whites or 16 egg whites in place of the 12 whole eggs. The texture will be slightly less rich, but they’ll still work great. I’ve made this swap for a lower-cholesterol version and my family didn’t even notice the difference.
Do I have to thaw the burritos before reheating?
Nope! That’s the beauty of this recipe. You can go straight from freezer to microwave or oven with no thawing required. Just adjust the reheating time slightly if you’re using the oven — add about 5 minutes compared to the thawed version.
Can I make these ahead and refrigerate instead of freeze?
You can, but they’re really designed for freezing. Refrigerated burritos will stay good for about 3 to 4 days, but the tortillas tend to get soggy. If you’re planning to eat them within a few days, I’d recommend storing the fillings separately and assembling fresh each morning. It’s a little more work, but the texture is better.
What’s the best way to prevent soggy tortillas?
Cool your fillings completely before assembling, don’t overfill, and wrap tightly. Also, make sure your hash browns are crispy before adding them. Soggy hash browns are the number one cause of soggy burritos. I learned this after a particularly disappointing batch that I had to eat with a fork.
Can I add vegetables to the filling?
Definitely. Sautéed bell peppers, onions, mushrooms, or spinach all work well. Just make sure to cook off any excess moisture before adding them to the burrito. I like to add a handful of baby spinach to the eggs right at the end of cooking — it wilts down and adds nutrients without changing the flavor much.
Pin This Recipe!
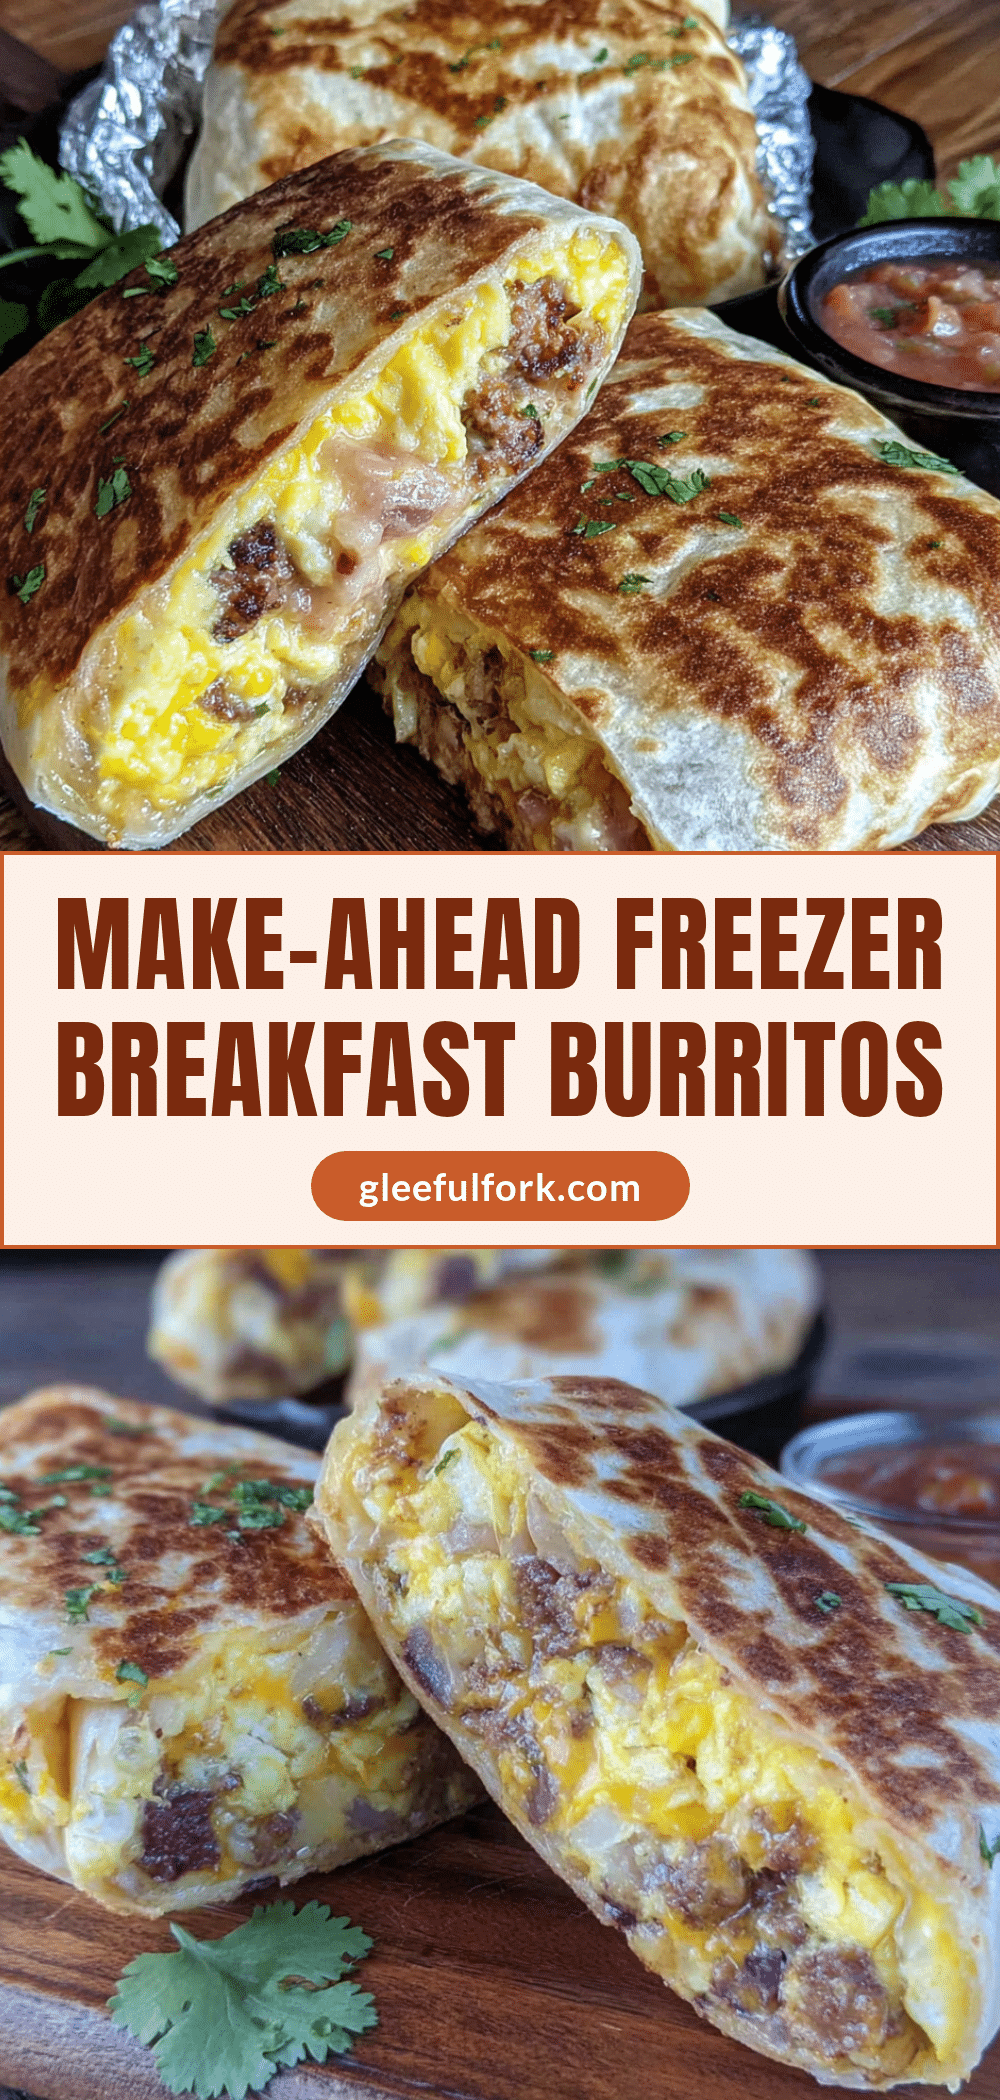
Easy Freezer Breakfast Burritos: Best Make-Ahead School Mornings

These easy freezer breakfast burritos are the ultimate make-ahead solution for hectic school mornings. With fluffy eggs, crispy hash browns, savory sausage, and melted cheese, they go from freezer to plate in under 3 minutes and taste like a warm, comforting win.
- Prep Time: 20 minutes
- Cook Time: 25 minutes
- Total Time: 45 minutes
- Yield: 10-12 servings 1x
- Category: Breakfast
- Cuisine: American
Ingredients
- 12 large eggs
- ¼ cup whole milk
- 2 tablespoons unsalted butter
- 1 pound breakfast sausage (mild or spicy)
- 2 cups frozen shredded hash browns
- 2 cups shredded cheddar cheese
- Salt and black pepper to taste
- 10–12 large flour tortillas (10-inch)
- Optional: diced bell peppers, onions, black beans, cooked bacon, or chopped spinach
Instructions
- Cook the sausage: Heat a large non-stick skillet over medium heat. Add the breakfast sausage and cook, breaking it up with a spatula, until browned and cooked through (8-10 minutes). Drain excess grease, leaving a little for flavor. Transfer to a bowl and let cool.
- Cook the hash browns: In a medium skillet, heat 1 tablespoon butter or oil over medium-high heat. Add frozen shredded hash browns in an even layer. Cook without stirring for 4 minutes, then flip and cook another 3-4 minutes until golden and crispy. Season with salt and pepper. Transfer to a plate and let cool.
- Scramble the eggs: In a mixing bowl, whisk together 12 eggs and ¼ cup milk until uniform and slightly frothy. Melt 2 tablespoons butter in the same skillet used for sausage (wiped clean) over medium-low heat. Pour in egg mixture, let sit 30 seconds, then gently stir with a silicone spatula until just set but still soft and glossy (3-4 minutes). Remove from heat immediately.
- Cool everything: Spread cooked sausage, hash browns, and scrambled eggs on separate plates or baking sheets. Let cool completely at room temperature (about 10 minutes).
- Assemble the burritos: Lay a large flour tortilla flat. In the center, layer about ¼ cup scrambled eggs, 2 tablespoons cooked sausage, 2 tablespoons hash browns, and a generous sprinkle of shredded cheddar. Fold sides inward, then fold bottom edge up and over filling, tucking snugly. Roll away from you, keeping tight, until seam is on bottom. Repeat with remaining tortillas and filling.
- Wrap and freeze: Wrap each burrito individually in aluminum foil or parchment paper with seam on bottom. Place on a baking sheet in a single layer and freeze for 2 hours until solid. Transfer to a freezer-safe zip-top bag, squeeze out air, seal, and label with date. Freeze for up to 3 months.
Notes
Cool fillings completely before assembling to prevent soggy tortillas. Undercook eggs slightly as they will finish cooking during reheating. For best results, freeze burritos individually on a baking sheet before bagging. Reheat from frozen: microwave wrapped in damp paper towel for 2-3 minutes (flip halfway), or oven at 350°F for 15-18 minutes, or air fryer at 350°F for 8-10 minutes.
Nutrition
- Serving Size: 1 burrito
- Calories: 400
- Sugar: 2.5
- Sodium: 650
- Fat: 20
- Saturated Fat: 8
- Carbohydrates: 30
- Fiber: 2.5
- Protein: 23
Keywords: freezer breakfast burritos, make-ahead breakfast, school morning breakfast, easy breakfast recipe, freezer-friendly breakfast


