Love this? Save it for later!
Share the inspiration with your friends
My husband took one bite of these fries, paused mid-chew, and just stared at the baking sheet like he was reconsidering his entire stance on vegetables. That look—pure confusion mixed with delight—is exactly how I knew this recipe was a keeper. He’s not exactly a butternut squash fan, you know. Usually I have to hide it in soups or mash it under a pile of cheese before he’ll touch it. But these crispy parmesan butternut squash fries? He reached for a second handful before I even finished plating dinner.
Honestly, I stumbled into this one by accident. I had a butternut squash sitting on my counter that I bought on a whim during a farmers market trip. You know how that goes—you see something gorgeous, imagine all the things you’ll make, and then it just sits there staring at you every time you open the fridge. I was craving fries but trying to be a little healthier after a weekend of indulgence. So I grabbed my sharpest knife, cranked the oven, and started experimenting. An hour later, I had a tray of golden, cheesy, perfectly crispy fries that made me forget regular potatoes even existed.
These aren’t your sad, soggy baked fries that leave you disappointed. The secret is a combination of high heat, smart prep, and a generous coating of parmesan that crisps up like a dream. The squash gets tender on the inside while the outside turns into this crunchy, salty, savory shell that’s honestly addictive. I’ve made them four times in the last two weeks, and each time they disappear faster than I can get them onto plates. If you’ve ever been let down by homemade vegetable fries, trust me—this version changes the game.
Why You’ll Love This Recipe
These crispy parmesan butternut squash fries hit that perfect sweet spot between indulgent and wholesome. They come out of the oven golden, crunchy, and absolutely packed with flavor, and they’re way easier to make than you’d think. Here’s why they’ve become a staple in my kitchen:
- Quick & Easy: From prep to plate in under 40 minutes. No complicated techniques, no fancy equipment—just a knife, a baking sheet, and a hot oven.
- Simple Ingredients: You probably already have most of these in your pantry. A butternut squash, some parmesan, basic spices, and olive oil. That’s it.
- Perfect for Any Occasion: Serve them as a cozy weeknight side, a healthier snack for game day, or a showstopping appetizer at your next dinner party. They fit anywhere.
- Crowd-Pleaser: I’ve served these to vegetable skeptics, picky kids, and full-on carnivores. Every single person went back for seconds. They’re that good.
- Unbelievably Delicious: The combination of sweet roasted squash, salty parmesan, and a hint of garlic and pepper creates a flavor that’s honestly addictive. You won’t miss regular fries one bit.
What makes this recipe different from all the other butternut squash fries out there is the technique. I don’t just toss the squash in oil and hope for the best. I’ve tested the temperature, the cut size, the coating method—everything. The parmesan isn’t just sprinkled on top; it’s mixed into a seasoned coating that clings to every fry, creating a crust that stays crispy even as it cools. This isn’t just another version of baked squash fries. It’s the best version.
There’s something about the way these fries make you feel, too. You get that satisfying crunch and salty hit you crave from regular fries, but you’re eating a vegetable loaded with vitamin A and fiber. It’s comfort food that actually does your body some good. The first time I made them, I closed my eyes after that first bite and just smiled. That’s the kind of recipe this is—simple enough for a Tuesday night, special enough to feel like a treat.
What Ingredients You Will Need
This recipe uses simple, wholesome ingredients that work together to create something truly special. You don’t need a long grocery list or obscure items—just a few pantry staples and one star vegetable. Let me walk you through each one.
For the Fries
- Butternut Squash (1 medium, about 2-3 pounds): Look for one that feels heavy for its size with firm, unblemished skin. A longer neck is easier to cut into uniform fry shapes. I prefer organic when I can find it, but conventional works just fine.
- Olive Oil (3 tablespoons): Use a good quality extra virgin olive oil for flavor, but regular olive oil works too. The oil helps the coating stick and promotes even browning.
- Grated Parmesan Cheese (½ cup, finely grated): This is the key to that crispy, savory crust. Buy a block of real parmesan and grate it yourself—the pre-shredded stuff in bags has anti-caking agents that prevent it from melting and crisping properly. I like Parmigiano-Reggiano for the best flavor.
- Cornstarch (2 tablespoons): The secret weapon for extra crispiness. It absorbs moisture from the squash surface and helps the coating adhere and crisp up in the oven. Don’t skip this!
- Garlic Powder (1 teaspoon): Adds a subtle savory depth without burning the way fresh garlic would at high heat.
- Paprika (½ teaspoon): For a touch of warmth and color. Smoked paprika adds a nice subtle smokiness if you have it.
- Salt (½ teaspoon, plus more to taste): I use fine sea salt. Adjust based on how salty your parmesan is.
- Black Pepper (¼ teaspoon, freshly ground): A little bit of heat and earthiness to balance the sweetness of the squash.
- Optional Pinch of Cayenne (⅛ teaspoon): If you like a little kick. It doesn’t make the fries spicy—just adds a subtle warmth that complements the parmesan beautifully.
For Serving (Optional but Recommended)
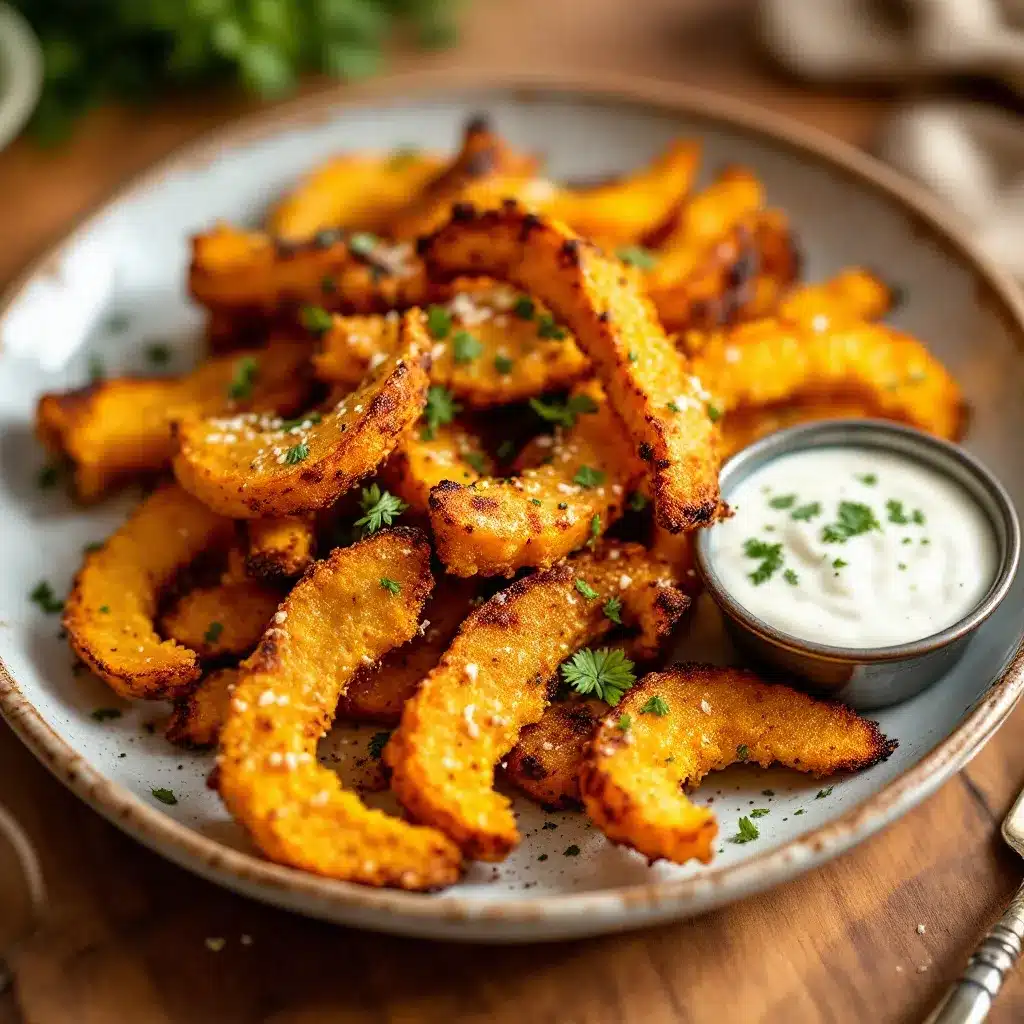
- Fresh Parsley (2 tablespoons, chopped): For a pop of color and freshness.
- Extra Grated Parmesan: Because more cheese is never a bad idea.
- Dipping Sauce of Choice: I love these with a simple garlic aioli, ranch dressing, or even a spicy sriracha mayo. A honey mustard dressing also works surprisingly well with the sweet squash.
Ingredient Selection Tips: When choosing a butternut squash, pay attention to the neck. A long, straight neck gives you those nice, even fry shapes without the bulbous seed cavity. If your squash has a large bulb, save that section for roasting separately or making soup. I learned this the hard way after struggling to get uniform cuts from a squat, round squash. Also, make sure your parmesan is finely grated—almost powdery. Coarse shreds won’t stick as well and can burn before the fries are done.
Substitution Guidance: For a dairy-free version, use nutritional yeast instead of parmesan. It won’t get quite as crispy, but the flavor is surprisingly similar. You can also swap the cornstarch for arrowroot powder or potato starch. If you’re watching your sodium, use a low-sodium parmesan and cut the added salt in half. And if butternut squash isn’t available, sweet potatoes work beautifully with this same coating and method—just adjust the cooking time slightly.
Equipment Needed
You don’t need a fancy kitchen to make these fries, but having the right tools makes the process smoother. Here’s what I use:
- Sharp Chef’s Knife (8-inch recommended): A sharp knife is non-negotiable for cutting butternut squash safely and evenly. Dull knives are dangerous—they slip. I use a Wusthof, but any sharp chef’s knife will do.
- Vegetable Peeler: For removing the tough skin. A Y-shaped peeler gives you more control than a straight one.
- Large Baking Sheet (half-sheet pan): A rimmed baking sheet is essential. You need enough space to spread the fries in a single layer without crowding. If they overlap, they steam instead of crisp.
- Parchment Paper or Silicone Baking Mat: Prevents sticking and makes cleanup a breeze. Parchment paper also helps with browning.
- Large Mixing Bowl: For tossing the fries with the coating. A bowl that’s big enough to toss without spilling is key.
- Measuring Spoons and Cups: For accuracy, especially with the cornstarch and parmesan.
- Cutting Board: A sturdy one that won’t slide around. I put a damp paper towel under mine for stability.
Budget-Friendly Options: If you don’t have a silicone baking mat, parchment paper is cheap and works perfectly. No chef’s knife? A sharp serrated knife can work in a pinch, though it’s harder to get clean cuts. And honestly, a good old-fashioned box grater works fine for grating the parmesan—no need for a Microplane or food processor.
Maintenance Tip: After cutting butternut squash, your knife will likely need a quick rinse and dry. The squash’s natural sugars can make the blade sticky. I wipe mine down immediately to prevent any residue from hardening.
Preparation Method
Alright, let’s get cooking. I’ve broken this down into clear steps with all the little details that make the difference between good fries and unforgettable ones.
Step 1: Preheat and Prep
Preheat your oven to 425°F (220°C). Line a large baking sheet with parchment paper or a silicone mat. The high heat is crucial—it’s what gives you that crispy exterior without drying out the inside of the squash. Don’t be tempted to lower the temperature; I tried 400°F once and ended up with sad, limp fries that took forever to brown.
Step 2: Prepare the Squash
Using a sharp chef’s knife, cut off both ends of the butternut squash. Stand it upright on the flat bottom you just created. Carefully slice down the middle to separate the neck from the bulbous bottom. Peel both sections with a vegetable peeler, making sure to remove all the tough skin. Cut the neck into planks about ½-inch thick, then slice those planks into ½-inch wide sticks—think thick-cut french fry size. For the bulb section, cut it in half, scoop out the seeds, and cut the flesh into similar-sized pieces. Try to keep them uniform so they cook evenly. This takes some practice, but don’t stress too much about perfection.
Step 3: Soak and Dry
Here’s a trick I picked up from making regular french fries: soak the cut squash in cold water for about 10 minutes. This removes excess starch and helps them get crispier. After soaking, drain them and pat them extremely dry with a clean kitchen towel or paper towels. This step is critical—any moisture on the surface will steam the fries instead of crisping them. I usually lay them out on a towel and press another towel on top to absorb as much moisture as possible.
Step 4: Make the Coating
In a large mixing bowl, whisk together the finely grated parmesan, cornstarch, garlic powder, paprika, salt, pepper, and cayenne if using. Make sure there are no lumps—the cornstarch can clump if not mixed well. The parmesan and cornstarch work together to create that golden, crispy crust you’re after.
Step 5: Coat the Fries
Drizzle the dried squash fries with olive oil and toss gently to coat. Then sprinkle the parmesan mixture over the top and toss again, using your hands to make sure every piece is evenly coated. Don’t be shy—really work the coating into all the nooks and crannies. The mixture should cling to the squash like a snowy blanket. If it seems too dry, add another drizzle of oil.
Step 6: Arrange on Baking Sheet
Spread the coated fries in a single layer on the prepared baking sheet. Make sure they’re not touching—give them some breathing room. If they’re crowded, they’ll steam and get soggy. If you have too many for one sheet, use two baking sheets or bake in batches. I learned this the hard way when I tried to cram everything onto one pan and ended up with a sad, steamy mess.
Step 7: Bake
Bake for 15 minutes, then carefully flip each fry using a spatula. This is a bit tedious, but it’s essential for even crisping. Bake for another 10-15 minutes, keeping a close eye on them in the last few minutes. They’re done when they’re golden brown, crispy on the outside, and tender on the inside when pierced with a fork. The edges should look dark and crunchy—that’s the parmesan doing its magic. Total baking time is usually 25-30 minutes, but ovens vary.
Step 8: Cool and Serve
Let the fries cool on the baking sheet for 2-3 minutes. This allows the crust to set and get even crispier. Then transfer them to a serving platter, sprinkle with fresh parsley and a little extra parmesan if you like, and serve immediately. They’re best hot and fresh, but trust me, they won’t last long enough to cool down completely.
Cooking Tips & Techniques
After making these fries more times than I can count, I’ve picked up a few tricks that make a real difference. Here’s what I wish someone had told me from the start:
- Don’t skip the cornstarch. I know it seems like an extra step, but it’s the difference between fries that are merely good and fries that are actually crispy. The cornstarch absorbs surface moisture and creates a thin, crunchy layer that the parmesan clings to. Without it, the cheese just melts off and you’re left with bare, soggy squash.
- Cut them uniformly. I cannot stress this enough. If some pieces are thicker than others, the thin ones will burn while the thick ones stay raw. Take your time with the knife work. A little extra effort upfront saves you from unevenly cooked fries.
- Flip them halfway through. Yes, it’s a pain. Yes, some might break. But flipping ensures both sides get that beautiful golden crust. I use a thin metal spatula and work gently. The ones that break? Those are the chef’s snack.
- Watch the last few minutes like a hawk. Ovens run differently, and these fries go from perfectly golden to burnt in about 60 seconds. The parmesan can darken quickly. I usually start checking at the 20-minute mark and pull them the moment they look right.
- Don’t overcrowd the pan. This is probably the most common mistake I see. If the fries are piled on top of each other, they release steam and turn into soggy, sad little things. Give them space. Use two baking sheets if you need to.
- Let them rest after baking. I know you’ll want to eat them immediately, but those 2-3 minutes of cooling on the baking sheet are crucial. The crust continues to crisp up as they cool slightly. Patience pays off here.
I once forgot to dry the squash thoroughly after soaking and ended up with a tray of mushy, pale fries that never crisped up no matter how long I baked them. It was a disappointing lesson, but now I’m religious about the drying step. Lay the cut fries on a clean kitchen towel, roll them up, and give them a gentle squeeze. It makes all the difference.
Variations & Adaptations
One of the best things about this recipe is how versatile it is. Here are some variations I’ve tried and loved:
- Spicy Chipotle Version: Add 1 teaspoon of chipotle powder and a pinch of cumin to the coating mixture. The smoky heat pairs beautifully with the sweet squash. Serve with a cooling lime crema for dipping.
- Herb & Garlic: Mix 1 teaspoon of dried rosemary or thyme into the parmesan coating. Fresh herbs don’t hold up as well at high heat, so stick with dried. The herbal notes add a lovely complexity.
- Everything Bagel Seasoning: After coating the fries with the parmesan mixture, sprinkle them generously with everything bagel seasoning before baking. The sesame seeds and poppy seeds add incredible texture and flavor. This is my current favorite variation.
- Air Fryer Method: If you have an air fryer, these fries come out even crispier. Preheat to 400°F (200°C), arrange the coated fries in a single layer in the basket (work in batches), and cook for 10-12 minutes, shaking halfway through. No flipping needed!
- Dairy-Free Adaptation: Replace the parmesan with ¼ cup of nutritional yeast and an extra tablespoon of cornstarch. The nutritional yeast gives a cheesy, umami flavor without any dairy. They won’t be quite as crispy, but they’re still delicious.
- Sweet Potato Swap: If butternut squash isn’t available, sweet potatoes work beautifully. Cut them into similar-sized sticks and follow the same method. They might need an extra 5 minutes of baking time.
I tried a curry-spiced version once with turmeric, cumin, and a pinch of cinnamon. It was interesting—not bad, but not my favorite. The warm spices clashed a bit with the parmesan. Stick with flavors that complement, not compete with, the sweet squash and salty cheese.
Serving & Storage Suggestions
These fries are best served hot and fresh, right out of the oven. The texture is at its peak when they’re still warm and the crust is perfectly crunchy. Here’s how I like to serve them:
- Temperature: Serve immediately after the 2-3 minute rest. They hold their crispiness for about 10-15 minutes before starting to soften.
- Presentation: Arrange them on a wooden board or a white platter for contrast. Sprinkle with fresh parsley and a final dusting of parmesan. Serve with small bowls of dipping sauces on the side.
- Dipping Sauces: I love a simple garlic aioli (mayo + minced garlic + lemon juice), a spicy sriracha mayo, or a classic ranch dressing. For something lighter, try a honey mustard dressing—the sweetness pairs perfectly with the squash. A balsamic glaze drizzle is also surprisingly good.
- Complementary Dishes: These fries are fantastic alongside a crispy bacon wrapped asparagus for a vegetable-forward dinner, or as a side to a perfect surf and turf for a special occasion. They also work beautifully as an appetizer for a fall gathering.
Storage: If you somehow have leftovers (it’s rare in my house), let them cool completely, then store them in an airtight container in the refrigerator for up to 3 days. They will lose their crispiness, unfortunately. To reheat, spread them on a baking sheet and pop them in a 400°F (200°C) oven for 5-7 minutes. The microwave will turn them into sad, soggy mush—don’t do it. An air fryer at 375°F (190°C) for 3-4 minutes works beautifully for reviving them.
Freezing: I don’t recommend freezing these fries. The texture changes significantly upon thawing and reheating. They’re best made fresh.
Nutritional Information & Benefits
These crispy parmesan butternut squash fries aren’t just delicious—they’re actually good for you. Here’s a rough estimate per serving (about ⅙ of the recipe):
- Calories: 180-200
- Total Fat: 10g
- Saturated Fat: 3g
- Carbohydrates: 22g
- Fiber: 4g
- Sugar: 5g (natural from squash)
- Protein: 6g
- Sodium: 350mg (varies with parmesan saltiness)
- Vitamin A: 200% of Daily Value
- Vitamin C: 35% of Daily Value
- Calcium: 15% of Daily Value
Health Benefits: Butternut squash is packed with vitamin A in the form of beta-carotene, which supports eye health and immune function. It’s also a great source of fiber, which aids digestion and keeps you feeling full. The parmesan adds calcium and protein, while the olive oil provides healthy monounsaturated fats. Compared to traditional french fries, these are significantly lower in unhealthy fats and calories, with way more nutritional value.
Dietary Considerations: This recipe is naturally vegetarian and can be made gluten-free by ensuring your cornstarch is certified gluten-free. For a dairy-free version, substitute nutritional yeast for the parmesan as mentioned above. It’s also lower in carbs than traditional potato fries, making it a good option for those watching their carbohydrate intake.
Conclusion
These crispy parmesan butternut squash fries have honestly changed the way I think about vegetable sides. They’re everything I want in a recipe—simple, satisfying, and secretly good for you. The sweet squash, the salty parmesan, that perfect crunch—it’s a combination that works on every level. Whether you’re serving them alongside a weeknight dinner, bringing them to a potluck, or just treating yourself to a healthier snack, they never disappoint.
I love how forgiving this recipe is, too. You can tweak the spices, swap the cheese, adjust the heat—it always turns out delicious. That’s the mark of a great recipe, you know? One that you can make your own. So don’t be afraid to experiment. Add a little more garlic powder if that’s your thing. Throw in some red pepper flakes for heat. Make it yours.
Give these a try, and let me know how they turn out. Did you find a new favorite dipping sauce? Did your kids actually eat a vegetable without complaining? I’d love to hear your stories. Drop a comment below, share your photos, and tag me if you post them online. Happy cooking, friends—you’ve got this.
Frequently Asked Questions
Can I make these fries ahead of time?
These fries are best enjoyed fresh out of the oven. However, you can prep the squash by cutting it into fry shapes and storing it in cold water in the refrigerator for up to 24 hours. Dry them thoroughly before coating and baking. Leftover baked fries can be reheated in the oven or air fryer to restore some crispiness.
Why are my butternut squash fries soggy?
Soggy fries usually result from one of three issues: not drying the squash thoroughly after washing, overcrowding the baking sheet, or not baking at a high enough temperature. Make sure your squash is bone-dry before coating, give each fry space on the pan, and keep that oven at 425°F (220°C).
Can I use pre-cut butternut squash from the store?
Yes, you can! Pre-cut squash saves time, but it’s often cut into irregular shapes that aren’t ideal for fries. Look for packages with larger, more uniform pieces. You’ll still need to cut them down into fry shapes. The texture might be slightly less crispy since pre-cut squash has been sitting longer and may have more surface moisture.
What’s the best way to cut a butternut squash safely?
Use a sharp chef’s knife and a stable cutting board. Cut off both ends first to create flat surfaces. Stand the squash upright and slice down the middle to separate the neck from the bulb. Peel with a vegetable peeler, then cut into planks and sticks. If you’re nervous, you can microwave the whole squash for 2-3 minutes to soften it slightly before cutting.
Can I make these in an air fryer instead of an oven?
Absolutely! Air fryers do an amazing job with these fries. Preheat your air fryer to 400°F (200°C), arrange the coated fries in a single layer in the basket (work in batches to avoid overcrowding), and cook for 10-12 minutes, shaking the basket halfway through. They come out even crispier than the oven version. Just keep an eye on them toward the end—air fryers cook fast.
Pin This Recipe!
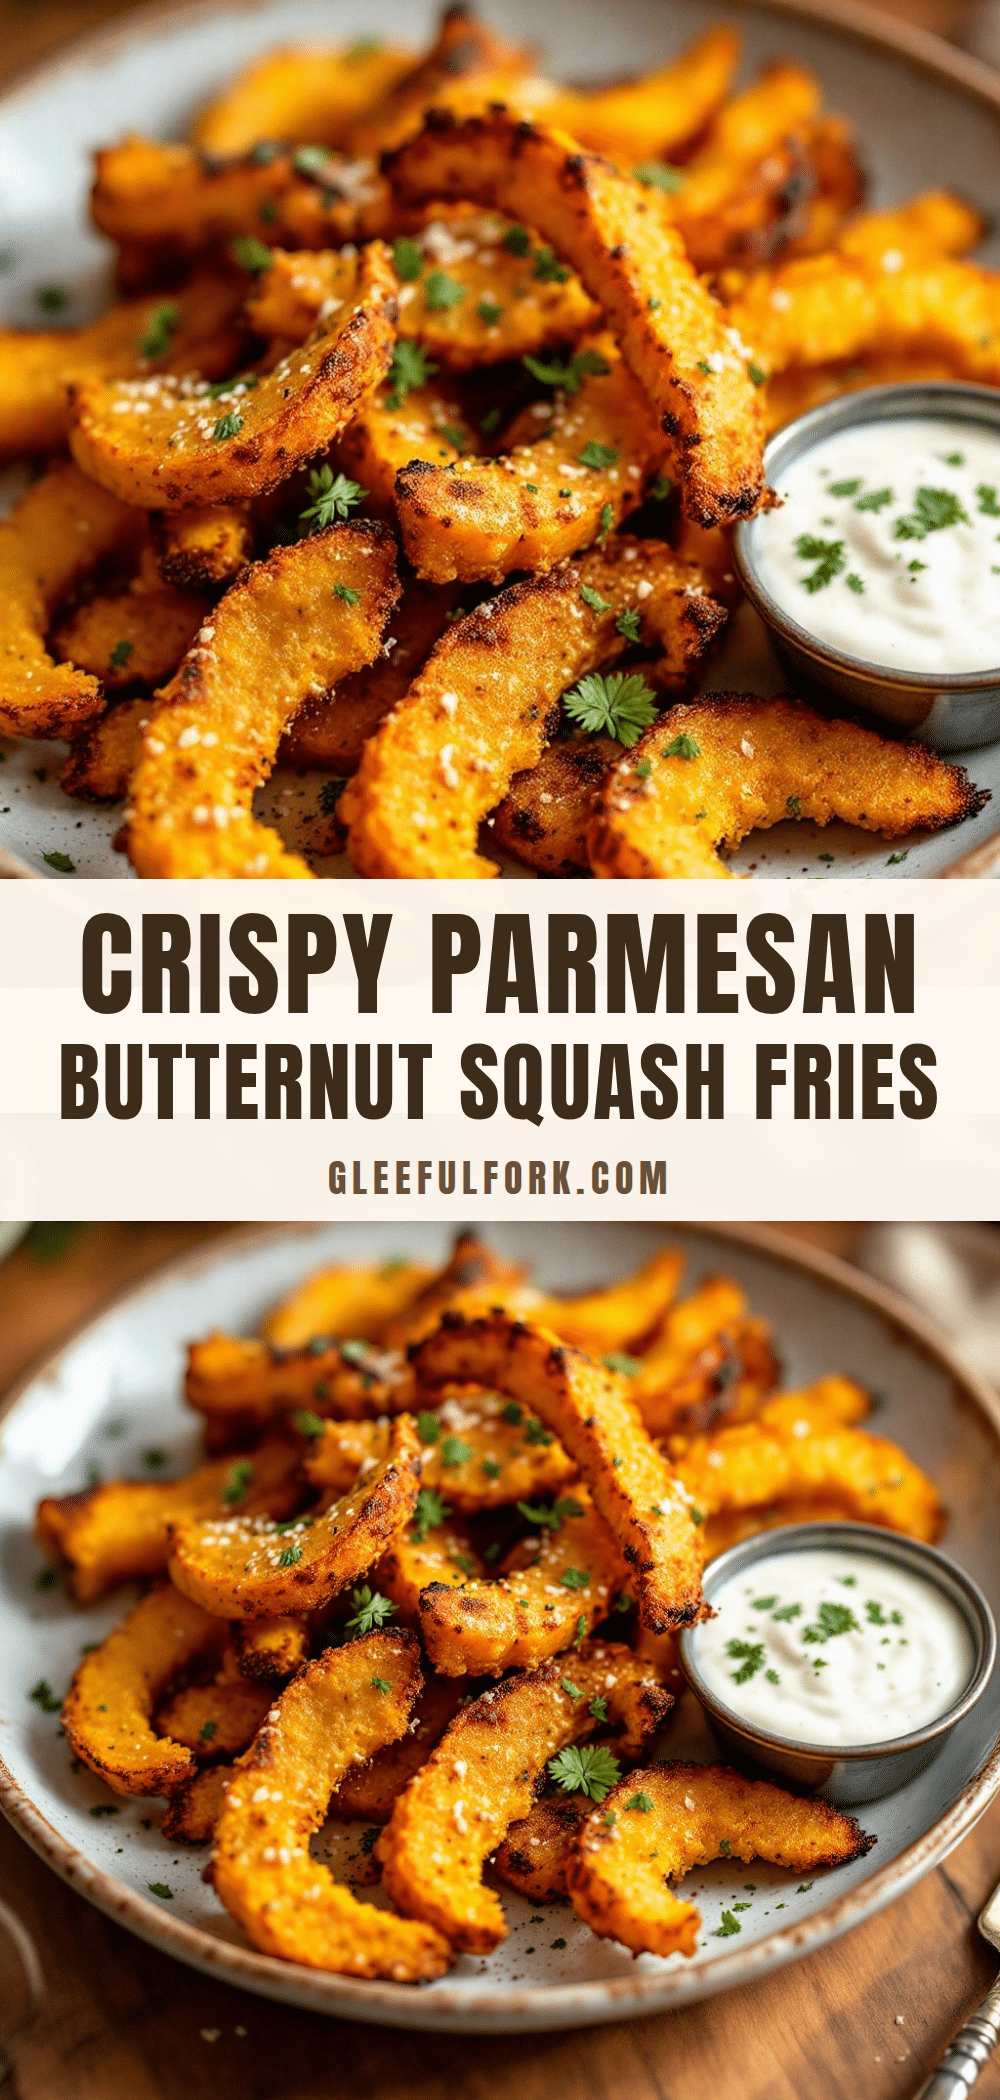
Crispy Parmesan Butternut Squash Fries: Easy Baked Recipe
These crispy parmesan butternut squash fries are baked to golden perfection with a crunchy, savory crust. A healthy, addictive alternative to traditional fries that even vegetable skeptics will love.
- Prep Time: 15 minutes
- Cook Time: 25-30 minutes
- Total Time: 40-45 minutes
- Yield: 4-6 servings 1x
- Category: Side Dish
- Cuisine: American
Ingredients
- 1 medium butternut squash (about 2–3 pounds)
- 3 tablespoons olive oil
- ½ cup finely grated Parmesan cheese
- 2 tablespoons cornstarch
- 1 teaspoon garlic powder
- ½ teaspoon paprika
- ½ teaspoon salt
- ¼ teaspoon freshly ground black pepper
- ⅛ teaspoon cayenne pepper (optional)
- 2 tablespoons fresh parsley, chopped (for serving)
- Extra grated Parmesan (for serving)
- Dipping sauce of choice (optional)
Instructions
- Preheat oven to 425°F (220°C). Line a large baking sheet with parchment paper or a silicone mat.
- Cut off both ends of the butternut squash. Stand upright and slice down the middle to separate the neck from the bulb. Peel both sections with a vegetable peeler.
- Cut the neck into ½-inch thick planks, then into ½-inch wide sticks. For the bulb, cut in half, scoop out seeds, and cut into similar-sized pieces.
- Soak the cut squash in cold water for 10 minutes. Drain and pat extremely dry with a clean kitchen towel or paper towels.
- In a large mixing bowl, whisk together Parmesan, cornstarch, garlic powder, paprika, salt, pepper, and cayenne (if using).
- Drizzle the dried squash fries with olive oil and toss gently to coat. Sprinkle the Parmesan mixture over the top and toss again, using hands to ensure even coating.
- Spread the coated fries in a single layer on the prepared baking sheet, making sure they are not touching.
- Bake for 15 minutes, then carefully flip each fry. Bake for another 10-15 minutes until golden brown and crispy on the outside and tender inside.
- Let the fries cool on the baking sheet for 2-3 minutes. Transfer to a serving platter, sprinkle with fresh parsley and extra Parmesan if desired. Serve immediately.
Notes
For best results, dry the squash thoroughly after soaking to ensure crispiness. Do not overcrowd the baking sheet. The fries are best served immediately. Leftovers can be reheated in a 400°F oven for 5-7 minutes or in an air fryer at 375°F for 3-4 minutes.
Nutrition
- Serving Size: 1/6 of recipe
- Calories: 180200
- Sugar: 5
- Sodium: 350
- Fat: 10
- Saturated Fat: 3
- Carbohydrates: 22
- Fiber: 4
- Protein: 6
Keywords: butternut squash fries, baked fries, parmesan fries, healthy fries, vegetable fries, crispy fries, easy side dish


