Love this? Save it for later!
Share the inspiration with your friends
The crackle of a gingersnap crust as you press it into the pan—that’s the sound that starts this whole thing. Not the pumpkin, not the cream cheese, not even the smell of cinnamon that eventually fills the kitchen. That first gritty, buttery resistance under your fingertips, the way the crushed cookies hold together when you squeeze them. That’s the foundation, literally and figuratively. Everything else is built on top of that promise of texture.
I found myself staring at a bag of gingersnaps in the grocery store last October, and honestly, I wasn’t even planning on making dessert. I was there for milk and eggs. But those cookies—they have this way of looking at you, don’t they? They know what they’re capable of. A graham cracker crust is fine, sure. But a gingersnap crust? That’s a statement. It’s spicy, it’s deep, it’s got this molasses warmth that regular cookies just can’t pull off.
These pumpkin cheesecake bars happened because I couldn’t stop thinking about that crust. The filling came second—a happy accident of too much cream cheese in the fridge and a can of pumpkin that had been hiding in the back of the pantry since last Thanksgiving. I layered them together, crossed my fingers, and pulled out a pan of something that made me actually stop mid-bite.
That’s the thing about the best recipes, you know? They don’t start with a plan. They start with a single, stubborn detail that won’t let you go. For me, it was the crunch.
Why You’ll Love This Recipe
I’ve made these bars more times than I can count, and every single time, someone asks for the recipe. That’s not a humble brag—it’s just true. There’s something about the combination of creamy, tangy cheesecake and that bold, spiced gingersnap base that hits different.
- Simple Ingredients: No weird stuff here. Cream cheese, pumpkin puree, sugar, eggs, spices, and a bag of good gingersnaps. You probably have most of this already.
- No Water Bath Needed: Full-size cheesecakes are dramatic. They crack, they weep, they demand a water bath. These bars? They’re chill. No fuss, no stress.
- Perfect for Fall Gatherings: Whether it’s Thanksgiving, a Friendsgiving potluck, or just a cozy Sunday, these bars show up and deliver.
- Crowd-Pleaser: I’ve watched pumpkin skeptics go back for seconds. The cheesecake layer mellows out the pumpkin flavor in the best way.
- Make-Ahead Friendly: These actually taste better after a night in the fridge. The flavors settle, the texture firms up, and everything gets along.
What makes these different from every other pumpkin cheesecake bar recipe out there? It’s the crust, hands down. I tested this with graham crackers, shortbread, even vanilla wafers. Nothing comes close to the warmth and complexity of crushed gingersnaps. The molasses and ginger in the cookies play off the pumpkin spice in a way that feels intentional, not accidental. Plus, I add a tiny pinch of black pepper to the filling. Trust me on this one—it doesn’t make it spicy, it just makes the pumpkin taste more like itself.
These bars are the kind of dessert that makes you close your eyes after the first bite. Not because it’s fancy or complicated, but because it just works. It’s comfort food reimagined—familiar enough to feel like home, but special enough to feel like an occasion.
What Ingredients You Will Need
This recipe uses straightforward, pantry-friendly ingredients to build layers of flavor and texture without any unnecessary fuss. Here’s everything you’ll need, grouped by component for easy shopping and prep.
For the Gingersnap Crust
- 2 cups (about 240g) gingersnap cookie crumbs – I prefer Nabisco or a bakery brand with real molasses flavor. Pulse them in a food processor until fine, or crush them in a zip-top bag with a rolling pin (great arm workout).
- 6 tablespoons (85g) unsalted butter, melted – Salted butter works too, just reduce the added salt elsewhere if you’re sensitive.
- 2 tablespoons (25g) granulated sugar – Just a little extra sweetness to balance the spice.
- 1/4 teaspoon fine sea salt – Enhances everything without making it salty.
For the Pumpkin Cheesecake Filling
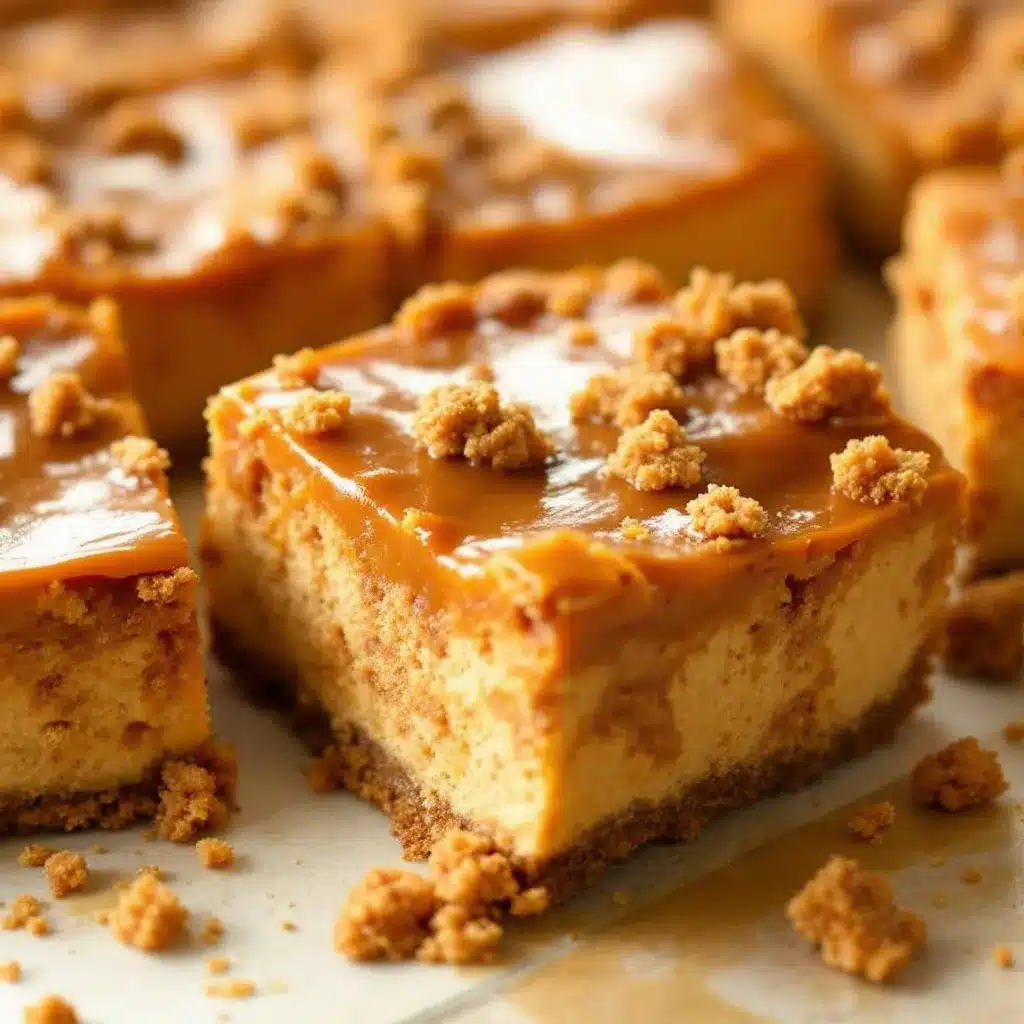
- 16 ounces (452g) full-fat cream cheese, softened – Low-fat won’t set up the same way. Trust me, I tried it once and ended up with soup. Let it sit on the counter for at least an hour before mixing.
- 3/4 cup (150g) granulated sugar – Just enough to sweeten without overpowering the tang.
- 1 cup (245g) pumpkin puree – Not pumpkin pie filling. Look for 100% pure pumpkin. Libby’s is my go-to.
- 2 large eggs, room temperature – Cold eggs can seize up the cream cheese mixture. Set them in warm water for 5 minutes if you forgot.
- 1 teaspoon vanilla extract – Pure vanilla, not imitation. It makes a difference.
- 1 teaspoon pumpkin pie spice – Or make your own with 1/2 teaspoon cinnamon, 1/4 teaspoon ginger, 1/4 teaspoon nutmeg, and a pinch of cloves.
- 1/4 teaspoon freshly ground black pepper – This is my secret trick. You won’t taste pepper, but it deepens the pumpkin flavor remarkably.
- 1 tablespoon all-purpose flour – Helps stabilize the filling and prevents cracking.
For the Optional Topping
- 1/2 cup (120ml) heavy cream – Whipped to soft peaks with a tablespoon of powdered sugar.
- Crushed gingersnaps or candied pecans – For garnish, if you’re feeling fancy.
I recommend using a kitchen scale for the cookie crumbs if you have one—measuring by weight is way more accurate. If you’re gluten-sensitive, look for gluten-free gingersnaps (they exist and work beautifully). For a dairy-free version, use a plant-based cream cheese alternative, though the texture will be slightly softer.
Equipment Needed
You don’t need a professional pastry kitchen for these bars, but a few specific tools will make your life easier.
- 9×9-inch square baking pan – Glass, ceramic, or metal all work. I prefer metal for even browning on the crust.
- Parchment paper – Cut two strips long enough to overhang on opposite sides. This creates a sling for lifting the bars out cleanly.
- Food processor or zip-top bag and rolling pin – For crushing cookies. The food processor is faster and gives more consistent crumbs.
- Electric hand mixer or stand mixer – Cream cheese needs to be whipped smooth, and doing it by hand is a workout I don’t recommend.
- Medium mixing bowls – One for the crust, one for the filling.
- Spatula – A rubber spatula for scraping every last bit of filling into the pan.
- Measuring cups and spoons – Accuracy matters, especially with the spices.
If you don’t have a food processor, don’t sweat it. I’ve crushed gingersnaps with the bottom of a cast iron skillet and it worked just fine. The crumbs won’t be as uniform, but the texture will still be delicious. For the mixer, a hand mixer is perfectly adequate—no need to drag out the stand mixer unless you want to.
Preparation Method
- Preheat and prep the pan. Preheat your oven to 350°F (175°C). Line your 9×9-inch baking pan with parchment paper, leaving about 2 inches of overhang on two opposite sides. This will be your sling for lifting the finished bars out. Lightly grease the parchment with butter or non-stick spray.
- Make the crust. In a food processor, pulse the gingersnap cookies until they become fine crumbs. You should have about 2 cups. Transfer to a medium bowl and add the sugar and salt. Pour in the melted butter and stir with a fork until every crumb is moistened. The mixture should look like wet sand and hold together when you squeeze it.
- Press the crust. Dump the crumb mixture into your prepared pan. Use the bottom of a flat measuring cup or a glass to press it down firmly and evenly. Don’t skimp on this step—a loose crust will fall apart when you cut the bars. Press it until it’s compact and uniform. Bake for 10 minutes, then set aside to cool while you make the filling. Leave the oven on.
- Beat the cream cheese. In a large bowl, beat the softened cream cheese with an electric mixer on medium speed until smooth and creamy, about 2 minutes. Scrape down the sides and bottom of the bowl with a spatula. Add the sugar and beat for another 2 minutes until light and fluffy.
- Add the pumpkin and eggs. Add the pumpkin puree, vanilla, pumpkin pie spice, black pepper, and flour. Beat on low speed until just combined. Add the eggs one at a time, beating on low after each addition until incorporated. Don’t overmix—you don’t want to incorporate too much air, which can cause cracks.
- Pour and spread. Pour the filling over the pre-baked crust. Use your spatula to spread it evenly to the edges. Give the pan a gentle tap on the counter to release any air bubbles.
- Bake. Bake at 350°F (175°C) for 35-40 minutes. The edges should be set and slightly puffed, but the center should still jiggle slightly when you gently shake the pan. That jiggle is your friend—it means the cheesecake will be silky, not dry. If the center looks completely firm, you’ve overbaked it.
- Cool completely. Place the pan on a wire rack and let it cool to room temperature. This takes about 1-2 hours. Don’t rush this step. If you put warm cheesecake in the fridge, condensation will form on the surface and make it soggy.
- Chill. Once cooled, cover the pan with plastic wrap and refrigerate for at least 4 hours, preferably overnight. This is the hardest part, I know, but it’s non-negotiable. The bars need time to set properly for clean slices.
- Slice and serve. Use the parchment sling to lift the entire block out of the pan. Place it on a cutting board. Use a sharp, thin-bladed knife to cut into 16 squares (4×4 grid). Wipe the knife clean between cuts for neat edges. Serve cold or at room temperature.
Sensory cues to watch for: The crust should smell deeply toasted and spicy when it comes out of the oven. The filling should look matte on the surface, not glossy. When you tap the pan, the center should wobble like firm Jell-O, not slosh like liquid.
Cooking Tips & Techniques
I’ve made these bars maybe a dozen times, and I’ve messed up plenty along the way. Here’s what I’ve learned so you don’t have to repeat my mistakes.
Room temperature ingredients matter. Cold cream cheese creates lumps that won’t smooth out no matter how long you beat it. Cold eggs can cause the mixture to curdle. Set everything out an hour before you start. If you forgot, microwave the cream cheese in 10-second bursts until it’s soft to the touch, and place the eggs in a bowl of warm water for 5 minutes.
Don’t overbake. This is the number one mistake people make with cheesecake bars. The center should still jiggle when you pull it out of the oven. It will continue to set as it cools. Overbaked cheesecake turns grainy and cracks like a desert floor. If you see cracks forming on the surface, you’ve gone too far.
Use a hot knife for clean slices. Run your knife under hot water, dry it off, then slice. Wipe and reheat between cuts. This gives you those beautiful, bakery-style edges that make people think you’re a pro. I learned this after serving a plate of sad, crumbly squares at a Friendsgiving.
Toast the crust a little longer if you want extra crunch. I’ve started baking my crust for 12 minutes instead of 10, and it makes a noticeable difference. The deeper color means more flavor, and the crust stays crisper even after the filling sits on top.
Plan your timing. These bars need at least 4 hours to chill, so make them the day before you plan to serve them. I usually make them on a Wednesday night for a Saturday gathering—they actually get better with age as the flavors meld.
Variations & Adaptations
One of the best things about this recipe is how flexible it is. Here are some variations I’ve tried and loved.
Gluten-Free Version
Swap the regular gingersnaps for gluten-free gingersnaps (Kinnikinnick makes a good one). Use a gluten-free all-purpose flour blend in place of the tablespoon of flour in the filling. Everything else stays the same. I served this at a dinner party where two guests had celiac, and they couldn’t tell the difference.
Bourbon Pumpkin Cheesecake Bars
Add 2 tablespoons of bourbon to the filling along with the vanilla. The alcohol mostly cooks off, leaving behind a warm, oaky depth that pairs beautifully with the gingersnap crust. I tried this on a whim one rainy November afternoon, and it’s now my go-to for adult gatherings.
Maple Pecan Twist
Replace the granulated sugar in the filling with 1/2 cup maple syrup (reduce the pumpkin puree by 2 tablespoons to compensate for the extra liquid). Top the baked bars with candied pecans before serving. The maple and pumpkin combination is ridiculously good.
Vegan Adaptation
Use a vegan cream cheese alternative (Miyoko’s or Kite Hill work best) and a flax egg (1 tablespoon ground flaxseed mixed with 3 tablespoons water, let sit for 5 minutes). The texture will be slightly softer and less dense, but the flavor is still spot-on. I developed this version for a friend’s vegan Thanksgiving, and it held up surprisingly well.
Spiced Chocolate Drizzle
Melt 1/2 cup dark chocolate chips with 1 tablespoon coconut oil and a pinch of cayenne pepper. Drizzle over the chilled bars before slicing. The heat from the cayenne plays off the ginger in the crust in a way that’s unexpected and addictive.
Serving & Storage Suggestions
These bars are versatile enough to fit into almost any occasion. Here’s how to serve and store them for the best experience.
Serving temperature: I prefer these bars cold, straight from the fridge. The texture is firmer, the flavors are sharper, and the crust stays snappy. If you prefer a softer, creamier texture, let them sit at room temperature for 15-20 minutes before serving. Both ways are delicious—it’s really a personal preference.
Presentation ideas: Cut the bars into neat squares and arrange them on a white platter for contrast. Top each bar with a small dollop of whipped cream and a tiny pinch of cinnamon. For a more rustic look, serve them on a wooden board with extra crushed gingersnaps scattered around. If you’re feeling extra, drizzle caramel sauce over the top and add a few flaky sea salt crystals.
What to serve alongside: A cup of hot coffee or spiced chai is the perfect companion. For a dessert spread, pair these bars with peanut butter cup brownie cheesecake bars for a dessert spread that covers all the bases. A glass of cold milk works beautifully too—the creaminess cuts through the richness.
Storage: Store the bars in an airtight container in the refrigerator for up to 5 days. Layer them between sheets of parchment paper to prevent sticking. I’ve never had a batch last that long, but theoretically, they’ll hold up.
Freezing: These freeze exceptionally well. Wrap individual bars tightly in plastic wrap, then place them in a freezer-safe bag or container. They’ll keep for up to 3 months. To thaw, transfer to the refrigerator overnight. Don’t thaw at room temperature—the condensation can make the crust soggy. I always keep a stash in the freezer for unexpected guests or late-night cravings.
How flavors develop: The first day, the pumpkin and spice flavors are bright and distinct. By day two or three, everything mellows and blends together. The crust softens slightly, absorbing moisture from the filling, which some people actually prefer. If you want the crunchiest crust, serve them within 24 hours.
Nutritional Information & Benefits
Let’s be real—these are a dessert, not a health food. But that doesn’t mean they don’t have some redeeming qualities.
Estimated nutritional values per bar (based on 16 servings):
- Calories: 285
- Total Fat: 18g
- Saturated Fat: 10g
- Carbohydrates: 28g
- Sugar: 18g
- Protein: 5g
- Fiber: 1g
- Sodium: 220mg
Health highlights: Pumpkin is packed with vitamin A (beta-carotene), which supports eye health and immune function. It’s also a good source of fiber and potassium. The ginger in the gingersnap crust has anti-inflammatory properties and can aid digestion—which you might appreciate after a heavy meal. Cream cheese provides calcium and protein, though it’s also high in saturated fat, so moderation is key.
Dietary considerations: This recipe contains gluten, dairy, and eggs. For gluten-free and vegan adaptations, see the variations section above. If you’re watching your sugar intake, you can reduce the sugar in the filling to 1/2 cup without major texture changes, but the bars won’t be as sweet.
My personal take: I don’t believe in guilt-tripping people about dessert. Food is meant to be enjoyed, and these bars are a celebration of fall flavors. One bar won’t derail your health goals, and the pumpkin actually brings some genuine nutritional value to the table. Enjoy them mindfully, share them with people you love, and don’t overthink it.
Conclusion
These pumpkin cheesecake bars with gingersnap crust are the kind of recipe that becomes a tradition. They’re not fussy, they’re not pretentious, and they don’t require a culinary degree to pull off. What they are is honest—honest about the fact that sometimes you want something creamy, something crunchy, something spiced and sweet and satisfying all at once.
I love that I can make these for a holiday dinner and impress everyone, or I can make them on a random Tuesday just because I found a bag of gingersnaps on sale. They adapt to the occasion without losing their identity. That’s rare in a recipe, and it’s why I keep coming back to them year after year.
If you make these bars—and I really hope you do—don’t be afraid to make them your own. Add more spice, swap the crust, drizzle them with chocolate. The best recipes are the ones that leave room for your personality. And if you come up with a variation that blows your mind, I’d love to hear about it. Drop a comment below, tag me in your photos, or just send a message saying how many you ate in one sitting (no judgment here).
Now go preheat that oven. Your kitchen is about to smell incredible.
Frequently Asked Questions
Can I use a different crust instead of gingersnaps?
Absolutely. Graham crackers, vanilla wafers, or shortbread cookies all work. Just keep the butter-to-crumb ratio the same. The flavor will be different, of course, but still delicious. If you use a sweeter cookie like vanilla wafers, reduce the added sugar to 1 tablespoon.
Why did my cheesecake bars crack on top?
Cracks usually happen from overbaking or overmixing. If the center is completely firm when you take it out, it’s overdone. Next time, pull it when the center still has a slight jiggle. Overmixing incorporates too much air, which expands in the oven and then collapses, causing cracks. Mix on low speed and stop as soon as the ingredients are combined.
Can I make these bars in a different size pan?
Yes, but you’ll need to adjust the baking time. An 8×8-inch pan will give you thicker bars and will need about 5-8 more minutes in the oven. A 9×13-inch pan will give you thinner bars and will bake faster—check them at 25 minutes. Keep an eye on the edges; they should be set but not dark.
How do I know when the cream cheese is properly softened?
Press your finger gently into the block. If it leaves an indentation without resistance, it’s ready. If your finger bounces back, it’s still too cold. If it feels greasy or melty, it’s too warm. Room temperature cream cheese should be around 68-70°F (20-21°C).
Can I use fresh pumpkin instead of canned?
You can, but you’ll need to roast and puree it first, then strain it through cheesecloth or a fine-mesh sieve to remove excess water. Fresh pumpkin has a higher water content than canned, which can make the filling loose. If you’re using fresh, reduce the pumpkin to 3/4 cup and add an extra tablespoon of flour to compensate. Honestly, canned pumpkin is more consistent and convenient for this recipe.
Pin This Recipe!
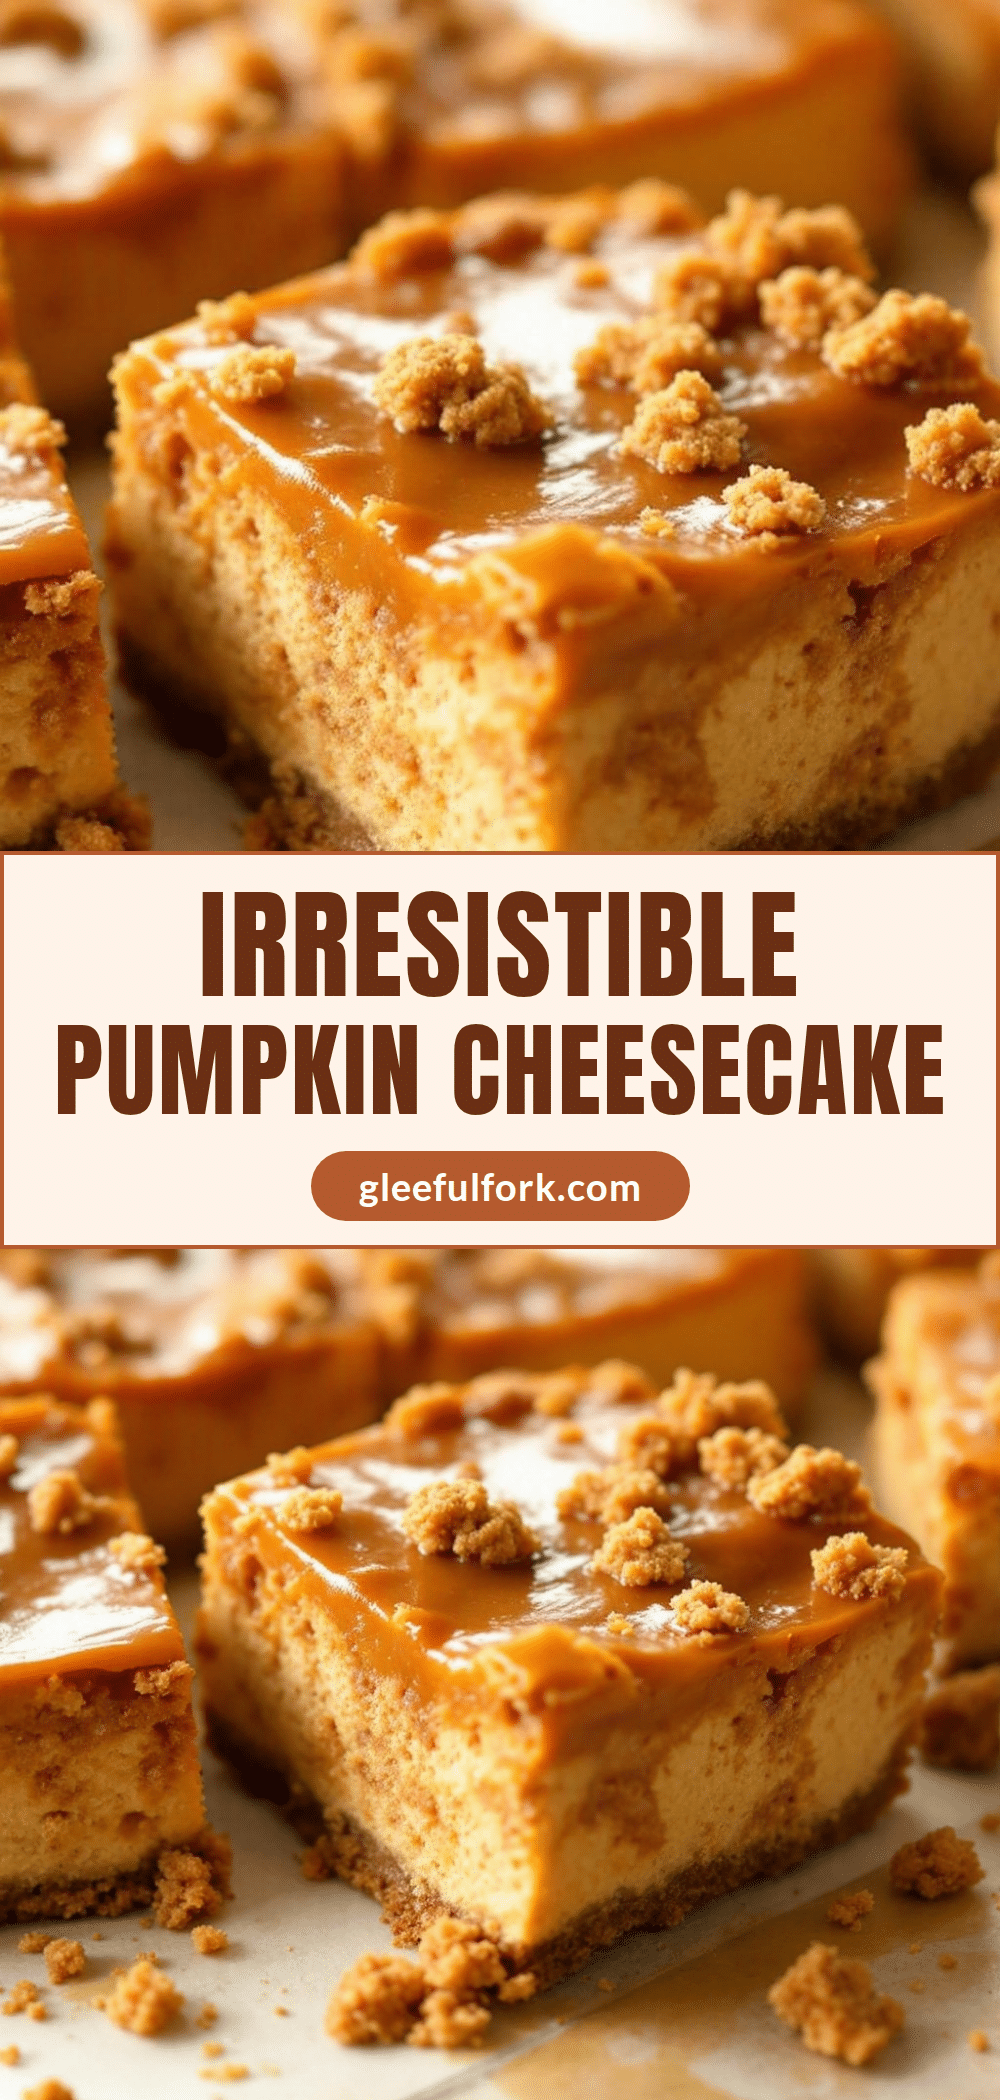
Best Pumpkin Cheesecake Bars with Gingersnap Crust
These pumpkin cheesecake bars feature a spicy gingersnap crust and a creamy, tangy pumpkin cheesecake filling. They’re easy to make, require no water bath, and are perfect for fall gatherings.
- Prep Time: 20 minutes
- Cook Time: 40 minutes
- Total Time: 5 hours (includes chilling time)
- Yield: 16 bars 1x
- Category: Dessert
- Cuisine: American
Ingredients
- 2 cups (about 240g) gingersnap cookie crumbs
- 6 tablespoons (85g) unsalted butter, melted
- 2 tablespoons (25g) granulated sugar
- 1/4 teaspoon fine sea salt
- 16 ounces (452g) full-fat cream cheese, softened
- 3/4 cup (150g) granulated sugar
- 1 cup (245g) pumpkin puree
- 2 large eggs, room temperature
- 1 teaspoon vanilla extract
- 1 teaspoon pumpkin pie spice
- 1/4 teaspoon freshly ground black pepper
- 1 tablespoon all-purpose flour
- 1/2 cup (120ml) heavy cream (optional, for topping)
- 1 tablespoon powdered sugar (optional, for topping)
- Crushed gingersnaps or candied pecans (optional, for garnish)
Instructions
- Preheat your oven to 350°F (175°C). Line a 9×9-inch baking pan with parchment paper, leaving about 2 inches of overhang on two opposite sides. Lightly grease the parchment with butter or non-stick spray.
- In a food processor, pulse the gingersnap cookies until they become fine crumbs. Transfer to a medium bowl and add the sugar and salt. Pour in the melted butter and stir with a fork until every crumb is moistened. The mixture should look like wet sand and hold together when squeezed.
- Dump the crumb mixture into the prepared pan. Use the bottom of a flat measuring cup or a glass to press it down firmly and evenly. Bake for 10 minutes, then set aside to cool while you make the filling. Leave the oven on.
- In a large bowl, beat the softened cream cheese with an electric mixer on medium speed until smooth and creamy, about 2 minutes. Scrape down the sides and bottom of the bowl. Add the sugar and beat for another 2 minutes until light and fluffy.
- Add the pumpkin puree, vanilla, pumpkin pie spice, black pepper, and flour. Beat on low speed until just combined. Add the eggs one at a time, beating on low after each addition until incorporated. Do not overmix.
- Pour the filling over the pre-baked crust. Use a spatula to spread it evenly to the edges. Give the pan a gentle tap on the counter to release any air bubbles.
- Bake at 350°F (175°C) for 35-40 minutes. The edges should be set and slightly puffed, but the center should still jiggle slightly when you gently shake the pan.
- Place the pan on a wire rack and let it cool to room temperature, about 1-2 hours.
- Once cooled, cover the pan with plastic wrap and refrigerate for at least 4 hours, preferably overnight.
- Use the parchment sling to lift the entire block out of the pan. Place it on a cutting board. Use a sharp, thin-bladed knife to cut into 16 squares (4×4 grid). Wipe the knife clean between cuts for neat edges. Serve cold or at room temperature.
Notes
For clean slices, run your knife under hot water, dry it off, then slice. Wipe and reheat between cuts. These bars actually taste better after a night in the fridge as the flavors meld. If you want extra crunch, bake the crust for 12 minutes instead of 10.
Nutrition
- Serving Size: 1 bar
- Calories: 285
- Sugar: 18
- Sodium: 220
- Fat: 18
- Saturated Fat: 10
- Carbohydrates: 28
- Fiber: 1
- Protein: 5
Keywords: pumpkin cheesecake bars, gingersnap crust, fall dessert, Thanksgiving dessert, cheesecake bars, pumpkin dessert


