Love this? Save it for later!
Share the inspiration with your friends
Fumbling with a half-empty block of cream cheese and a bag of shredded cheddar that had seen better days when the realization hit—I had promised sliders for the big game and my fridge was basically a wasteland of leftovers and half-used condiments. The clock was ticking, friends were texting “what time should we be there?” and I was staring at a container of leftover rotisserie chicken like it held the secrets to the universe. Honestly, I almost just ordered pizza.
But then I spotted the bottle of Frank’s RedHot hiding behind the pickles, and my brain did that thing where two completely separate cravings collide into something brilliant. Buffalo chicken dip. Slider buns. Why had I never thought to combine them into one glorious, handheld situation? Thirty minutes later, I was pulling a baking dish out of the oven that smelled like victory, and my husband had already stolen two before I could even snap a photo. These best buffalo chicken dip stuffed football sliders were born from pure desperation, and honestly, they turned out better than anything I could have planned.
That’s the thing about game day food, right? It doesn’t need to be fancy. It needs to be the kind of thing people stand around the counter eating straight off the pan, napkins optional, talking with their mouths full because nobody cares about manners when there’s melted cheese involved. These sliders have that energy. They’re messy in the best way, packed with that tangy, spicy, creamy buffalo dip goodness we all fight over, but now it’s stuffed inside soft, buttery rolls that soak up every bit of sauce. You won’t need a plate. You won’t need a fork. You’ll just need more napkins.
Why You’ll Love This Recipe
Look, I’ve tested a lot of game day recipes over the years. Some are hits, some are… let’s just say they end up in the trash before halftime. These best buffalo chicken dip stuffed football sliders? They’re the ones people text me about the next day asking for the recipe. Here’s why they work.
- Quick & Easy : From fridge to table in under 30 minutes. No complicated steps, no fancy techniques. If you can stir and spoon, you can make these.
- Simple Ingredients : Everything you need is probably already in your kitchen or a quick trip to the store away. Rotisserie chicken, cream cheese, hot sauce, cheddar, ranch seasoning, and slider buns. That’s it.
- Perfect for Game Day : These are literally shaped like footballs (well, close enough) and they scream “touchdown snack.” They’re portable, easy to grab, and you can make a big batch without breaking a sweat.
- Crowd-Pleaser : I’ve served these to kids, spice-averse relatives, and friends who claim they don’t like blue cheese. Everyone goes back for seconds. The spicy-creamy balance is just right—enough heat to wake up your taste buds but not so much that you need a glass of milk.
- Unbelievably Delicious : The texture is next-level. You get the soft, buttery bun, the creamy, tangy buffalo chicken filling, and that slightly crisp top from the cheese and butter wash. It’s comfort food in handheld form, and it’s honestly the best thing I’ve made for a party in years.
What makes these different from every other slider recipe out there is the stuffing technique. Instead of just piling dip on top of a bun (which gets soggy and falls apart), we hollow out the rolls, fill them with the thick, creamy buffalo chicken mixture, and then bake them until the edges get golden and the cheese gets bubbly. The filling stays inside, the buns stay sturdy, and every single bite has that perfect ratio of bread to dip. It’s not just another version—it’s the version.
What Ingredients You Will Need
This recipe uses simple, everyday ingredients to create something that tastes like you spent hours in the kitchen. The magic is in how they come together, not in complicated shopping lists. Here’s what you’ll need.
- For the Buffalo Chicken Filling:
- 2 cups cooked shredded chicken (rotisserie chicken works perfectly, or use leftover grilled chicken)
- 8 oz cream cheese, softened (full-fat gives the creamiest texture, but reduced-fat works too)
- 1/2 cup buffalo hot sauce (Frank’s RedHot is my go-to for that classic flavor)
- 1/2 cup shredded sharp cheddar cheese (adds richness and helps bind the filling)
- 1/4 cup crumbled blue cheese (optional, but I love the tangy kick—use ranch seasoning if you’re not a blue cheese fan)
- 1 tablespoon ranch seasoning mix (adds that savory, herby depth)
- 1/4 cup sour cream (keeps the filling creamy and prevents it from drying out)
- Salt and black pepper to taste
- For the Sliders:
- 12 slider buns (soft, slightly sweet Hawaiian rolls are my favorite—they get perfectly golden and buttery)
- 3 tablespoons unsalted butter, melted
- 1 teaspoon garlic powder
- 1 teaspoon dried parsley (for that little green pop on top)
- 1/2 cup shredded mozzarella cheese (for the top—gets melty and slightly crispy)
- Optional: sesame seeds or everything bagel seasoning for garnish
When it comes to the hot sauce, I recommend sticking with Frank’s RedHot for the most authentic buffalo flavor. It’s tangy, spicy without being overwhelming, and it has that vinegar kick that cuts through the richness of the cream cheese. If you want more heat, add a teaspoon of cayenne pepper to the filling. For a milder version, use a mild buffalo sauce or mix the hot sauce with a little extra sour cream.
The cream cheese is non-negotiable for that luscious, dip-like texture. Make sure it’s truly softened to room temperature—microwaving it for 10-15 seconds works in a pinch, but don’t overdo it or it’ll get grainy. I’ve tried this with Neufchâtel cheese (lower fat) and it works, but the filling is slightly less creamy. For the best results, go full-fat.
One more thing about the chicken. Shredded rotisserie chicken is the ultimate shortcut here. It’s already cooked, flavorful, and shreds beautifully. But if you have leftover grilled chicken, baked chicken, or even canned chicken (drained well), it’ll work too. Just make sure it’s finely shredded so it mixes evenly into the filling.
Equipment Needed
You don’t need a lot of fancy gear for this recipe, which is part of the beauty. Here’s what you’ll need.
- Large mixing bowl (for combining the filling ingredients)
- 9×13 inch baking dish (or any oven-safe dish that fits 12 sliders snugly)
- Sharp knife or serrated bread knife (for slicing the rolls in half and hollowing them out)
- Small saucepan or microwave-safe bowl (for melting butter)
- Pastry brush (for brushing the butter mixture on top)
- Measuring cups and spoons
- Fork or hand mixer (for shredding chicken and mixing the filling)
- Aluminum foil (for covering the dish during the first part of baking)
If you don’t have a pastry brush, you can use a spoon to drizzle the melted butter over the rolls. It won’t be as even, but it’ll still taste amazing. No 9×13 dish? Use a cast iron skillet or any oven-safe baking dish that fits the sliders snugly. The key is keeping them close together so they stay soft and soak up all that buttery goodness.
I’ve made these in a disposable aluminum pan for tailgating before, and they turned out just as good. Just watch the baking time—disposable pans can cook a little faster. Honestly, the only tool I’d say is essential is a good knife for slicing the rolls without squishing them. A serrated bread knife works best for that clean cut.
Preparation Method

Alright, let’s get cooking. This comes together fast, so I recommend having everything prepped and measured before you start. Trust me, your future self will thank you.
- Preheat your oven to 350°F (175°C). While it’s heating up, grab your 9×13 baking dish and give it a light spray with non-stick cooking spray. You want the sliders to release easily later.
- Make the buffalo chicken filling. In a large mixing bowl, combine the softened cream cheese, shredded chicken, buffalo hot sauce, shredded cheddar, crumbled blue cheese (if using), ranch seasoning, and sour cream. Use a fork or a hand mixer on low speed to mix everything together until it’s well combined and creamy. Don’t overmix—you want some texture from the chicken, not a paste. Taste it and adjust the salt and pepper. The filling should be thick enough to hold its shape when spooned, not runny. If it seems too loose, add another tablespoon of shredded cheddar.
- Prepare the slider buns. Carefully slice the entire block of 12 slider buns in half horizontally, keeping them connected as a single slab. Place the bottom half of the buns in the prepared baking dish. Now for the fun part—using your fingers or a small spoon, gently hollow out a shallow well in each bun bottom. You’re not digging all the way through, just creating a little pocket for the filling to sit in. This keeps the filling from squishing out the sides and helps the buns stay sturdy. Set the top half of the buns aside.
- Stuff the sliders. Spoon the buffalo chicken filling evenly over the hollowed-out bun bottoms, pressing it down gently so it fills the wells and spreads to the edges. Don’t pile it too high—you want the top bun to sit nicely without everything exploding. A generous half-cup of filling per slider is about right.
- Add the top layer of cheese. Sprinkle the shredded mozzarella cheese evenly over the filling. This creates that beautiful, melty, slightly crispy top layer that makes these sliders so irresistible.
- Top with the bun tops. Place the top half of the slider buns over the filling and cheese, pressing down gently to secure everything. In a small bowl, mix the melted butter with the garlic powder and dried parsley. Brush this mixture generously over the tops of the buns. If you’re using sesame seeds or everything bagel seasoning, sprinkle them on now.
- Bake covered. Cover the baking dish loosely with aluminum foil and bake for 15 minutes. This steams the buns and ensures the filling gets hot all the way through without the tops burning.
- Bake uncovered. Remove the foil and bake for another 8-10 minutes, until the tops are golden brown and the cheese is bubbly and starting to get crispy around the edges. If you want extra crispy tops, switch the oven to broil for the last 1-2 minutes—but watch closely so they don’t burn.
- Rest and serve. Let the sliders rest in the dish for 5 minutes before serving. This is crucial—the filling needs a minute to set up so it doesn’t slide everywhere when you pick up a slider. Use a spatula to lift them out, and serve warm.
One thing I learned the hard way: don’t skip the resting step. The first time I made these, I pulled them out of the oven and immediately tried to serve them. The filling was so hot and loose that the buns basically disintegrated. Five minutes of patience makes all the difference. You’ll see the cheese set up and the buns absorb just enough butter to become soft but not soggy.
Cooking Tips & Techniques
I’ve made these best buffalo chicken dip stuffed football sliders probably a dozen times now, and I’ve picked up a few tricks along the way. Here’s what I wish someone had told me the first time.
Don’t overfill the buns. I know it’s tempting to pile on as much buffalo chicken dip as possible, but trust me—less is more here. If you overfill, the filling will squish out the sides when you put the top bun on, and you’ll end up with a mess. Aim for a generous but manageable amount. The filling should stay inside the bun when you bite into it, not run down your arm.
Toast the buns first for extra sturdiness. If you’re worried about soggy bottoms (a real concern with any stuffed slider), try this trick: after slicing the buns in half, place the bottom halves on a baking sheet and toast them in the oven for 3-4 minutes before adding the filling. This creates a barrier that helps prevent sogginess. I do this when I’m making them ahead of time, and it works like a charm.
Use room temperature cream cheese. This is non-negotiable for a smooth, creamy filling. Cold cream cheese will leave you with lumpy pockets of cheese that don’t blend well. Leave it out on the counter for 30 minutes before you start, or microwave it in 10-second bursts until it’s soft but not melted.
Make the filling ahead of time. This is my favorite time-saving hack. You can prepare the buffalo chicken filling up to 2 days in advance and store it in the fridge. When you’re ready to assemble, just let it sit at room temperature for 15 minutes to soften slightly, then spoon it into the buns. The flavors actually get better as they meld together overnight.
Watch the broiler. If you decide to broil the tops for extra crispiness, do not walk away. The line between golden perfection and burnt disaster is about 30 seconds. I learned this the hard way when I got distracted by a touchdown and ended up with charcoal tops. Set a timer for 60 seconds and check constantly.
Use a serrated knife to cut the sliders. When you’re ready to separate them, use a serrated knife with a gentle sawing motion. A regular knife will squish the buns and push the filling out. Clean cuts make for prettier presentation and less mess.
Variations & Adaptations
One of the best things about this recipe is how adaptable it is. Here are some variations I’ve tried and loved.
Spicy Buffalo Ranch Sliders. For an extra kick, add 1-2 tablespoons of pickled jalapeños (chopped) to the filling, and use a spicy ranch seasoning instead of regular. The acidity from the jalapeños cuts through the richness beautifully. I made this version for a super bowl party and they disappeared in minutes.
Blue Cheese Lovers’ Version. If you’re a blue cheese fanatic like me, double the crumbled blue cheese in the filling and add a few extra crumbles on top before baking. The tangy, funky flavor pairs perfectly with the spicy buffalo sauce. Just be warned—this version is not for the faint of heart.
Healthier Twist. Use reduced-fat cream cheese, low-fat cheddar, and Greek yogurt instead of sour cream. Swap the slider buns for whole wheat or keto-friendly rolls. The texture is slightly less indulgent, but the flavor is still amazing. I’ve also made these with shredded cauliflower mixed into the chicken to lighten things up—it works surprisingly well.
Vegetarian Option. Replace the chicken with 2 cups of finely chopped roasted cauliflower or canned chickpeas (mashed). The texture is different, but the buffalo flavor still shines. I’ve made this for a vegetarian friend and she begged for the recipe.
BBQ Chicken Sliders. Swap the buffalo sauce for your favorite BBQ sauce, and replace the blue cheese with smoked gouda. It’s a completely different flavor profile but just as delicious. I made these for a summer cookout and they were a huge hit.
Gluten-Free Version. Use gluten-free slider buns (I like the ones from Schar or Udi’s) and double-check that your hot sauce and ranch seasoning are certified gluten-free. Everything else in the recipe is naturally gluten-free. Just be careful not to overbake gluten-free buns—they dry out faster than regular ones.
Air Fryer Method. If you want extra crispy tops without heating up the whole oven, assemble the sliders in a single layer in your air fryer basket (you may need to work in batches). Cook at 350°F for 5-6 minutes, then check. The air fryer gives the tops a beautiful golden crust while keeping the insides soft and steamy.
Serving & Storage Suggestions
These sliders are best served warm, straight out of the oven, when the cheese is still stretchy and the buns are soft and buttery. But they’re also surprisingly good at room temperature—which is perfect for parties where people graze over a few hours.
Serving Suggestions. Arrange the sliders on a large platter with a side of extra buffalo sauce for dipping (because you can never have too much). I like to serve them with celery sticks and carrot sticks on the side—the crunch and freshness balance out the richness. A fresh cowboy caviar or honey mustard coleslaw would be perfect alongside these sliders for a complete game day spread. For drinks, cold beer (an IPA or lager works great) or a tangy lemonade cuts through the richness beautifully.
Storage. Leftover sliders can be stored in an airtight container in the refrigerator for up to 3 days. The buns will soften a bit, but the flavor is still fantastic. To reheat, wrap individual sliders in foil and warm them in a 350°F oven for 8-10 minutes, or microwave them for 30-45 seconds. The oven method keeps the buns from getting too soggy.
Freezing Instructions. These sliders freeze surprisingly well. Assemble them completely (but don’t bake) and place the dish in the freezer for 2-3 hours until the sliders are solid. Wrap the entire dish tightly in plastic wrap and then foil, and freeze for up to 2 months. When you’re ready to bake, thaw overnight in the refrigerator, then bake as directed, adding 5-10 minutes to the covered baking time. I’ve done this for multiple game day parties and nobody has ever guessed they were frozen.
Make-Ahead Tip. If you’re hosting a party, assemble the sliders the night before, cover tightly with foil, and refrigerate. The next day, just pop them in the oven straight from the fridge—add 5 minutes to the covered baking time to account for the cold start. This is my go-to strategy for stress-free entertaining.
Nutritional Information & Benefits
Let’s be real—these are indulgent party sliders, not health food. But here’s the nutritional breakdown for one slider (based on 12 servings) so you can plan your game day spread accordingly.
- Calories: Approximately 320-350 per slider
- Protein: 18-20g (thanks to the chicken and cheese)
- Fat: 18-22g (mostly from cream cheese, cheese, and butter)
- Carbohydrates: 22-25g (from the buns)
- Fiber: 1-2g
- Sugar: 4-6g (depending on the buns)
- Sodium: 600-800mg (buffalo sauce and ranch seasoning add sodium)
On the plus side, chicken is a great source of lean protein, and the hot sauce contains capsaicin, which has anti-inflammatory properties and can boost metabolism. The cream cheese and cheddar provide calcium and vitamin A. If you’re watching your sodium, use low-sodium hot sauce and skip the extra salt in the filling.
These sliders are not suitable for vegetarians (unless you use the cauliflower option), vegans, or anyone with a dairy allergy. They do contain gluten, so use gluten-free buns if needed. For a lower-calorie option, use reduced-fat cheese and sour cream, and swap the butter wash for a light spray of olive oil.
Conclusion
These best buffalo chicken dip stuffed football sliders are the kind of recipe that becomes a tradition. They’re the dish people request for every game day, every party, every casual get-together where good food and good company are the only things that matter. They’re messy, they’re indulgent, and they’re absolutely worth every single calorie.
What I love most about this recipe is how forgiving it is. You can tweak the spice level, swap out the cheese, use whatever chicken you have on hand—and it still turns out amazing. It’s not a fussy, precision-baking situation. It’s a “throw it together, bake it, and watch it disappear” kind of recipe. And honestly, those are my favorite kinds of recipes.
So go ahead—make these for your next game day, your next party, or just a random Tuesday when you need something comforting and delicious. Customize them to your heart’s content. Add extra jalapeños. Double the blue cheese. Use Hawaiian rolls or brioche buns. Make them your own. And when your friends ask for the recipe (they will), send them my way.
I’d love to hear how yours turn out! Drop a comment below and let me know what variations you tried, or tag me in your photos on social media. Happy cooking, and here’s to good food and great games!
Frequently Asked Questions
Can I make these buffalo chicken dip stuffed sliders ahead of time?
Absolutely! You can assemble the sliders completely (without baking) up to 24 hours in advance. Cover tightly with foil and refrigerate. When ready to serve, bake as directed, adding 5-10 minutes to the covered baking time since you’re starting from cold. This is my favorite way to prep for parties.
What’s the best type of chicken to use?
Rotisserie chicken is my top pick because it’s already cooked, flavorful, and shreds beautifully. But leftover grilled chicken, baked chicken breasts, or even well-drained canned chicken all work great. Just make sure the chicken is finely shredded so it mixes evenly into the creamy filling.
Can I use a different type of cheese?
Yes! Sharp cheddar is classic, but you can use Monterey Jack, pepper jack (for extra heat), gouda, or even a Mexican blend. For the top, mozzarella gives that perfect melty stretch, but provolone or white cheddar also work well. Just avoid pre-shredded cheese with anti-caking agents—it doesn’t melt as smoothly.
How do I prevent the sliders from getting soggy?
Three tricks: First, toast the bottom buns for 3-4 minutes before adding the filling. Second, don’t overfill—the filling should sit inside the bun, not overflow. Third, let the sliders rest for 5 minutes after baking before serving. This allows the cheese to set and the buns to absorb the butter without becoming mushy.
Can I freeze these sliders?
Yes, and they freeze beautifully! Assemble the sliders completely but don’t bake them. Freeze the dish until solid (about 2-3 hours), then wrap tightly in plastic wrap and foil. Freeze for up to 2 months. When ready to bake, thaw overnight in the fridge, then bake as directed, adding 5-10 minutes to the covered baking time.
Pin This Recipe!
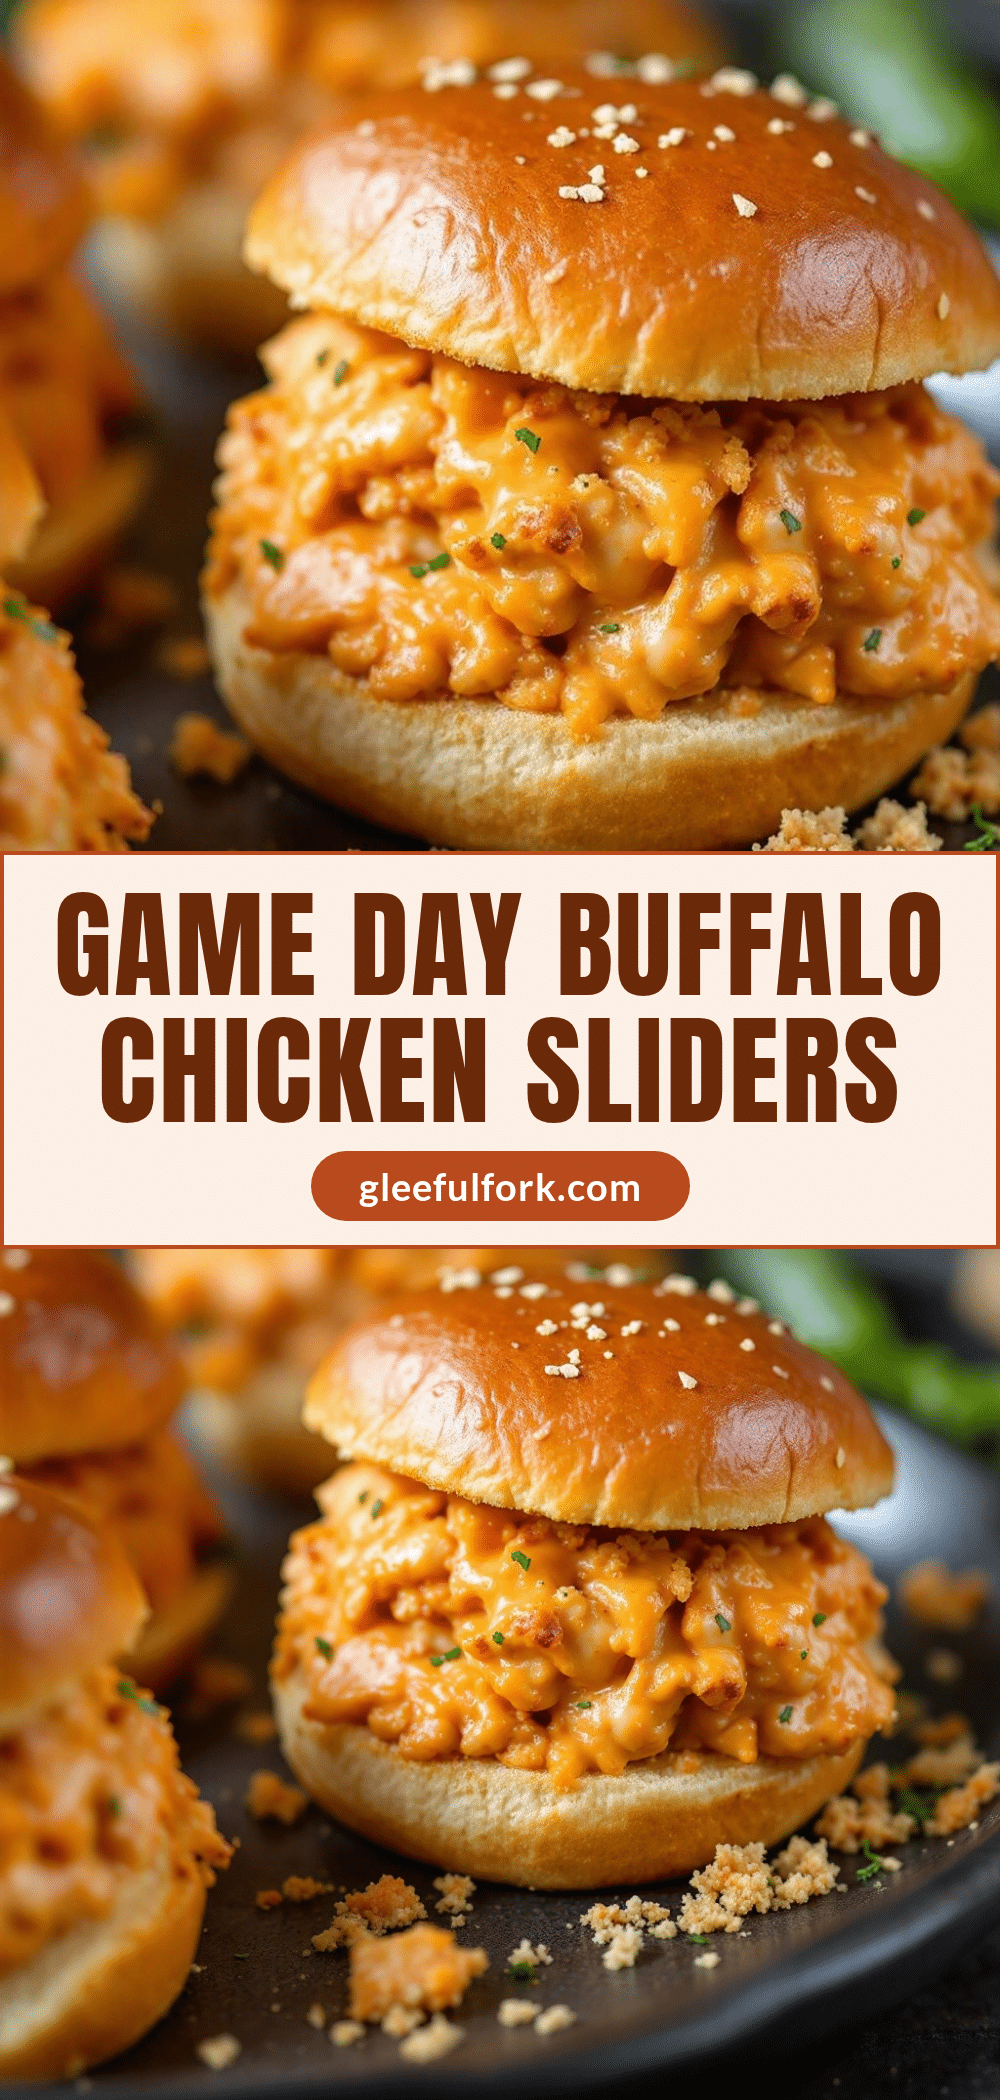
Best Buffalo Chicken Dip Stuffed Sliders: Easy Game Day Recipe
These best buffalo chicken dip stuffed football sliders are the ultimate game day snack—soft, buttery rolls stuffed with creamy, spicy buffalo chicken dip, topped with melted cheese and baked to golden perfection. Quick, easy, and absolutely irresistible.
- Prep Time: 15 minutes
- Cook Time: 25 minutes
- Total Time: 40 minutes
- Yield: 12 servings 1x
- Category: Appetizer
- Cuisine: American
Ingredients
- 2 cups cooked shredded chicken (rotisserie chicken works perfectly)
- 8 oz cream cheese, softened
- 1/2 cup buffalo hot sauce (Frank’s RedHot recommended)
- 1/2 cup shredded sharp cheddar cheese
- 1/4 cup crumbled blue cheese (optional)
- 1 tablespoon ranch seasoning mix
- 1/4 cup sour cream
- Salt and black pepper to taste
- 12 slider buns (soft, slightly sweet Hawaiian rolls recommended)
- 3 tablespoons unsalted butter, melted
- 1 teaspoon garlic powder
- 1 teaspoon dried parsley
- 1/2 cup shredded mozzarella cheese
- Optional: sesame seeds or everything bagel seasoning for garnish
Instructions
- Preheat your oven to 350°F (175°C). Lightly spray a 9×13 baking dish with non-stick cooking spray.
- Make the buffalo chicken filling: In a large mixing bowl, combine softened cream cheese, shredded chicken, buffalo hot sauce, shredded cheddar, crumbled blue cheese (if using), ranch seasoning, and sour cream. Mix until well combined and creamy. Adjust salt and pepper to taste.
- Prepare the slider buns: Carefully slice the entire block of 12 slider buns in half horizontally, keeping them connected as a single slab. Place the bottom half in the prepared baking dish. Gently hollow out a shallow well in each bun bottom using your fingers or a small spoon.
- Stuff the sliders: Spoon the buffalo chicken filling evenly over the hollowed-out bun bottoms, pressing down gently.
- Add the top layer of cheese: Sprinkle shredded mozzarella cheese evenly over the filling.
- Top with the bun tops: Place the top half of the slider buns over the filling and cheese, pressing down gently. In a small bowl, mix melted butter with garlic powder and dried parsley. Brush this mixture generously over the tops of the buns. Sprinkle with sesame seeds or everything bagel seasoning if desired.
- Bake covered: Cover the baking dish loosely with aluminum foil and bake for 15 minutes.
- Bake uncovered: Remove the foil and bake for another 8-10 minutes, until tops are golden brown and cheese is bubbly. For extra crispy tops, broil for 1-2 minutes, watching closely.
- Rest and serve: Let the sliders rest in the dish for 5 minutes before serving. Use a spatula to lift them out and serve warm.
Notes
Don’t overfill the buns to prevent filling from squishing out. Toast the bottom buns for 3-4 minutes before filling to prevent sogginess. Use room temperature cream cheese for a smooth filling. Let sliders rest for 5 minutes after baking to allow the filling to set. For make-ahead, assemble sliders (without baking) up to 24 hours in advance and refrigerate; add 5-10 minutes to covered baking time. Freeze unbaked sliders for up to 2 months.
Nutrition
- Serving Size: 1 slider
- Calories: 335
- Sugar: 5
- Sodium: 700
- Fat: 20
- Saturated Fat: 10
- Carbohydrates: 23
- Fiber: 1
- Protein: 19
Keywords: buffalo chicken dip sliders, game day sliders, football sliders, buffalo chicken sliders, easy appetizer, party food


