Love this? Save it for later!
Share the inspiration with your friends
I had refused to make stuffing for Thanksgiving for almost a decade. Not because I didn’t like it—honestly, I loved it. But because I had this stubborn idea that the boxed stuff was just fine, and that homemade stuffing was one of those dishes that sounded good in theory but never lived up to the hype in practice. Then my brother-in-law showed up at our Friendsgiving last November with a foil pan of this brown butter sage situation, and I found myself standing over the stove at 11 PM that night, eating cold stuffing straight from the pan when I thought no one was watching.
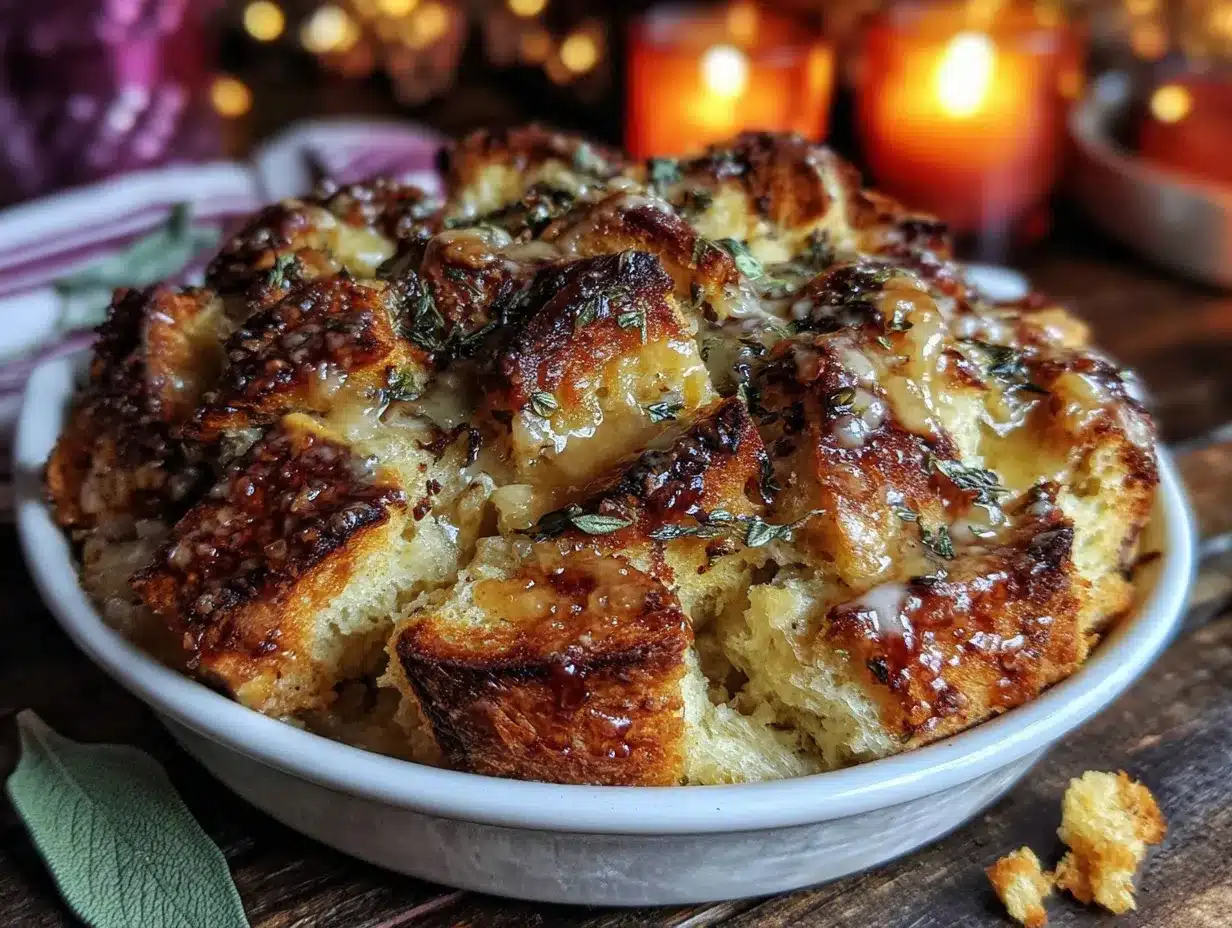
He caught me. Of course he did. “I thought you didn’t like stuffing,” he said, and I had a forkful halfway to my mouth with absolutely no defense. The thing is, this isn’t just stuffing. It’s the kind of dish that makes you question every Thanksgiving you’ve ever had without it. The sourdough gets all crispy on the edges but stays tender in the middle. The brown butter adds this nutty, almost caramel-like richness that you can’t quite name but you know you need more of. And the sage—well, let me tell you, fresh sage changes everything.
I spent the next week texting him for the recipe, tweaking it in my own kitchen, and testing it on anyone who walked through my door. My neighbor Karen stopped by to borrow an egg and left forty-five minutes later with a full container of stuffing and a promise to make it for her own family. Maybe you’ve been there too—stuck in a food rut, convinced that some classic dish just isn’t worth the effort. I’m here to tell you that this one absolutely is. This recipe stayed with me because it proved me wrong, and I’ve been making it ever since.
Why You’ll Love This Recipe
This isn’t your grandmother’s stuffing—though honestly, she’d probably approve too. Let me break down why this version has become my most-requested holiday dish.
- Quick & Easy : Comes together in under an hour once your bread is dried out. Perfect for busy Thanksgiving mornings or when you need to bring a dish to a Friendsgiving without spending all day in the kitchen.
- Simple Ingredients : No fancy grocery trips needed. You probably already have sourdough bread, butter, sage, onions, and celery in your kitchen right now.
- Perfect for Holidays : Great for Thanksgiving, Christmas, Easter brunch, or honestly any cold-weather gathering where you want something warm and comforting on the table.
- Crowd-Pleaser : I’ve served this to kids who “don’t like stuffing” and adults who claim they’re “not bread people.” It always gets rave reviews and recipe requests.
- Unbelievably Delicious : The combination of nutty brown butter, aromatic sage, and crusty sourdough creates a texture and flavor that’s next-level comfort food.
What makes this recipe different from every other stuffing out there? It’s the technique of browning the butter first. That one extra step transforms the entire dish, adding a depth of flavor you just can’t get from regular melted butter. Plus, using sourdough bread gives it a tangy backbone that balances the richness of the butter and broth perfectly. This isn’t just another version—it’s my best version, tested across three different holidays and countless dinner parties.
This recipe is the kind that makes you close your eyes after the first bite. It’s comfort food reimagined—richer, more flavorful, but with the same soul-soothing satisfaction you expect from a classic holiday dish. Perfect for impressing guests without stress, or turning a simple Sunday dinner into something memorable.
What Ingredients You Will Need
This recipe uses simple, wholesome ingredients to deliver bold flavor and satisfying texture without the fuss. Most of these are pantry staples, but a few key players make all the difference.
For the Stuffing Base
- 1 large loaf sourdough bread (about 1 pound), cut into 1-inch cubes (day-old or slightly stale works best; fresh is fine if you toast it)
- 1 cup unsalted butter (2 sticks) — I recommend Kerrygold for the richest flavor, but any good-quality unsalted butter works
- 1 large yellow onion, diced (about 1 ½ cups)
- 3 celery stalks, diced (about 1 cup)
- 4 cloves garlic, minced
- ¼ cup fresh sage leaves, chopped (about 15-20 leaves) — do NOT substitute dried sage here; fresh is non-negotiable for that aromatic punch
- 1 tablespoon fresh thyme leaves (or 1 teaspoon dried)
- 1 tablespoon fresh rosemary, chopped (or 1 teaspoon dried)
- 2 cups low-sodium chicken or vegetable broth (adds richness; use vegetable broth for a vegetarian version)
- 2 large eggs, lightly beaten (helps bind everything together)
- 1 teaspoon kosher salt (plus more to taste)
- ½ teaspoon black pepper, freshly ground
Optional Add-Ins
- ½ cup dried cranberries (adds a pop of sweetness and color)
- ½ cup chopped pecans or walnuts (toasted, for extra crunch)
- 1 cup cooked Italian sausage, crumbled (for a heartier, non-vegetarian version)
- ½ cup grated Parmesan cheese (adds a salty, umami kick)
Ingredient Selection Tips : Look for a sourdough loaf with a sturdy crust and dense crumb—avoid the super soft, airy loaves. The bread needs to hold its shape during baking. For the sage, choose leaves that are vibrant green and fragrant, without any wilting or brown spots. I’ve found that farmers’ markets often have the best fresh herbs, but grocery store bunches work perfectly fine too.
Substitution Guidance : If you need this to be gluten-free, use a good-quality gluten-free sourdough or sturdy gluten-free bread. For a dairy-free version, substitute the butter with a high-quality vegan butter stick (not margarine)—I’ve had great results with Miyoko’s. The eggs can be omitted for a vegan version; just add an extra ¼ cup of broth to help bind everything together.
Equipment Needed
You don’t need a professional kitchen to make this stuffing, but a few key tools will make your life easier.
- Large skillet or Dutch oven — I use my 12-inch cast iron skillet for browning the butter and sautéing the vegetables. A heavy-bottomed pan works best for even heat distribution.
- Large mixing bowl — Big enough to toss all the ingredients without spilling. I use a 5-quart bowl, but any large bowl works.
- 9×13-inch baking dish — Standard size for this recipe. A 3-quart casserole dish works too.
- Sharp chef’s knife — For dicing onions, celery, and chopping herbs. A dull knife makes this step frustrating.
- Cutting board — Preferably large enough to handle chopping everything at once.
- Wooden spoon or spatula — For stirring the butter and vegetables.
- Measuring cups and spoons — For accuracy, especially with the broth and seasonings.
- Whisk — For beating the eggs and mixing the broth.
Budget-Friendly Options : If you don’t have a Dutch oven, any large, deep skillet will work. No 9×13 dish? Use a 10-inch cast iron skillet or a 2-quart baking dish instead—just adjust the baking time slightly. I’ve even made this in a disposable aluminum pan when traveling to Friendsgiving, and it turned out great.
Personal Experience : I used to think I needed a fancy enameled Dutch oven for browning butter, but honestly, my regular stainless steel skillet works even better because I can see the color change more clearly. Just something I learned after ruining a few batches of butter in a dark pan!
Preparation Method
Let me walk you through this step by step. I’ve made this recipe at least a dozen times, so I’ve learned all the little tricks along the way.
Step 1: Prepare the Bread
Preheat your oven to 350°F (175°C). Spread the sourdough cubes in a single layer on two large baking sheets. Bake for 12-15 minutes, stirring halfway through, until the bread is dry and lightly toasted but not browned. You want it crisp on the outside but still slightly soft in the center. Remove from the oven and let cool completely. Pro tip: If you’re short on time, you can leave the bread out overnight to dry instead of toasting it. I’ve done both methods, and the overnight drying gives a slightly better texture.
Step 2: Brown the Butter
In your large skillet or Dutch oven, melt the butter over medium heat. Once melted, continue cooking, swirling the pan occasionally. The butter will foam up, then settle down. Watch carefully—this happens fast! After about 5-7 minutes, you’ll see golden brown specks forming at the bottom of the pan, and the butter will smell nutty and amazing. Remove from heat immediately and pour the brown butter into a heat-safe bowl, leaving the browned bits in the skillet. Don’t walk away from the butter—I’ve burned more batches than I’d like to admit. The line between perfect brown butter and burnt butter is about 30 seconds.
Step 3: Sauté the Vegetables
Return the skillet to medium heat. Add the diced onion and celery, and cook for 6-8 minutes, stirring occasionally, until softened and translucent. Add the minced garlic, chopped sage, thyme, and rosemary, and cook for another minute until fragrant. Season with ½ teaspoon of salt and ¼ teaspoon of pepper. Remove from heat. The smell at this point is absolutely intoxicating—I always pause to take it in.
Step 4: Combine the Ingredients
In your large mixing bowl, combine the toasted sourdough cubes and the sautéed vegetable mixture. Pour the reserved brown butter over everything and toss gently to combine. In a separate small bowl, whisk together the beaten eggs and 1 ½ cups of the broth. Pour this mixture over the bread mixture and toss again until everything is evenly moistened. Add the remaining ½ cup of broth if the mixture seems dry—it should look moist but not soggy. I use my hands for this step because it’s the best way to distribute everything evenly without crushing the bread.
Step 5: Bake the Stuffing
Preheat your oven to 375°F (190°C). Grease your 9×13-inch baking dish with butter or cooking spray. Transfer the stuffing mixture to the prepared dish and spread it into an even layer. Cover with foil and bake for 25 minutes. Remove the foil and bake for another 20-25 minutes, until the top is golden brown and crispy. Let rest for 5-10 minutes before serving. The contrast between the crispy top and the soft, custard-like interior is what makes this stuffing unforgettable.
Cooking Tips & Techniques
I’ve learned a few things the hard way so you don’t have to. Here are my best tips for stuffing success.
Don’t Overcrowd the Pan : When toasting the bread cubes, make sure they’re in a single layer on the baking sheets. If they’re piled on top of each other, they’ll steam instead of toast, and you’ll end up with soggy stuffing. Use two sheets if you need to—it’s worth the extra pan to wash.
The Butter Watch : Browning butter is one of those techniques that seems intimidating but is actually simple once you know what to look for. The key is to keep the heat at medium and watch for the color change. When the butter turns a warm amber color and smells like toasted nuts, you’re there. Remove it from the heat immediately because the residual heat will continue cooking it. I once got distracted by a phone call and ended up with black butter. The kitchen smelled terrible for hours. Learn from my mistake!
Moisture Balance : The perfect stuffing is moist but not wet. If you’re using very dry bread, you might need the full 2 cups of broth. If your bread is still slightly soft, start with 1 ½ cups and add more as needed. The mixture should hold together when you squeeze a handful but shouldn’t release any liquid. This is one of those things you learn by feel—trust your instincts!
Make-Ahead Strategy : You can assemble the stuffing completely up to 24 hours in advance. Just prepare it through step 4, cover the baking dish with foil, and refrigerate. When you’re ready to bake, add about 10-15 minutes to the covered baking time since it’s starting from cold. This is my go-to strategy for Thanksgiving—it frees up oven space and reduces stress.
Crispy Top Trick : If you want an extra-crispy top, broil the stuffing for 2-3 minutes after it’s fully baked. Watch it like a hawk—it can go from golden to burnt in seconds. This is my secret for getting that perfect crunchy layer that everyone fights over.
Variations & Adaptations
One of the best things about this recipe is how adaptable it is. Here are some of my favorite variations.
Vegetarian Version
Use vegetable broth instead of chicken broth, and add 1 cup of sautéed mushrooms for an earthy, meaty flavor. I’ve also added ½ cup of cooked lentils for extra protein and texture. This version is so good that even my meat-loving husband requests it.
Gluten-Free Adaptation
Substitute the sourdough with a good-quality gluten-free bread. I’ve had the best results with Against the Grain brand’s sourdough—it has the right texture and holds up well. Toast the cubes a few minutes longer since gluten-free bread tends to be denser. Everything else stays the same!
Seasonal Variations
In the fall, I add ½ cup of diced apple (Honeycrisp or Granny Smith) along with the onions—the sweetness pairs beautifully with the sage. In the spring, I swap the sage for fresh dill and add ½ cup of chopped asparagus. For a winter holiday version, add ½ cup of dried cherries and ¼ cup of chopped fresh parsley for color.
Spicy Sausage Version
Cook 1 pound of spicy Italian sausage in the skillet before sautéing the vegetables, breaking it up with a wooden spoon. Remove the sausage with a slotted spoon and set aside. Proceed with the recipe, adding the cooked sausage back in when you combine the ingredients. This version is a crowd favorite at my house—it adds so much depth and a little kick of heat.
Personal Variation I Love
I once added ½ cup of crumbled blue cheese to the stuffing just before baking, and honestly, it was incredible. The tangy, sharp flavor cuts through the richness of the brown butter perfectly. My husband was skeptical, but he went back for thirds. Just be sure to use a mild blue cheese like Gorgonzola so it doesn’t overpower the dish.
Serving & Storage Suggestions
This stuffing is best served warm, straight from the oven, with the top still crispy and the inside soft and fragrant. I like to spoon it onto plates alongside roasted turkey, mashed potatoes, and a dollop of cranberry sauce. It also pairs beautifully with a simple green salad dressed with lemon vinaigrette—the acidity cuts through the richness.
Presentation Tip : For a beautiful presentation, transfer the stuffing to a serving platter and garnish with a few fresh sage leaves and a sprinkle of flaky sea salt. The green leaves against the golden stuffing make for a stunning holiday table.
Complementary Dishes : This stuffing is fantastic with roasted chicken, pork chops, or even a simple pan-seared salmon. For a vegetarian meal, serve it alongside a hearty mushroom gravy and roasted root vegetables. A crisp white wine like Sauvignon Blanc or a light Pinot Noir pairs beautifully.
Storage Instructions : Leftover stuffing can be stored in an airtight container in the refrigerator for up to 4 days. The flavors actually deepen overnight, so leftovers might taste even better! To freeze, transfer the cooled stuffing to a freezer-safe container and freeze for up to 3 months. Thaw in the refrigerator overnight before reheating.
Reheating Methods : For the best results, reheat stuffing in a 350°F (175°C) oven for 15-20 minutes, covered with foil. Remove the foil for the last 5 minutes to re-crisp the top. You can also reheat individual portions in the microwave for 1-2 minutes, but the top won’t be as crispy. Pro tip: If reheating from frozen, add a splash of broth to prevent it from drying out.
Flavor Development : I actually prefer this stuffing on day two. The flavors meld together beautifully, and the texture becomes even more cohesive. It’s perfect for making ahead and enjoying throughout the holiday weekend.
Nutritional Information & Benefits
While this is definitely a comfort food, it does offer some nutritional benefits worth noting. Here’s a rough estimate per serving (based on 10 servings):
- Calories : Approximately 320-350
- Protein : 8-10 grams
- Carbohydrates : 35-40 grams
- Fat : 18-22 grams
- Fiber : 3-4 grams
- Sodium : 500-600 mg
Health Benefits : Sage is packed with antioxidants and has anti-inflammatory properties. It’s also been traditionally used to support digestion—which is perfect for a heavy holiday meal! The sourdough bread is easier to digest than regular bread thanks to the fermentation process, and it has a lower glycemic index. Celery and onions add fiber and vitamins A, C, and K.
Dietary Considerations : This recipe can be made vegetarian, gluten-free, and dairy-free with the substitutions mentioned earlier. It contains gluten and dairy in its original form, and eggs are used as a binder. For a lower-sodium version, use unsalted butter and low-sodium broth, and reduce the added salt to ½ teaspoon.
Personal Wellness Perspective : I believe in enjoying food without guilt, especially during holidays. This stuffing is rich and indulgent, but it’s made with real, whole ingredients. One serving alongside plenty of vegetables and lean protein makes for a balanced, satisfying meal. Life’s too short to skip the brown butter!
Conclusion
This brown butter sage stuffing with sourdough has completely changed how I think about holiday side dishes. It’s proof that sometimes the simplest upgrades—browning the butter, using fresh herbs, choosing good bread—can transform a classic into something truly extraordinary. I’ve made this for Thanksgiving, Christmas, Easter, and even random Sunday dinners, and it never fails to impress.
I encourage you to make this recipe your own. Add your favorite mix-ins, adjust the herbs to what you have on hand, or double it if you’re feeding a crowd. The beauty of stuffing is that it’s forgiving and adaptable. Whether you’re a seasoned cook or a holiday kitchen novice, this recipe will make you look like a pro.
Honestly, I love this recipe because it reminds me that the best dishes often come from challenging our assumptions. I spent years thinking stuffing wasn’t worth the effort, and now I can’t imagine a holiday table without it. If you try it, I’d love to hear how it turns out. Drop a comment below, share your variations, or tag me in your photos—I’m always inspired by how people make recipes their own. Happy cooking, and may your holidays be filled with good food and even better company!
Frequently Asked Questions
Can I make this stuffing ahead of time?
Absolutely! You can assemble the stuffing completely up to 24 hours in advance. Just prepare it through step 4, cover the baking dish with foil, and refrigerate. When you’re ready to bake, add about 10-15 minutes to the covered baking time since it’s starting from cold. This is a lifesaver for busy holiday mornings.
Can I use dried sage instead of fresh?
I really recommend using fresh sage for this recipe. Fresh sage has a bright, aromatic flavor that dried sage just can’t match. If you absolutely have to use dried, use 1 tablespoon instead of ¼ cup fresh, and add it with the other dried herbs. The flavor will be different—more muted and slightly musty—but it will still be good.
How do I know when the butter is properly browned?
You’re looking for two signs: color and smell. The butter will turn a warm, golden-amber color with small brown specks at the bottom of the pan. It will also smell nutty and toasty—almost like hazelnuts. The whole process takes about 5-7 minutes over medium heat. Watch carefully because it goes from perfect to burnt very quickly!
Can I use a different type of bread?
Yes, you can! While sourdough is my favorite for its tangy flavor and sturdy texture, you can use French bread, Italian bread, or even a good-quality white bread. Just avoid super soft sandwich bread—it will turn into mush. If you’re using a different bread, you might need to adjust the amount of broth slightly since different breads absorb liquid differently.
How do I get the top extra crispy?
After the stuffing is fully baked, remove the foil and switch your oven to broil. Broil for 2-3 minutes, watching closely, until the top is golden brown and crispy. You can also drizzle a little melted butter over the top before broiling for extra crunch. Just don’t walk away—broiling happens fast!
Pin This Recipe!
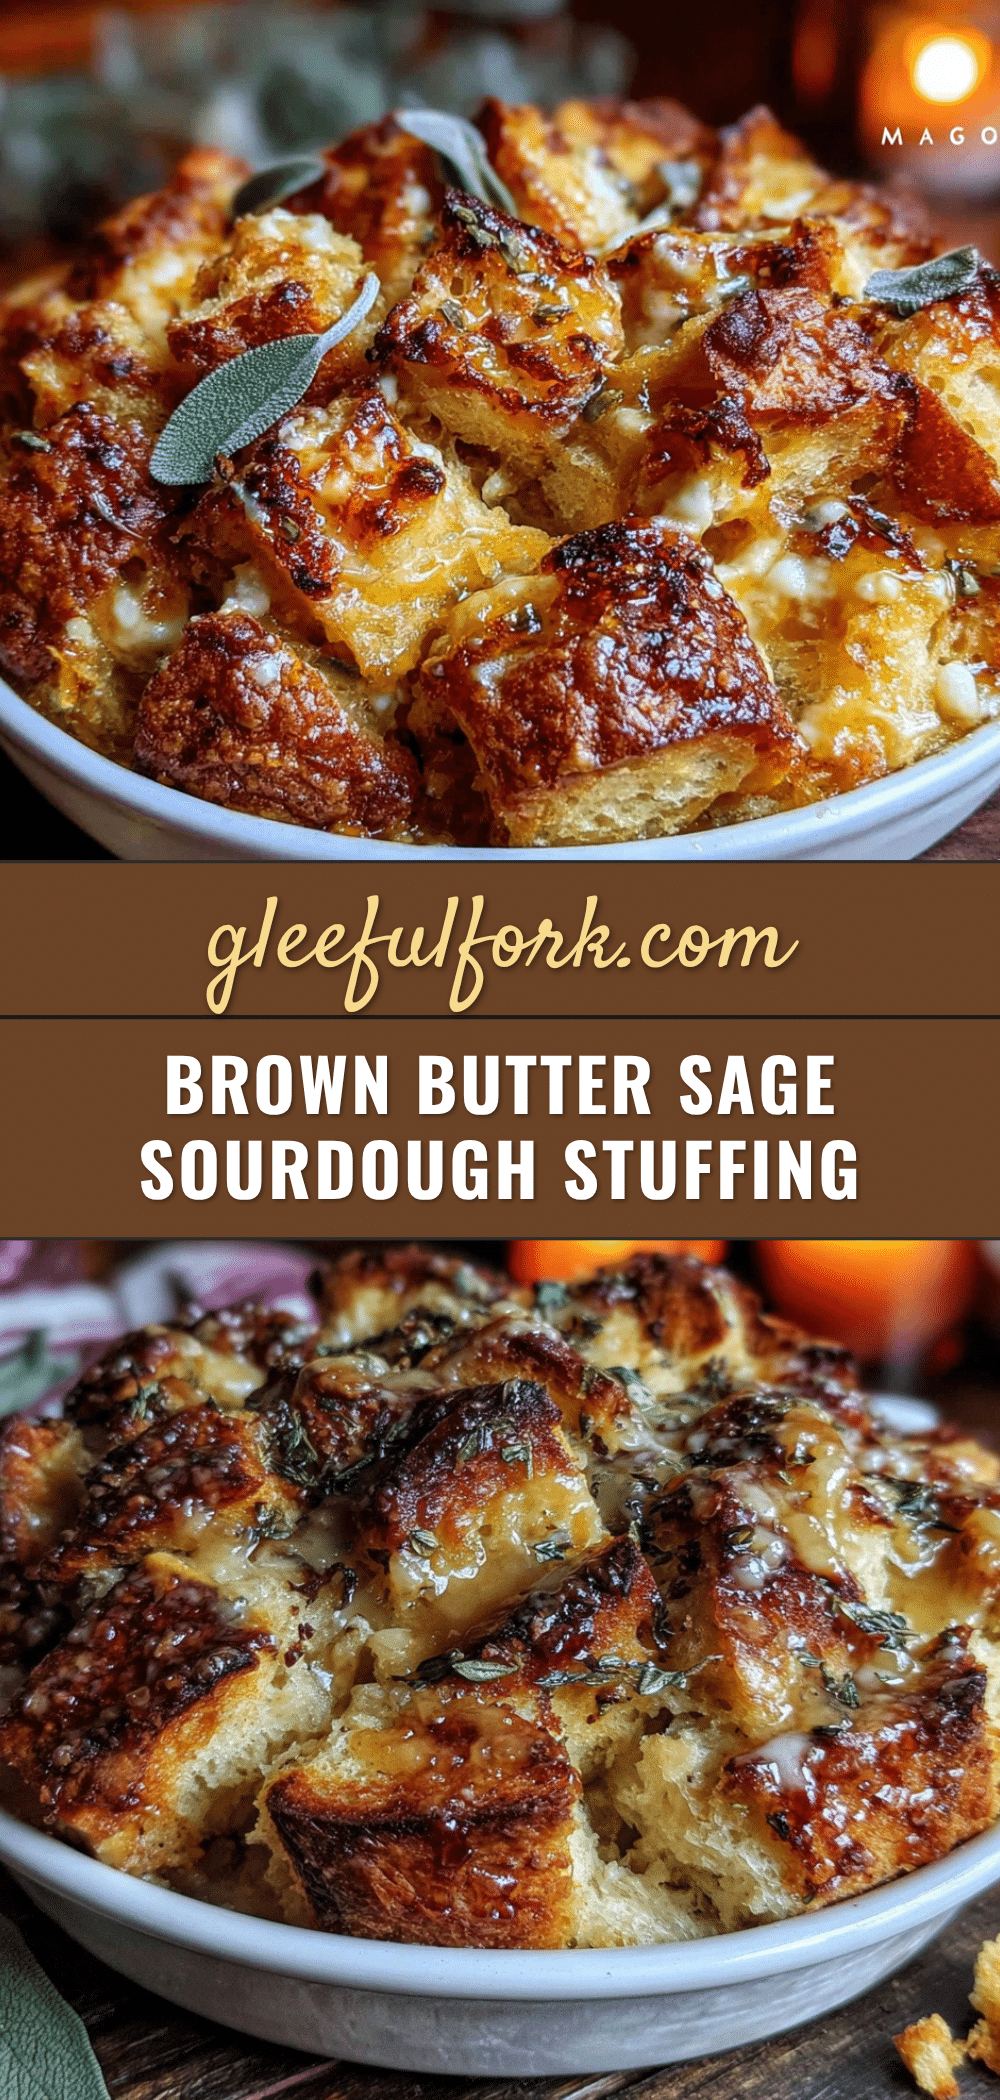
Best Brown Butter Sage Stuffing with Sourdough

This brown butter sage stuffing with sourdough is a game-changing holiday side dish. Nutty brown butter, aromatic fresh sage, and crusty sourdough create a texture and flavor that’s next-level comfort food.
- Prep Time: 20 minutes
- Cook Time: 45 minutes
- Total Time: 1 hour 5 minutes
- Yield: 10 servings 1x
- Category: Side Dish
- Cuisine: American
Ingredients
- 1 large loaf sourdough bread (about 1 pound), cut into 1-inch cubes (day-old or slightly stale works best; fresh is fine if you toast it)
- 1 cup unsalted butter (2 sticks) — I recommend Kerrygold for the richest flavor, but any good-quality unsalted butter works
- 1 large yellow onion, diced (about 1 ½ cups)
- 3 celery stalks, diced (about 1 cup)
- 4 cloves garlic, minced
- ¼ cup fresh sage leaves, chopped (about 15–20 leaves) — do NOT substitute dried sage here; fresh is non-negotiable for that aromatic punch
- 1 tablespoon fresh thyme leaves (or 1 teaspoon dried)
- 1 tablespoon fresh rosemary, chopped (or 1 teaspoon dried)
- 2 cups low-sodium chicken or vegetable broth (adds richness; use vegetable broth for a vegetarian version)
- 2 large eggs, lightly beaten (helps bind everything together)
- 1 teaspoon kosher salt (plus more to taste)
- ½ teaspoon black pepper, freshly ground
- ½ cup dried cranberries (optional, adds a pop of sweetness and color)
- ½ cup chopped pecans or walnuts (optional, toasted, for extra crunch)
- 1 cup cooked Italian sausage (optional, crumbled, for a heartier, non-vegetarian version)
- ½ cup grated Parmesan cheese (optional, adds a salty, umami kick)
Instructions
- Preheat your oven to 350°F (175°C). Spread the sourdough cubes in a single layer on two large baking sheets. Bake for 12-15 minutes, stirring halfway through, until the bread is dry and lightly toasted but not browned. You want it crisp on the outside but still slightly soft in the center. Remove from the oven and let cool completely.
- In your large skillet or Dutch oven, melt the butter over medium heat. Once melted, continue cooking, swirling the pan occasionally. The butter will foam up, then settle down. Watch carefully—this happens fast! After about 5-7 minutes, you’ll see golden brown specks forming at the bottom of the pan, and the butter will smell nutty and amazing. Remove from heat immediately and pour the brown butter into a heat-safe bowl, leaving the browned bits in the skillet.
- Return the skillet to medium heat. Add the diced onion and celery, and cook for 6-8 minutes, stirring occasionally, until softened and translucent. Add the minced garlic, chopped sage, thyme, and rosemary, and cook for another minute until fragrant. Season with ½ teaspoon of salt and ¼ teaspoon of pepper. Remove from heat.
- In your large mixing bowl, combine the toasted sourdough cubes and the sautéed vegetable mixture. Pour the reserved brown butter over everything and toss gently to combine. In a separate small bowl, whisk together the beaten eggs and 1 ½ cups of the broth. Pour this mixture over the bread mixture and toss again until everything is evenly moistened. Add the remaining ½ cup of broth if the mixture seems dry—it should look moist but not soggy.
- Preheat your oven to 375°F (190°C). Grease your 9×13-inch baking dish with butter or cooking spray. Transfer the stuffing mixture to the prepared dish and spread it into an even layer. Cover with foil and bake for 25 minutes. Remove the foil and bake for another 20-25 minutes, until the top is golden brown and crispy. Let rest for 5-10 minutes before serving.
Notes
Don’t walk away from the butter—the line between perfect brown butter and burnt butter is about 30 seconds. For an extra-crispy top, broil the stuffing for 2-3 minutes after it’s fully baked. You can assemble the stuffing completely up to 24 hours in advance; just add about 10-15 minutes to the covered baking time if starting from cold.
Nutrition
- Serving Size: 1 serving (about 1 c
- Calories: 335
- Sugar: 4
- Sodium: 550
- Fat: 20
- Saturated Fat: 12
- Carbohydrates: 37
- Fiber: 3
- Protein: 9
Keywords: stuffing, brown butter, sage, sourdough, Thanksgiving, holiday, side dish, comfort food


