Love this? Save it for later!
Share the inspiration with your friends
My sister-in-law was standing in my kitchen last Saturday, staring into the empty fridge like it owed her money. It was one of those mid-October afternoons where the light turns gold and the air gets crisp, but the grocery store was out of everything interesting. She didn’t want a complicated pie that needed three crusts and a degree in pastry arts. She just wanted comfort. She wanted that specific, warm feeling you get when you bite into something sweet, spiced, and soft.
I looked at the counter. There was a can of pumpkin puree I’d bought for a soup that never happened. There was a bag of chocolate chips that had been sitting there since Halloween last year (okay, maybe just two weeks, but it felt older). And there was some pumpkin pie spice that smelled like nostalgia. We didn’t have time to bake a cake. We didn’t have time to wait for sourdough to rise. We needed something fast, forgiving, and deeply satisfying.
So I grabbed a loaf pan and started tossing things together. Honestly, it started as a experiment to use up ingredients before they went bad, but it turned into the best snack bread I’ve made in years. The key isn’t fancy techniques or expensive tools. It’s just letting the pumpkin do its job and trusting the chocolate to balance the spice. This moist pumpkin chocolate chip snack bread became our go-to for rainy mornings, afternoon slumps, and those moments when you just need a hug in food form.
It stuck with me because it’s so simple. You don’t need to stand over a stove. You don’t need to temper eggs. You just mix, pour, and wait. And when that smell hits the house—cinnamon, nutmeg, and warm sugar—it changes the whole vibe of the place. It’s not just bread. It’s a mood. And once you try it, you’ll probably start making it every weekend, just for that reason.
Why You’ll Love This Recipe
Let’s be real for a second. Most pumpkin bread recipes out there are dry. I mean, truly dry. Like, you need to drown it in butter just to get it down dry kind of dry. I’ve tested dozens of versions over the years, from the classic dense loaves to the lighter, cake-like ones, and I’ve finally nailed the one that hits that perfect sweet spot. This isn’t just another pumpkin bread; it’s the one that actually stays moist for days, which is rare for quick breads without a ton of fat.
- Quick & Easy: This comes together in under 15 minutes of active prep. You’re basically just dumping ingredients into a bowl. It’s perfect for busy weeknights or when you have a sudden craving and don’t want to spend hours in the kitchen.
- Simple Ingredients: No fancy grocery trips needed. You likely already have pumpkin puree, flour, sugar, and chocolate chips in your pantry or fridge. It’s pantry-friendly comfort food at its finest.
- Perfect for Gifting: This makes two loaves, so you can keep one and wrap the other in plastic and foil. It’s the ultimate gift for neighbors, coworkers, or friends who need a pick-me-up.
- Crowd-Pleaser: Kids love the chocolate chips, and adults love the spice. It’s versatile enough to be a breakfast treat, a dessert, or an afternoon snack. It always gets rave reviews.
- Unbelievably Delicious: The texture is incredibly tender, almost like a dense muffin, but with the richness of a pound cake. The pumpkin adds moisture that oil alone can’t achieve, and the chocolate chips provide little bursts of sweetness in every bite.
What makes this recipe different is the balance. I’ve found that using a mix of oil and a bit of brown sugar creates a chewiness that white sugar just doesn’t give you. Plus, the pumpkin puree isn’t just for flavor; it’s the secret weapon for that tender crumb. It’s comfort food reimagined—healthier than a cupcake, but with the same soul-soothing satisfaction. It’s perfect for impressing guests without stress, or turning a simple Tuesday evening into something memorable.
What Ingredients You Will Need
This recipe uses simple, wholesome ingredients to deliver bold flavor and satisfying texture without the fuss. The beauty of this snack bread is that it relies on staples you probably already have. The pumpkin puree provides moisture and earthiness, while the spices bring the warmth. The chocolate chips add that necessary sweet contrast. You don’t need anything exotic or hard to find, which is half the battle in getting home bakers excited to try new recipes.
- For the Wet Mix:
- Pumpkin Puree: Use 100% pure pumpkin, not pie filling. Pie filling has added sugar and spices that will throw off the balance. I recommend Libby’s or a high-quality canned brand for consistency.
- Vegetable Oil: Neutral oil keeps the bread moist. Canola or light olive oil work well. Oil stays softer than butter at room temperature, which is why this bread stays tender for days.
- Eggs: Large eggs, room temperature. They bind the ingredients and add structure. Don’t skip them; they’re crucial for the rise.
- Vanilla Extract: A splash of pure vanilla enhances the pumpkin flavor. Don’t use imitation vanilla if you can help it.
- For the Dry Mix:
- All-Purpose Flour: The base of the bread. Don’t try to swap this for cake flour unless you want a very different texture.
- Baking Soda & Baking Powder: Both are used for lift. Baking soda reacts with the acidic pumpkin, while baking powder gives a final boost in the oven.
- Pumpkin Pie Spice: This is the star. It’s a blend of cinnamon, ginger, nutmeg, and cloves. If you don’t have it, you can mix your own, but the blend is easier.
- Salt: A pinch of salt balances the sweetness and makes the spices pop.
- For the Sweetness & Texture:
- Granulated Sugar: Provides sweetness and helps with the crust.
- Brown Sugar: Adds moisture and a caramel-like depth. I prefer light brown sugar for a milder flavor, but dark works too.
- Chocolate Chips: Semi-sweet or milk chocolate chips. Semi-sweet cuts the sweetness better, which I prefer. You can also use chunks for a more rustic look.
If you’re looking to substitute, you can use maple syrup instead of some of the sugar for a slightly more natural sweetness, but it will change the texture. For a gluten-free option, a 1:1 gluten-free flour blend works well, though the bread may be slightly denser. I’ve also used pumpkin chunks from fresh sugar pumpkins before, but puree is just so much more consistent for a quick bread like this.
What Equipment Do I Need?
You don’t need much. A couple of large mixing bowls, a whisk, and a loaf pan (or two smaller ones) are all you really need. I use a standard 9×5 inch loaf pan, but you can also use two mini loaf pans if you want individual portions. A silicone spatula is helpful for scraping the bowl clean so you don’t waste any batter. If you don’t have a whisk, a fork works in a pinch. Just make sure your loaf pans are in good condition—rusty or warped pans can affect the bake. I always line my pans with parchment paper for easy removal, though greasing and flouring works too. Keep it simple; you don’t need fancy gadgets.
Preparation Method
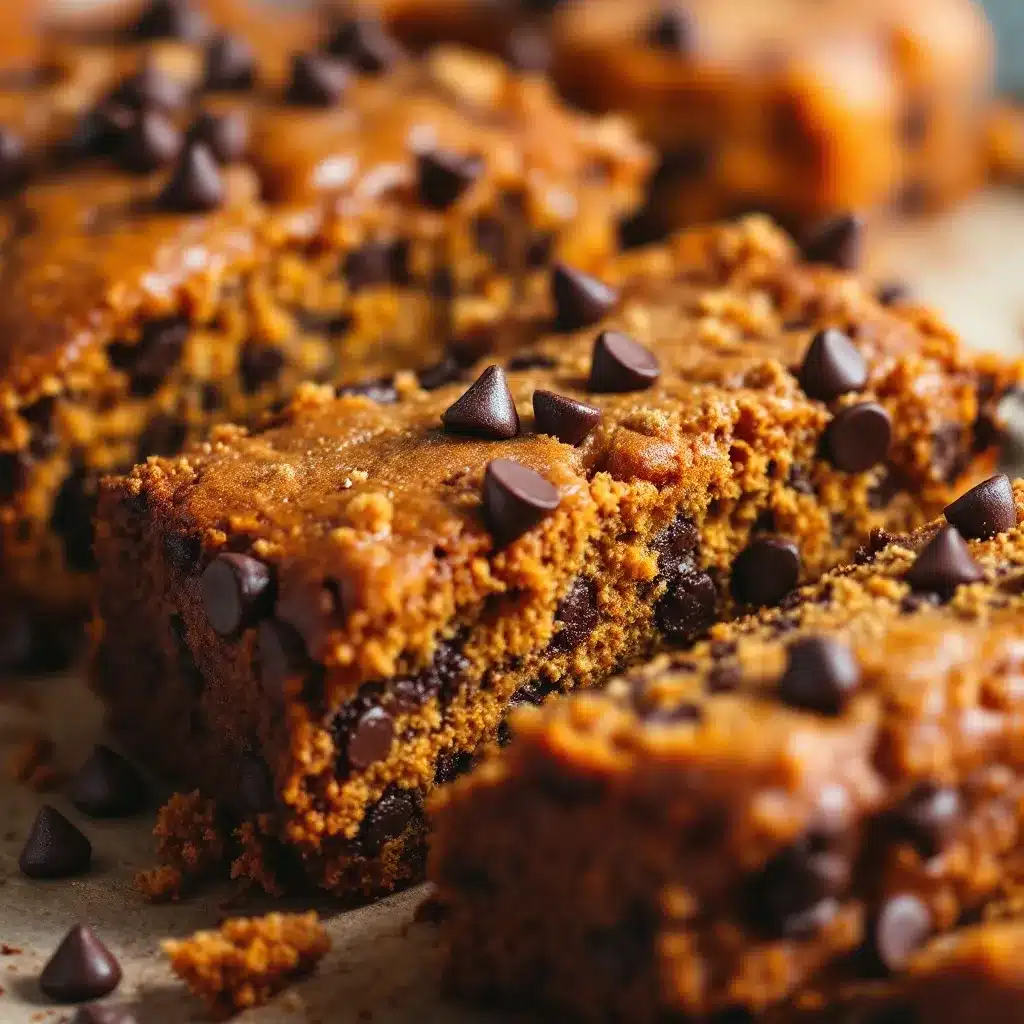
Let’s get into the nitty-gritty. This part is straightforward, but there are a few tricks to keep the bread from turning out dense or dry. The goal is to mix just enough to combine the ingredients. Overmixing is the enemy of tender quick breads.
- Prep Your Pans and Oven (5 mins): Preheat your oven to 350°F (175°C). Grease two 9×5 inch loaf pans with butter or non-stick spray. For the best results, line the bottom and sides with parchment paper, leaving an overhang on the sides. This acts as a sling, making it super easy to lift the bread out once it’s cool. If you don’t have parchment, just grease and flour the pans well.
- Mix the Wet Ingredients (3 mins): In a large bowl, whisk together the vegetable oil, granulated sugar, and brown sugar until smooth. Add the eggs one at a time, whisking well after each addition. The mixture should look pale and creamy. Stir in the pumpkin puree and vanilla extract. At this point, the batter will look a bit curdled—that’s normal. Don’t panic. Just keep going.
- Combine the Dry Ingredients (2 mins): In a separate medium bowl, whisk together the flour, baking soda, baking powder, pumpkin pie spice, and salt. Whisking the dry ingredients separately ensures that the leavening agents and spices are evenly distributed. This prevents pockets of baking soda that can leave a soapy taste.
- Combine Wet and Dry (2 mins): Pour the dry ingredients into the wet ingredients. Use a spatula or wooden spoon to gently fold them together. Stop mixing as soon as you no longer see streaks of flour. The batter will be thick and heavy. Do not overmix. If you mix too much, the gluten develops, and your bread becomes tough. It’s okay if it’s a little lumpy.
- Fold in the Chocolate Chips (1 min): Gently fold in the chocolate chips. You can reserve a handful to sprinkle on top for a pretty crust, but most of it should go into the batter. This ensures chocolate in every bite.
- Bake (50-60 mins): Divide the batter evenly between the two prepared loaf pans. Bake for 50 to 60 minutes. Start checking at 50 minutes. The bread is done when a toothpick inserted into the center comes out clean or with just a few moist crumbs (no wet batter). The top should be golden brown and spring back slightly when touched. If the top is browning too fast, tent it loosely with aluminum foil for the last 15 minutes.
- Cool Completely (30+ mins): Let the bread cool in the pans for 10 minutes, then use the parchment sling to lift them out. Transfer to a wire rack to cool completely. This step is crucial. If you slice it while it’s hot, it will be gummy and fall apart. Let it cool for at least an hour, preferably longer, before slicing.
How to Get the Best Results
Here are some pro tips I’ve learned from burning a few loaves over the years. First, room temperature ingredients mix better. Cold eggs can cause the batter to seize up slightly. Second, measure your flour correctly. Scooping flour directly from the bag packs it down, leading to dry bread. Spoon the flour into your measuring cup and level it off. Third, trust your toothpick. Oven temperatures vary, so don’t rely solely on the time. Check for doneness visually and with the toothpick test. Finally, don’t skip the cooling time. I know it’s hard to wait, but hot bread is a mess. Let it rest, and the flavors will meld and improve.
Variations & Adaptations
One of the best things about this recipe is how adaptable it is. You can tweak it to fit your dietary needs or taste preferences without losing the core flavor.
- Gluten-Free: Swap the all-purpose flour for a high-quality 1:1 gluten-free flour blend. Add a teaspoon of xanthan gum if your blend doesn’t include it. The texture will be slightly more crumbly but still delicious.
- Dairy-Free: This recipe is naturally dairy-free if you use oil and dairy-free chocolate chips. Just check your chocolate chip brand to ensure no milk solids are added.
- Reduced Sugar: You can reduce the sugar by up to 25% without affecting the texture too much. Use a sugar substitute that measures like sugar if you’re cutting back significantly, but note that this may change the browning.
- Spice It Up: Add a pinch of cayenne pepper for a kick. It sounds weird, but it pairs beautifully with pumpkin and chocolate. Or add chopped pecans or walnuts for crunch.
- White Chocolate Chip: Swap the semi-sweet chips for white chocolate chips for a sweeter, milder flavor profile. This is a personal favorite of mine for a more dessert-like treat.
I’ve also tried adding a swirl of cream cheese into the batter before baking. It creates a marbled effect and adds a tangy richness that’s incredible. Just drop spoonfuls of sweetened cream cheese on top of the batter and swirl with a knife. It’s a game-changer if you have the extra time.
Serving & Storage Suggestions
This bread is best served at room temperature. It’s perfect sliced thick and paired with a cup of coffee or tea. I love it with a dollop of whipped cream or a slice of sharp cheddar cheese on the side for a savory-sweet contrast. It also makes excellent toast! Toasted pumpkin bread with a little butter is a breakfast winner.
For storage, wrap the cooled bread tightly in plastic wrap and store it at room temperature for up to 3 days. For longer storage, wrap it in foil and freeze it for up to 3 months. Thaw it overnight in the refrigerator or at room temperature. Reheat slices in the microwave for 20 seconds to bring back that fresh-baked warmth. The flavors actually develop over the first day, so it often tastes better on day two.
Nutritional Information & Benefits
While this is a treat, pumpkin puree adds some nutritional value. It’s high in vitamin A and fiber, which is a nice bonus for a sweet bread. Each slice (assuming 10 slices per loaf) contains approximately 220 calories, 3g of protein, 35g of carbohydrates, and 9g of fat. It’s not a health food, but it’s a better option than a slice of cake. The fiber from the pumpkin helps with digestion, and the spices have anti-inflammatory properties. Enjoy it in moderation as part of a balanced diet.
Conclusion
This moist pumpkin chocolate chip snack bread is more than just a recipe; it’s a seasonal ritual. It’s easy to make, hard to resist, and perfect for sharing. I hope you try it and make it your own. Add your favorite nuts, swap the chocolate, or just enjoy it plain. It’s a blank canvas for your creativity. If you make it, I’d love to hear how it turned out. Leave a comment below with your tips or variations. Share it with friends and family, and let’s keep the autumn vibes going all season long. Happy baking!
Frequently Asked Questions
Can I use fresh pumpkin instead of canned?
Yes, you can. Roast a sugar pumpkin (not a carving pumpkin), scoop out the flesh, and puree it until smooth. However, fresh puree can be watery. You may need to drain it in a cheesecloth for a few hours to remove excess moisture, or reduce the amount slightly to avoid a soggy bread.
Why is my bread dense?
This usually happens from overmixing the batter or using too much flour. Remember to mix just until combined. Also, make sure you’re measuring your flour correctly by spooning it into the cup rather than scooping directly from the bag.
Can I freeze this bread?
Absolutely. Wrap the cooled loaf tightly in plastic wrap and then in aluminum foil. It will last in the freezer for up to 3 months. Thaw it at room temperature or slice and freeze individual portions for easy snacking.
What if I don’t have pumpkin pie spice?
You can make your own blend. Mix 1 teaspoon cinnamon, 1/2 teaspoon ginger, 1/4 teaspoon nutmeg, and 1/4 teaspoon cloves. This will give you a similar flavor profile to store-bought pumpkin pie spice.
Can I make mini loaves?
Yes! Use two mini loaf pans or a muffin tin. If using mini loaves, bake for 25-30 minutes. If using muffin tins, bake for 18-22 minutes. Keep an eye on them so they don’t burn.
Pin This Recipe!
Moist Pumpkin Chocolate Chip Snack Bread
A simple, moist, and spiced quick bread loaded with chocolate chips. This easy recipe uses pantry staples and requires minimal prep time, making it perfect for snacking, gifting, or breakfast.
- Prep Time: 15 minutes
- Cook Time: 50-60 minutes
- Total Time: 1 hour 15 minutes
- Yield: 2 loaves (approx. 20 slices) 1x
- Category: Dessert
- Cuisine: American
Ingredients
- 1 cup pumpkin puree (100% pure, not pie filling)
- 1/2 cup vegetable oil (canola or light olive oil)
- 2 large eggs (room temperature)
- 1 teaspoon vanilla extract
- 1 1/2 cups all-purpose flour
- 1 teaspoon baking soda
- 1/2 teaspoon baking powder
- 1 1/2 teaspoons pumpkin pie spice
- 1/2 teaspoon salt
- 3/4 cup granulated sugar
- 1/2 cup brown sugar (light or dark)
- 1 cup semi-sweet or milk chocolate chips
Instructions
- Preheat oven to 350°F (175°C). Grease two 9×5 inch loaf pans and line with parchment paper for easy removal.
- In a large bowl, whisk together vegetable oil, granulated sugar, and brown sugar until smooth.
- Add eggs one at a time, whisking well after each addition until the mixture is pale and creamy.
- Stir in pumpkin puree and vanilla extract.
- In a separate medium bowl, whisk together flour, baking soda, baking powder, pumpkin pie spice, and salt.
- Pour dry ingredients into wet ingredients and gently fold together with a spatula until just combined. Do not overmix.
- Gently fold in chocolate chips.
- Divide batter evenly between the two prepared loaf pans.
- Bake for 50-60 minutes, or until a toothpick inserted into the center comes out clean or with moist crumbs.
- Let bread cool in pans for 10 minutes, then lift out using parchment sling and transfer to a wire rack to cool completely before slicing.
Notes
Do not overmix the batter to ensure a tender crumb. Measure flour by spooning it into the cup rather than scooping directly from the bag. For best results, let the bread cool completely before slicing to prevent it from being gummy. Can be stored at room temperature for 3 days or frozen for up to 3 months.
Nutrition
- Serving Size: 1 slice
- Calories: 220
- Sugar: 22
- Sodium: 180
- Fat: 9
- Saturated Fat: 2
- Carbohydrates: 35
- Fiber: 2
- Protein: 3
Keywords: pumpkin bread, chocolate chip bread, quick bread, fall baking, snack bread, easy recipe, gluten-free option


