Love this? Save it for later!
Share the inspiration with your friends
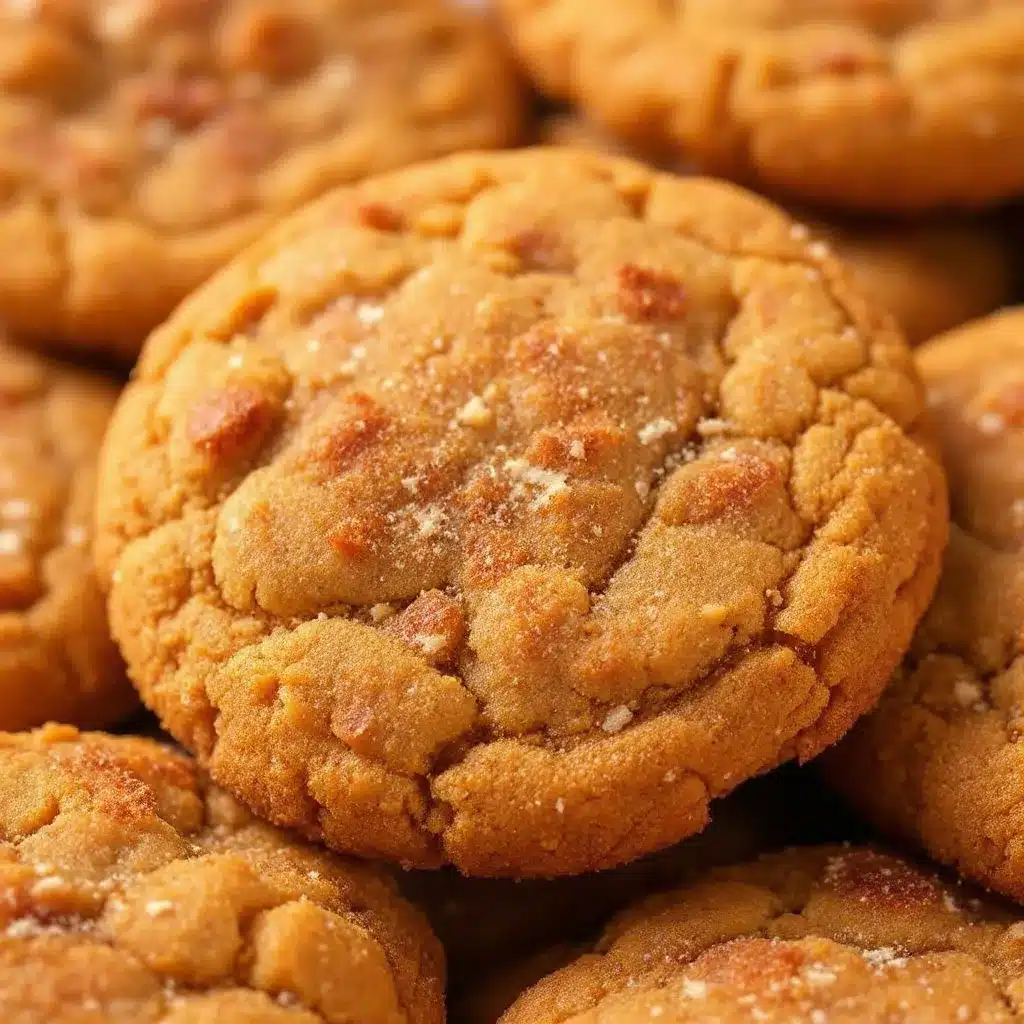
I want a snickerdoodle. No—I want a snickerdoodle that tastes like fall, feels like a hug, and has that nutty, toasty thing brown butter does to everything it touches. The problem is, most pumpkin cookies come out cakey. They’re soft, sure, but they lack that crackly, cinnamon-sugar crust that makes a snickerdoodle a snickerdoodle. I’ve been staring at my pantry for a solid five minutes, holding a stick of butter like it owes me money, and I think I’ve figured it out.
The trick is browning the butter first—it deepens the flavor without making the dough greasy—and using just enough pumpkin purée for moisture and color, not so much that the cookies turn into little orange muffins. I want a cookie that looks like a snickerdoodle, chews like a snickerdoodle, but tastes like someone caramelized a pumpkin pie and rolled it in cinnamon sugar. That’s the goal.
So I browned the butter, watched it foam and settle into that amber magic, and let it cool just enough so it wouldn’t cook the egg. I mixed the dough by hand—no mixer, because I wanted to feel when it came together—and I refrigerated it for exactly 45 minutes. Not 30, not an hour. Forty-five minutes, because that’s when the dough firms up but doesn’t get hard. I baked a test batch, and honestly? I closed my eyes after the first bite. That’s how I knew this recipe was ready to share.
Why You’ll Love These Brown Butter Pumpkin Snickerdoodle Cookies
These cookies aren’t just another fall dessert. They’re the result of about six test batches, a very patient family, and one particularly memorable afternoon when I forgot the cinnamon entirely and learned that lesson the hard way. Here’s why they work:
- Quick & Easy: From start to finish, you’re looking at about an hour and a half—most of that is chilling time. The actual hands-on work takes maybe 20 minutes.
- Simple Ingredients: You probably have everything except maybe the pumpkin purée. No weird specialty flours or obscure extracts.
- Perfect for Fall Gatherings: Thanksgiving, Friendsgiving, cozy weekend baking, or just a Tuesday that needs a little more cinnamon in it.
- Crowd-Pleaser: I brought a batch to a potluck last month, and someone asked for the recipe before they’d even finished the first cookie. That’s always a good sign.
- Unbelievably Delicious: The brown butter adds a toasty, nutty depth that regular butter just can’t match. Paired with pumpkin and warm spices, it’s next-level comfort food.
What makes these different from every other pumpkin snickerdoodle recipe? It’s the technique. Browning the butter removes some of the water content, which means less steam during baking and a chewier, denser cookie. Plus, I use a higher ratio of cream of tartar than most recipes—that’s what gives snickerdoodles their signature tangy flavor and that beautiful crackly top. These cookies are chewy on the inside, slightly crisp on the edges, and absolutely swimming in cinnamon sugar.
Honestly, this is the kind of cookie that makes you close your eyes after the first bite. It’s fall in cookie form, and it’s exactly what you need right now.
What Ingredients You Will Need
This recipe uses simple, wholesome ingredients to deliver that perfect balance of nutty brown butter, warm pumpkin spice, and classic snickerdoodle tang. Most of these are pantry staples, which makes this an easy last-minute bake when the fall craving hits.
For the Cookies
- 1 cup (226g) unsalted butter — Use a high-quality butter like Kerrygold or Plugrà for the best browning results. European-style butter has a higher fat content, which means richer flavor and better texture.
- ¾ cup (150g) granulated sugar — Regular white sugar works perfectly here. It helps create that crackly top when combined with the cream of tartar.
- ½ cup (100g) packed light brown sugar — Adds moisture and a hint of molasses flavor that complements the brown butter beautifully.
- 1 large egg, room temperature — Room temperature egg incorporates more evenly into the brown butter mixture. If you forget to take it out ahead of time, place it in a bowl of warm water for 5 minutes.
- 1 teaspoon vanilla extract — Pure vanilla extract, not imitation. It makes a difference in depth of flavor.
- ½ cup (120g) pumpkin purée — Not pumpkin pie filling. Make sure you’re getting 100% pumpkin purée. I prefer Libby’s for consistent results, but any brand works.
- 2 cups (250g) all-purpose flour — Spoon and level your flour. Scooping directly from the bag can pack in too much flour and make the cookies dry.
- 1 teaspoon cream of tartar — This is non-negotiable for snickerdoodles. It gives them that signature tang and helps with the crackly top.
- ½ teaspoon baking soda — Helps the cookies spread just enough without becoming flat.
- ½ teaspoon salt — Fine sea salt or table salt. Kosher salt works too, but use a full teaspoon if you go that route.
- 1½ teaspoons ground cinnamon — The backbone of the spice blend. Use fresh cinnamon for the best flavor.
- ½ teaspoon ground nutmeg — Freshly grated is amazing if you have it, but pre-ground works fine.
- ½ teaspoon ground ginger — Adds warmth without being overpowering.
- ¼ teaspoon ground cloves — Just a touch. Cloves are strong, so don’t overdo it.
For the Cinnamon Sugar Coating
- ¼ cup (50g) granulated sugar
- 2 teaspoons ground cinnamon
- Pinch of nutmeg — Optional, but I think it adds a little something extra.
Equipment Needed
You don’t need a fancy kitchen to make these cookies. Here’s what you’ll actually use:
- Medium saucepan — For browning the butter. A light-colored saucepan is best so you can see the butter change color.
- Large mixing bowl — For the dough. Glass or stainless steel works best.
- Whisk — For mixing the dry ingredients and combining the wet ingredients.
- Rubber spatula — For folding everything together without overmixing.
- Baking sheets — Two standard half-sheet pans work perfectly. Line them with parchment paper or silicone baking mats.
- Cooling rack — Essential for letting the cookies cool evenly and stay chewy.
- Cookie scoop — A 1.5-tablespoon scoop makes uniform cookies. If you don’t have one, use a spoon and your hands to roll the dough into balls.
- Small bowl — For the cinnamon sugar coating.
- Plastic wrap — For chilling the dough. I’ve used beeswax wraps too, and they work fine.
If you don’t have a cookie scoop, don’t worry. I’ve made these cookies with just a spoon and my hands more times than I can count. They still turn out perfect.
Preparation Method
Let’s get to the good part. Follow these steps carefully, and you’ll have the best brown butter pumpkin snickerdoodle cookies of your life.
- Brown the butter. Place the unsalted butter in a medium saucepan over medium heat. Let it melt completely, then swirl the pan occasionally. The butter will foam, then foam again, and you’ll see brown specks form at the bottom. This takes about 5-7 minutes. Once it smells nutty and looks amber-colored, remove it from the heat immediately. Pour it into a heatproof bowl and let it cool for 10-15 minutes. Don’t skip the cooling step—if the butter is too hot, it will cook the egg when you mix it in.
- Mix the wet ingredients. In a large bowl, whisk together the cooled brown butter, granulated sugar, and brown sugar until smooth. It should look like wet sand. Add the room temperature egg, vanilla extract, and pumpkin purée. Whisk until fully combined and smooth. The mixture will look slightly thicker than a typical cookie dough base because of the pumpkin.
- Combine the dry ingredients. In a separate bowl, whisk together the all-purpose flour, cream of tartar, baking soda, salt, cinnamon, nutmeg, ginger, and cloves. Make sure there are no lumps—cream of tartar can be clumpy, so break up any chunks with your fingers or the whisk.
- Fold the dry into the wet. Add the dry ingredients to the wet mixture in two additions. Use a rubber spatula to fold gently until just combined. Overmixing will make the cookies tough. Stop when you no longer see streaks of flour. The dough will be soft and slightly sticky—that’s normal.
- Chill the dough. Cover the bowl with plastic wrap and refrigerate for at least 45 minutes, or up to 2 hours. Chilling is crucial. It solidifies the brown butter, prevents the cookies from spreading too much, and allows the flavors to meld. I once skipped this step out of impatience, and the cookies turned into flat, greasy discs. Learn from my mistake.
- Preheat and prepare. About 10 minutes before the dough is done chilling, preheat your oven to 350°F (175°C). Line two baking sheets with parchment paper or silicone baking mats.
- Make the cinnamon sugar coating. In a small bowl, mix together the ¼ cup granulated sugar, 2 teaspoons cinnamon, and pinch of nutmeg.
- Shape and coat the cookies. Using a 1.5-tablespoon cookie scoop or a spoon, portion the dough into balls about 1.5 inches in diameter. Roll each ball between your palms to smooth it out, then roll it generously in the cinnamon sugar mixture. Place the coated dough balls on the prepared baking sheets, spacing them about 2 inches apart. I usually fit 12 cookies per sheet.
- Bake. Bake one sheet at a time in the center of the oven for 10-12 minutes. The cookies should look puffed and slightly cracked on top, with golden brown edges. The centers will look soft and underdone—that’s what you want. They’ll continue to set as they cool.
- Cool. Let the cookies rest on the baking sheet for 5 minutes. This allows them to firm up without becoming hard. Then transfer them to a cooling rack to cool completely. If you try to move them too soon, they’ll fall apart. Trust me, I’ve done it.
Cooking Tips & Techniques
I’ve made these cookies more times than I care to admit, and I’ve learned a few things along the way. Here are my best tips for perfect results every time:
- Watch the brown butter closely. It can go from perfectly amber to burnt in about 30 seconds. As soon as you see brown specks and smell that nutty aroma, pull it off the heat. Pour it into a cool bowl to stop the cooking process immediately.
- Use a light-colored saucepan for browning butter. Dark pans make it hard to see the color change, and you’ll end up with burnt butter. I learned this the hard way and had to start over.
- Don’t overmix the dough. Once you add the flour, mix just until it disappears. Overworking the dough develops gluten, which makes cookies tough. You want tender, chewy cookies, not bread rolls.
- Chill the dough for at least 45 minutes. I know it’s tempting to skip this, but don’t. The brown butter needs time to solidify again, and the flavors need time to meld. Chilled dough also spreads less and gives you that perfect thick, chewy texture.
- Use a cookie scoop for uniform sizes. This ensures even baking. If some cookies are bigger than others, the small ones will burn while the big ones are still underdone.
- Bake one sheet at a time. If you bake two sheets at once, the heat circulates unevenly, and your cookies won’t bake consistently. I know it takes longer, but it’s worth it.
- Let them cool on the baking sheet. Those 5 minutes of resting time are crucial. The cookies are fragile when they come out of the oven, and moving them too soon will ruin their texture.
Variations & Adaptations
One of the best things about this recipe is how adaptable it is. Here are a few variations I’ve tried and loved:
- Gluten-Free Version: Substitute the all-purpose flour with a 1:1 gluten-free baking flour blend. I’ve used Bob’s Red Mill and King Arthur Measure for Measure, and both worked well. Add an extra tablespoon of flour to account for the difference in absorption.
- Dairy-Free Version: Use vegan butter sticks instead of unsalted butter. I recommend Miyoko’s or Earth Balance. Brown the vegan butter the same way—it works surprisingly well. The flavor is slightly different, but still delicious.
- Extra Spicy Version: Double the cinnamon and add ¼ teaspoon of cardamom. Cardamom and pumpkin are a match made in heaven. I made this version for a holiday party, and people couldn’t stop talking about it.
- Chocolate Chip Version: Fold in ½ cup of white chocolate chips or dark chocolate chunks after mixing the dough. The sweetness of white chocolate pairs beautifully with the warm spices, while dark chocolate adds a nice bitterness.
- Maple Glaze Version: Drizzle a simple maple glaze over the cooled cookies. Mix ½ cup powdered sugar with 2 tablespoons maple syrup and 1 tablespoon milk. It adds a lovely extra layer of flavor and makes the cookies look fancy.
- Air Fryer Version: If you’re short on time, you can bake these in an air fryer. Preheat to 325°F (160°C). Place 4-6 dough balls in the basket, leaving space between them. Bake for 6-8 minutes, checking at the 6-minute mark. The air fryer gives them a slightly crisper exterior, which I actually really like.
Serving & Storage Suggestions
These cookies are best served slightly warm, when the brown butter flavor is at its peak and the edges are still a little soft. Let them cool for about 5-10 minutes after baking, then grab one and enjoy it with a cold glass of milk or a hot cup of coffee. They’re also fantastic crumbled over vanilla ice cream for an easy fall dessert.
For storage, keep the cookies in an airtight container at room temperature for up to 5 days. Layer them between sheets of parchment paper to prevent sticking. I’ve found that they actually taste even better on day two—the flavors have more time to meld together.
To freeze the baked cookies, place them in a single layer on a baking sheet and freeze for 1 hour. Then transfer them to a freezer-safe bag or container. They’ll keep for up to 3 months. Thaw at room temperature for about 15 minutes before serving.
You can also freeze the unbaked dough balls. Roll them into balls, coat them in the cinnamon sugar, and place them on a baking sheet lined with parchment paper. Freeze for 1-2 hours, then transfer the frozen dough balls to a freezer bag. When you’re ready to bake, place the frozen dough balls directly on a baking sheet and add 2-3 minutes to the baking time. No need to thaw first.
If you’re looking for more sweet treats to round out your fall baking, you might also enjoy these tender strawberry shortcake stuffed cookies for a fruity twist, or these festive red, white, and blue M&M chocolate chip cookies for a fun, colorful option. And if you’re in the mood for something truly decadent, these decadent peanut butter cup brownie cheesecake bars are absolutely worth the effort.
Nutritional Information & Benefits
Here’s the estimated nutritional breakdown for one cookie (based on 24 cookies per batch):
| Nutrient | Amount Per Cookie |
|---|---|
| Calories | 165 |
| Total Fat | 9g |
| Saturated Fat | 5g |
| Cholesterol | 30mg |
| Sodium | 95mg |
| Total Carbohydrates | 21g |
| Dietary Fiber | 1g |
| Sugars | 13g |
| Protein | 2g |
While these are definitely a treat, the pumpkin purée adds a boost of vitamin A and fiber. The brown butter provides a small amount of vitamin A and healthy fats. If you’re looking for a lower-sugar option, you can reduce the sugar in the dough to ½ cup granulated and ⅓ cup brown sugar, though the texture will be slightly less tender.
These cookies are not gluten-free, dairy-free, or vegan in their standard form, but I’ve included substitution options in the variations section above.
Conclusion
These brown butter pumpkin snickerdoodle cookies are everything I want fall baking to be—warm, comforting, and just a little bit special. The nutty depth of the brown butter, the subtle sweetness of the pumpkin, and that classic cinnamon sugar coating come together in a way that feels both familiar and new. Honestly, I don’t think I’ll ever make regular snickerdoodles again.
I hope you give these a try and make them your own. Maybe you’ll add extra cinnamon, or swap in some white chocolate chips, or drizzle them with maple glaze. Whatever you do, I’d love to hear about it. Leave a comment below and let me know how they turned out—did you make any changes? Did you serve them at a gathering? Did you eat three in one sitting? No judgment here.
Happy baking, friends. And remember: browned butter makes everything better.
Frequently Asked Questions
Can I use pumpkin pie filling instead of pumpkin purée?
No, I wouldn’t recommend it. Pumpkin pie filling is pre-sweetened and spiced, which will throw off the sugar and spice balance in this recipe. Stick with 100% pumpkin purée for the best results.
Why did my cookies turn out flat?
This usually happens for one of three reasons: the butter was too warm when you mixed the dough, you skipped the chilling step, or you used too much sugar. Make sure your brown butter is cooled to room temperature before mixing, and always chill the dough for at least 45 minutes.
Can I make these cookies ahead of time?
Absolutely. You can make the dough up to 3 days in advance and keep it refrigerated. Or you can freeze the unbaked dough balls for up to 3 months. Just bake them straight from frozen, adding 2-3 minutes to the baking time.
Can I use salted butter instead of unsalted?
You can, but I’d recommend reducing the added salt in the recipe to ¼ teaspoon. Salted butter varies in salt content between brands, so it’s harder to control the final flavor. Unsalted butter gives you more control.
How do I know when the brown butter is ready?
Look for three signs: the butter will smell nutty and toasty, it will turn a deep amber color, and you’ll see brown specks forming at the bottom of the pan. As soon as you see those specks, remove the pan from the heat. It happens fast, so don’t walk away from the stove.
Pin This Recipe!
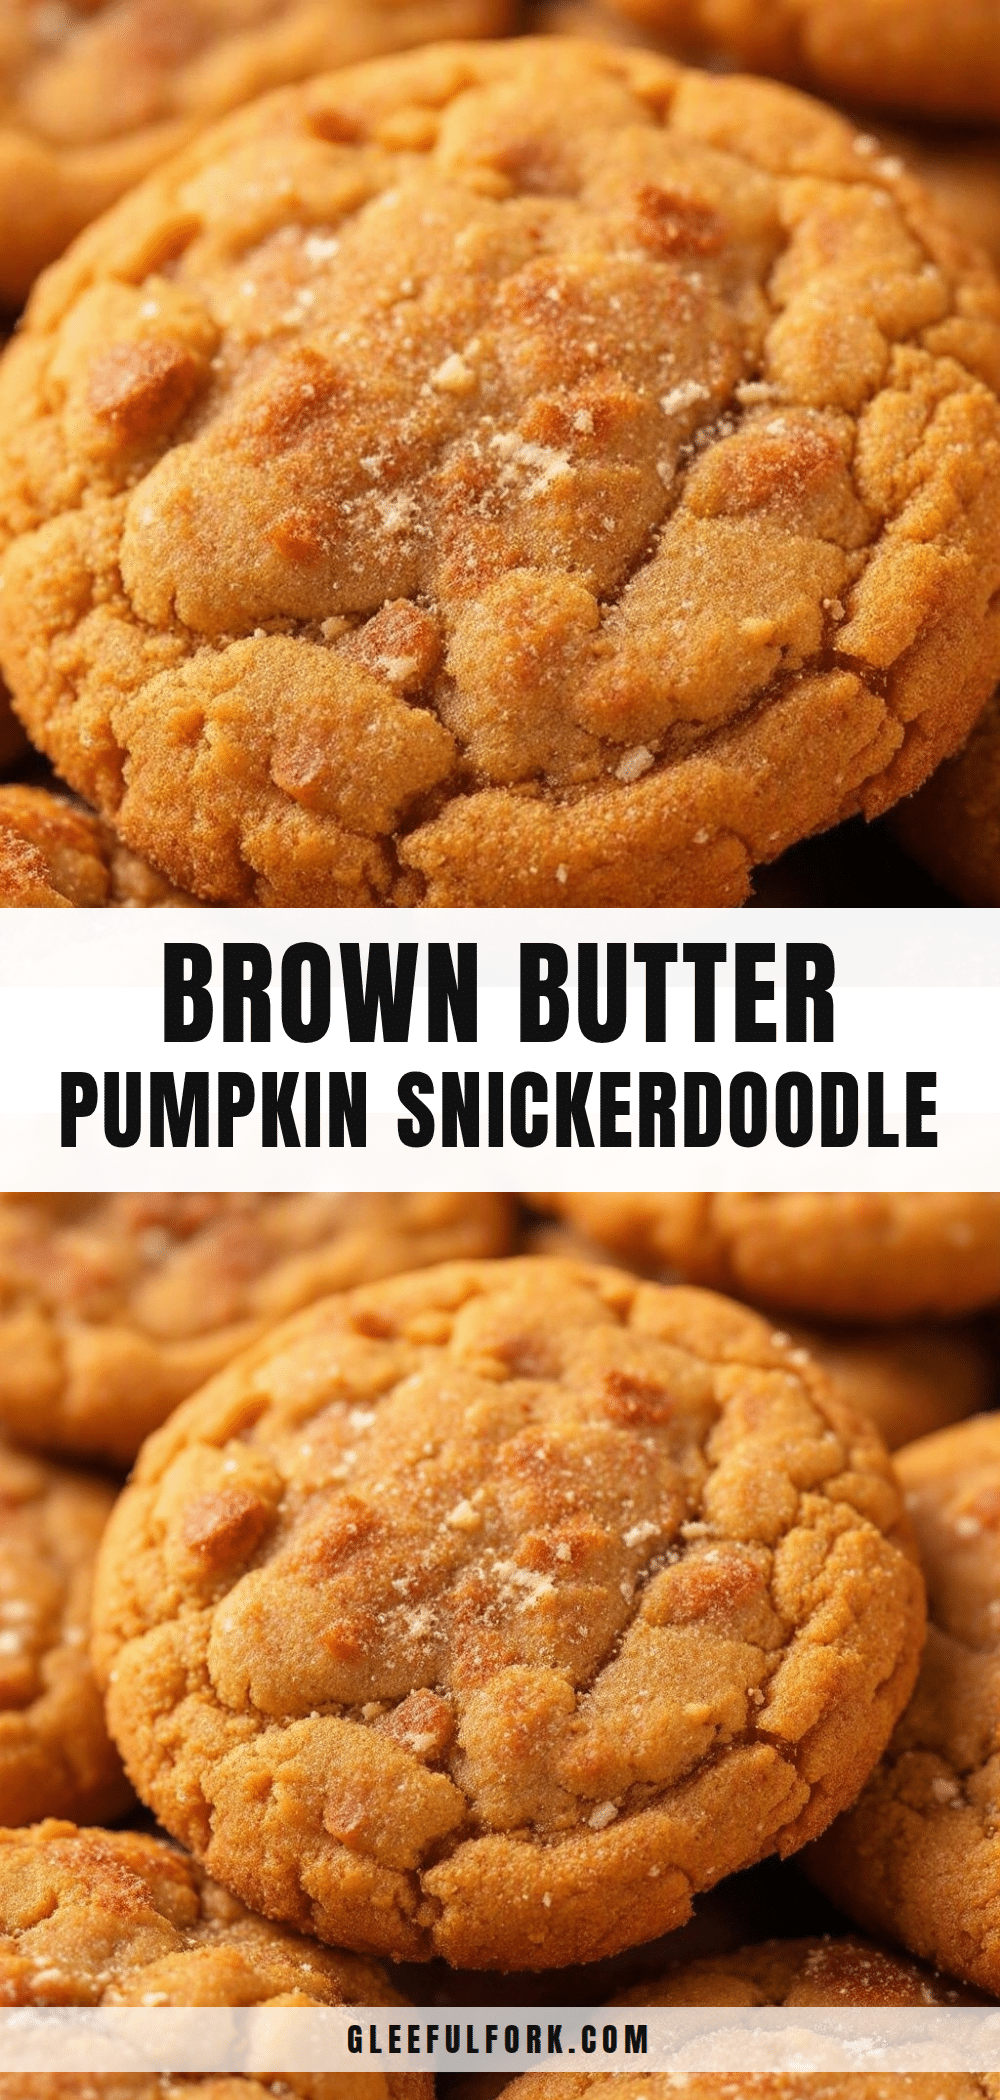
Perfect Brown Butter Pumpkin Snickerdoodle Cookies Recipe
These brown butter pumpkin snickerdoodle cookies combine nutty brown butter, warm pumpkin spice, and a classic cinnamon-sugar coating for a chewy, crackly fall treat that tastes like a caramelized pumpkin pie in cookie form.
- Prep Time: 20 minutes
- Cook Time: 12 minutes
- Total Time: 1 hour 17 minutes
- Yield: 24 cookies 1x
- Category: Dessert
- Cuisine: American
Ingredients
- 1 cup (226g) unsalted butter
- ¾ cup (150g) granulated sugar
- ½ cup (100g) packed light brown sugar
- 1 large egg, room temperature
- 1 teaspoon vanilla extract
- ½ cup (120g) pumpkin purée
- 2 cups (250g) all-purpose flour
- 1 teaspoon cream of tartar
- ½ teaspoon baking soda
- ½ teaspoon salt
- 1½ teaspoons ground cinnamon
- ½ teaspoon ground nutmeg
- ½ teaspoon ground ginger
- ¼ teaspoon ground cloves
- ¼ cup (50g) granulated sugar (for coating)
- 2 teaspoons ground cinnamon (for coating)
- Pinch of nutmeg (for coating, optional)
Instructions
- Brown the butter: Place unsalted butter in a medium saucepan over medium heat. Melt completely, swirling occasionally, until it foams, turns amber, and smells nutty (5-7 minutes). Remove from heat immediately and pour into a heatproof bowl. Let cool for 10-15 minutes.
- Mix wet ingredients: In a large bowl, whisk together cooled brown butter, granulated sugar, and brown sugar until smooth. Add room temperature egg, vanilla extract, and pumpkin purée. Whisk until fully combined and smooth.
- Combine dry ingredients: In a separate bowl, whisk together flour, cream of tartar, baking soda, salt, cinnamon, nutmeg, ginger, and cloves until no lumps remain.
- Fold dry into wet: Add dry ingredients to wet mixture in two additions, folding gently with a rubber spatula until just combined. Do not overmix. Dough will be soft and slightly sticky.
- Chill dough: Cover bowl with plastic wrap and refrigerate for at least 45 minutes (up to 2 hours).
- Preheat and prepare: About 10 minutes before dough is done chilling, preheat oven to 350°F (175°C). Line two baking sheets with parchment paper or silicone baking mats.
- Make cinnamon sugar coating: In a small bowl, mix together ¼ cup granulated sugar, 2 teaspoons cinnamon, and pinch of nutmeg.
- Shape and coat cookies: Using a 1.5-tablespoon cookie scoop or spoon, portion dough into 1.5-inch balls. Roll each ball between palms to smooth, then roll generously in cinnamon sugar mixture. Place on prepared baking sheets, spacing 2 inches apart.
- Bake: Bake one sheet at a time in center of oven for 10-12 minutes, until puffed, slightly cracked on top, and golden brown on edges. Centers will look soft.
- Cool: Let cookies rest on baking sheet for 5 minutes, then transfer to a cooling rack to cool completely.
Notes
Chill dough for at least 45 minutes to prevent spreading. Watch brown butter closely to avoid burning. Use a light-colored saucepan to see color change. Let cookies cool on baking sheet for 5 minutes before moving. For best results, bake one sheet at a time.
Nutrition
- Serving Size: 1 cookie
- Calories: 165
- Sugar: 13
- Sodium: 95
- Fat: 9
- Saturated Fat: 5
- Carbohydrates: 21
- Fiber: 1
- Protein: 2
Keywords: brown butter, pumpkin, snickerdoodle, cookies, fall, cinnamon sugar, easy, chewy


