Love this? Save it for later!
Share the inspiration with your friends
I ruined three cake pans trying to make strawberry shortcake before I finally gave up on the oven. It wasn’t just a little scorch. It was a charcoal disaster that left my kitchen smelling like regret and burnt sugar for days. I kept thinking if I just used more butter, or baked it hotter, or maybe added more vanilla, the magic would happen. But all it did was turn my expensive bakeware into blackened relics.
Honestly, I didn’t even like shortcake that much. The sponge was always too dry, and the whipped cream slid right off. It felt like a holiday obligation rather than a treat. I wanted that flavor—the tangy cream, the sweet berries, the soft cake—but without the heat, the hassle, or the burnt edges. So, I stopped baking. I started layering.
This creamy no-bake strawberry shortcake icebox cake changed everything for me. It started as a desperate attempt to salvage a summer evening. I had a pint of berries starting to get mushy and a carton of heavy cream that needed using. I crumbled some ladyfingers into a dish, poured the cream over them, and tossed in the fruit. I told myself it was just a fancy trifle.
When I tasted it the next morning, the ladyfingers had softened into something like cake. The flavors had married in the fridge. It was cool, sweet, and incredibly easy. I realized I didn’t need an oven to make dessert. I just needed patience and a container. Now, this is my go-to when the weather is too hot to stand near the stove. It is the only strawberry dessert that doesn’t end in a trip to the trash can.
Why You’ll Love This No-Bake Strawberry Shortcake Icebox Cake
Let’s face it, most dessert recipes promise the world and deliver a lot of work. This recipe is different because it respects your time and your sanity. I have tested this version over dozens of summers, tweaking the ratios until the texture was just right. It is not just a pile of fruit and cream. It is a structured, creamy, layered experience that feels fancy but takes almost no effort. Here is why this specific version stands out from the crowd.
- Zero Oven Heat: This comes together in under 15 minutes of active work. You do not need to preheat anything. It is perfect for those sticky July afternoons when the idea of standing in front of a hot stove makes you sweat before you even start cooking.
- Pantry Staples: You likely already have the core ingredients. Ladyfingers, heavy cream, sugar, and strawberries are common items. You do not need a specialty grocery run. This makes it a reliable emergency dessert that actually tastes homemade.
- Perfect for Summer Gatherings: Whether it is a potluck, a backyard BBQ, or just a Tuesday night treat, this dish travels well. It stays cold and firm in the fridge. It pairs beautifully with other light summer dishes, like my fresh cowboy caviar if you are hosting a larger meal.
- Crowd-Pleaser Texture: The magic here is the ladyfingers. They absorb the cream and turn soft, almost like a sponge cake, but they hold their shape. It creates a texture that is neither too mushy nor too hard. Kids love it because it is sweet. Adults love it because it is not overly heavy.
- Unbelievably Delicious: The balance of tart fresh strawberries against the rich, slightly sweet cream is next-level comfort food. It tastes like a high-end restaurant dessert but with half the ingredients. It is the kind of recipe that makes you close your eyes after the first bite.
This recipe isn’t just good. It is the kind that makes you forget you didn’t bake anything. It is comfort food reimagined—healthier in effort, faster in prep, but with the same soul-soothing satisfaction of a traditional shortcake. It is perfect for impressing guests without the stress of timing a cake in the oven.
What Ingredients You Will Need
This recipe uses simple, wholesome ingredients to deliver bold flavor and satisfying texture without the fuss. The beauty of an icebox cake is that the quality of the few ingredients you use matters immensely. Since there are no complex chemical leaveners or long mixing times to hide behind, you need good stuff. Here is what you need to get that perfect creamy, berry-filled result.
For the Cream Layer
- Heavy Whipping Cream: You need cold heavy cream with at least 35% fat content. This is what creates the stable structure. Lower fat creams will not hold peaks. I recommend using a brand like Clover or Organic Valley for the cleanest flavor.
- Granulated Sugar: Just a quarter cup is enough to sweeten the cream without making it cloying. It also helps stabilize the whipped cream slightly as it dissolves.
- Vanilla Extract: Use pure vanilla extract, not imitation. Two teaspoons add that classic shortcake aroma that ties the whole dish together.
- Full-Fat Cream Cheese: This is my secret weapon. Eight ounces of softened cream cheese adds tang and helps the cream hold its shape longer. It prevents the dessert from weeping in the fridge.
For the Cake Layers
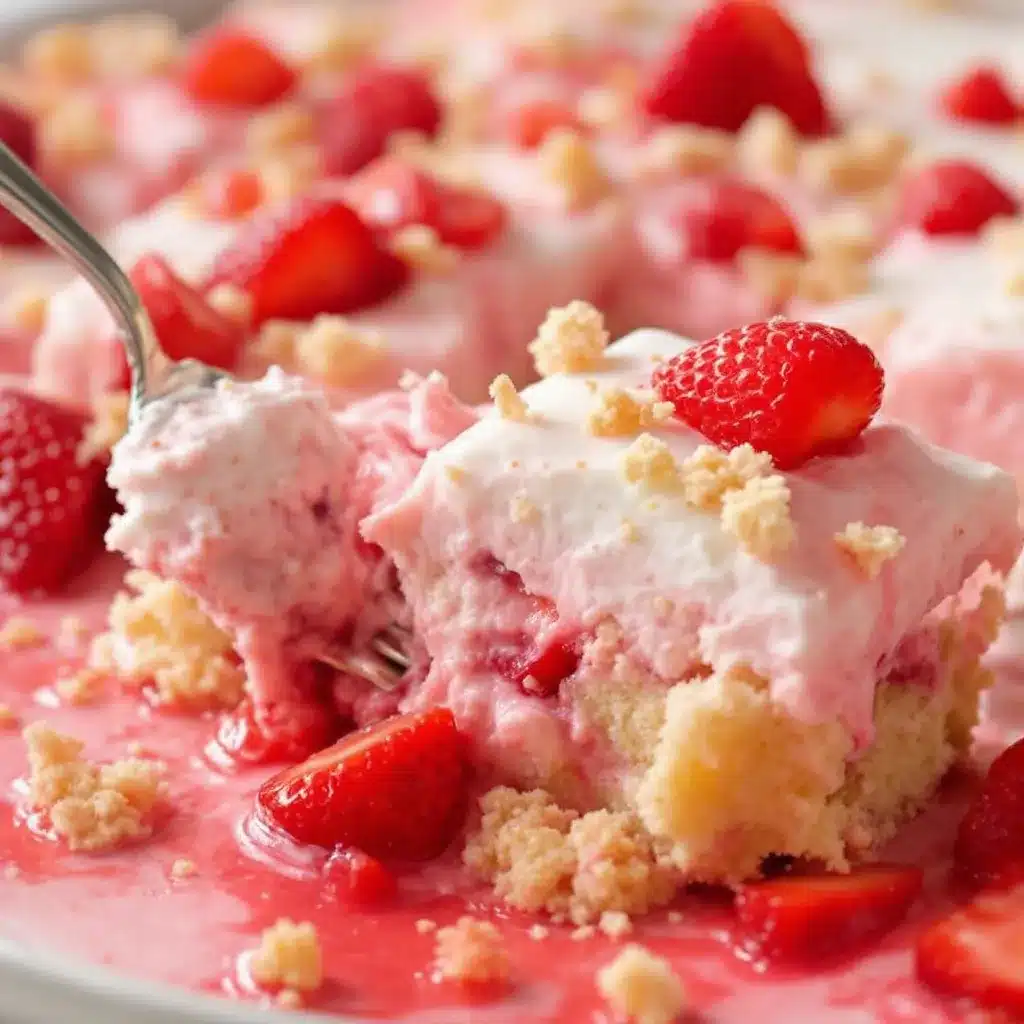
- Ladyfingers: You need two standard boxes. These dry sponge cookies are essential. They act as the “cake” part. Do not substitute with angel food cake unless you adjust the liquid ratio, as ladyfingers are designed to soak up moisture quickly.
For the Berry Layer
- Fresh Strawberries: Two pounds of ripe, red strawberries. Look for berries that are fragrant and firm. If they are already mushy, they will turn your cake into a soup. Wash them and hull them before slicing.
- Optional Sugar for Berries: If your strawberries are tart, toss them with a tablespoon of sugar while they sit. This draws out the juices, creating a natural syrup that flavors the cream.
If you need to adjust for dietary needs, you can use a dairy-free cream cheese alternative and a plant-based heavy cream, though the texture will be slightly softer. For a gluten-free option, look for certified gluten-free ladyfingers, which are widely available now. I also suggest checking out my tender strawberry shortcake stuffed cookies if you want a baked version of these same flavors later on.
Equipment Needed
You do not need a fancy stand mixer or a dozen specialized tools to make this. In fact, keeping it simple is part of the charm. Here is what you will need to pull this off without a mess.
- 9×13 Inch Dish: A standard glass or ceramic baking dish works best. Glass allows you to see the layers, which is satisfying. You can also use a deep serving bowl or a loaf pan if you want individual portions.
- Hand Mixer or Whisk: A hand mixer makes whipping the cream and cream cheese much faster. If you do not have one, a sturdy balloon whisk and some elbow grease will work. It takes about five minutes of arm work.
- Large Mixing Bowl: Make sure it is wide enough to fold the ingredients together without spilling. A stainless steel bowl is nice because it stays cold.
- Sharp Knife and Cutting Board: For slicing the strawberries evenly. Uniform slices look better and stack better.
- Plastic Wrap: You must cover the dish tightly. This prevents the cake from absorbing fridge odors and keeps the top layer from drying out.
If you only have a small bowl, you can make a single-layer version. It will take less time to chill. Avoid using metal bowls if your kitchen is very hot, as the cream can warm up too fast. A chilled bowl helps the cream whip up faster.
Preparation Method
Making this creamy no-bake strawberry shortcake icebox cake is straightforward. The key is keeping everything cold and layering it correctly. Follow these steps closely for the best texture.
- Prepare the Strawberries (10 minutes): Wash and hull your strawberries. Slice them into quarter-inch thick slices. If they are very juicy, toss them with a tablespoon of sugar and let them sit for ten minutes. This creates a syrup. Drain any excess liquid if it pools at the bottom, as too much liquid can make the ladyfingers soggy too fast.
- Whip the Cream (5 minutes): In a large chilled bowl, combine the cold heavy cream, softened cream cheese, sugar, and vanilla. Beat on medium-high speed. Start slow to incorporate the cream cheese, then increase speed. Whip until you see stiff peaks. The cream should hold its shape when you lift the beater. Do not over-whip, or it will turn grainy.
- First Ladyfinger Layer: Take your ladyfingers and arrange them in a single layer across the bottom of your 9×13 dish. You may need to break a few to fit the corners. They should be snug but not overlapping too much.
- First Cream Layer: Spread half of the whipped cream mixture over the ladyfingers. Use an offset spatula or a butter knife to get it into the corners. Make it even. This acts as the glue for the next layer.
- First Berry Layer: Spread half of the sliced strawberries over the cream. Try to distribute them evenly. This ensures every bite has fruit.
- Second Ladyfinger Layer: Add another layer of ladyfingers on top of the berries. Again, break pieces as needed to fill gaps. This layer will absorb some berry juice, which is good.
- Second Cream Layer: Spread the remaining whipped cream over the second layer of ladyfingers. Smooth the top. This is your final surface. You can leave it plain or decorate it.
- Second Berry Layer: Arrange the remaining strawberries on top of the cream. You can lay them flat or stand them up for height. This is your decorative layer.
- Chill (4 hours minimum): Cover the dish tightly with plastic wrap. Place it in the refrigerator. You need at least four hours for the ladyfingers to soften completely. Overnight is best. The longer it sits, the better the flavor melds.
If you are in a rush, you can cut the chilling time to two hours, but the ladyfingers will retain a bit more crunch. For the true icebox cake experience, patience is required.
Cooking Tips & Techniques
There are a few tricks to making this recipe fail-proof. I have learned them the hard way, mostly through ruined textures and soggy bottoms.
- Keep Everything Cold: The most important rule. If your cream is warm, it will not whip. If your bowl is warm, it will take forever. Put your bowl and beaters in the freezer for ten minutes before you start. This is a professional trick that makes a huge difference.
- Do Not Skip the Cream Cheese: I know it adds a tang, but it also stabilizes the cream. Without it, the heavy cream can deflate or separate as it sits in the fridge. The cream cheese keeps the structure firm for days.
- Watch the Ladyfinger Soak: Ladyfingers are like sponges. If you leave the cake in the fridge for more than three days, the bottom layer can become mushy. It is best eaten within two to three days. The texture changes over time, becoming more like a trifle.
- Drain the Berries: If your strawberries are super juicy, the excess liquid can pool at the bottom. This makes the bottom layer of ladyfingers soggy. If you see a lot of juice, drain it off before assembling. You can stir the juice back into the cream if you want extra flavor.
- Softened Cream Cheese: Make sure your cream cheese is truly soft. If it is cold and hard, you will get lumps in your cream. Leave it on the counter for thirty minutes before you start. You should be able to press a finger into it easily.
These tips ensure consistency. They turn a simple mix-and-chill recipe into something that rivals bakery desserts.
Variations & Adaptations
Once you master the base recipe, you can play with it. The structure is very forgiving. Here are a few ways to change it up.
Chocolate Lover’s Twist
Add two tablespoons of unsweetened cocoa powder to the whipped cream mixture. It turns the cream into a chocolate mousse. It pairs surprisingly well with strawberries. The bitterness cuts the sweetness nicely.
Raspberry or Blueberry Swap
You can swap all or half of the strawberries for raspberries or blueberries. Raspberries are tart and work well. Blueberries are sweeter and smaller, so they might sink a bit. If using blueberries, toss them with a teaspoon of cornstarch to help them stay on top.
Lemon Zest Variation
Add the zest of one lemon to the cream. It brightens the flavor and makes it taste fresher. This is great if you find the cream too rich. It adds a citrus note that complements the berries.
Gluten-Free Option
Use gluten-free ladyfingers. They can be slightly more fragile, so handle them gently. You might need an extra layer of cream to help them stick together.
I once made this with peaches instead of strawberries in late summer. It was delicious but needed more sugar in the cream because peaches are less acidic. Taste your fruit before you start. Adjust accordingly.
Serving & Storage Suggestions
This cake is best served cold. Straight from the fridge is ideal. It holds its shape well when sliced. Use a sharp knife to cut clean squares. Wipe the knife between cuts for neat edges.
Storage Instructions
- Refrigerator: Keep it covered in plastic wrap. It will last for up to three days. After that, the ladyfingers may become too soft.
- Freezer: You can freeze this cake. Wrap it tightly in plastic and then foil. It will keep for up to one month. Thaw it in the fridge overnight. The texture may be slightly icier, but it is still good.
Serving Ideas
Serve this with a side of fresh mint leaves for color. It looks beautiful on a dessert table. It pairs well with coffee or tea. If you want a drink, try a glass of refreshing blueberry lavender lemonade. The tartness balances the sweet cake.
The flavors develop over time. The first day is crisp. The second day is softer and more integrated. I usually find the second day is the best day to eat it. The ladyfingers have fully softened, and the cream is perfectly smooth.
Nutritional Information & Benefits
This dessert is rich in calories due to the cream and cheese. A typical serving has about 350-400 calories. It contains fat from the dairy and sugar from the berries and added sugar.
- Fat: The heavy cream and cream cheese provide saturated fat. It is satisfying but should be enjoyed in moderation.
- Vitamins: The strawberries provide Vitamin C and antioxidants. They add a healthy element to the treat.
- Dietary Notes: This recipe contains gluten and dairy. It is not suitable for vegans or those with lactose intolerance unless substitutions are made.
I view this as a special occasion dessert. It is not a daily health food. But it is a treat that uses real fruit and simple ingredients. It feels indulgent without being overly complicated.
Conclusion
This creamy no-bake strawberry shortcake icebox cake is worth trying. It saves you from the oven and delivers a delicious result. It is easy to make and impressive to serve. I love it because it brings back the joy of summer desserts without the heat.
I encourage you to customize it. Add your favorite berries. Try a different cookie. Make it your own. I still remember the first time I made this after burning so many cakes. That relief and joy is what this recipe is about.
Please leave a comment below if you make it. I love hearing how it turned out for you. Share your photos or variations. It helps me know what works for you.
Enjoy every bite. It is a simple pleasure that deserves a spot in your summer rotation.
Frequently Asked Questions
Can I use frozen strawberries?
Yes, but thaw them completely and drain the excess liquid. Frozen berries release a lot of water, which can make the cake soggy. Pat them dry with a paper towel before layering.
How long do I need to chill the cake?
Four hours is the minimum. The ladyfingers need time to absorb the cream and soften. Overnight is best for the best texture. If you cut it too soon, the layers will slide apart.
Can I make this in a different size dish?
Yes. You can use a 9×9 dish for a thicker cake, or a loaf pan for individual portions. Adjust the layering accordingly. The chilling time will remain the same.
Why is my cream runny?
Your cream or bowl was likely too warm. Heavy cream needs to be very cold to whip properly. Also, ensure your cream cheese is fully incorporated and not clumpy.
Can I add alcohol to this recipe?
Yes. A tablespoon of Kirsch or strawberry liqueur in the cream adds a nice adult flavor. It does not interfere with the setting of the cake. Just stir it in with the vanilla.
Pin This Recipe!
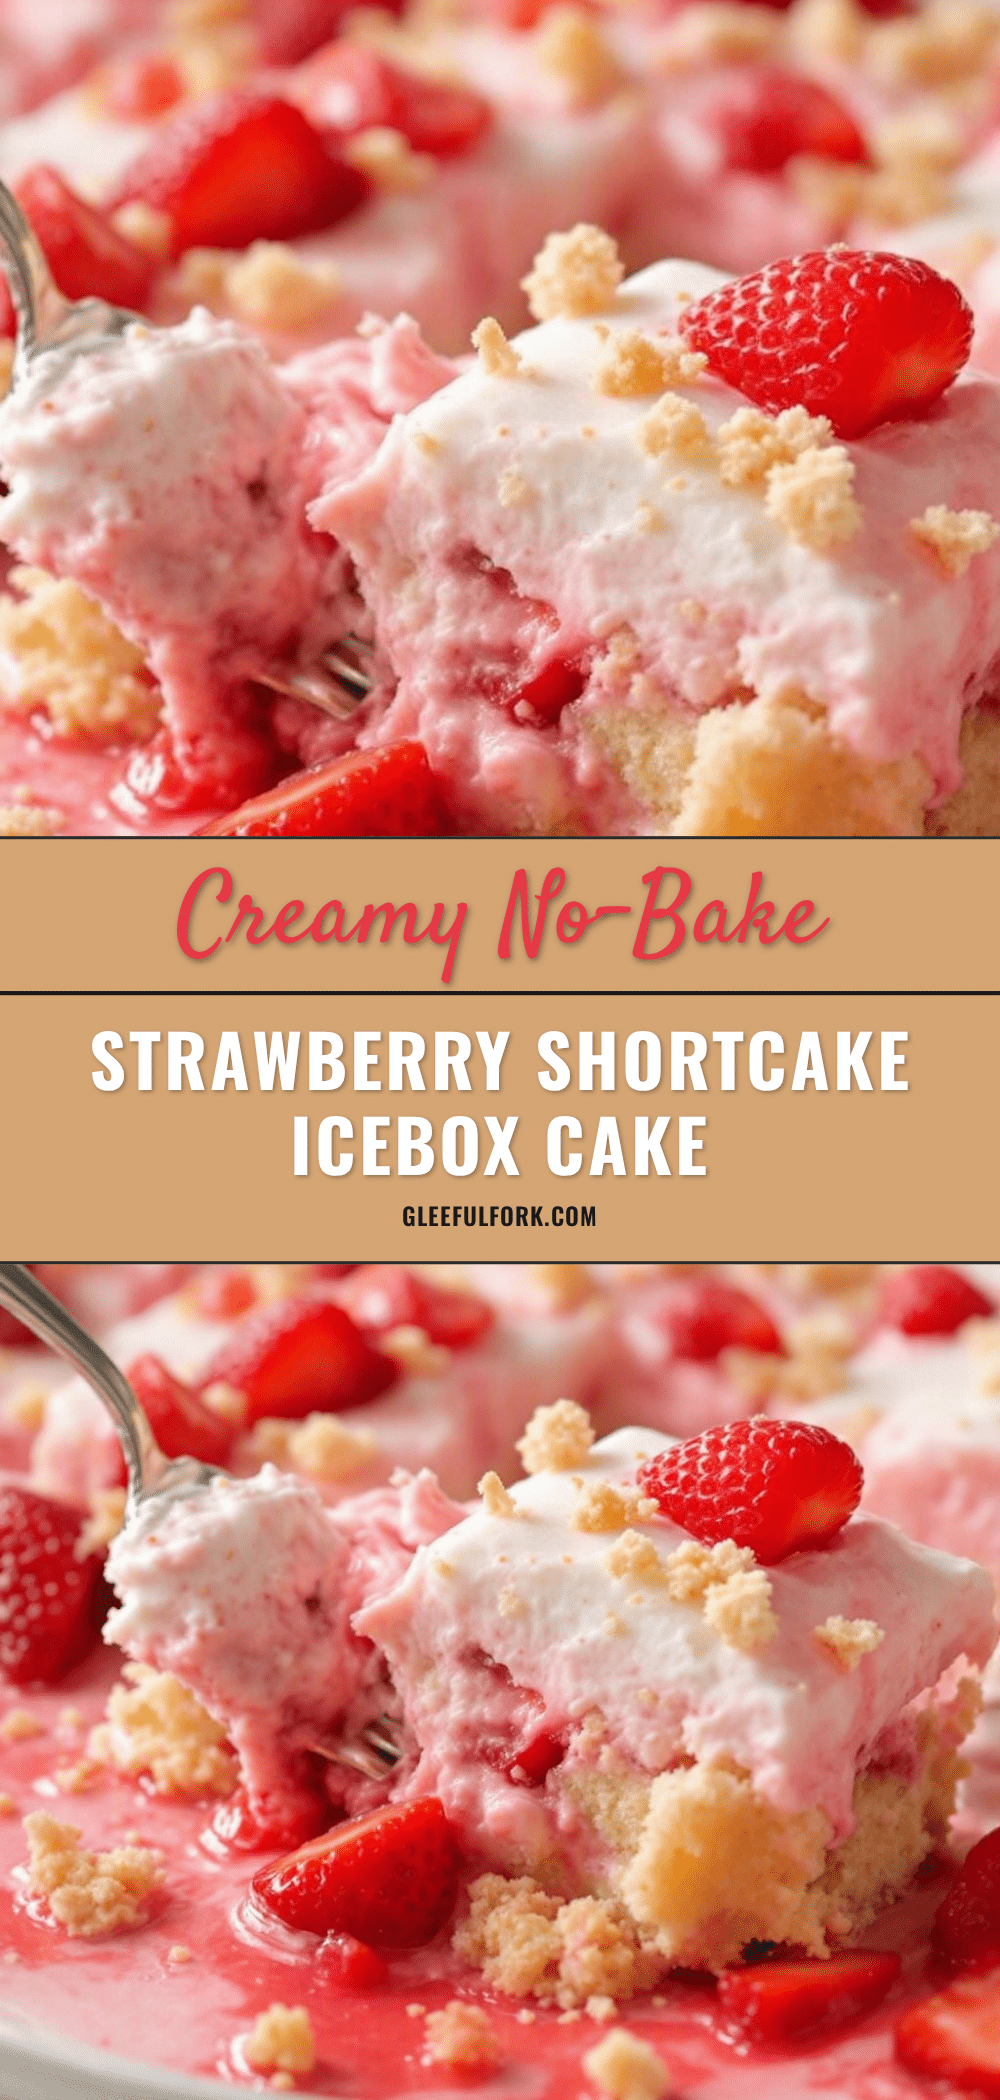
Creamy No-Bake Strawberry Shortcake Icebox Cake: 5-Ingredient Dessert
A refreshing, no-bake summer dessert featuring layers of ladyfingers, whipped cream cheese mixture, and fresh strawberries. This icebox cake requires no oven and sets in the fridge for a soft, cake-like texture.
- Prep Time: 15 minutes
- Cook Time: 0 minutes
- Total Time: 4 hours 15 minutes
- Yield: 8 servings 1x
- Category: Dessert
- Cuisine: American
Ingredients
- 2 pounds fresh strawberries, washed, hulled, and sliced
- 1 tablespoon granulated sugar (optional, for macerating strawberries)
- 8 ounces full-fat cream cheese, softened
- 2 cups heavy whipping cream, cold
- 1/4 cup granulated sugar
- 2 teaspoons pure vanilla extract
- 2 boxes ladyfingers
Instructions
- Slice strawberries into quarter-inch thick slices. If desired, toss with 1 tablespoon sugar and let sit for 10 minutes to create syrup. Drain excess liquid if pooling.
- In a large chilled bowl, combine cold heavy cream, softened cream cheese, 1/4 cup sugar, and vanilla extract.
- Beat on medium-high speed, starting slow to incorporate cream cheese, then increasing speed until stiff peaks form. Do not over-whip.
- Arrange a single layer of ladyfingers across the bottom of a 9×13 inch dish, breaking pieces as needed to fit.
- Spread half of the whipped cream mixture over the ladyfingers.
- Spread half of the sliced strawberries over the cream layer.
- Add a second layer of ladyfingers on top of the berries.
- Spread the remaining whipped cream over the second layer of ladyfingers.
- Arrange the remaining strawberries on top of the cream.
- Cover the dish tightly with plastic wrap and refrigerate for at least 4 hours, or overnight, until ladyfingers are soft.
Notes
Keep all ingredients and equipment cold to ensure the cream whips properly. The cream cheese stabilizes the mixture. For best texture, let the cake chill overnight. It can be stored in the refrigerator for up to 3 days or frozen for up to 1 month.
Nutrition
- Serving Size: 1 slice
- Calories: 375
- Sugar: 22
- Sodium: 150
- Fat: 28
- Saturated Fat: 17
- Carbohydrates: 30
- Fiber: 2
- Protein: 5
Keywords: no-bake dessert, strawberry shortcake, icebox cake, summer dessert, easy dessert, ladyfingers, whipped cream, gluten-free option


