Love this? Save it for later!
Share the inspiration with your friends
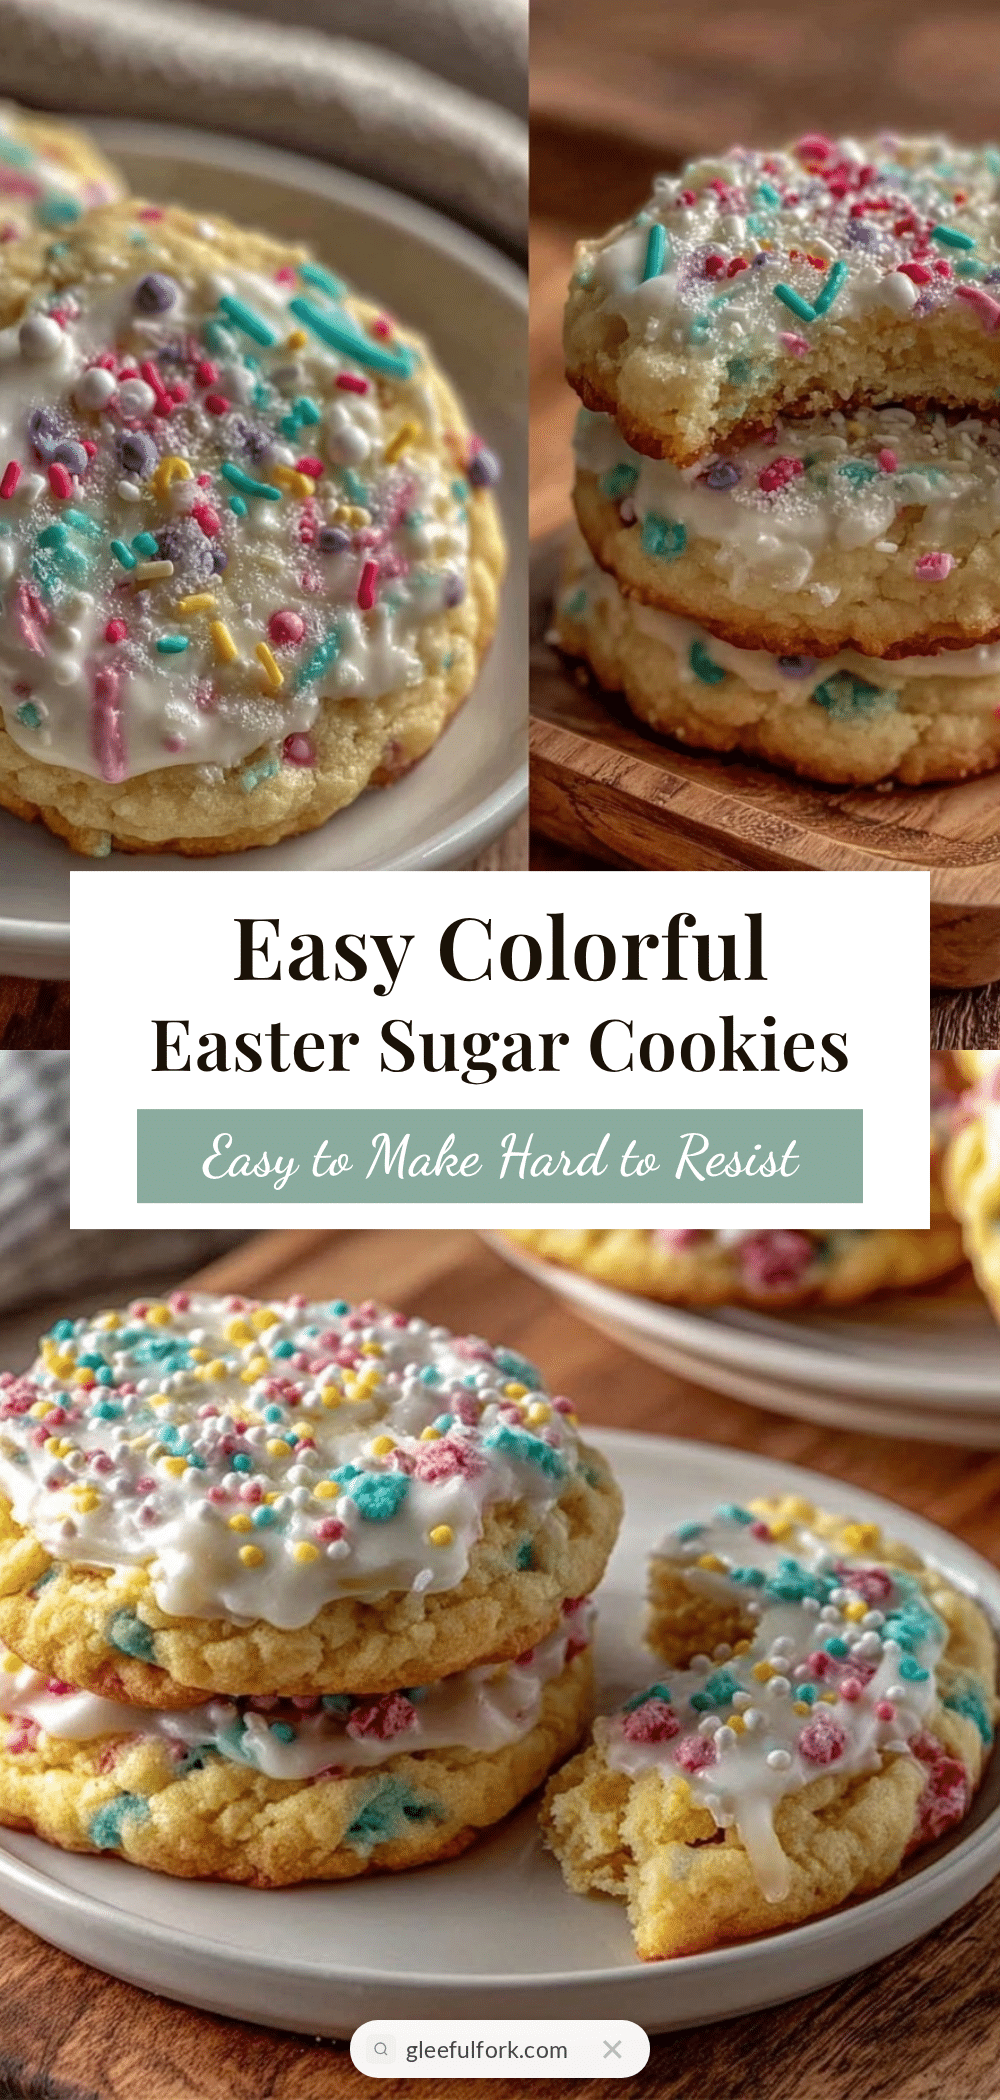
“I wasn’t supposed to be baking that afternoon,” I admit. It was the kind of spring day when the sun suddenly bursts through the clouds, and you find yourself rummaging through the pantry for something fun to do. Honestly, I had zero plans to make anything fancy—just a quick snack to keep my restless energy in check. But then I stumbled upon this stash of pastel-colored sprinkles and cheap little cookie cutters I’d grabbed from a dollar store weeks ago, and a light bulb went off. What started as a casual experiment turned into these Easy Colorful Easter Sugar Cookies with Simple Dollar Store Decorating, which quickly became my go-to festive treat.
Maybe you’ve been there too—the desire to whip up something cute and cheerful without the fuss or fancy tools. These cookies remind me of those sweet, chaotic afternoons when the kitchen looks like a glitter bomb went off, but somehow, it all works out. I remember getting distracted halfway through decorating, accidentally knocking over a bowl (of course), and laughing it off because these cookies were just too fun to be serious about. The best part? You don’t need expensive supplies or hours of work—just a few affordable finds and a little bit of creativity.
So, if you’re looking for a recipe that’s colorful, quick, and perfect for celebrating Easter with minimal hassle, stick around. Let me tell you why this recipe stuck with me and why it might just become your new seasonal favorite.
Why You’ll Love This Recipe
After testing and tweaking this recipe over a few weekends (and a handful of sugar-induced dance breaks), I can confidently say it hits all the right notes. Here’s why this recipe is a keeper:
- Quick & Easy: The dough comes together in under 15 minutes, and baking takes just 10. Perfect for last-minute Easter plans or an afternoon project with the kids.
- Simple Ingredients: No need for specialty stores—just pantry staples and a few colorful sprinkles or dollar store decorations.
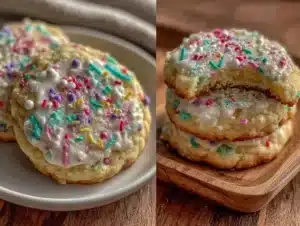
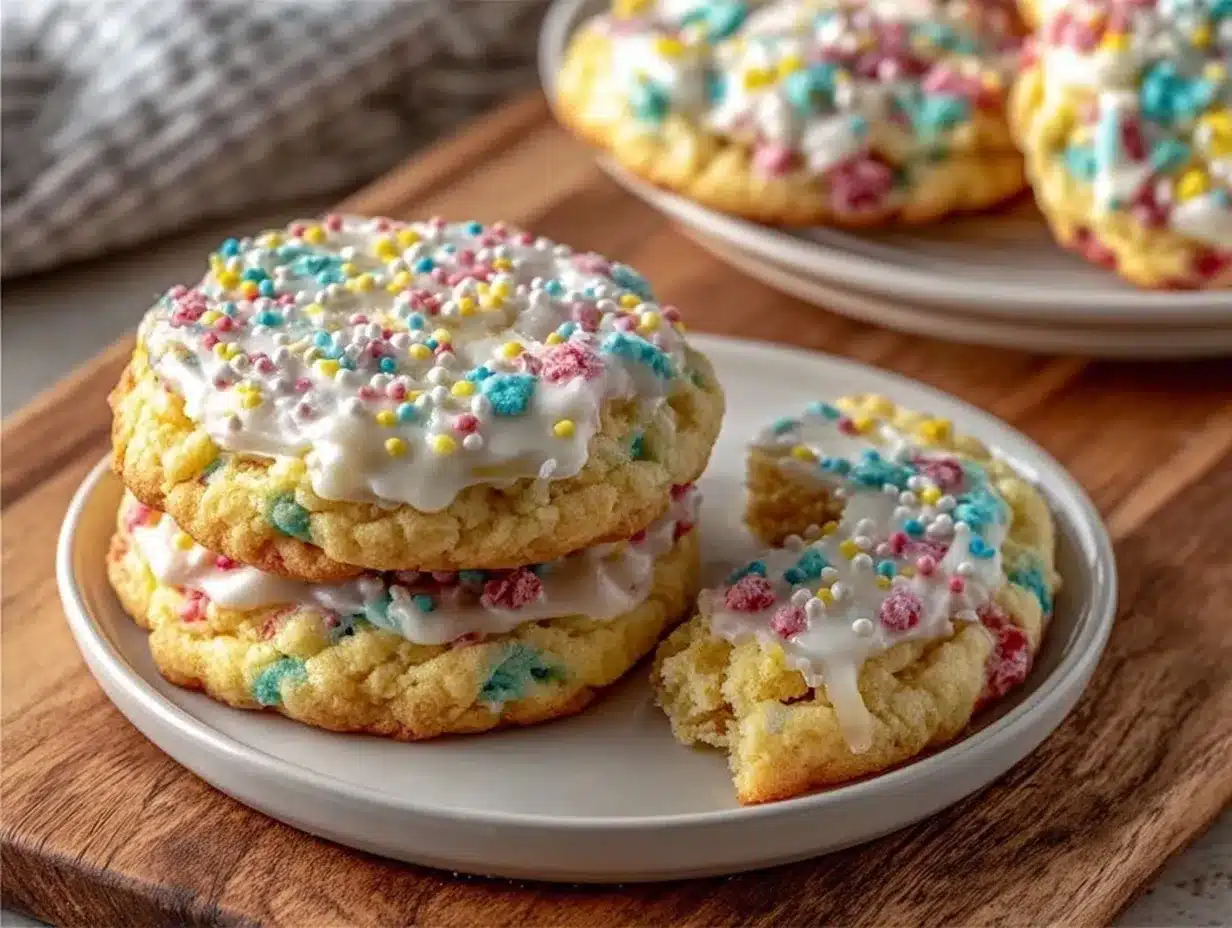
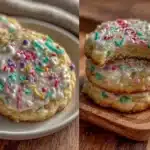
- Perfect for Easter Celebrations: Bright pastels and playful shapes bring a festive vibe to any gathering or casual brunch.
- Crowd-Pleaser: Everyone from picky kids to cookie connoisseurs loves these. The texture is just right—soft but sturdy enough to hold all the decorations.
- Unbelievably Delicious: This isn’t your average sugar cookie. The slight lemon zest and vanilla combo give it a fresh twist that makes you close your eyes with the first bite.
What makes these cookies stand out is the decorating method. I mean, let’s be honest, not all of us have a piping bag or fancy icing nozzles lying around. Using simple dollar store decorating tools and a bit of royal icing magic, you get charming, colorful results without the stress. This recipe isn’t just about the cookie itself—it’s about making the whole Easter baking experience approachable and fun, no matter your skill level.
What Ingredients You Will Need
This recipe uses straightforward, wholesome ingredients to deliver bright, cheerful Easter sugar cookies that are both tender and sturdy enough for decorating. Most items are pantry staples, and the decorations can be sourced from your local dollar store or craft aisle.
- For the cookie dough:
- 2 ¾ cups (345g) all-purpose flour
- 1 teaspoon baking powder
- ½ teaspoon salt
- 1 cup (226g) unsalted butter, softened (I like using Land O Lakes for creaminess)
- 1 ½ cups (300g) granulated sugar
- 1 large egg, room temperature
- 2 teaspoons vanilla extract (pure is best here)
- 1 teaspoon lemon zest (optional, but adds a fresh twist)
- 2 tablespoons milk (whole or 2%, or any plant-based milk you prefer)
- For the royal icing:
- 3 cups (360g) powdered sugar, sifted
- 2 tablespoons meringue powder (or substitute with 2 large egg whites for a more traditional approach)
- 4-5 tablespoons water (adjust for consistency)
- Food coloring gels in pastel shades (pink, blue, yellow, green)
- Decorations:
- Assorted sprinkles (pastels, Easter-themed shapes, nonpareils)
- Dollar store decorating tools like plastic piping bags, small brushes, or silicone spatulas
- Optional: edible glitter or pearl dust for a little extra sparkle
If you don’t have meringue powder, no big deal—just use fresh egg whites but remember to store the cookies carefully. Also, if you want a gluten-free option, swapping the flour for a 1-to-1 gluten-free blend usually works well, though the texture shifts a bit.
Equipment Needed
- Mixing bowls (medium and large)
- Electric mixer or sturdy whisk (an electric hand mixer saves time but a wooden spoon works if you’re patient)
- Measuring cups and spoons (precision makes a difference here)
- Rolling pin (a clean wine bottle works in a pinch!)
- Cookie cutters in Easter shapes (bunnies, eggs, chicks)
- Baking sheets lined with parchment paper or silicone mats
- Cooling racks for cookies
- Plastic piping bags or resealable sandwich bags (cut a small hole in the corner to pipe icing)
- Small bowls or cups for mixing icing colors
Personally, I’ve found inexpensive silicone mats to be a game-changer for easy cookie release and cleanup. And those plastic piping bags from the dollar store? They’re surprisingly sturdy and perfect for simple decorating tasks. If you don’t have cookie cutters, a sharp knife or even stencils can work just fine—sometimes the imperfect shapes add character!
Preparation Method
- Mix the dry ingredients: In a medium bowl, whisk together 2 ¾ cups (345g) of flour, 1 teaspoon baking powder, and ½ teaspoon salt. Set aside. (Tip: Sifting the flour helps keep the dough soft and smooth.) – 5 minutes
- Cream the butter and sugar: In a large bowl, use an electric mixer to cream 1 cup (226g) softened unsalted butter with 1 ½ cups (300g) granulated sugar until light and fluffy—about 3-4 minutes. You’ll notice the mixture turns pale and airy, which is key for tender cookies. – 5 minutes
- Add egg and flavorings: Beat in 1 large room-temperature egg, 2 teaspoons vanilla extract, and 1 teaspoon lemon zest until just combined. It might look a bit loose, but that’s okay. – 2 minutes
- Combine wet and dry ingredients: Gradually add the flour mixture in batches, alternating with 2 tablespoons of milk. Mix on low speed or fold gently with a spatula until a soft dough forms. Avoid overmixing—you want it just combined. The dough should feel soft but not sticky. – 5 minutes
- Chill the dough: Divide dough into two discs, wrap each in plastic wrap, and refrigerate for at least 1 hour (or up to overnight). Chilling helps the dough firm up for easier rolling and cleaner cookie shapes. – 60 minutes
- Preheat oven and prepare pans: Set the oven to 350°F (175°C). Line baking sheets with parchment paper or silicone mats. – 10 minutes
- Roll and cut: On a lightly floured surface, roll one dough disc out to about ¼ inch (6 mm) thickness. Use your Easter-themed cookie cutters to cut shapes, transferring them carefully to the baking sheets. Save scraps, re-roll, and repeat. (Pro tip: Keep the dough cool while working to avoid sticking and shrinking.) – 15 minutes
- Bake: Bake cookies for 8-10 minutes, until edges just begin to turn golden. Keep an eye on them—overbaking dries them out. They’ll still be soft but firm up as they cool. – 10 minutes
- Cool completely: Let cookies cool on the baking sheet for 5 minutes, then transfer to a wire rack to cool fully before decorating. (Trust me, icing warm cookies is a mess!) – 20 minutes
- Prepare royal icing: In a bowl, mix 3 cups (360g) powdered sugar with 2 tablespoons meringue powder. Slowly add 4-5 tablespoons water, stirring until smooth. The icing should be thick enough to hold its shape but soft enough to pipe—adjust water to get the right consistency. Divide into smaller bowls and tint with your chosen pastel food colors. – 10 minutes
- Decorate: Using plastic piping bags or sandwich bags with a tiny corner snipped, outline and flood the cookies with icing. Quickly sprinkle with decorations before the icing dries. For details, use a toothpick or small brush to shape the icing. – 30 minutes
- Let icing set: Allow decorated cookies to dry at room temperature for several hours or overnight before stacking or storing. This keeps the decorations intact. – Several hours
Don’t worry if your first batch looks a bit homemade — honestly, that’s part of the charm. And if you get distracted or mess up (like I did when I knocked over a bowl of sprinkles), just laugh it off and keep decorating!
Cooking Tips & Techniques
Here’s what I’ve learned from many cookie-baking sessions with this recipe:
- Keep your butter soft but not melted. It makes creaming easier and ensures the dough blends well.
- Chill the dough thoroughly. This prevents spreading in the oven and keeps your shapes crisp.
- Use parchment paper or silicone mats. They help cookies bake evenly and make cleanup a breeze.
- Don’t overbake. Cookies might look slightly underdone when you pull them out, but they firm up as they cool.
- For royal icing, consistency is key. Too runny and it won’t hold shape; too thick and it’s hard to pipe. Test by dragging a spoon through the icing — it should flow slowly and smooth out in about 10 seconds.
- Practice piping on parchment before decorating cookies. It helps control the flow and pressure, especially if you’re new to icing.
- Work quickly when decorating. Sprinkles stick best when icing is still wet.
Honestly, I’ve had batches where the dough was too sticky, or the icing cracked, but each batch taught me something new. Patience and a little mess are just part of the fun.
Variations & Adaptations
- Flavor twists: Add almond extract instead of vanilla for a nutty note, or mix in orange zest for a citrusy pop.
- Dietary swaps: Use almond flour or a gluten-free blend to make these cookies gluten-free. Swap butter with coconut oil for a dairy-free version.
- Decorating alternatives: Instead of royal icing, try melted white chocolate tinted with food-safe colors, or use store-bought frosting for a quicker finish.
- Seasonal shapes: While Easter shapes are perfect here, these cookies work great for any holiday—just switch up the cutters and colors.
- Personal twist: I once added a few drops of food-grade lavender oil to the icing for a subtle floral note that surprised everyone.
Serving & Storage Suggestions
Serve these colorful Easter sugar cookies at room temperature for the best texture and flavor. They pair beautifully with a cup of tea, fresh lemonade, or even a simple glass of milk.
If you’re hosting a brunch or potluck, arrange the cookies on a festive platter with pastel napkins to make them pop. I like sprinkling a few extra sprinkles around the plate for a playful touch.
Store leftovers in an airtight container at room temperature for up to 5 days. If you want to keep them longer, freeze the baked and decorated cookies in a single layer, then transfer to a sealed bag. Thaw at room temperature before serving.
Reheating isn’t necessary; these cookies taste best fresh or gently warmed (just a few seconds in the microwave) if you prefer a softer bite. Over time, the flavors mellow and the icing hardens, so if you’re prepping ahead, that’s a nice bonus.
Nutritional Information & Benefits
Each cookie (based on about 24 cookies per batch) contains approximately:
- Calories: 150-170
- Fat: 7g (mostly from butter)
- Carbohydrates: 22g
- Sugar: 14g
- Protein: 1.5g
While these are treats, using real butter and fresh ingredients means you’re avoiding artificial preservatives and additives common in store-bought cookies. The lemon zest adds a touch of vitamin C and a bright flavor punch without extra sugar.
For those mindful of allergens, the recipe contains gluten, dairy, and eggs, but substitutions can make it approachable for many diets. Just remember: homemade treats like these bring joy and connection, and sometimes that’s the best kind of nourishment.
Conclusion
This Easy Colorful Easter Sugar Cookies with Simple Dollar Store Decorating recipe truly captures the fun and spirit of the holiday without stress or fancy gear. Whether you’re a seasoned baker or just looking to have a little creative fun, these cookies bring color, sweetness, and smiles to any table.
Feel free to tweak the flavors, colors, and decorations to fit your style. Honestly, that’s what makes this recipe so special—it’s a jumping-off point for your own Easter magic. I keep coming back to it because it’s simple, joyful, and reminds me that sometimes, the best treats come from happy accidents and a sprinkle of patience.
If you try this recipe, I’d love to hear how your cookies turned out or see your decorating takes—drop a comment below or share your photos!
Happy baking and happy Easter!
FAQs
Can I use store-bought frosting instead of royal icing?
Yes! Store-bought frosting is a quicker option, but it won’t harden like royal icing. For sturdier decorations, royal icing is best, but frosting works well for casual decorating.
How do I keep my cookies from spreading too much?
Chilling the dough is key. Make sure your dough is cold before rolling and cutting. Also, don’t over-bake, as that can cause excessive spreading.
Can I make the dough ahead of time?
Absolutely. You can prepare the dough and chill it for up to 48 hours before rolling and baking. This actually helps develop flavor and texture.
What if I don’t have Easter-shaped cookie cutters?
No worries! Use any cookie cutters you have, or cut shapes freehand with a knife. Irregular shapes add character and charm.
How should I store decorated cookies to keep them fresh?
Store in an airtight container at room temperature for up to 5 days. For longer storage, freeze fully decorated cookies in a single layer and thaw before serving.
Pin This Recipe!
Easy Colorful Easter Sugar Cookies with Simple Dollar Store Decorating Ideas
These colorful Easter sugar cookies are quick and easy to make, perfect for festive celebrations with simple decorating tools from the dollar store. They feature a tender yet sturdy texture with a fresh lemon zest and vanilla twist.
- Prep Time: 15 minutes
- Cook Time: 10 minutes
- Total Time: 1 hour 35 minutes plus several hours for icing to set
- Yield: 24 cookies 1x
- Category: Dessert
- Cuisine: American
Ingredients
- 2 ¾ cups (345g) all-purpose flour
- 1 teaspoon baking powder
- ½ teaspoon salt
- 1 cup (226g) unsalted butter, softened
- 1 ½ cups (300g) granulated sugar
- 1 large egg, room temperature
- 2 teaspoons vanilla extract
- 1 teaspoon lemon zest (optional)
- 2 tablespoons milk (whole, 2%, or plant-based)
- 3 cups (360g) powdered sugar, sifted (for royal icing)
- 2 tablespoons meringue powder (or 2 large egg whites as substitute)
- 4–5 tablespoons water (for royal icing)
- Food coloring gels in pastel shades (pink, blue, yellow, green)
- Assorted sprinkles (pastels, Easter-themed shapes, nonpareils)
- Dollar store decorating tools like plastic piping bags, small brushes, or silicone spatulas
- Optional: edible glitter or pearl dust
Instructions
- Mix the dry ingredients: whisk together flour, baking powder, and salt in a medium bowl; set aside.
- Cream the butter and sugar: beat softened butter with granulated sugar until light and fluffy, about 3-4 minutes.
- Add egg and flavorings: beat in egg, vanilla extract, and lemon zest until just combined.
- Combine wet and dry ingredients: gradually add flour mixture alternating with milk, mixing until soft dough forms; avoid overmixing.
- Chill the dough: divide dough into two discs, wrap in plastic wrap, refrigerate at least 1 hour or overnight.
- Preheat oven to 350°F (175°C) and line baking sheets with parchment paper or silicone mats.
- Roll and cut: roll dough to ¼ inch thickness on floured surface, cut shapes with cookie cutters, transfer to baking sheets.
- Bake cookies for 8-10 minutes until edges begin to turn golden; let cool on baking sheet 5 minutes, then transfer to wire rack to cool completely.
- Prepare royal icing: mix powdered sugar with meringue powder, add water gradually until smooth and pipeable; divide and tint with food coloring.
- Decorate: pipe icing onto cookies using plastic piping bags or sandwich bags, sprinkle decorations while icing is wet, use toothpick or brush for details.
- Let icing set: allow decorated cookies to dry at room temperature for several hours or overnight before storing or stacking.
Notes
Keep butter soft but not melted for easier creaming. Chill dough thoroughly to prevent spreading. Use parchment paper or silicone mats for even baking and easy cleanup. Avoid overbaking to keep cookies soft. Adjust royal icing consistency by adding water slowly. Practice piping on parchment before decorating. Work quickly when decorating to ensure sprinkles stick well. Dough can be prepared and chilled up to 48 hours ahead. Store cookies in airtight container at room temperature up to 5 days or freeze for longer storage.
Nutrition
- Serving Size: 1 cookie
- Calories: 160
- Sugar: 14
- Sodium: 90
- Fat: 7
- Saturated Fat: 4.5
- Carbohydrates: 22
- Protein: 1.5
Keywords: Easter sugar cookies, colorful cookies, easy sugar cookies, dollar store decorating, royal icing cookies, festive cookies, spring baking