Love this? Save it for later!
Share the inspiration with your friends
The plate was wiped clean before I could even grab a napkin. My husband didn’t even look up from his phone to ask for seconds. He just reached for another one, crumbs already dusting his shirt. It was the third time that week. Honestly, I wasn’t surprised, but I was quietly impressed with myself for pulling it off. These aren’t your average, soft, chewy cookies that lose their shape in the mailbox. These are crispy brown butter gingerbread snickerdoodles, and they have a life of their own.
It started when I was trying to use up a stick of butter that had been sitting in the fridge too long. I wanted to save it, so I decided to brown it. I watched it foam and turn nutty, smelling like a bakery in a movie. Then I thought, why not mix that rich, toasty flavor with the classic tang of cream of tartar? And maybe a hint of ginger for warmth. I figured it was a long shot. Who wants a snickerdoodle that actually crunches?
But then I baked them. The edges spread just enough to get that lacy, crisp texture, while the centers stayed slightly soft. The smell alone stopped my day. When my kids came home from school, the question wasn’t “What’s for dinner?” but “Are the cookies done yet?” They devoured them. Even my picky eater, who usually turns his nose up at anything with “spice” in it, asked for the recipe. I guess I finally nailed the balance between comfort and crunch.
I’ve made them for potlucks, office parties, and late-night snack attacks. Every time, the result is the same: an empty plate and a few satisfied sighs. It’s not about being a perfect baker; it’s about knowing what makes people smile. This recipe does that. It’s simple, it smells amazing, and it delivers. I think I’m going to keep making these until the butter runs out or the neighbors start knocking on the door.
Why You’ll Love This Recipe
There is a specific kind of magic that happens when you mix traditional techniques with unexpected flavors. I’ve spent years testing cookie doughs, and let’s face it, most snickerdoodles are just sugar cookies with a sour twist. They’re fine, but they don’t stick in your memory. This version is different. It’s got depth. It’s got crunch. And it’s got that nutty aroma that makes your kitchen feel like a high-end Parisian patisserie, minus the fancy apron.
- Quick & Easy: You can have these in the oven in under 30 minutes. The browning of the butter takes a few minutes, but it’s mostly passive cooking. You’re not standing there stirring for an hour. It’s perfect for those nights when you want something homemade but don’t have the energy to bake a cake.
- Simple Ingredients: You likely have everything right now. Butter, sugar, flour, eggs, cream of tartar, ginger, and cinnamon. No weird health food store runs. Just pantry staples that you trust. It’s cooking without the stress of missing items.
- Perfect for Entertaining: These cookies travel well. They don’t crumble as easily as soft cookies because of that crispy edge. They’re sturdy enough to put in a tin for a neighbor or a coworker. I’ve handed them out at work and gotten compliments that lasted for days.
- Crowd-Pleaser: Kids love the sugar coating. Adults love the ginger kick. It bridges the gap between dessert and snack. It’s the kind of treat that disappears fast, so you’ll always need a backup batch ready.
- Unbelievably Delicious: The brown butter changes everything. It adds a toasty, caramel-like note that plain butter just can’t match. When you mix that with the tangy cream of tartar and the warm spices, you get a flavor profile that is complex but familiar. It’s next-level comfort food.
What makes this recipe stand out is the texture contrast. Most people expect a snickerdoodle to be soft and cakey. This one has a shatteringly crisp edge that gives way to a chewy center. It’s not just another version of a classic; it’s the best version I’ve found. It’s the kind of cookie that makes you close your eyes after the first bite and forget about your to-do list for a moment. It’s comfort food reimagined—crunchier, spicier, but with the same soul-soothing satisfaction.
What Ingredients You Will Need
This recipe relies on high-quality basics to deliver bold flavor without needing fancy add-ins. The magic here is in the transformation of the butter and the balance of spices. You don’t need exotic ingredients, just the right ones, prepared correctly. Here is what you need to get that perfect crispy texture and gingerbread depth.
- Unsalted Butter (1 cup / 226g): This is the star. You’ll be browning it, so use a good quality butter. I prefer brands like Plugrá or Land O’Lakes because they have a consistent water content that helps the browning process. Salted butter can work, but you’d need to reduce the added salt in the recipe.
- Granulated Sugar (1 cup / 200g): For the dough. This provides structure and sweetness. You’ll also need extra for rolling, obviously.
- Packed Brown Sugar (1 cup / 220g): Light or dark works, but dark adds a molasses-like depth that pairs well with ginger. It helps keep the center chewy while the edges crisp up.
- Large Eggs (2): Room temperature is best here. They help emulsify the brown butter and sugar. If they’re too cold, your dough might seize up a bit.
- Vanilla Extract (1 tsp): Pure vanilla is worth the extra few dollars. It rounds out the spicy notes.
- All-Purpose Flour (2 ½ cups / 315g): Don’t over-measure. Spoon it into the cup and level it off. Too much flour makes them dry and hard. Too little makes them spread too thin. Aim for that middle ground.
- Cream of Tartar (1 tsp): This is non-negotiable for snickerdoodles. It gives them that signature tang and helps with the rise. It also interacts with the baking soda to create a tender crumb.
- Baking Soda (½ tsp): Helps the cookies spread and brown. It works in tandem with the acid in the cream of tartar.
- Salt (½ tsp): Just a pinch to balance the sweetness. If you’re using salted butter, skip this or reduce it.
- Ginger (1 tsp ground): This gives the “gingerbread” identity. It’s warm and slightly spicy. Don’t skip it; it’s what makes this unique.
- Cinnamon (1 tsp ground): Classic pairing with ginger. It adds warmth and aroma.
- Extra Granulated Sugar (for rolling): About ½ cup. Mix this with a pinch of cinnamon if you want extra spice on the outside.
For the best results, make sure your spices are fresh. Ground ginger and cinnamon lose potency over time. If your jar has been sitting since last Christmas, it’s probably time to buy a new one. Fresh spices make a huge difference in the final flavor profile.
Equipment Needed
You don’t need a fancy kitchen to make these cookies. In fact, keeping it simple helps you focus on the technique. Here is what you’ll need to get the job done right.
- Heavy-Bottomed Saucepan: Essential for browning the butter. A thin pan might burn the butter quickly. I use a stainless steel saucepan because I can see the color change clearly. It also makes it easier to scrape the bottom.
- Mixing Bowls: One large bowl for the wet ingredients and one medium for the dry. Glass or ceramic works best so you can see what’s going on.
- Whisk and Spatula: A whisk is great for combining the dry ingredients and whipping the eggs with sugar. A silicone spatula is crucial for folding in the flour and scraping the bowl. I have a few old spatulas that I love; just make sure they are heat-resistant if you’re using them near the warm butter.
- Baking Sheets: Light-colored aluminum sheets are best. Dark sheets can cause the bottoms to burn too quickly. If you only have dark pans, lower your oven temperature by 25 degrees.
- Parchment Paper: Line your baking sheets. This prevents sticking and makes cleanup a breeze. I never bake cookies without it anymore. It’s worth the tiny cost.
- Cooling Rack: Lets air circulate under the cookies so they don’t get soggy from steam. If you skip this, the bottoms might stay soft when you want them crispy.
If you don’t have a heavy-bottomed pan, you can use a regular one, but you just need to watch it more closely. Stir constantly. It’s not hard, just requires attention. The goal is even browning, not burning.
Preparation Method
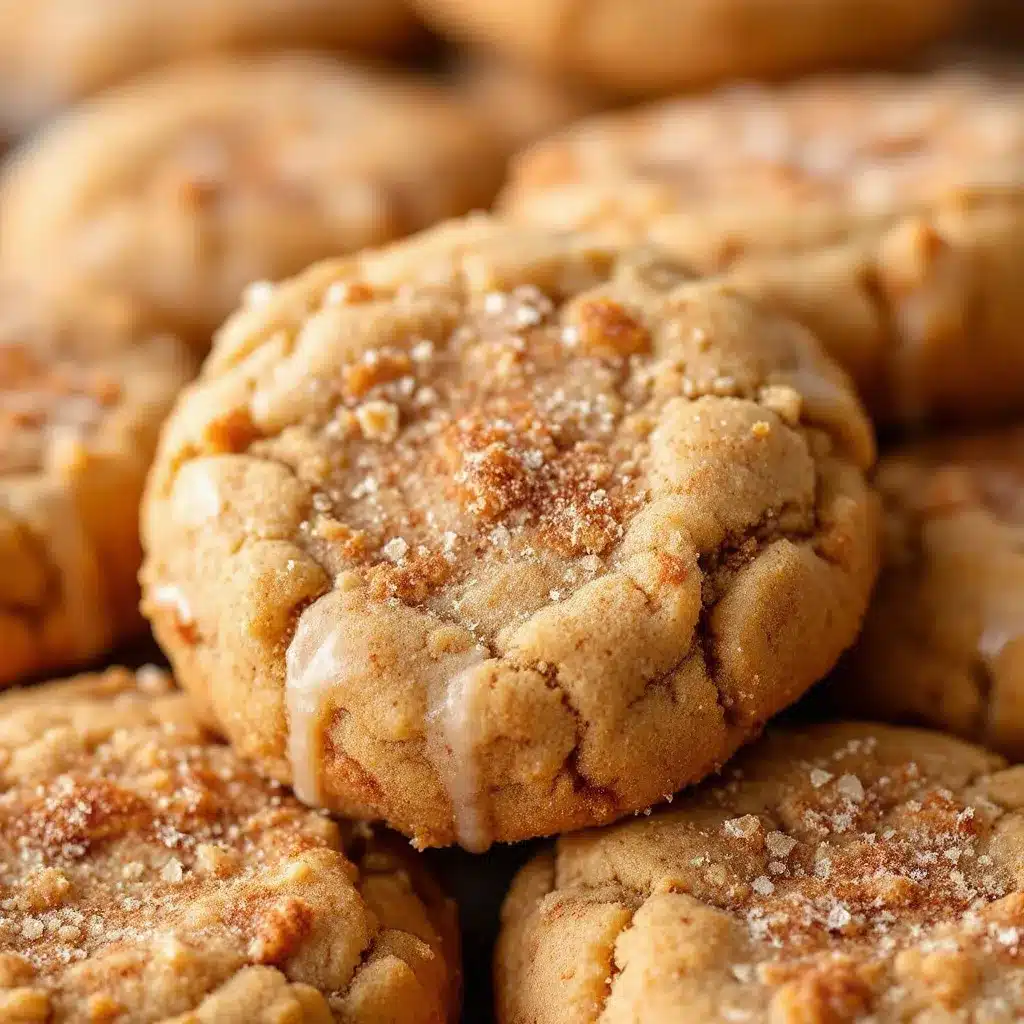
Making these cookies is straightforward, but there are a few key moments where you need to pay attention. Here is how to do it step-by-step for the best results.
- Brown the Butter (5 minutes): Start by melting the butter in your saucepan over medium heat. Stir it constantly. It will foam up, then settle down. Watch for the brown bits at the bottom and that nutty smell. As soon as you see it, take it off the heat. Pour it into a heat-proof bowl to cool slightly. This step takes about 5 minutes. Don’t walk away.
- Mix Wet Ingredients (3 minutes): In a large bowl, whisk the granulated sugar, brown sugar, cooled brown butter, eggs, and vanilla. Whisk vigorously for about a minute. You want the mixture to look glossy and combined. This helps dissolve the sugar, which contributes to the crisp edges.
- Combine Dry Ingredients (2 minutes): In a separate bowl, whisk together the flour, cream of tartar, baking soda, salt, ginger, and cinnamon. Make sure there are no lumps of cream of tartar. It can be clumpy if it’s been in the humid kitchen.
- Combine Wet and Dry (2 minutes): Slowly add the dry ingredients to the wet ingredients. Use your spatula to fold them together. Stop as soon as you see no more streaks of flour. Overmixing develops gluten, which can make cookies tough. We want tender, not tough.
- Chill the Dough (30 minutes): This is crucial. Cover the bowl and put it in the fridge for at least 30 minutes. Chilling solidifies the fat, which prevents the cookies from spreading too thin before they set. If you skip this, you’ll get flat, greasy cookies. If you’re in a rush, freeze it for 15 minutes.
- Preheat and Prepare (5 minutes): Preheat your oven to 350°F (175°C). Line your baking sheets with parchment paper. In a small bowl, mix the extra sugar with a pinch of cinnamon if you like.
- Scoop and Roll (10 minutes): Scoop dough into balls, about 1.5 tablespoons each. Roll them in the sugar mixture until fully coated. Place them on the baking sheets, leaving about 2 inches of space. They will spread.
- Bake (10-12 minutes): Bake for 10-12 minutes. You want the edges to be golden brown and crisp. The centers might look slightly soft. This is okay; they will firm up as they cool. Do not overbake them, or they will lose all chewiness.
- Cool (15 minutes): Let them cool on the baking sheet for 5 minutes, then transfer to a wire rack. This is when the crispiness really sets in. Eat them warm for a soft center, or let them cool completely for maximum crunch.
Keep an eye on the first batch. Ovens vary. If your cookies spread too fast, your oven might be too hot. If they stay puffy and don’t spread, your oven might be too cool. Adjust accordingly for the next batch.
Cooking Tips & Techniques
I’ve made a lot of mistakes with brown butter cookies, and I’m here to help you avoid them. The biggest mistake people make is not cooling the brown butter enough. If you add hot butter to the sugar and eggs, you can cook the eggs or melt the sugar prematurely. Let it cool until it’s just warm to the touch, or even room temperature. It should be liquid, but not hot.
Another common error is overmixing the dough. Once you add the flour, stop. Mix just until combined. I know it’s tempting to get every last bit of flour incorporated, but that’s when you get tough cookies. You want a soft, slightly sticky dough. If it feels too dry, add a teaspoon of milk. If it’s too wet, add a tablespoon of flour.
Chilling the dough is not optional. I tried skipping it once to save time, and the results were disappointing. The cookies spread into thin, crispy discs with no center. Chilling allows the flavors to meld and the fat to solidify. It’s the secret to that thick, chewy center with crisp edges. If you’re short on time, the freezer is your friend.
When baking, rotate your pans halfway through. Most ovens have hot spots. Rotating ensures even browning. Also, use light-colored pans. Dark pans absorb more heat and can burn the bottoms. If you only have dark pans, lower the temperature by 25 degrees and check a few minutes early.
Finally, don’t be afraid to taste the dough. Raw flour isn’t dangerous in small amounts, and it helps you adjust the sweetness or spice level before you bake. If you want more ginger, add a little extra. If you want it sweeter, add a bit more sugar. Customize it to your taste.
Variations & Adaptations
While the classic gingerbread snickerdoodle is my favorite, there are plenty of ways to tweak this recipe. Here are a few ideas to keep things interesting.
- Gluten-Free Option: You can substitute the all-purpose flour with a 1:1 gluten-free flour blend. Make sure it contains xanthan gum, or add ½ tsp if it doesn’t. The texture might be slightly more crumbly, but the flavor will be the same.
- Dairy-Free Version: Use a high-quality vegan butter stick instead of regular butter. Make sure to brown it just like regular butter. You can also use a dairy-free milk alternative if the dough feels dry.
- Chocolate Chip Twist: Add ½ cup of dark chocolate chips to the dough. The bitterness of the chocolate pairs beautifully with the ginger and brown butter. It’s a game-changer.
- White Chocolate Macadamia: Swap the chocolate chips for white chocolate chips and macadamia nuts. The nuts add a nice crunch, and the white chocolate complements the ginger well.
- Spice It Up: Add a pinch of cardamom or nutmeg to the dry ingredients. These spices enhance the ginger and add complexity. Just be careful not to overpower the ginger flavor.
I’ve tried adding orange zest to the dough, and it was surprisingly good. The citrus cuts through the richness of the brown butter. It’s a nice bright note. Feel free to experiment with these variations to find your perfect cookie.
Serving & Storage Suggestions
These cookies are best served at room temperature, where the crispness is at its peak. They pair wonderfully with a hot cup of coffee or a glass of cold milk. The ginger and brown butter flavors are enhanced by the warmth of the coffee.
For storage, keep them in an airtight container at room temperature for up to 5 days. If you live in a humid climate, add a piece of bread to the container to keep them crisp. The bread absorbs excess moisture.
You can also freeze the dough balls. Scoop them onto a baking sheet and freeze them solid. Once frozen, transfer them to a freezer bag. You can bake them straight from the freezer, just add 1-2 minutes to the baking time. This is great for having fresh cookies on demand.
Leftover cookies will stay fresh for a week if stored properly. They actually taste better on day two, as the flavors have had time to meld. Just make sure they are completely cool before storing, or they will get soggy.
Nutritional Information & Benefits
While these are definitely a treat, they do have some redeeming qualities. Brown butter adds a nutty flavor without extra sugar. Ginger has anti-inflammatory properties and can help with digestion. Cinnamon helps regulate blood sugar levels.
Each cookie contains approximately 150 calories, with 8g of fat, 18g of carbs, and 2g of protein. They are not a health food, but they are made with simple, recognizable ingredients. If you are gluten-sensitive, use a gluten-free flour blend. If you are dairy-free, use vegan butter.
I try to enjoy these in moderation, as part of a balanced diet. They are perfect for sharing with friends and family, which adds a social benefit that no nutrition label can measure. Plus, the act of baking itself can be a stress reliever.
Conclusion
These crispy brown butter gingerbread snickerdoodles are a winner. They combine the best of both worlds: the crunch of a shortbread and the chew of a snickerdoodle. The brown butter adds a sophistication that elevates the simple cookie. The ginger gives it a unique twist that keeps you coming back for more.
I encourage you to try this recipe. Don’t be afraid to adjust the spices to your liking. Make it your own. Bake them for your neighbors, your coworkers, or just for yourself. You won’t regret it.
If you make these, I’d love to hear how they turn out. Leave a comment below and let me know what you thought. Did you add chocolate chips? Did you use dark brown sugar? Share your variations. And if you loved this, check out my tender strawberry shortcake stuffed cookies for another fun twist on classics.
Happy baking! I hope these cookies bring as much joy to your kitchen as they have to mine.
Frequently Asked Questions
Can I use salted butter for this recipe?
Yes, you can, but reduce the added salt in the recipe to ¼ tsp. Salted butter varies in salt content, so taste the dough before baking to adjust if needed.
Why are my cookies spreading too much?
This usually means the butter was too warm when mixed with the sugar, or the dough wasn’t chilled enough. Make sure to chill the dough for at least 30 minutes and use cooled brown butter.
Can I freeze the baked cookies?
Yes, bake them first, let them cool completely, then store them in an airtight container in the freezer for up to 3 months. Thaw at room temperature before eating.
What if I don’t have cream of tartar?
You can substitute it with ½ tsp lemon juice or white vinegar, but the texture won’t be quite the same. Cream of tartar is key for that authentic snickerdoodle tang and rise.
How do I know when the brown butter is done?
Look for golden brown foam, brown specks at the bottom of the pan, and a nutty aroma. It takes about 5-7 minutes. Watch it closely so it doesn’t burn.
Pin This Recipe!
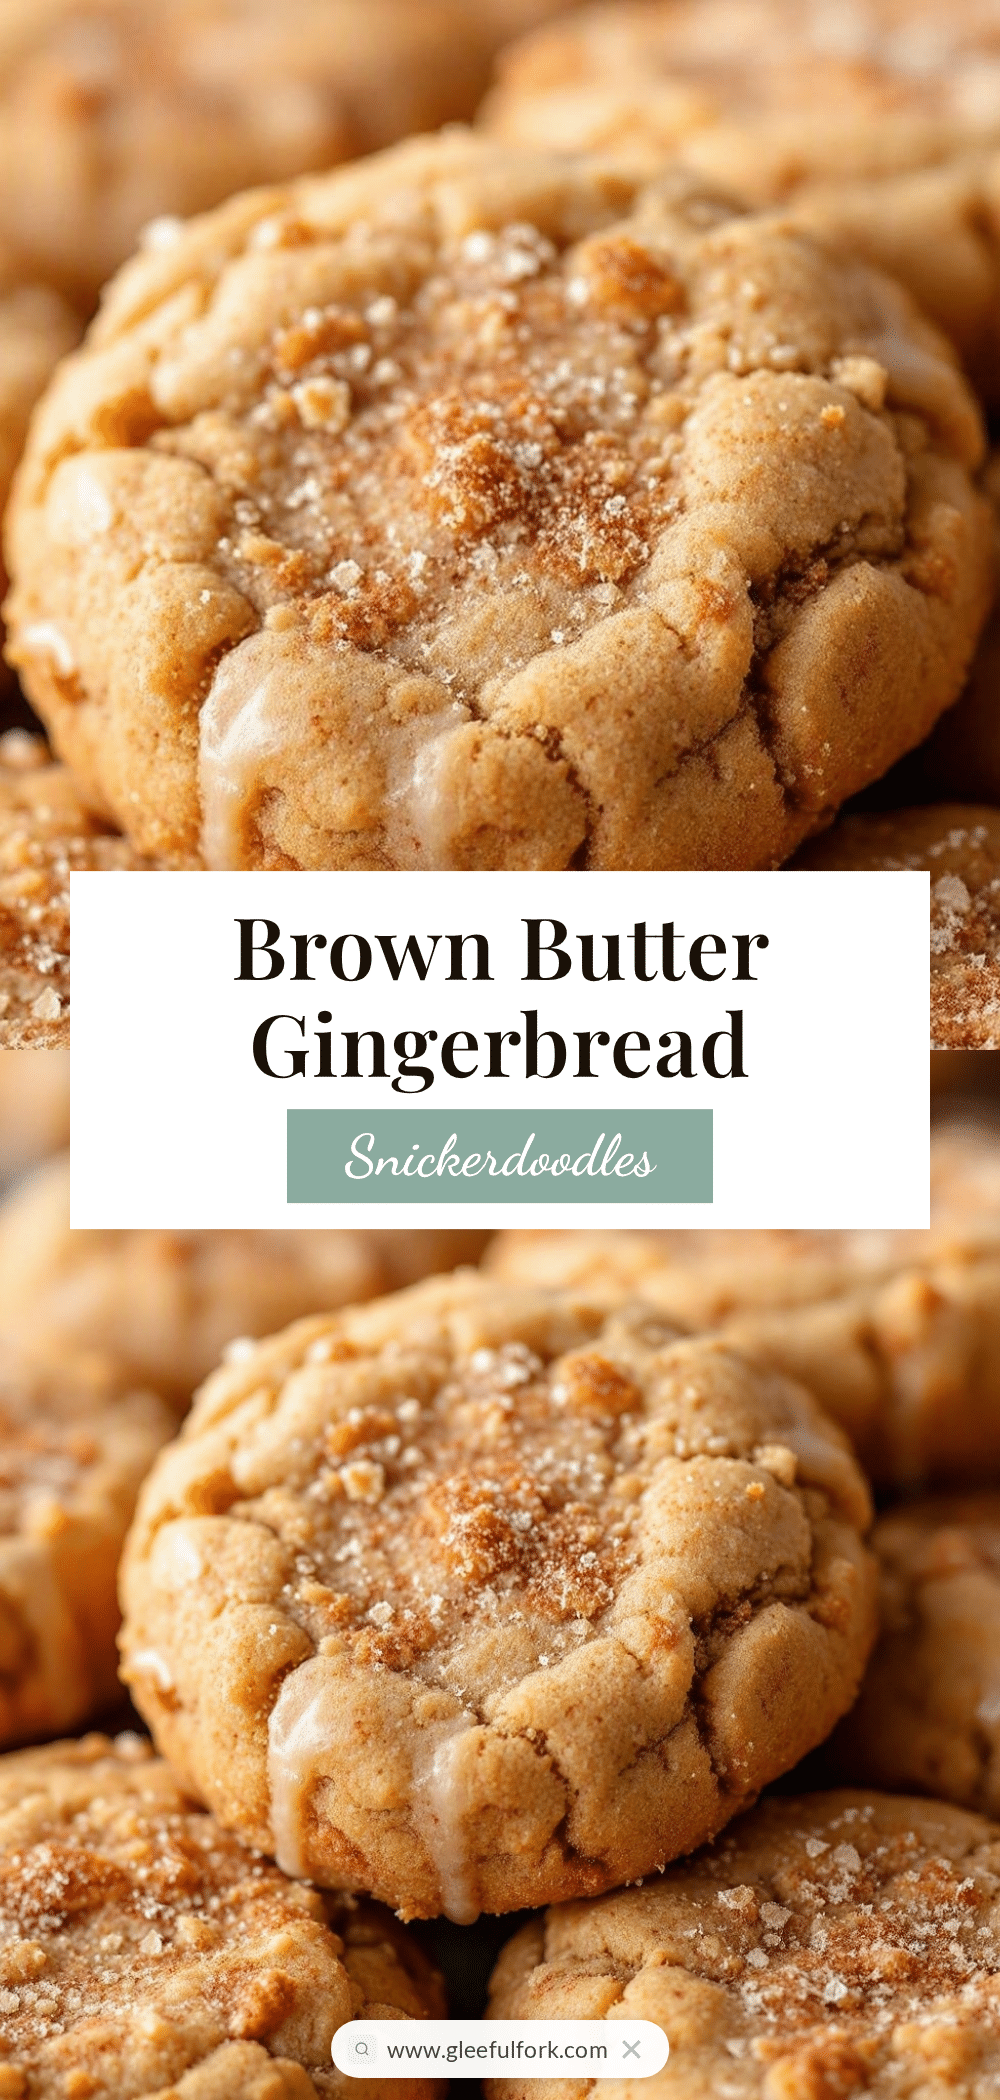
Crispy Brown Butter Gingerbread Snickerdoodles
These crispy brown butter gingerbread snickerdoodles combine the tang of cream of tartar with the nutty depth of browned butter and warm spices. They feature shatteringly crisp edges and a chewy center, making them a perfect crowd-pleasing treat.
- Prep Time: 30 minutes
- Cook Time: 12 minutes
- Total Time: 45 minutes
- Yield: Approximately 24 cookies 1x
- Category: Dessert
- Cuisine: American
Ingredients
- 1 cup (226g) unsalted butter
- 1 cup (200g) granulated sugar, plus extra for rolling
- 1 cup (220g) packed brown sugar
- 2 large eggs, room temperature
- 1 tsp vanilla extract
- 2 ½ cups (315g) all-purpose flour
- 1 tsp cream of tartar
- ½ tsp baking soda
- ½ tsp salt
- 1 tsp ground ginger
- 1 tsp ground cinnamon
- ½ cup granulated sugar for rolling (optional: mix with pinch of cinnamon)
Instructions
- Brown the butter: Melt butter in a heavy-bottomed saucepan over medium heat. Stir constantly until it foams, settles, and develops brown bits and a nutty aroma (about 5 minutes). Pour into a heat-proof bowl to cool slightly.
- Mix wet ingredients: In a large bowl, whisk granulated sugar, brown sugar, cooled brown butter, eggs, and vanilla vigorously for about a minute until glossy.
- Combine dry ingredients: In a separate bowl, whisk together flour, cream of tartar, baking soda, salt, ginger, and cinnamon until no lumps remain.
- Combine wet and dry: Slowly add dry ingredients to wet ingredients. Fold with a spatula until just combined and no flour streaks remain. Do not overmix.
- Chill dough: Cover the bowl and refrigerate for at least 30 minutes (or freeze for 15 minutes if short on time) to solidify the fat.
- Preheat and prepare: Preheat oven to 350°F (175°C). Line baking sheets with parchment paper. Mix extra sugar with a pinch of cinnamon if desired.
- Scoop and roll: Scoop dough into 1.5 tablespoon balls. Roll them in the sugar mixture until fully coated. Place on baking sheets, leaving 2 inches of space between them.
- Bake: Bake for 10-12 minutes until edges are golden brown and crisp. Centers may look slightly soft.
- Cool: Let cookies cool on the baking sheet for 5 minutes, then transfer to a wire rack to cool completely.
Notes
Ensure butter is cooled to room temperature before mixing with eggs to avoid cooking them. Chilling the dough is crucial for preventing excessive spreading and ensuring a chewy center. If using salted butter, reduce added salt to 1/4 tsp. For gluten-free, use a 1:1 GF flour blend with xanthan gum. For dairy-free, use vegan butter.
Nutrition
- Serving Size: 1 cookie
- Calories: 150
- Sugar: 12
- Sodium: 120
- Fat: 8
- Saturated Fat: 5
- Carbohydrates: 18
- Fiber: 0.5
- Protein: 2
Keywords: brown butter cookies, gingerbread snickerdoodles, crispy cookies, easy cookie recipe, fall baking, holiday cookies, snickerdoodle variation


