Love this? Save it for later!
Share the inspiration with your friends
I did not trust that cake pops could ever be crispy. Honestly, I thought the idea sounded like a mistake until the first bite. We have all seen those dense, fudgy spheres coated in thick chocolate that crack when you bite into them. I assumed gingerbread would only make things heavier. It felt like a contradiction in terms to me. How can something so light and airy hold up to the structural integrity needed for a pop? Plus, gingerbread is usually associated with soft, spiced loaves or crisp, flat cookies. The idea of a sphere seemed impractical at best.
My sister-in-law brought a batch to our holiday gathering last year. She insisted they were “crispy” but warned me they had to be eaten within an hour. I rolled my eyes internally. I took one small bite from the corner of a box. The shell shattered with a audible snap. Inside, the gingerbread crumb was moist but not mushy. The spiced flavor hit my palate with a warmth that felt nostalgic but refined. I stood there in the kitchen, holding the stick, trying to process the texture. It was unlike anything I had ever made or eaten.
That moment shifted something in my approach to holiday baking. I stopped looking for safe, traditional options. I started experimenting with moisture control and coating techniques. The result is this recipe for crispy iced gingerbread cake pops. They are not just a treat; they are a structural triumph. The crunch of the icing meets the tender crumb in a way that feels almost impossible. You will find yourself making them for every occasion, not just Christmas.
I kept coming back to the box where they came from. The flavor lingered on my tongue for hours. It was the perfect balance of sweet, spicy, and crunchy. I knew I had to figure out how to recreate that experience at home. It took some trial and error, but the final product is worth every minute of the effort. These pops have become a staple in my holiday rotation.
Why You’ll Love This Recipe
There is a specific satisfaction in making these gingerbread cake pops that goes beyond just eating them. It is about the technique and the result. After testing dozens of variations, I have found that the key to success lies in the moisture balance. Most home bakers fail because the cake is too moist, leading to a soggy coating. My method ensures a firm, dry crumb that holds up perfectly. This is not just another holiday cookie recipe; it is a dessert that demands respect.
- Quick & Easy: While they look intricate, they come together in under two hours if you use a store-bought cake base. For homemade, it is still manageable for a busy weeknight after the kids are asleep.
- Simple Ingredients: You likely already have most of these items in your pantry. Molasses, ginger, cinnamon, and flour are staples. No fancy grocery trips are needed for this recipe.
- Perfect for Holiday Parties: These are great for office potlucks, school events, or cozy dinners. They are handheld, festive, and easy to eat while mingling.
- Crowd-Pleaser: Always gets rave reviews from kids and adults alike. The crunch factor is a novelty that everyone notices immediately.
- Unbelievably Delicious: The texture and flavor combo is next-level comfort food. It tastes like Christmas in a bite-sized form.
What makes this recipe different is the double-dip coating method. By dipping the cake ball in melted candy melts or chocolate, then adding a second layer of icing, you create a seal that prevents the cake from absorbing moisture. This is a professional trick that keeps them crispy for days. Whether you use white icing with red sprinkles or gold dust for a more elegant look, this isn’t just another version—it’s your best version.
This recipe isn’t just good—it is the kind that makes you close your eyes after the first bite. It is comfort food reimagined—healthier in portion size, but with the same soul-soothing satisfaction. It is perfect for impressing guests without stress, or turning a simple meal into something memorable. The aroma of baking gingerbread fills the house, setting the mood for the entire holiday season.
What Ingredients You Will Need
This recipe uses simple, wholesome ingredients to deliver bold flavor and satisfying texture without the fuss. The foundation is a moist but firm cake base, which is then bound with a small amount of frosting. The coating is where the magic happens, creating that essential crispy shell. You can use high-quality chocolate or candy melts for the best results. Candy melts are easier to work with because they do not require tempering and stay firm at room temperature.
For the Cake Base
- One box of yellow or vanilla cake mix: I recommend Boxed Cake Mix brands for consistency, but a homemade gingerbread cake works too. The cake mix provides a uniform crumb structure that is easier to roll.
- Two large eggs: Room temperature eggs bind the ingredients better. Do not skip this step.
- One-third cup vegetable oil: Oil keeps the cake moist longer than butter. This is crucial for the texture.
- One cup water: Hot water helps to bloom the spices if you add them separately.
- One tablespoon ground ginger: This is the primary spice. Use fresh if possible for a sharper bite.
- One teaspoon ground cinnamon: Adds warmth and depth to the flavor profile.
- Half teaspoon ground cloves: Use sparingly. Cloves are potent and can overpower the mix if used too heavily.
- Half teaspoon nutmeg: Freshly grated nutmeg is best, but pre-ground works fine in a pinch.
- Two tablespoons molasses: Use unsulphured molasses for a cleaner, sweeter flavor. Dark molasses adds a richer, more bitter note.
For the Binding and Coating

- One cup gingerbread frosting: You can use store-bought cream cheese frosting or make your own. The frosting acts as the glue for the cake crumbs.
- Two cups white chocolate chips: High-quality chips melt smoother. Brands like Guittard or Callebaut are excellent choices.
- One tablespoon shortening: This thins the chocolate for a smoother dip and helps it set harder.
- Decorations: Red and green sprinkles, crushed candy canes, or gold luster dust. Use these to make the pops festive and visually appealing.
If you are looking for substitutions, you can use gluten-free cake mix for a GF option. For a dairy-free version, use coconut oil-based frosting and dairy-free chocolate chips. The structure will hold up just as well if you keep the moisture levels in check. The key is to ensure the cake base is not too wet before you add the frosting.
Equipment Needed
You do not need a lot of specialized gear to make these cake pops, but having the right tools makes the process much smoother. A stand mixer or hand mixer is essential for mixing the cake batter evenly. You will also need a baking sheet lined with parchment paper. This prevents sticking and makes cleanup easier.
A cake pop mold or a silicone muffin tin can help shape the balls uniformly, but it is not strictly necessary. I prefer using my hands to roll them, as it gives more control over the density. A melting pot or a microwave-safe bowl is required for melting the chocolate. If you use a microwave, use short bursts of power to avoid burning the chocolate. A thermometer is helpful if you want to ensure the chocolate is at the right temperature for dipping.
Cake pop sticks are crucial for handling the finished product. Make sure they are food-safe and sturdy. A cup or a block of foam is needed to hold the sticks upright while the coating sets. This prevents the pops from sliding over or sticking to the surface. I keep a dedicated block of foam for this purpose. It is a budget-friendly item that lasts for years.
For maintenance, always clean your mixing bowls immediately after use. Dried cake batter is difficult to scrub off later. If you use silicone molds, they are dishwasher safe and easy to store. Avoid using metal sticks if you are storing the pops for a long time, as they can rust. Plastic or wooden sticks are more durable for long-term storage.
Preparation Method
Start by preheating your oven to 350°F (175°C). Prepare your baking sheet with parchment paper. In a large mixing bowl, combine the cake mix, eggs, oil, and water. Add the ground ginger, cinnamon, cloves, nutmeg, and molasses. Mix on medium speed for two minutes until the batter is smooth and well-combined. The batter should be thick but pourable. If it is too dry, add a tablespoon of water. If it is too wet, add a tablespoon of flour.
Pour the batter into the prepared baking sheet. Spread it out evenly to a thickness of about half an inch. This ensures even baking. Bake for 12-15 minutes. The cake should be firm to the touch and slightly golden on the edges. Do not overbake, or the cake will be dry and crumbly. Let the cake cool completely in the pan. This step is critical. If the cake is warm, it will melt the frosting and make the balls too soft to handle. Cooling takes about an hour.
Once cool, crumble the cake into a large bowl. Use your fingers to break up any large chunks. You should have fine, sandy crumbs. Add the frosting to the crumbs. Start with half a cup and mix. Add more frosting as needed until the mixture holds together when squeezed. Do not add too much frosting, or the pops will be greasy. The mixture should feel like damp sand.
Roll the mixture into one-inch balls. Place them on a baking sheet lined with parchment paper. Chill the balls in the refrigerator for 30 minutes. This firms them up and makes them easier to dip. While the balls chill, melt the white chocolate chips with the shortening. Use a microwave in 30-second intervals, stirring between each. The chocolate should be smooth and fluid.
Dip a cake pop stick into the melted chocolate, then insert it into the cake ball. This acts as glue. Dip the entire ball into the chocolate, ensuring full coverage. Tap off excess chocolate gently against the side of the bowl. Place the pop into the foam block to set. Repeat with the remaining balls. If you are adding decorations, do so immediately before the chocolate sets. Sprinkle with red and green sprinkles or dust with gold luster dust.
Let the pops set at room temperature for one hour. Do not refrigerate them immediately, as condensation can make the coating soggy. Once set, they are ready to serve or store. The entire process takes about three hours from start to finish. The result is a batch of perfectly crispy, spiced cake pops that are sure to impress.
How do I know when the cake is done baking?
Insert a toothpick into the center of the cake. If it comes out clean or with a few moist crumbs, it is done. If wet batter sticks to the toothpick, bake for another two minutes. The cake should spring back when lightly pressed.
Can I use homemade gingerbread cake?
Yes, but be careful with the moisture content. Homemade gingerbread is often denser. You may need to use less frosting to bind the crumbs. Test a small ball first to ensure it holds its shape.
Why is my chocolate seizing?
Chocolate seizes when it comes into contact with water or milk. Ensure your bowl and utensils are completely dry. If the chocolate becomes grainy, add a teaspoon of warm water and stir vigorously to restore smoothness.
How do I prevent the sticks from falling out?
Dipping the tip of the stick in chocolate before inserting it into the cake ball creates a strong bond. Also, do not push the stick all the way to the bottom. Leave a small gap to allow the chocolate to anchor it.
Can I make these ahead of time?
Yes, you can make the cake balls up to a week in advance. Store them in an airtight container in the refrigerator. Bring them to room temperature before dipping to prevent condensation on the coating.
Cooking Tips & Techniques
One of the biggest mistakes people make is using too much frosting. The frosting should only be used to bind the crumbs, not to make the cake moist. If the mixture feels wet, add more cake crumbs. The goal is a firm, dry ball that can withstand the weight of the coating. Another common error is dipping the cake balls when the chocolate is too hot. If the chocolate is too thin, it will drip off and not coat evenly. If it is too thick, it will be lumpy. Test the consistency on a piece of parchment paper before dipping the actual pops.
I learned this the hard way after a batch of pops slid off the sticks during setting. The chocolate was too warm, and the cake balls were too soft. Now, I always chill the cake balls for at least 30 minutes before dipping. This firmness is non-negotiable for a successful pop. Also, work in a cool room if possible. Heat makes the chocolate soft and difficult to handle. If your kitchen is warm, turn on the air conditioning or work in the evening.
For consistent results, use a cookie scoop to portion the cake mixture. This ensures all the pops are the same size, which leads to uniform dipping and setting times. It also speeds up the process significantly. You do not have to guess the size of each ball. Just scoop, roll, and chill. This method reduces waste and improves the overall presentation.
Another pro tip is to add a pinch of salt to the chocolate coating. Salt enhances the flavor of the white chocolate and balances the sweetness of the gingerbread. It is a subtle change that makes a big difference in the final taste. Do not skip this step. It adds a layer of complexity that makes the pops taste more professional.
Finally, do not rush the setting process. If you try to eat the pops before the chocolate is fully set, the coating may crack or stick to your teeth. Patience is key. Let them sit for the full hour at room temperature. The texture will be crisp and clean, providing the perfect eating experience. This technique ensures that every pop is a success, every time.
Variations & Adaptations
While the classic gingerbread flavor is a holiday staple, there are many ways to adapt this recipe. For a peppermint twist, add crushed peppermint candies to the chocolate coating. This creates a festive red and white look that is perfect for winter. You can also add a drop of peppermint extract to the frosting for an extra kick of flavor. This variation is always a hit with children.
For a spicier version, add a pinch of cayenne pepper to the cake batter. The heat complements the sweetness of the chocolate and the warmth of the spices. It creates a complex flavor profile that is intriguing and delicious. This is great for adults who enjoy a bit of heat in their desserts. Just start with a small amount and adjust to taste.
If you want to try a different coating, use dark chocolate instead of white. Dark chocolate pairs beautifully with the molasses and spices in the gingerbread. It adds a richer, more intense flavor. You can also use colored candy melts for a more vibrant look. Green, red, and gold are classic choices for the holidays. This variation allows for more creative expression.
For a dairy-free option, use coconut oil-based frosting and dairy-free chocolate chips. The texture will be slightly different, but the flavor will still be excellent. You can also use almond milk instead of water in the cake batter. This adds a subtle nutty flavor that complements the spices. These adaptations make the recipe accessible to a wider audience without sacrificing taste.
I also tried adding a layer of cream cheese filling inside the cake balls. This adds a tangy contrast to the sweet gingerbread. It is a bit more labor-intensive, but the result is worth it. You can pipe a small amount of frosting into the center of the cake ball before rolling it. This creates a surprise center that is both delicious and visually appealing. It is a great way to elevate the simple cake pop into a more sophisticated treat.
Serving & Storage Suggestions
Serve these cake pops at room temperature for the best texture. Cold cake pops can make the chocolate coating brittle and prone to cracking. Arrange them on a festive platter with parchment paper liners. Add a few fresh sprigs of rosemary or pine needles for a decorative touch. This presentation is perfect for holiday parties and gift giving.
Pair these pops with a hot cup of coffee or tea. The warmth of the beverage complements the spiced flavor of the cake. You can also serve them alongside a glass of mulled wine or hot chocolate. These beverages enhance the holiday spirit and create a cozy atmosphere. They are also great as a standalone snack during movie nights or while wrapping gifts.
Store leftover cake pops in an airtight container at room temperature. They will stay fresh for up to one week. Do not refrigerate them, as the moisture can make the coating soggy. If you need to store them for longer, freeze the pops in a single layer on a baking sheet. Once frozen, transfer them to a freezer-safe bag. They can be stored for up to three months. Thaw them at room temperature before serving.
When reheating, do not use the microwave. This will melt the chocolate and ruin the texture. If the pops have softened slightly, you can crisp them up by placing them in a low oven for a few minutes. This restores the crunch without damaging the coating. Always check the texture before serving to ensure they are in perfect condition.
Flavors develop over time as the spices meld with the chocolate. The pops taste even better after a day or two. This allows the flavors to deepen and become more complex. If you are making them for a party, consider making them a day in advance. This ensures they are at their peak flavor when served. It is a small step that makes a big difference in the final result.
Nutritional Information & Benefits
Each cake pop contains approximately 150-200 calories, depending on the size and coating. They are a moderate treat that fits well into a balanced diet. The gingerbread spices offer anti-inflammatory benefits, with ginger and cinnamon being well-known for their health properties. Molasses provides a source of iron and calcium, adding a nutritional boost to the sweet treat.
However, these pops are high in sugar and carbohydrates due to the cake mix and chocolate coating. They are not suitable for low-carb or keto diets unless significant modifications are made. For those with gluten sensitivities, using a gluten-free cake mix is an option, but cross-contamination should be considered. Always check the labels of all ingredients to ensure they meet your dietary needs.
From a wellness perspective, these pops are best enjoyed in moderation. They are a special occasion treat rather than a daily snack. The combination of sweet and spicy flavors can satisfy cravings without the need for large portions. Sharing them with friends and family adds a social element that contributes to overall well-being. Food is not just about nutrition; it is also about connection and joy.
If you are looking for a lighter option, consider making smaller cake pops. This reduces the calorie count per serving while still allowing you to enjoy the flavor. You can also reduce the amount of sugar in the frosting by using a sugar substitute. These small adjustments can make the recipe more suitable for health-conscious individuals. Ultimately, the goal is to enjoy these treats responsibly and mindfully.
Conclusion
Making crispy iced gingerbread cake pops is a rewarding experience that yields delicious results. The combination of spiced cake and crunchy coating creates a unique texture that is hard to resist. These pops are perfect for holiday gatherings, gift giving, or simply treating yourself. They are easy to make and customizable to suit your preferences. I encourage you to try this recipe and share your results.
If you enjoy this recipe, you might also like trying my festive red white blue M and M chocolate chip cookies for a different festive treat. Or, for a savory option, check out my savory loaded deviled eggs for your next party. These recipes complement the cake pops well and offer a variety of flavors for your holiday table.
I love this recipe because it brings back memories of holiday baking while introducing a modern twist. It is a testament to the joy of experimenting in the kitchen. I hope you find as much pleasure in making them as I did. Please leave a comment below to share your experience or any variations you tried. I love hearing from my readers and seeing their creations.
Happy baking, and Merry Christmas! May your holidays be filled with sweet treats and happy memories. These cake pops are sure to be a highlight of your season. Enjoy every bite.
FAQs
Can I use a different type of cake mix?
Yes, you can use spice cake or yellow cake mix. However, gingerbread cake mix will give the most authentic flavor. Adjust the spices accordingly if using a different base.
How long do the cake pops last?
They last up to one week at room temperature in an airtight container. For longer storage, freeze them for up to three months.
Why did my chocolate coating crack?
This usually happens if the cake balls are too cold or the chocolate is too thick. Bring the cake balls to room temperature before dipping and ensure the chocolate is smooth and fluid.
Can I make these without a mixer?
Yes, you can mix the batter by hand. It will take longer, but the result will be the same. Just ensure the ingredients are well combined.
What is the best way to store the decorations?
Store the pops in a single layer in an airtight container. Avoid stacking them, as this can crush the decorations and the coating.
Pin This Recipe!
Crispy Iced Gingerbread Cake Pops: Best Christmas Treat

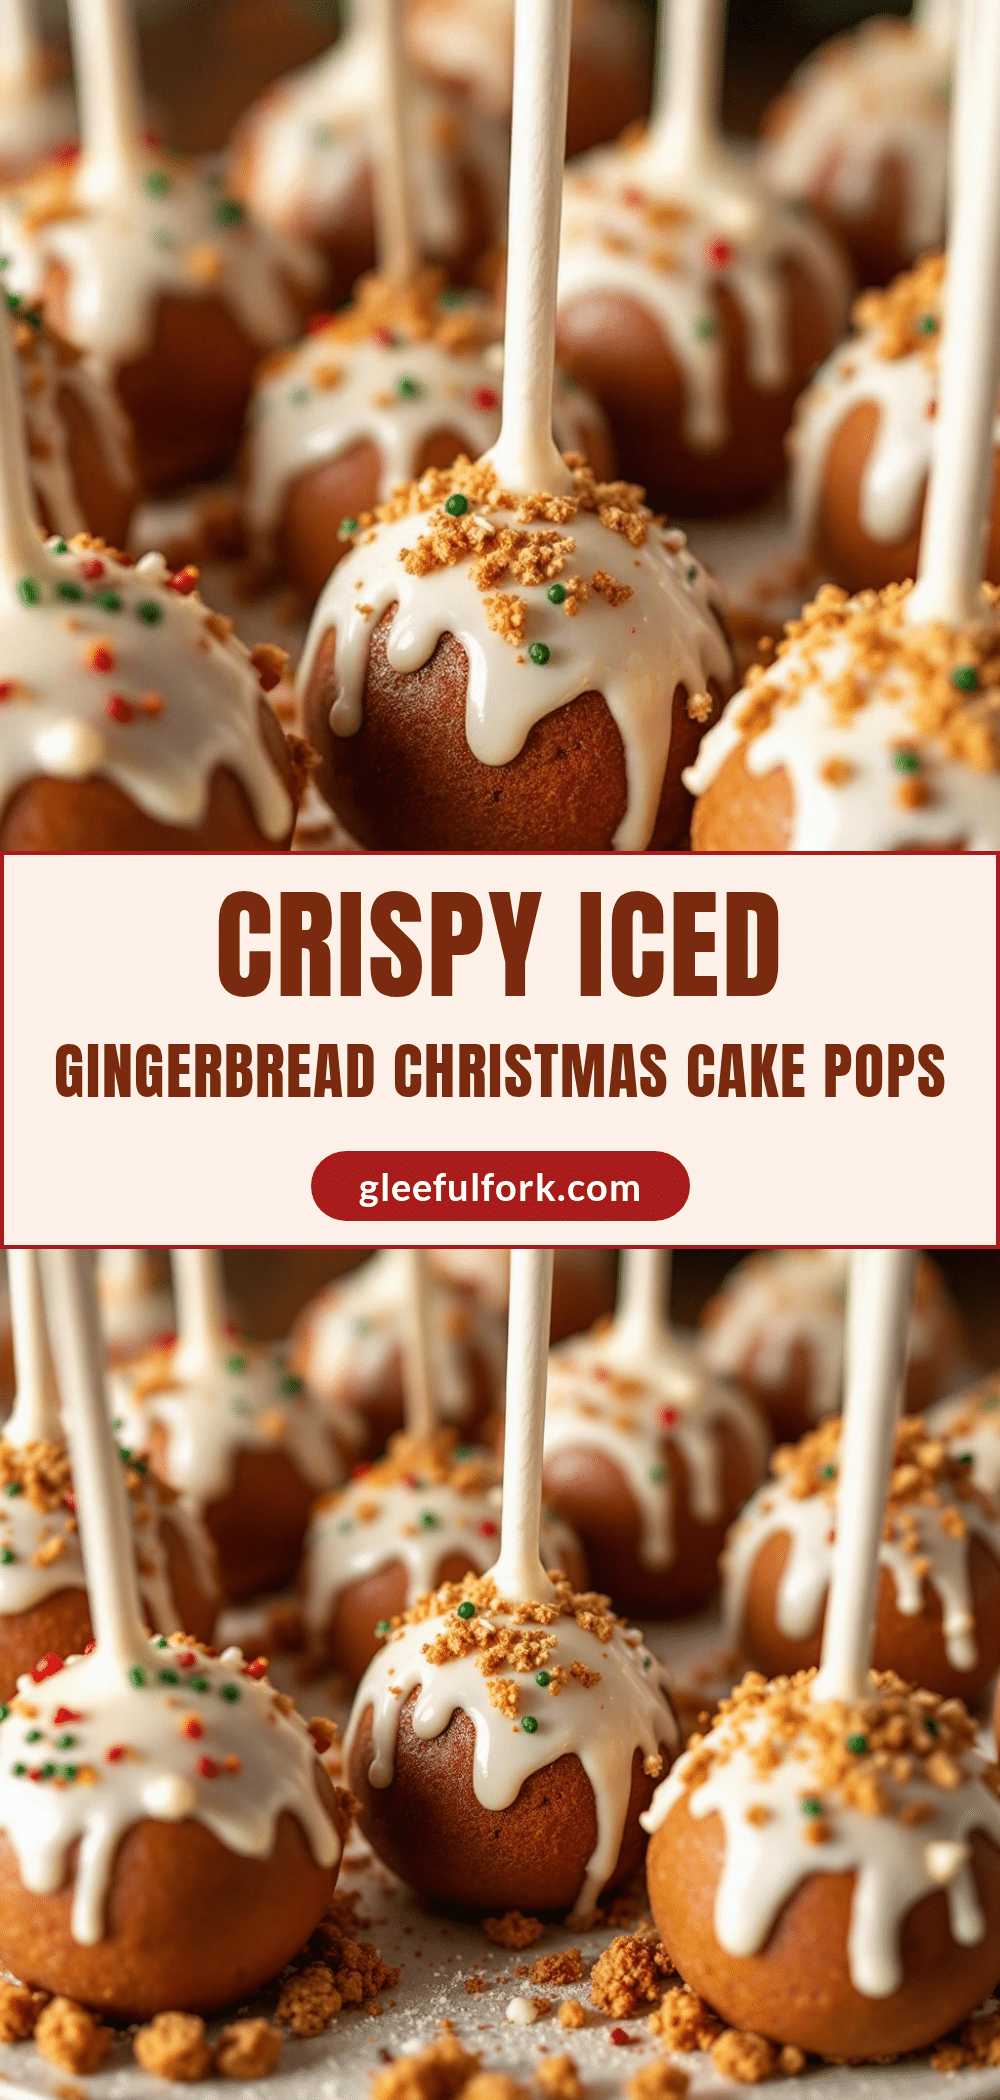
These crispy iced gingerbread cake pops feature a spiced, firm cake base coated in a double-dipped white chocolate shell for a crunchy, festive holiday treat.
- Prep Time: 1 hour
- Cook Time: 15 minutes
- Total Time: 3 hours
- Yield: 24 servings 1x
- Category: Dessert
- Cuisine: American
Ingredients
- 1 box yellow or vanilla cake mix
- 2 large eggs, room temperature
- 1/3 cup vegetable oil
- 1 cup water (hot)
- 1 tablespoon ground ginger
- 1 teaspoon ground cinnamon
- 1/2 teaspoon ground cloves
- 1/2 teaspoon nutmeg
- 2 tablespoons molasses
- 1 cup gingerbread frosting (or cream cheese frosting)
- 2 cups white chocolate chips
- 1 tablespoon shortening
- Red and green sprinkles, crushed candy canes, or gold luster dust for decoration
- Cake pop sticks
Instructions
- Preheat oven to 350°F (175°C) and line a baking sheet with parchment paper.
- In a large bowl, combine cake mix, eggs, oil, water, ginger, cinnamon, cloves, nutmeg, and molasses. Mix on medium speed for 2 minutes until smooth.
- Pour batter onto the prepared baking sheet, spreading it to a thickness of about 1/2 inch.
- Bake for 12-15 minutes until firm and slightly golden. Let cool completely in the pan (about 1 hour).
- Crumble the cooled cake into fine crumbs in a large bowl.
- Add frosting to the crumbs, starting with 1/2 cup, and mix until the mixture holds together like damp sand. Add more frosting if needed.
- Roll the mixture into 1-inch balls and place them on a parchment-lined baking sheet.
- Chill the cake balls in the refrigerator for 30 minutes to firm them up.
- Melt white chocolate chips with shortening in 30-second intervals, stirring until smooth.
- Dip the tip of a cake pop stick into the melted chocolate and insert it into a cake ball.
- Dip the entire ball into the chocolate, tap off excess, and place in a foam block or cup to set.
- Add decorations immediately before the chocolate sets.
- Let pops set at room temperature for 1 hour before serving.
Notes
Ensure the cake is completely cool before crumbling to prevent the frosting from melting. Do not refrigerate the finished pops immediately as condensation can make the coating soggy. For best results, chill the cake balls for at least 30 minutes before dipping.
Nutrition
- Serving Size: 1 cake pop
- Calories: 175
- Sugar: 18
- Sodium: 150
- Fat: 8
- Saturated Fat: 5
- Carbohydrates: 24
- Fiber: 1
- Protein: 2
Keywords: gingerbread, cake pops, christmas treats, holiday baking, crispy cake pops, white chocolate, gingerbread recipe


