Love this? Save it for later!
Share the inspiration with your friends
I figured a one-bowl chocolate chip pumpkin bread would be a compromise recipe — something quick that couldn’t possibly deliver the deep, spiced flavor of the traditional loaf I grew up making. It took about twelve minutes of whisking for that assumption to fall apart completely. The batter came together so fast I actually checked the bowl twice, convinced I’d forgotten something.
The thing is, pumpkin bread has always felt like a project to me. You know — pull out the stand mixer, cream the butter and sugar separately, sift the dry ingredients into a separate bowl, then slowly alternate adding them while holding your breath that the batter doesn’t curdle. It’s a whole production. And sure, that method works. But this one-bowl version? It’s almost suspiciously easy. You dump everything in, stir until it looks right, and somehow the loaf comes out tender, moist, and perfectly spiced every single time.
I developed this recipe on a Tuesday afternoon when I had exactly one hour before picking up my kids from school. The kitchen was already a disaster from breakfast, and I didn’t have the energy for another sink full of mixing bowls. So I grabbed my largest mixing bowl — the one I usually reserve for pasta salads — and started throwing things in. Butter, sugar, eggs, pumpkin puree, vanilla. Then the dry ingredients right on top. I stirred with a wooden spoon that had seen better days, scraped the batter into a loaf pan, and shoved it in the oven.
Forty-five minutes later, the house smelled like autumn had exploded inside it. The bread rose beautifully, cracked right down the center in that classic bakery-style way, and tasted so good I ate two slices standing at the counter. That’s the thing about this recipe — it doesn’t ask for perfection. It just asks for one bowl, a spoon, and thirty seconds of your time. The rest takes care of itself.
Why You’ll Love This Recipe
Let’s be honest — most pumpkin bread recipes are fussy. They require multiple bowls, softened butter that you forgot to take out of the fridge, and enough dirty dishes to make you question your life choices. This one is different. It’s the kind of recipe you’ll actually make on a random Wednesday, not just save for Pinterest and forget about.
- One Bowl, No Mixer: You don’t need a stand mixer, hand mixer, or any fancy equipment. Just a bowl and a whisk or wooden spoon. The cleanup takes about thirty seconds.
- Pantry-Friendly Ingredients: Canned pumpkin, basic baking staples, and chocolate chips. No trips to specialty stores or weird ingredient hunts.
- Perfect for Fall Mornings: This bread is moist enough to eat plain but sturdy enough to toast and slather with butter. It’s equally at home on a Thanksgiving brunch table or a Tuesday breakfast plate.
- Crowd-Pleasing Flavor: The chocolate chips melt into pockets of gooey sweetness against the warm, spiced pumpkin base. Kids love it. Adults love it. I’ve watched people argue over the last slice.
- Unbelievably Moist: The combination of pumpkin puree and melted butter creates a texture that stays tender for days. No dry, crumbly loaf here — just soft, sliceable perfection.
What makes this recipe different from the dozens of other pumpkin breads out there? It’s the technique — or rather, the lack of it. By melting the butter instead of creaming it, you skip the step that usually requires precision and patience. The melted butter emulsifies with the sugar and eggs in a way that creates a fine, tender crumb without any extra effort. Plus, the chocolate chips aren’t just an afterthought. I fold them in generously, reserving a handful to press into the top of the batter before baking. That way, every slice has visible, melty chocolate right at the surface.
This is the kind of bread that makes you close your eyes after the first bite. It’s comfort food reimagined — faster, simpler, but with the same soul-soothing satisfaction. Perfect for impressing guests without stress, or turning a quiet afternoon into something memorable.
What Ingredients You Will Need
This recipe uses simple, wholesome ingredients to deliver bold pumpkin flavor and rich chocolatey pockets without the fuss. Most of these are pantry staples, which means you can probably make this bread right now without a grocery run.
- All-purpose flour — 1 ¾ cups (210g). Standard all-purpose flour works beautifully here. For a lighter texture, spoon and level your flour rather than scooping directly from the bag. If you’re gluten-free, swap in a 1:1 gluten-free baking blend.
- Granulated sugar — 1 cup (200g). Regular white sugar gives the bread structure and sweetness. You can reduce it to ¾ cup if you prefer a less sweet loaf, but don’t go lower than that or the texture will suffer.
- Light brown sugar — ½ cup (100g), packed. This adds moisture and a subtle molasses depth that pairs perfectly with pumpkin. Dark brown sugar works too if that’s what you have.
- Pumpkin puree — 1 cup (245g). Use canned pumpkin puree, not pumpkin pie filling. Libby’s is my go-to brand for consistent texture and flavor. If you’re using homemade pumpkin puree, make sure it’s well-drained — excess water will make the bread gummy.
- Melted butter — ½ cup (113g), unsalted. Melt and cool it slightly before using. Salted butter works fine — just skip the added salt in the recipe.
- Large eggs — 2, at room temperature. Cold eggs can seize the melted butter, so let them sit on the counter for 15 minutes before starting. In a pinch, place them in a bowl of warm water for 5 minutes.
- Vanilla extract — 2 teaspoons. Pure vanilla extract adds warmth. Imitation works in a pinch, but pure is noticeably better here.
- Baking soda — 1 teaspoon. This is the primary leavener. Make sure it’s fresh — test it by dropping a pinch into vinegar; it should fizz immediately.
- Baking powder — ½ teaspoon. Adds a little extra lift for a lighter crumb.
- Salt — ½ teaspoon. Balances the sweetness and enhances the pumpkin flavor.
- Pumpkin pie spice — 2 teaspoons. You can use store-bought or make your own: 1 teaspoon cinnamon, ½ teaspoon ginger, ¼ teaspoon nutmeg, ¼ teaspoon cloves. I like the blend from McCormick for its balanced warmth.
- Cinnamon — 1 teaspoon. Extra cinnamon because pumpkin and cinnamon are non-negotiable friends.
- Semi-sweet chocolate chips — 1 cup (175g). I prefer Ghirardelli semi-sweet chips for their rich flavor and ability to hold their shape. Dark chocolate or milk chocolate both work — adjust based on your sweetness preference.
Equipment Needed
The beauty of this recipe is that you probably already own everything you need. No expensive gadgets required — just basic kitchen tools that have been hanging out in your drawers for years.
- Large mixing bowl — Any bowl works, but a wide, deep one makes mixing easier and prevents flour from flying everywhere. My go-to is a plain ceramic bowl I bought at a thrift store for three dollars.
- Whisk or wooden spoon — A whisk incorporates air more efficiently, but a wooden spoon gets the job done just fine. I use a whisk for the wet ingredients and switch to a rubber spatula for folding in the flour and chips.
- 9×5-inch loaf pan — Standard size. If your pan is glass or ceramic, reduce the oven temperature by 25°F and bake a few minutes longer. Metal pans conduct heat more evenly for a golden crust.
- Parchment paper — Optional but highly recommended. Lining the pan with parchment creates built-in handles that make lifting the loaf out effortless. No scraping, no stuck slices.
- Cooling rack — Essential for even cooling. If you don’t have one, use the inverted top of your oven grate or a wire trivet.
- Measuring cups and spoons — For accuracy, use dry measuring cups for dry ingredients and liquid measuring cups for the pumpkin and melted butter.
If you don’t have a whisk, a fork works in a pinch. If you don’t have parchment paper, grease the pan thoroughly with butter or non-stick spray and dust it with a little flour. The bread will still release — just be patient and let it cool completely before removing.
Preparation Method
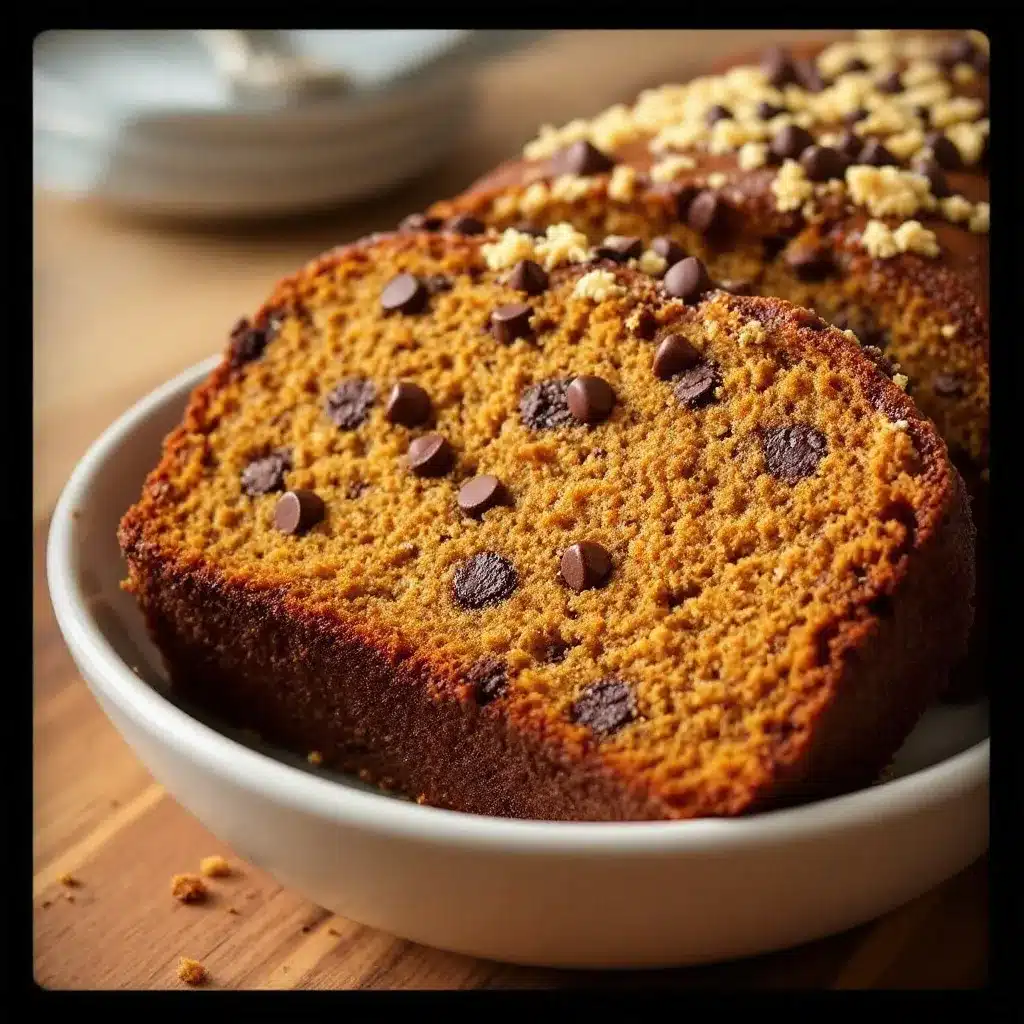
This method is designed to be as straightforward as possible. Read through it once before you start so you know where you’re headed, then dive in. Total active time is about 10 minutes — the oven does the rest.
- Preheat your oven to 350°F (175°C). Position the rack in the center of the oven. While it’s heating, line your loaf pan with parchment paper or grease it thoroughly. I like to leave about 2 inches of overhang on the long sides for easy lifting.
- Melt the butter in a small saucepan over low heat or in a microwave-safe bowl in 20-second bursts. Set it aside to cool slightly while you gather the other ingredients. You want it warm, not hot — if it’s too hot, it might scramble the eggs when you add them.
- In your large mixing bowl, combine the melted butter, granulated sugar, and brown sugar. Whisk them together until the mixture looks smooth and slightly thickened, about 30 seconds. The sugars should be mostly dissolved — a few tiny grains are fine.
- Add the eggs one at a time, whisking well after each addition. The batter will look glossy and smooth. Don’t rush this — proper emulsification is what gives the bread its tender crumb.
- Add the pumpkin puree and vanilla extract. Whisk until fully combined. The batter will thicken noticeably and turn a beautiful deep orange. Stop and scrape the sides of the bowl with a spatula to make sure everything is incorporated.
- Sprinkle the flour, baking soda, baking powder, salt, pumpkin pie spice, and cinnamon directly over the wet ingredients. Don’t sift — just scatter them evenly. This is where the one-bowl magic really happens. Stir gently with a spatula or wooden spoon until just combined. A few streaks of flour are okay — overmixing will make the bread tough.
- Fold in the chocolate chips with a few gentle strokes. Reserve about ¼ cup of chips to sprinkle on top later. The batter will be thick and slightly sticky — that’s exactly what you want.
- Pour the batter into the prepared loaf pan and spread it evenly with a spatula. Sprinkle the reserved chocolate chips over the top, pressing them gently into the surface so they stay put during baking.
- Bake for 50 to 60 minutes, or until a toothpick inserted into the center comes out clean or with a few moist crumbs attached. If the top is browning too quickly (after about 40 minutes), tent the pan loosely with aluminum foil.
- Let the bread cool in the pan for 15 minutes, then lift it out using the parchment paper handles and transfer to a cooling rack. Cool completely before slicing — about 1 hour. I know it’s tempting to cut into it warm, but the texture sets as it cools. Warm slices tend to crumble and the chocolate chips will smear.
Cooking Tips & Techniques
I’ve made this bread at least two dozen times, and I’ve made every mistake you can imagine. Here’s what I’ve learned so you don’t have to repeat my errors.
Don’t overmix the batter. This is the number one mistake people make with quick breads. Once you add the flour, stir only until you can’t see dry streaks anymore. Overmixing develops gluten, which creates a dense, rubbery loaf instead of a tender one. I learned this the hard way when my first loaf came out tough enough to bounce.
Use room temperature eggs. Cold eggs can cause the melted butter to seize and create lumps in the batter. If you forgot to take them out ahead of time, place them in a bowl of warm water for 5 minutes. It’s a small step that makes a noticeable difference in texture.
Check your pumpkin pie spice freshness. Spices lose potency over time, and stale pumpkin pie spice will leave your bread tasting flat. If your spice jar has been sitting in the cabinet for more than a year, replace it or make your own blend from individual spices. The difference is night and day.
Reserve chocolate chips for the top. This isn’t just for looks — it ensures that every slice has visible chocolate right at the surface. Without this step, the chips tend to sink to the bottom during baking, leaving the top of the loaf bare. Press them in gently so they don’t disappear into the batter.
Let it cool completely. I know the smell is intoxicating. I know you want a warm slice with butter melting into it. But cutting into this bread while it’s still warm will result in a crumbly mess. The structure needs time to set. Trust me — I’ve sacrificed many slices to impatience.
Toast leftover slices. Day-old pumpkin bread is even better toasted. Pop a slice in the toaster or under the broiler for 2 minutes, then spread with salted butter. The edges get crispy while the inside stays soft. It’s a whole new experience.
Variations & Adaptations
This recipe is forgiving enough to handle all kinds of tweaks. Here are some of my favorite variations, tested and approved.
Gluten-Free Version: Substitute the all-purpose flour with a 1:1 gluten-free baking blend that contains xanthan gum. I’ve had excellent results with King Arthur Measure for Measure. The texture is slightly more delicate, so let the bread cool completely before slicing. Add an extra 2 tablespoons of pumpkin puree to compensate for the drier gluten-free flour.
Dairy-Free Version: Use melted coconut oil or a plant-based butter in place of regular butter. I like using refined coconut oil because it doesn’t add coconut flavor. For the chocolate chips, look for dairy-free semi-sweet chips — Enjoy Life makes a reliable option.
Nutty Pumpkin Bread: Fold in ½ cup of toasted pecans or walnuts along with the chocolate chips. Toast the nuts first in a dry skillet over medium heat for 3-4 minutes until fragrant — this brings out their oils and prevents them from turning soggy in the batter.
Spiced-Up Version: Add ¼ teaspoon of cayenne pepper or a pinch of black pepper to the dry ingredients. The heat doesn’t make the bread spicy — it just amplifies the warmth of the pumpkin spices and creates a subtle, lingering complexity. I tried this on a whim and now I can’t go back.
Chocolate Lover’s Version: Swap ¼ cup of the flour with unsweetened cocoa powder and double the chocolate chips. You’ll get a double-chocolate pumpkin loaf that’s rich enough to pass for dessert. Reduce the sugar by 2 tablespoons to balance the bitterness of the cocoa.
Pumpkin Chocolate Chip Muffins: Divide the batter among a 12-cup muffin tin lined with paper cups. Bake at 350°F for 18-22 minutes. This is my go-to for school bake sales and weekend brunches. The muffins freeze beautifully, too.
Serving & Storage Suggestions
This bread is versatile enough to work for breakfast, snack time, or dessert. Here’s how to serve it and keep it fresh.
Serving Temperature: Serve at room temperature for the best texture. If you want a warm slice, toast it lightly — don’t microwave it, or the chocolate chips will melt into a puddle and the bread will turn rubbery. A pat of salted butter on a toasted slice is pure magic.
Presentation Ideas: Dust the top with powdered sugar just before serving for a bakery-style finish. Or drizzle with a simple glaze made from 1 cup powdered sugar mixed with 2 tablespoons milk and ½ teaspoon vanilla. For fall gatherings, arrange slices on a wooden board with apple slices, cinnamon sticks, and a small dish of honey butter.
Complementary Dishes: This bread pairs beautifully with a hot cup of coffee, chai tea, or spiced apple cider. For a full brunch spread, serve it alongside easy lazy morning breakfast board ideas for a no-cook spread that looks impressive with minimal effort. It also works well as a sweet counterpoint to savory dishes like creamy loaded bacon ranch pasta salad at potlucks and barbecues.
Storage Instructions: Wrap the cooled loaf tightly in plastic wrap or aluminum foil and store at room temperature for up to 4 days. Do not refrigerate — the cold temperature dries out the bread and dulls the flavor. For longer storage, slice the bread, wrap individual slices in plastic wrap, and place them in a freezer bag. Freeze for up to 3 months.
Reheating from Frozen: Thaw a slice at room temperature for 30 minutes, then toast it. Or pop a frozen slice directly into the toaster — it’ll take two cycles, but the result is nearly as good as fresh. The chocolate chips stay intact and the pumpkin flavor remains vibrant.
Flavor Development: Honestly, this bread tastes even better on day two. The pumpkin and spice flavors meld together overnight, creating a deeper, more rounded taste. If you can resist eating it all on day one, wrap it tightly and let it rest — you’ll be rewarded.
Nutritional Information & Benefits
This bread is a treat, but it also offers some nutritional perks thanks to its star ingredient. Here’s a rough breakdown per slice (based on 10 slices):
| Nutrient | Amount Per Slice |
|---|---|
| Calories | 320 |
| Total Fat | 14g |
| Saturated Fat | 8g |
| Carbohydrates | 47g |
| Fiber | 2g |
| Sugar | 28g |
| Protein | 5g |
| Vitamin A | 95% DV |
| Iron | 10% DV |
Health Benefits: Pumpkin is packed with vitamin A (in the form of beta-carotene), which supports eye health and immune function. It’s also a good source of fiber, which aids digestion and helps you feel full longer. The chocolate chips add antioxidants from cocoa, though let’s be honest — we’re eating this for the joy, not the health benefits.
Dietary Considerations: This recipe is vegetarian and can easily be made dairy-free or gluten-free using the substitutions listed above. It is not low-carb or keto-friendly due to the sugar and flour content. For a lower-sugar version, reduce the granulated sugar to ¾ cup and use dark chocolate chips with at least 70% cocoa.
Potential Allergens: Contains wheat, dairy, and eggs. If you’re serving a crowd with allergies, make the gluten-free or dairy-free adaptations and clearly label the bread.
I believe in balance — this bread is a delicious indulgence, and there’s nothing wrong with that. Pair it with a protein-rich breakfast like eggs or Greek yogurt to round out your meal, or enjoy a slice as an afternoon pick-me-up. Life is too short for joyless eating.
Conclusion
This easy one bowl chocolate chip pumpkin bread is proof that simple recipes can deliver extraordinary results. No complicated techniques, no sink full of dirty dishes, no specialty ingredients — just honest, comforting food that tastes like a hug in loaf form.
What I love most about this recipe is how adaptable it is. Make it for Thanksgiving brunch, pack it in lunchboxes, gift it to neighbors during the holidays, or bake it on a random Tuesday because the house needs to smell like fall. It works for every occasion, and it works every time. The combination of tender pumpkin crumb and melty chocolate chips is one of those flavor marriages that just makes sense — like peanut butter and jelly, or cinnamon and sugar.
I’d love to hear how this bread turns out in your kitchen. Did you add nuts? Swap the chocolate for dried cranberries? Double the spices? Leave a comment below and tell me about your version — I genuinely read every single one. And if you share a photo on social media, tag me so I can see your beautiful loaf. Happy baking, friends. This one’s a keeper.
Frequently Asked Questions
Can I use fresh pumpkin instead of canned?
Yes, but you’ll need to roast and puree it first, then drain off any excess liquid. Fresh pumpkin tends to be more watery than canned, which can make the bread gummy. Spread the puree on a paper towel-lined plate for 10 minutes to absorb extra moisture before using.
Why did my bread sink in the middle?
This usually happens when the batter is overmixed or the oven temperature is too low. Overmixing creates too much air, which rises quickly then collapses. Make sure your oven is fully preheated to 350°F and resist the urge to open the door during the first 35 minutes of baking.
Can I make this recipe into cupcakes?
Absolutely. Divide the batter among a 12-cup muffin tin lined with paper liners and bake at 350°F for 18-22 minutes. Check for doneness with a toothpick — it should come out clean or with a few moist crumbs. This is my favorite way to portion them for parties and bake sales.
How do I prevent chocolate chips from sinking to the bottom?
Toss the chocolate chips with 1 tablespoon of flour before folding them into the batter. The flour coating creates friction that helps the chips stay suspended. Also, make sure your batter is thick enough — if it’s too thin, everything sinks. This recipe’s batter should be thick and scoopable, not runny.
Can I freeze this pumpkin bread?
Yes, and it freezes beautifully. Cool the loaf completely, wrap it tightly in plastic wrap, then in aluminum foil, and freeze for up to 3 months. Thaw overnight in the refrigerator or at room temperature for a few hours. For best results, slice before freezing so you can grab individual portions as needed.
Pin This Recipe!
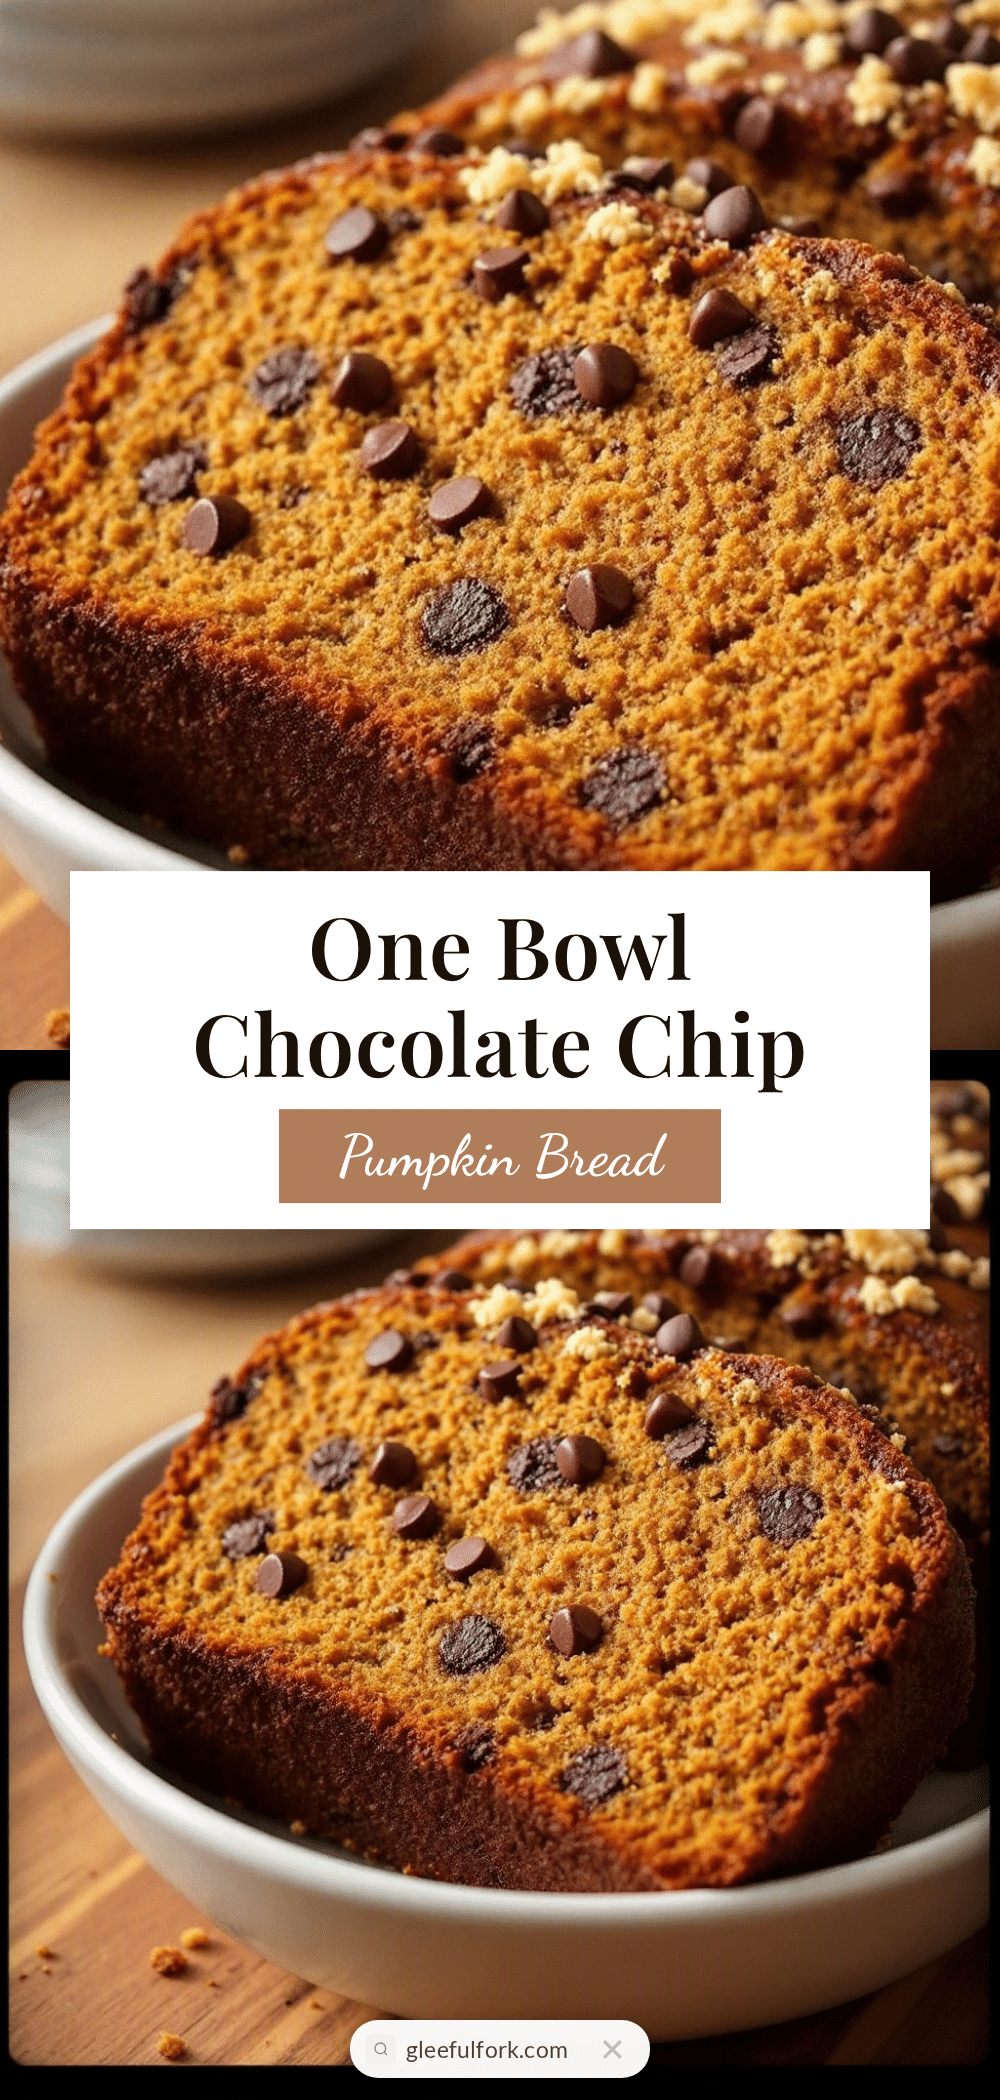
Easy One Bowl Chocolate Chip Pumpkin Bread Recipe
This easy one-bowl chocolate chip pumpkin bread is tender, moist, and perfectly spiced. Made with simple pantry ingredients and no mixer required, it’s the perfect quick bread for fall mornings or any time you crave comfort food.
- Prep Time: 10 minutes
- Cook Time: 50 minutes
- Total Time: 1 hour
- Yield: 10 servings 1x
- Category: Dessert
- Cuisine: American
Ingredients
- 1 ¾ cups (210g) all-purpose flour
- 1 cup (200g) granulated sugar
- ½ cup (100g) packed light brown sugar
- 1 cup (245g) pumpkin puree (not pumpkin pie filling)
- ½ cup (113g) unsalted butter, melted and slightly cooled
- 2 large eggs, at room temperature
- 2 teaspoons vanilla extract
- 1 teaspoon baking soda
- ½ teaspoon baking powder
- ½ teaspoon salt
- 2 teaspoons pumpkin pie spice
- 1 teaspoon ground cinnamon
- 1 cup (175g) semi-sweet chocolate chips
Instructions
- Preheat your oven to 350°F (175°C). Position the rack in the center of the oven. Line a 9×5-inch loaf pan with parchment paper or grease it thoroughly.
- Melt the butter in a small saucepan over low heat or in a microwave-safe bowl in 20-second bursts. Set aside to cool slightly.
- In a large mixing bowl, combine the melted butter, granulated sugar, and brown sugar. Whisk until smooth and slightly thickened, about 30 seconds.
- Add the eggs one at a time, whisking well after each addition until the batter is glossy and smooth.
- Add the pumpkin puree and vanilla extract. Whisk until fully combined. The batter will thicken and turn a deep orange. Scrape the sides of the bowl with a spatula.
- Sprinkle the flour, baking soda, baking powder, salt, pumpkin pie spice, and cinnamon directly over the wet ingredients. Stir gently with a spatula or wooden spoon until just combined. A few streaks of flour are okay—do not overmix.
- Fold in the chocolate chips with a few gentle strokes. Reserve about ¼ cup of chips to sprinkle on top later.
- Pour the batter into the prepared loaf pan and spread it evenly. Sprinkle the reserved chocolate chips over the top, pressing them gently into the surface.
- Bake for 50 to 60 minutes, or until a toothpick inserted into the center comes out clean or with a few moist crumbs. If the top browns too quickly, tent loosely with aluminum foil after about 40 minutes.
- Let the bread cool in the pan for 15 minutes, then lift it out using the parchment paper handles and transfer to a cooling rack. Cool completely before slicing, about 1 hour.
Notes
For best results, use room temperature eggs to prevent the melted butter from seizing. Do not overmix the batter once flour is added. Let the bread cool completely before slicing to avoid crumbling. Day-old bread is even better toasted. Store wrapped tightly at room temperature for up to 4 days, or freeze for up to 3 months.
Nutrition
- Serving Size: 1 slice
- Calories: 320
- Sugar: 28
- Sodium: 280
- Fat: 14
- Saturated Fat: 8
- Carbohydrates: 47
- Fiber: 2
- Protein: 5
Keywords: pumpkin bread, chocolate chip pumpkin bread, one bowl pumpkin bread, easy pumpkin bread, fall baking, quick bread


