Love this? Save it for later!
Share the inspiration with your friends
That nutty, toasty smell — the kind that fills your kitchen before you even see the color change in the pan — still takes me straight to my friend Mia’s tiny apartment in Portland. I was visiting for the weekend, and she was already elbow-deep in flour, telling me about this “game-changing” cookie she’d been testing for weeks. I thought, sure, another chocolate chip cookie recipe. But then she poured the liquid gold — the brown butter — into the mixing bowl, and the whole place smelled like toasted hazelnuts and caramel. I was hooked before I even tasted the dough.
Honestly, I didn’t think you could improve on a classic chocolate chip cookie. But that first bite? The edges were crisp, the center was so soft it barely held together, and the flavor had this deep, almost butterscotch note that regular butter just can’t touch. It was the kind of cookie that makes you close your eyes for a second. I asked for the recipe immediately, and over the years, I’ve tweaked it until it’s become my absolute go-to. This isn’t just another cookie; it’s a little piece of that perfect, cozy afternoon, made better with a few tricks I’ve learned along the way.
So, if you’re looking for a cookie that’s genuinely chewy, deeply flavorful, and surprisingly simple to make, you’ve found it. This is my best version of a chewy brown butter chocolate chip cookie, and I can’t wait for you to try it.
Why You’ll Love This Recipe
Look, I’ve made a lot of cookies. Some were flat and sad, others were cakey when I wanted chewy. But this recipe? It’s the one I keep coming back to, and here’s exactly why.
- Unbelievably Chewy Texture: The combination of melted brown butter and an extra egg yolk creates a texture that’s soft, dense, and perfectly chewy in the center with those gorgeous, crispy edges. No more crunchy, dry cookies!
- Deep, Nutty Flavor: Browning the butter is a simple step that unlocks a world of flavor. It adds a toasty, caramel-like richness that makes these taste like you spent hours in the kitchen, when really, it’s just a few extra minutes.
- Simple, Everyday Ingredients: You don’t need any fancy flours or exotic extracts. This recipe uses basic pantry staples — butter, sugar, eggs, flour, and chocolate chips. It’s all about technique, not a complicated shopping list.
- Perfect for Any Occasion: Need a quick dessert for a weeknight? A show-stopping treat for a potluck? Or just a rainy-day baking project? These cookies fit the bill every time. They’re a crowd-pleaser, through and through. They even pair wonderfully with a scoop of our creamy dairy-free ice cream for an extra-special sundae.
- Foolproof for Bakers of All Levels: I’ve tested this recipe more times than I can count. The instructions are clear, the steps are forgiving, and the result is consistently amazing. Even if you’re new to browning butter, I’ll walk you through it.
This isn’t just another chocolate chip cookie recipe. It’s the one that makes you look like a pro. It’s the one people will ask you for. And honestly? It’s the one that tastes like a warm hug.
What Ingredients You Will Need
This recipe uses simple, wholesome ingredients to deliver that signature chewy texture and incredible brown butter flavor. Most of these are probably in your kitchen right now, which makes it perfect for a spontaneous baking session.
- Unsalted Butter (1 cup / 2 sticks): This is the star of the show. We’ll be browning it to unlock its nutty, toasty potential. I always use unsalted so I can control the salt level. If you only have salted butter, just reduce the added salt in the recipe by ¼ teaspoon.
- Brown Sugar (1 cup, packed / 200g): The key to that chewy texture! Brown sugar has molasses in it, which adds moisture and a deep, caramel-like flavor that pairs perfectly with the brown butter. I use light brown sugar, but dark brown sugar will give an even more intense molasses flavor.
- Granulated Sugar (½ cup / 100g): This helps the cookies spread just the right amount and gives those edges a beautiful crispness. The balance of brown and white sugar is crucial for the perfect texture.
- Large Eggs (1 whole + 1 yolk): The whole egg provides structure, while the extra yolk adds richness and that signature chewiness. It’s a little trick I picked up from a bakery cookbook, and it makes all the difference. Make sure your eggs are at room temperature for the best emulsion.
- Vanilla Extract (2 teaspoons): Use pure vanilla extract if you can. It enhances all the other flavors and adds a beautiful aromatic quality. I’m a fan of Nielsen-Massey, but any good brand will do.
- All-Purpose Flour (2 ¼ cups / 280g): Standard all-purpose flour is perfect here. I recommend spooning it into your measuring cup and leveling it off with a knife, rather than scooping directly from the bag. Scooping can pack the flour, leading to dry, dense cookies.
- Baking Soda (1 teaspoon): This is our leavening agent. It helps the cookies spread and become tender. Make sure it’s fresh for the best results.
- Salt (1 teaspoon): Don’t skip this! Salt isn’t just for flavor; it balances the sweetness and enhances the chocolate. I use fine sea salt.
- Semi-Sweet Chocolate Chips (2 cups / 340g): Use a good-quality chocolate chip. I love Ghirardelli or Guittard for their flavor and meltability. You can also chop up a high-quality chocolate bar for bigger puddles of chocolate. For a fun twist, try using a mix of semi-sweet and dark chocolate chips.
- Flaky Sea Salt (for finishing, optional but highly recommended): A sprinkle of flaky salt like Maldon right when the cookies come out of the oven is a game-changer. It adds a little crunch and a burst of salty flavor that makes the chocolate and brown butter sing.
Equipment Needed
You don’t need a professional bakery setup for these cookies. Here’s what you’ll need to make them perfectly.
- Light-Colored Saucepan: This is crucial for browning the butter. A light-colored pan makes it much easier to see the butter change from yellow to golden to that perfect amber brown. A dark pan can hide the color and lead to burnt butter.
- Large Mixing Bowls: You’ll need at least one for the dry ingredients and one for the wet ingredients. I prefer glass or stainless steel bowls.
- Whisk and Rubber Spatula: A whisk for combining the dry ingredients and a good rubber spatula for folding everything together. The spatula is also great for scraping every last bit of that precious brown butter out of the pan.
- Hand Mixer or Stand Mixer: You can cream the butter and sugars by hand with a wooden spoon, but a hand mixer or stand mixer with the paddle attachment makes it much easier and faster.
- Baking Sheets (2-3): I recommend using light-colored, rimmed baking sheets. Dark sheets can cause the bottoms of the cookies to brown too quickly.
- Parchment Paper or Silicone Baking Mat: This prevents the cookies from sticking and ensures even browning. It also makes cleanup a breeze.
- Cooling Rack: Essential for letting the cookies cool properly so they don’t continue to cook on the hot baking sheet.
- Cookie Scoop (about 1.5 tablespoons): For uniform cookies that bake evenly. A #40 scoop is perfect. If you don’t have one, you can use two spoons.
Preparation Method
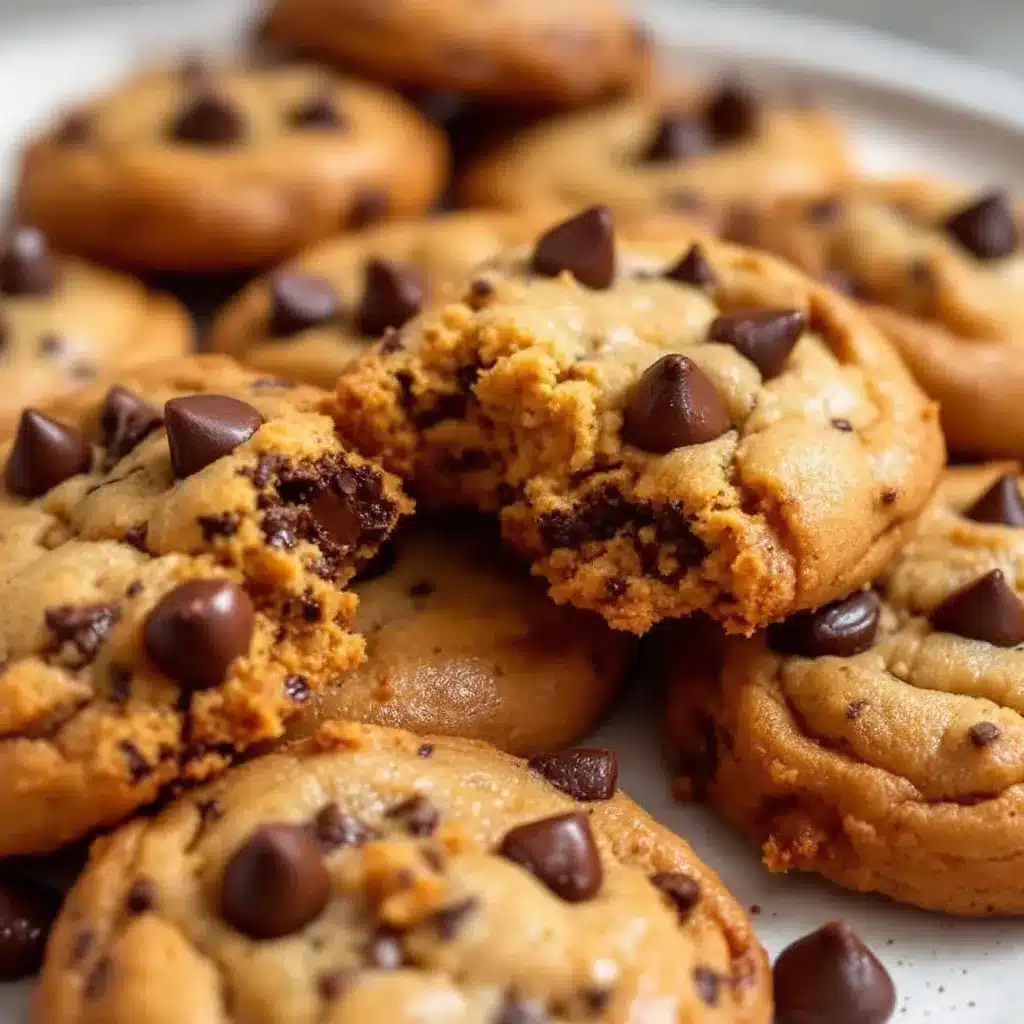
Alright, let’s get to the fun part. Follow these steps, and you’ll have a batch of the best chewy brown butter chocolate chip cookies you’ve ever made.
- Brown the Butter: Place the 1 cup (2 sticks) of unsalted butter in your light-colored saucepan over medium heat. Stir it frequently with a rubber spatula or wooden spoon. It will melt, then foam, then start to crackle and pop. Keep stirring. After about 5-8 minutes, the foam will subside, and you’ll see little brown specks forming at the bottom of the pan. The butter will smell nutty and amazing. As soon as it turns a rich, golden-amber color, remove it from the heat immediately. Pour it into a large mixing bowl (including all those beautiful brown bits) and let it cool for 10-15 minutes. Don’t skip the cooling step, or your cookies will be greasy!
- Combine Dry Ingredients: In a separate medium bowl, whisk together the 2 ¼ cups (280g) all-purpose flour, 1 teaspoon baking soda, and 1 teaspoon salt. Set this aside.
- Cream the Butter and Sugars: Once the brown butter has cooled slightly (it should still be liquid but not hot), add the 1 cup (packed, 200g) brown sugar and ½ cup (100g) granulated sugar. Beat with a hand mixer or stand mixer on medium speed for 2-3 minutes, until the mixture looks like a thick, grainy paste. It won’t get light and fluffy like room-temperature butter, and that’s perfectly fine.
- Add the Eggs and Vanilla: Add the 1 whole large egg and 1 large egg yolk, plus the 2 teaspoons of vanilla extract. Beat on medium speed for another 1-2 minutes, until the mixture is smooth, creamy, and slightly lighter in color. Scrape down the sides of the bowl with your spatula.
- Add the Dry Ingredients: With the mixer on low speed, gradually add the flour mixture to the wet ingredients. Mix only until just combined — you don’t want to overwork the gluten. A few streaks of flour are okay.
- Fold in the Chocolate Chips: Switch to your rubber spatula. Gently fold in the 2 cups (340g) of semi-sweet chocolate chips until they are evenly distributed. The dough will be thick and glorious.
- Chill the Dough (The Most Important Step!): Cover the bowl with plastic wrap and refrigerate the dough for at least 30 minutes, and up to 72 hours. I know it’s tempting to skip this, but trust me. Chilling solidifies the brown butter, prevents the cookies from spreading too much, and allows the flavors to meld and deepen. The longer you chill, the more complex the flavor.
- Preheat and Prepare: When you’re ready to bake, preheat your oven to 375°F (190°C). Line your baking sheets with parchment paper or silicone baking mats.
- Scoop and Bake: Using your cookie scoop or two spoons, portion the dough into balls about 1.5 tablespoons in size. Place them about 2-3 inches apart on the prepared baking sheets. Bake for 10-12 minutes, or until the edges are golden brown and the centers look slightly underdone and puffy. They will look a little soft in the middle — that’s what you want!
- Finish and Cool: Remove the baking sheet from the oven. If you’re using it, immediately sprinkle a little flaky sea salt over the hot cookies. Let them cool on the baking sheet for 5 minutes — this allows them to set up. Then, transfer them to a wire cooling rack to cool completely. Or, you know, eat one warm. I won’t tell.
Cooking Tips & Techniques
I’ve made every mistake in the book so you don’t have to. Here are a few things I’ve learned that make all the difference.
- Watch the Brown Butter Like a Hawk: It can go from perfect to burnt in seconds. The second you see that amber color and smell that nutty aroma, pull it off the heat. Don’t walk away from the pan! If it burns, you have to start over. I’ve done it, and it’s a sad, sad waste of butter.
- Room Temperature Eggs are Your Friend: Cold eggs can seize up the brown butter mixture, making it lumpy. To quickly bring eggs to room temperature, place them in a bowl of warm (not hot) water for 5-10 minutes.
- Don’t Overmix the Dough: Once you add the flour, mix just until you can’t see it anymore. Overmixing develops gluten, which leads to tough, cakey cookies instead of chewy ones.
- Chill the Dough, Seriously: I can’t stress this enough. If you bake the dough right away, the cookies will spread into thin, greasy puddles. Chilling for at least 30 minutes is non-negotiable for the perfect chewy texture. It’s the best trick for a consistently perfect cookie.
- Bake One Test Cookie: If you’re unsure about your oven, bake just one cookie first. This lets you test the spread and baking time without ruining a whole batch. Adjust your next sheet based on what you see.
Variations & Adaptations
This recipe is a fantastic base, and I love playing around with it. Here are a few of my favorite ways to change it up.
- Add Some Nuts: Toast 1 cup of pecans or walnuts and chop them roughly. Fold them in along with the chocolate chips for a wonderful crunch. The toasty nuts pair beautifully with the brown butter.
- Go for a Different Chocolate: Swap out half the semi-sweet chips for white chocolate chips and dried cranberries, or use milk chocolate chips for a sweeter cookie. Dark chocolate chunks are also a fantastic choice for a more intense flavor.
- Make Them a Sandwich Cookie: Bake the cookies as directed and let them cool completely. Then, spread a generous layer of vanilla buttercream or even a scoop of our creamy dairy-free ice cream between two cookies for an epic treat.
- Try a Different Flour: For a slightly different texture, you can substitute up to ½ cup of the all-purpose flour with whole wheat flour. It will add a nutty flavor and a bit more structure. For a gluten-free version, use a good 1-to-1 gluten-free baking flour blend.
- Spice It Up: Add 1 teaspoon of cinnamon and ¼ teaspoon of nutmeg to the dry ingredients for a warm, spiced cookie that’s perfect for fall.
Serving & Storage Suggestions
These cookies are best enjoyed warm, but they’re pretty incredible at any temperature. Here’s how to serve and store them.
- Serving: Serve them slightly warm with a cold glass of milk or a hot cup of coffee. They also make a fantastic dessert alongside a scoop of vanilla ice cream or a dollop of whipped cream.
- Storage: Store the completely cooled cookies in an airtight container at room temperature. They will stay soft and chewy for up to 5 days. I like to put a slice of bread in the container — it absorbs excess air and helps keep the cookies extra soft. Just replace the bread every day or two.
- Freezing: You can freeze the baked cookies for up to 3 months. Layer them between sheets of parchment paper in a freezer-safe container. Thaw at room temperature or warm them in a 300°F (150°C) oven for a few minutes.
- Freezing the Dough: This is my favorite trick. Scoop the dough into balls and place them on a baking sheet lined with parchment paper. Freeze until solid, then transfer the dough balls to a freezer bag. You can bake them directly from frozen, just add 2-3 minutes to the baking time. Fresh cookies whenever you want!
- Flavor Development: Honestly, these cookies taste even better the next day. The flavors have time to meld and deepen, making them even more delicious. So don’t be afraid to make them a day ahead for a party.
Nutritional Information & Benefits
Let’s be real, these are a treat. But knowing what’s in them is part of enjoying them mindfully. Here’s an approximate nutritional breakdown per cookie (based on 24 cookies).
- Calories: ~220 kcal
- Fat: ~13g
- Carbohydrates: ~28g
- Protein: ~3g
- Sugar: ~18g
While they’re not a health food, there are a few small silver linings. The brown butter offers a small amount of Vitamin A, and the dark chocolate chips are a source of antioxidants. Plus, baking from scratch means you control exactly what goes into them—no preservatives or artificial ingredients. They’re a wholesome indulgence, perfect for a special occasion or a little self-care. For a lighter, gut-healthy snack, you might also enjoy our fresh probiotic cucumber salad on the side.
Conclusion
So there you have it—my go-to recipe for the most incredible chewy brown butter chocolate chip cookies. It’s a recipe that turns a simple, beloved classic into something truly special with just one extra step. The nutty brown butter, the perfectly chewy center, the crisp edges, and the melty chocolate—it’s a combination that’s hard to beat.
I really hope you give these a try. Don’t be intimidated by browning the butter; it’s easier than you think, and the payoff is huge. And please, feel free to make them your own. Add your favorite nuts, swap the chocolate, or just enjoy them exactly as written.
When you do make them, I’d love to hear about it! Drop a comment below and let me know how they turned out, or share a photo on Pinterest. Your baking adventures make my day. Happy baking, friend!
Frequently Asked Questions
Why did my cookies turn out flat?
The most common culprit is skipping the chill time. The dough needs to be cold so the butter doesn’t melt too quickly in the oven, causing the cookies to spread into flat puddles. Also, make sure your baking soda is fresh.
Can I use salted butter instead of unsalted?
Yes, you can. Just reduce the added salt in the recipe to about ¼ teaspoon. The flavor will be slightly different, but it will still work perfectly.
Can I make the dough ahead of time and bake it later?
Absolutely! This is one of the best things about this recipe. You can chill the dough for up to 72 hours. The longer it chills, the more the flavors develop, resulting in an even more delicious cookie.
How do I store the cookies to keep them chewy?
Store them in an airtight container at room temperature. Adding a slice of bread to the container will help absorb excess air and keep them soft for several days.
Can I freeze the cookie dough?
Yes! Scoop the dough into balls, freeze them on a baking sheet, and then transfer them to a freezer bag. You can bake them straight from the freezer—just add a couple of extra minutes to the baking time.
Pin This Recipe!
Chewy Brown Butter Chocolate Chip Cookies – Best Easy Recipe

These chewy brown butter chocolate chip cookies have a deep, nutty flavor and a perfectly soft center with crispy edges. A simple technique makes them incredibly delicious and a crowd-pleaser for any occasion.
- Prep Time: 15 minutes
- Cook Time: 12 minutes
- Total Time: 1 hour 2 minutes (including 30 minutes chilling)
- Yield: 24 servings 1x
- Category: Dessert
- Cuisine: American
Ingredients
- 1 cup (2 sticks) unsalted butter
- 1 cup (packed, 200g) brown sugar
- ½ cup (100g) granulated sugar
- 1 large egg + 1 large egg yolk
- 2 teaspoons vanilla extract
- 2 ¼ cups (280g) all-purpose flour
- 1 teaspoon baking soda
- 1 teaspoon salt
- 2 cups (340g) semi-sweet chocolate chips
- Flaky sea salt (for finishing, optional)
Instructions
- Brown the butter: Place 1 cup (2 sticks) unsalted butter in a light-colored saucepan over medium heat. Stir frequently until it melts, foams, and then turns a rich golden-amber color with brown specks and a nutty aroma (about 5-8 minutes). Remove from heat immediately and pour into a large mixing bowl, including the brown bits. Let cool for 10-15 minutes.
- Combine dry ingredients: In a separate medium bowl, whisk together 2 ¼ cups (280g) all-purpose flour, 1 teaspoon baking soda, and 1 teaspoon salt. Set aside.
- Cream the butter and sugars: Add 1 cup (packed, 200g) brown sugar and ½ cup (100g) granulated sugar to the cooled brown butter. Beat with a hand mixer or stand mixer on medium speed for 2-3 minutes until it forms a thick, grainy paste.
- Add the eggs and vanilla: Add 1 whole large egg, 1 large egg yolk, and 2 teaspoons vanilla extract. Beat on medium speed for 1-2 minutes until smooth, creamy, and slightly lighter in color. Scrape down the sides of the bowl.
- Add the dry ingredients: With the mixer on low speed, gradually add the flour mixture to the wet ingredients. Mix only until just combined (a few streaks of flour are okay).
- Fold in the chocolate chips: Using a rubber spatula, gently fold in 2 cups (340g) semi-sweet chocolate chips until evenly distributed.
- Chill the dough: Cover the bowl with plastic wrap and refrigerate for at least 30 minutes (up to 72 hours). This step is crucial for texture and flavor.
- Preheat and prepare: When ready to bake, preheat oven to 375°F (190°C). Line baking sheets with parchment paper or silicone baking mats.
- Scoop and bake: Using a cookie scoop (about 1.5 tablespoons), portion dough into balls and place 2-3 inches apart on prepared baking sheets. Bake for 10-12 minutes, until edges are golden brown and centers look slightly underdone and puffy.
- Finish and cool: Remove from oven. If using, immediately sprinkle flaky sea salt over hot cookies. Let cool on baking sheet for 5 minutes, then transfer to a wire cooling rack to cool completely.
Notes
Chilling the dough is non-negotiable for the perfect chewy texture. Watch the brown butter carefully as it can burn quickly. For best flavor, chill dough for up to 72 hours. Store cookies in an airtight container at room temperature for up to 5 days; add a slice of bread to keep them soft. Dough can be frozen for up to 3 months.
Nutrition
- Serving Size: 1 cookie
- Calories: 220
- Sugar: 18
- Fat: 13
- Carbohydrates: 28
- Protein: 3
Keywords: brown butter chocolate chip cookies, chewy cookies, easy cookie recipe, homemade cookies, chocolate chip cookies


