Love this? Save it for later!
Share the inspiration with your friends
Halloween treat bags had become a bit of a problem around our house. Not the handing out part—I love seeing the tiny ghosts and goblins come to the door. The problem was what went inside those bags. My kids would sort through their haul, and the store-bought candy would get eaten in a flash, but the homemade stuff? It either fell apart, got soggy, or just didn’t feel special enough to share with the neighborhood kids. I wanted something that felt like a real Halloween treat—something that said “I actually thought about this”—but without spending three days in the kitchen.
Mini pumpkin pie cookies weren’t even on my radar at first. I was trying to figure out a way to get that classic fall flavor into something portable, something that wouldn’t smush in a treat bag, something that a five-year-old could handle without making a mess. Regular pumpkin pie is great, but it’s not exactly grab-and-go friendly. And pumpkin cookies? They’re good, but they never quite hit that same warm, spiced, custardy note that a real pie does. I needed a hybrid—a cookie that thought it was a pie, basically.
These easy mini pumpkin pie cookies for Halloween treat bags turned out to be exactly that missing piece. They’re tiny, which is key for little hands, and they hold up way better than you’d expect. The first batch I made vanished before I could even get them into the bags—my husband “tested” about six of them, and my youngest kept sneaking them off the cooling rack. They’ve got that buttery crust, that smooth pumpkin filling, and just enough sweetness to feel like a treat without being overwhelming. Honestly, they’re the kind of thing you make once and then suddenly you’re making them for every fall gathering.
Why You’ll Love This Recipe
Let me tell you why these cookies have become my go-to for Halloween and honestly, for any fall occasion that comes up. I’ve tested this recipe about four times now, and each batch taught me something new about getting that perfect balance of flavor and texture.
- Perfect for Treat Bags: These cookies are small, sturdy, and don’t need refrigeration, which makes them ideal for packing up and handing out. No crumbling, no melting, no stress.
- Simple Ingredients: You probably already have most of these in your pantry right now. No hunting down obscure spices or specialty flours—just good, basic baking staples.
- Kid-Friendly to Make: My seven-year-old helped press the dough into the mini muffin tin, and she felt like a real baker. It’s a great way to get little ones involved without too much fuss.
- That Real Pumpkin Pie Flavor: The secret is in the filling—it uses actual pumpkin puree and a blend of warm spices that tastes just like your favorite Thanksgiving pie, but in cookie form.
- Make-Ahead Friendly: You can prep the dough and filling a day ahead, then bake them fresh when you’re ready. Or freeze the baked cookies for up to a month—they thaw beautifully.
What makes these different from other pumpkin cookie recipes I’ve tried is the texture. Most pumpkin cookies turn out cakey and soft, which is fine, but these have a tender, almost shortbread-like crust that holds its shape. The filling stays creamy without being runny. It’s the kind of cookie that makes people say “wait, these are cookies?” in a good way. I’ve brought them to potlucks and watched adults go back for thirds, which tells me they’re not just for the kids.
There’s something about that first bite—the way the buttery crust gives way to the spiced pumpkin filling—that just feels like fall. It’s the kind of treat that makes you want to curl up with a blanket and watch a scary movie, or pack a few in a bag for the school Halloween party. They’re simple enough for a Tuesday night but special enough for a celebration.
What Ingredients You Will Need
This recipe uses simple, wholesome ingredients to deliver that classic pumpkin pie flavor in a portable cookie form. Most of these are pantry staples, which makes this an easy last-minute recipe when you realize Halloween is tomorrow and you haven’t made anything yet. Trust me, I’ve been there.
For the Crust
- 1 ½ cups all-purpose flour (spooned and leveled—don’t scoop directly from the bag or you’ll get too much)
- ½ cup unsalted butter, cold and cut into small cubes (cold butter is key for a flaky, tender crust)
- ¼ cup granulated sugar
- 1 large egg yolk (save the white for brushing the tops)
- 1 teaspoon vanilla extract
- ¼ teaspoon salt
For the Pumpkin Filling
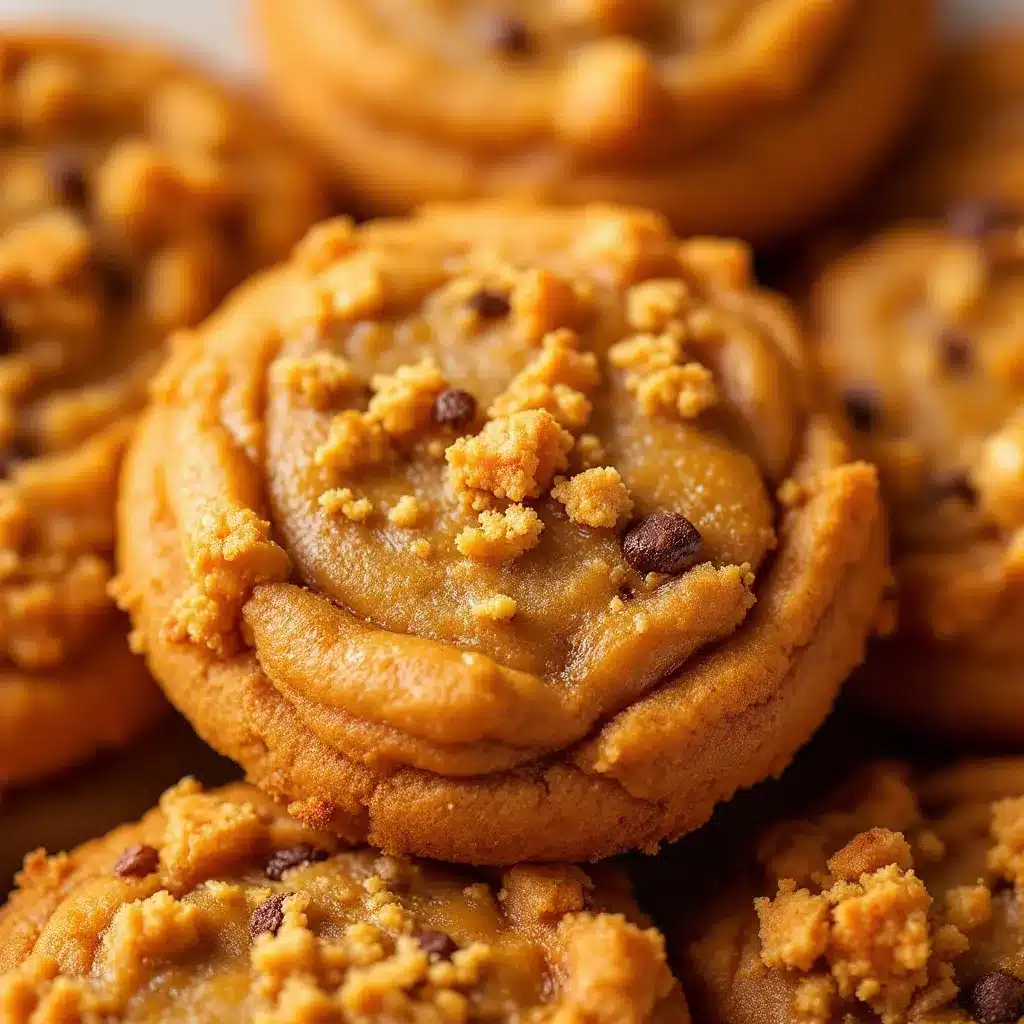
- ¾ cup pumpkin puree (not pumpkin pie filling—make sure it’s 100% pure pumpkin. I prefer Libby’s for consistent texture)
- ¼ cup brown sugar, packed (light or dark works, dark gives a deeper molasses flavor)
- 1 large egg
- ¼ cup heavy cream (or half-and-half if that’s what you have)
- 1 teaspoon pumpkin pie spice (or make your own: ½ tsp cinnamon, ¼ tsp ginger, ⅛ tsp nutmeg, pinch of cloves)
- ¼ teaspoon cinnamon (extra, because why not)
- Pinch of salt
For Assembly and Topping
- Flour for dusting
- 1 egg white, beaten (for brushing the crust edges)
- Whipped cream or powdered sugar for serving (optional, but highly recommended)
A few notes on ingredients: I’ve tried this recipe with whole wheat pastry flour, and it works okay but the crust is a bit less tender. Stick with all-purpose for the best texture. For the pumpkin puree, don’t use the leftover pumpkin from a can that’s been sitting in the fridge for a week—it gets watery. Open a fresh can or freeze the remainder for another use. If you’re dairy-free, you can substitute cold coconut oil for the butter and full-fat coconut milk for the heavy cream, but the flavor will be slightly different. I’ve tested it, and it’s still good, just not quite as rich.
Equipment Needed
You don’t need a ton of fancy equipment for these cookies, which is part of why I love this recipe. Here’s what you’ll need:
- Mini muffin tin (the 24-cup size is perfect—you’ll get about 24 cookies from this recipe)
- Food processor or pastry cutter (for cutting the butter into the flour. A food processor makes it faster, but a pastry cutter and a bowl work just fine)
- Rolling pin
- 2-inch round cookie cutter (or a small glass with a 2-inch diameter rim)
- Small bowl and whisk (for the filling)
- Cooling rack
- Parchment paper
If you don’t have a mini muffin tin, you can use a regular muffin tin and make bigger cookies—just adjust the baking time by about 5-7 minutes. I’ve also used a silicone mini muffin pan, and it worked great; the cookies popped right out. For the cookie cutter, I’ve used the rim of a shot glass in a pinch, and it worked perfectly. Don’t stress about having the exact tools—baking is flexible.
One tip: if you’re using a metal mini muffin tin, make sure it’s a non-stick one, or grease it really well. The first time I made these, I used an old tin that was past its prime, and I spent fifteen minutes coaxing cookies out with a butter knife. Not fun. A quick spray of non-stick baking spray with flour makes a world of difference.
Preparation Method
Alright, let’s get to the good part. I’m going to walk you through this step by step, with all the little details I wish someone had told me the first time I made these.
Step 1: Make the Crust Dough
In a food processor, pulse together the flour, sugar, and salt until combined. Add the cold butter cubes and pulse about 10-12 times, until the mixture looks like coarse meal with some pea-sized butter pieces still visible. If you’re doing this by hand, use a pastry cutter or two knives to cut the butter into the flour until you get that same texture.
In a small bowl, whisk the egg yolk and vanilla together. Add this to the flour mixture and pulse (or stir) just until the dough starts to come together. It should look shaggy and hold together when you squeeze a bit in your hand. If it seems too dry, add a teaspoon of ice water. If it’s too wet, add a tablespoon of flour.
Turn the dough out onto a lightly floured surface, gather it into a ball, and flatten it into a disk. Wrap it in plastic wrap and refrigerate for at least 30 minutes. This is important—the dough needs to chill so the butter firms up again, which gives you that flaky texture. I’ve skipped this step before, and the crust was tough. Don’t be me.
Step 2: Make the Pumpkin Filling
While the dough chills, make the filling. In a medium bowl, whisk together the pumpkin puree, brown sugar, egg, heavy cream, pumpkin pie spice, cinnamon, and salt until smooth. It should look like a thick, creamy custard. Taste it—yes, you can taste raw filling, it’s fine—and adjust the spices if you want more warmth. I usually add an extra pinch of cinnamon because I can’t help myself.
Set the filling aside. It will thicken slightly as it sits, which is good. If it seems too runny, you can add a teaspoon of cornstarch, but I’ve never needed to with this recipe.
Step 3: Roll and Cut the Dough
Preheat your oven to 350°F (175°C). Lightly grease your mini muffin tin with non-stick spray.
On a lightly floured surface, roll the chilled dough out to about ⅛-inch thickness. I like to roll between two sheets of parchment paper to avoid adding too much extra flour, which can make the dough dry. Use your 2-inch cookie cutter to cut out rounds. You’ll need about 24 rounds for the crusts.
Gently press each round into a cup of the mini muffin tin, shaping it to form a small crust that comes up the sides slightly. Don’t worry if they look a little uneven—they’ll bake up fine. If the dough cracks, just press it back together with your fingers. It’s very forgiving.
Step 4: Fill and Bake
Spoon about a teaspoon of the pumpkin filling into each crust. Don’t overfill—leave a little room at the top because the filling will puff up slightly as it bakes. I learned this the hard way when filling overflowed and made a sticky mess on my pan.
Brush the edges of the crust with the beaten egg white. This gives them a nice golden sheen and helps seal the crust. Bake for 15-18 minutes, until the crust is golden brown and the filling is set but still slightly jiggly in the center. They’ll firm up as they cool.
Let them cool in the pan for 5 minutes, then carefully transfer to a wire rack to cool completely. If any stick, run a thin knife around the edge to loosen them.
Step 5: Cool and Serve
Let the cookies cool completely before serving or packing. The filling will set as it cools, giving you that perfect creamy texture. If you try to eat them too soon, the filling will be runny and the crust might crumble. Patience, my friend.
Once cooled, you can dust them with powdered sugar, add a tiny dollop of whipped cream, or leave them as-is for packing into treat bags. They’re delicious at room temperature or slightly warm.
Cooking Tips & Techniques
I’ve made these easy mini pumpkin pie cookies for Halloween treat bags about a dozen times now, and I’ve picked up a few tricks along the way. Here are the ones that make the biggest difference.
Keep everything cold. The butter in the crust needs to stay cold until it hits the oven. If your kitchen is warm, pop the shaped crusts in the fridge for 10 minutes before filling and baking. This prevents the butter from melting too fast, which would make the crust tough instead of tender.
Don’t overwork the dough. When you’re mixing the crust, stop as soon as it comes together. Overmixing develops gluten, and gluten makes cookies tough. You want these to be tender and crumbly, not chewy.
Use a cookie scoop for the filling. A small 1-teaspoon cookie scoop makes filling the crusts so much faster and neater than using a spoon. Less mess, more consistent portions.
Watch the edges. The crust can go from golden to burnt pretty quickly. I start checking at 15 minutes and rotate the pan if the ones in the back are browning faster. Every oven is different, so trust your eyes more than the timer.
Let them cool completely. I know it’s hard to wait, but these cookies really do need to cool fully before you move them. The filling sets as it cools, and moving them too soon can cause the crust to break. I lost three cookies to impatience on my second batch. It was a sad day.
One mistake I made early on was using pumpkin pie filling instead of pure pumpkin puree. The pie filling has added sugar and spices, and the texture was way too sweet and gloopy. Stick with pure pumpkin puree—you control the sweetness and spice level.
Variations & Adaptations
One of the best things about this recipe is how easy it is to tweak. Here are some variations I’ve tried and loved.
Gluten-Free Version
Swap the all-purpose flour with a 1:1 gluten-free baking flour blend (I like King Arthur’s Measure for Measure). The crust will be a bit more delicate, so handle it gently, but the flavor is still spot-on. I made these for a friend with celiac disease, and she said they were better than the gluten-full version. High praise.
Dairy-Free Version
Use cold coconut oil or vegan butter in place of the butter, and substitute the heavy cream with full-fat coconut milk or oat cream. The flavor will be slightly different—coconut oil adds a subtle coconut note—but they’re still delicious. I’ve made these for a dairy-free Halloween party, and they disappeared just as fast as the regular ones.
Chocolate Drizzle
For a more decadent treat, melt some dark chocolate and drizzle it over the cooled cookies. The chocolate pairs beautifully with the pumpkin and spices. I did this for a Halloween potluck, and people went crazy for them. Just let the chocolate set before packing them into treat bags.
Savory Version
Okay, this one’s a little out there, but hear me out. Reduce the sugar in the crust to 1 tablespoon, skip the cinnamon and nutmeg in the filling, and add a pinch of black pepper and sage instead. Fill with a mixture of pumpkin, cream cheese, and parmesan. Bake as directed. They’re like tiny pumpkin tarts, and they’re amazing with a glass of wine. I served these at a fall dinner party, and they were the surprise hit of the night.
Mini Pumpkin Pie Bites with Graham Cracker Crust
If you want to skip the from-scratch crust, you can use a graham cracker crust instead. Mix 1 cup graham cracker crumbs with ¼ cup melted butter and 2 tablespoons sugar. Press into the mini muffin tin and pre-bake for 5 minutes before adding the filling. It’s quicker and gives a different texture—crunchier, sweeter, and totally delicious. I’ve done this when I was short on time, and no one complained.
Serving & Storage Suggestions
These cookies are versatile when it comes to serving. Here’s how I handle them.
Serving Temperature: They’re best at room temperature or slightly warm. If you’re serving them at a party, you can make them a day ahead and set them out on a platter. A light dusting of powdered sugar right before serving makes them look extra special.
For Halloween Treat Bags: Let the cookies cool completely, then place them in small cellophane bags or treat bags. Tie with a ribbon or twist tie. They’ll stay fresh for 2-3 days at room temperature, which is perfect for handing out on Halloween night. I usually make mine the day before and store them in an airtight container until it’s time to pack the bags.
Complementary Dishes: These pair beautifully with a warm cup of apple cider or a pumpkin spice latte. For a dessert spread, serve them alongside some peanut butter cup brownie cheesecake bars for a fun contrast of flavors. They also go great with a scoop of vanilla ice cream or a dollop of fresh whipped cream.
Storage: Store in an airtight container at room temperature for up to 3 days. If you need to stack them, place a sheet of parchment paper between layers to prevent sticking. Do not refrigerate—the fridge makes the crust go soft.
Freezing: These freeze beautifully. Place the cooled cookies on a baking sheet and freeze until solid (about 1 hour), then transfer to a freezer-safe bag or container. They’ll keep for up to 1 month. Thaw at room temperature for about 30 minutes before serving. The filling might be slightly softer after freezing, but the flavor is still great.
Reheating: If you want to serve them warm, pop them in a 300°F oven for 5-7 minutes. Don’t use the microwave—it makes the crust soggy. I learned that one the hard way.
Nutritional Information & Benefits
Here’s the approximate nutritional breakdown for one cookie (based on 24 cookies):
- Calories: 85
- Fat: 5g
- Carbohydrates: 9g
- Protein: 1.5g
- Fiber: 0.5g
- Sugar: 5g
These numbers are estimates and will vary based on your specific ingredients and portion sizes. The good news is that these cookies are relatively low in sugar compared to many Halloween treats, and they have a bit of fiber and vitamin A from the pumpkin. Pumpkin is packed with beta-carotene, which your body converts to vitamin A—great for eye health and immune function.
If you’re watching your sugar intake, you can reduce the brown sugar in the filling to 3 tablespoons without sacrificing too much sweetness. I’ve done this, and they’re still plenty sweet for my taste. For a lower-carb option, you can use a sugar substitute like monk fruit sweetener in both the crust and filling, but the texture will be slightly different.
These cookies are vegetarian and can easily be made gluten-free or dairy-free as noted in the variations section. They contain eggs and dairy in the standard version, so keep that in mind if you’re baking for someone with allergies.
Conclusion
These easy mini pumpkin pie cookies for Halloween treat bags have become a staple in my fall baking rotation, and I think they deserve a spot in yours too. They’re simple enough to make on a weeknight, but they look and taste like you put in way more effort than you actually did. That’s my favorite kind of recipe—the one that makes you look like a hero without the stress.
What I love most about these cookies is how they bring people together. My kids get so excited when they see me pulling out the mini muffin tin, because they know what’s coming. And when I hand out treat bags on Halloween night, I love seeing the parents’ faces light up when they realize there’s something homemade in there. It’s a small gesture, but it means a lot.
I’d love to hear how these turn out for you. Did you try any of the variations? Did your kids help make them? Did you pack them in treat bags or serve them at a party? Drop a comment below and let me know. And if you’re looking for more fall baking inspiration, check out my blueberry lavender lemonade for a refreshing non-alcoholic drink to go alongside these cookies, or try my red, white, and blue M&M cookies for another fun treat bag idea. Happy baking, and happy Halloween!
Frequently Asked Questions
Can I use canned pumpkin pie filling instead of pure pumpkin puree?
I wouldn’t recommend it. Pumpkin pie filling has added sugar and spices, which will make the filling way too sweet and throw off the texture. Stick with 100% pure pumpkin puree so you can control the sweetness and spice level yourself.
How far in advance can I make these cookies?
You can make them up to 3 days ahead and store them in an airtight container at room temperature. They also freeze well for up to a month. Just thaw at room temperature before serving or packing into treat bags.
Can I make these without a mini muffin tin?
Yes! You can use a regular muffin tin to make larger cookies—just adjust the baking time by about 5-7 minutes. You’ll get fewer cookies, but they’ll be bigger and just as delicious. You can also shape the crusts by hand into small tartlet shapes on a baking sheet, but they won’t hold their shape as well.
My crust keeps cracking when I press it into the muffin tin. What am I doing wrong?
This usually happens when the dough is too cold or too dry. Let it sit at room temperature for 5 minutes before rolling. If it’s still cracking, you can add a teaspoon of water to the dough and mix gently. Also, make sure you’re not over-flouring your work surface—too much extra flour makes the dough dry and brittle.
Can I double this recipe for a larger batch?
Absolutely! This recipe doubles beautifully. Just make sure you have enough mini muffin tins or work in batches. The dough can be made ahead and refrigerated for up to 2 days, so you can spread the work out over a couple of days if you’re making a big batch for a party or Halloween treat bags.
Pin This Recipe!
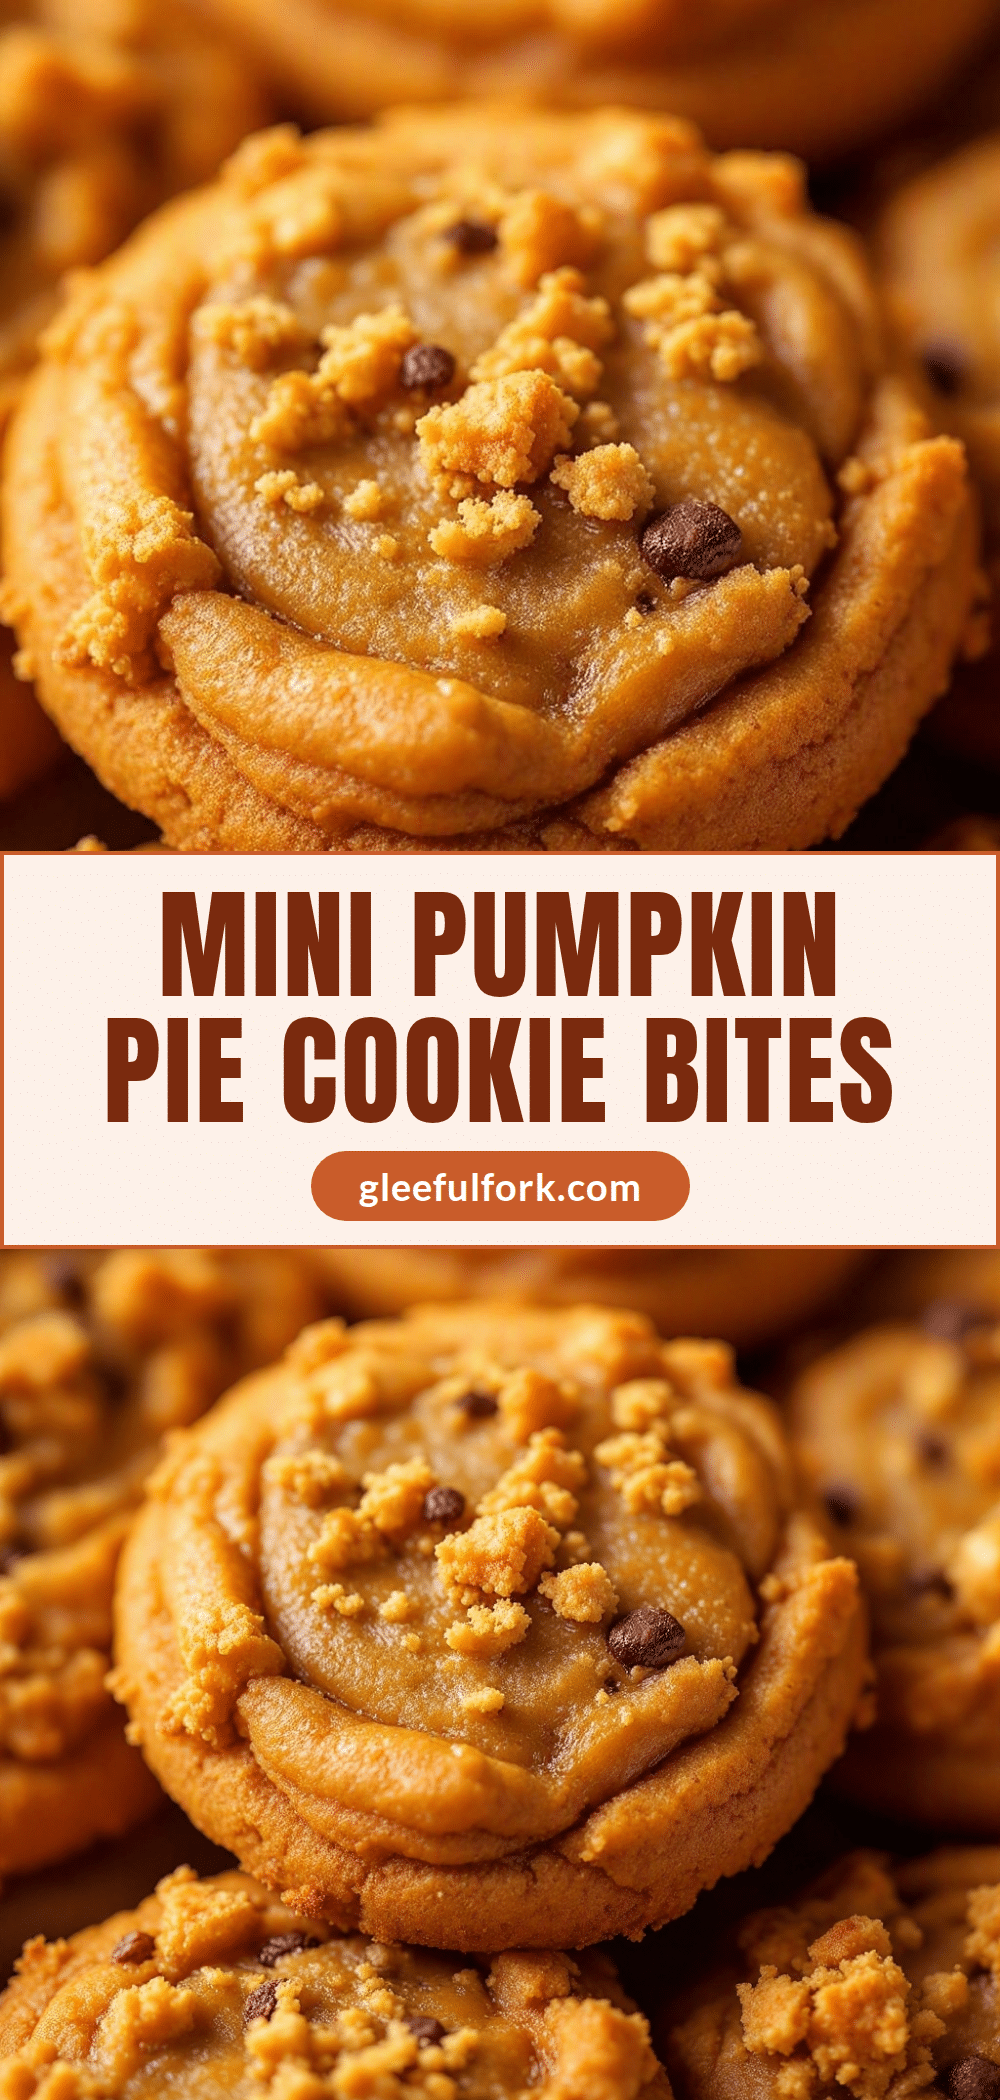
Easy Mini Pumpkin Pie Cookies for Halloween Treat Bags
These easy mini pumpkin pie cookies are the perfect Halloween treat bag filler. They have a buttery crust and a creamy pumpkin filling, and they hold up well without refrigeration.
- Prep Time: 30 minutes
- Cook Time: 18 minutes
- Total Time: 48 minutes
- Yield: 24 cookies 1x
- Category: Dessert
- Cuisine: American
Ingredients
- 1 ½ cups all-purpose flour
- ½ cup unsalted butter, cold and cut into small cubes
- ¼ cup granulated sugar
- 1 large egg yolk
- 1 teaspoon vanilla extract
- ¼ teaspoon salt
- ¾ cup pumpkin puree
- ¼ cup brown sugar, packed
- 1 large egg
- ¼ cup heavy cream
- 1 teaspoon pumpkin pie spice
- ¼ teaspoon cinnamon
- Pinch of salt
- Flour for dusting
- 1 egg white, beaten
- Whipped cream or powdered sugar for serving (optional)
Instructions
- Make the crust dough: In a food processor, pulse together flour, sugar, and salt. Add cold butter cubes and pulse until mixture resembles coarse meal with pea-sized butter pieces. Whisk egg yolk and vanilla together, add to flour mixture, and pulse until dough starts to come together. Turn out onto a floured surface, form into a disk, wrap in plastic, and refrigerate for at least 30 minutes.
- Make the pumpkin filling: In a medium bowl, whisk together pumpkin puree, brown sugar, egg, heavy cream, pumpkin pie spice, cinnamon, and salt until smooth. Set aside.
- Preheat oven to 350°F (175°C). Lightly grease a mini muffin tin.
- Roll the chilled dough on a floured surface to ⅛-inch thickness. Cut out rounds with a 2-inch cookie cutter. Press each round into a cup of the mini muffin tin to form a small crust.
- Spoon about 1 teaspoon of pumpkin filling into each crust. Brush crust edges with beaten egg white.
- Bake for 15-18 minutes, until crust is golden and filling is set but slightly jiggly. Cool in pan for 5 minutes, then transfer to a wire rack to cool completely.
- Cool completely before serving or packing. Dust with powdered sugar or add whipped cream if desired.
Notes
Keep butter cold for flaky crust. Don’t overwork the dough. Let cookies cool completely before moving. Use pure pumpkin puree, not pumpkin pie filling. Can be made gluten-free or dairy-free with substitutions.
Nutrition
- Serving Size: 1 cookie
- Calories: 85
- Sugar: 5
- Sodium: 60
- Fat: 5
- Saturated Fat: 3
- Carbohydrates: 9
- Fiber: 0.5
- Protein: 1.5
Keywords: mini pumpkin pie cookies, Halloween treat bags, pumpkin cookies, fall baking, easy pumpkin recipe


