Love this? Save it for later!
Share the inspiration with your friends
I swore I’d never make homemade ice cream without a machine. Honestly, it felt like one of those kitchen lies people tell you—”Oh, it’s easy!”—right before you end up with a freezer full of icy crystals and regret. For years, I stuck to the store-bought stuff, perfectly content with my pint of premium vanilla. Then last July, during a heatwave that made my kitchen feel like a sauna, my neighbor Carla showed up at my door with a container of homemade salted caramel ice cream. She’d made it in her regular mixing bowl. No churn. No special equipment. I took one spoonful, let it melt on my tongue, and felt genuinely annoyed. She’d been holding out on me.
That first bite had this unexpected texture—creamy, almost velvety, with ribbons of caramel that were somehow both sticky and smooth. And the salt? It hit you right at the end, like a little wink. I asked for the recipe, and she shrugged and said, “It’s just cream, condensed milk, and caramel. You probably have everything.” She was right. I had everything except the confidence to try it. So I did. I made a batch that same week, and let me tell you, I messed up the caramel the first time—burnt it bad, filled my whole apartment with a smell like regret. But the second batch? That one worked. And I’ve been making it ever since.
This recipe is the one that changed my mind about homemade ice cream. It’s the one I bring to every summer barbecue, the one my friends text me about in June. If you’ve ever thought you needed a fancy machine to make great ice cream at home—honestly, I get it. I thought the same thing. But this no-churn salted caramel situation is about to prove you wrong, in the best possible way.
Why You’ll Love This Recipe
This isn’t just another ice cream recipe. It’s the kind that makes you close your eyes after the first bite. Here’s why it works:
- No Machine Needed : You don’t need an ice cream maker, a churn, or any fancy gadget. Just a mixing bowl and a whisk. That’s it.
- 5 Minutes of Prep : Seriously. The active time here is shorter than most store runs. Whip the cream, fold in the condensed milk and caramel, and freeze.
- Simple Pantry Ingredients : Heavy cream, sweetened condensed milk, sugar, butter, salt, and vanilla. You probably have most of these right now.
- Perfect for Summer Gatherings : Bring this to a cookout, a birthday party, or just eat it on your couch. It’s a guaranteed crowd-pleaser.
- Unbelievably Creamy Texture : No ice crystals. No icy chunks. Just smooth, scoopable, dreamy ice cream that rivals any premium brand.
What makes this recipe different from the rest? It’s the method. Most no-churn recipes rely on whipped cream and condensed milk, which is fine. But I add a homemade salted caramel sauce that gets swirled in at the very end. That caramel doesn’t just sit on top—it weaves through the entire batch, creating little pockets of salty-sweet goodness in every single scoop. It’s a small tweak, but it changes everything.
I’ve tested this recipe at least a dozen times. I’ve tried different ratios of salt, different types of cream, even different brands of condensed milk. This version is the one that works every single time. It’s comfort food reimagined—cool, creamy, and deeply satisfying, without the hassle.
What Ingredients You Will Need
This recipe uses simple, wholesome ingredients to deliver bold flavor and a silky texture without any fuss. Most of these are pantry staples, which is exactly why I love it.
For the Salted Caramel Sauce
- 1 cup (200g) granulated sugar : Regular white sugar works best. Don’t use brown sugar here—it changes the flavor and texture of the caramel.
- 6 tablespoons (85g) unsalted butter : Cut into small pieces. I use Kerrygold for its rich, creamy taste, but any good unsalted butter works.
- 1/2 cup (120ml) heavy cream : Room temperature is key here. Cold cream will seize the caramel and make it grainy.
- 1 teaspoon flaky sea salt : I love Maldon for its delicate crunch, but any flaky salt works. Avoid table salt—it’s too fine and can make the caramel taste harsh.
- 1 teaspoon vanilla extract : Pure vanilla extract, not imitation. It adds warmth and depth to the caramel.
For the Ice Cream Base
- 2 cups (480ml) heavy cream : Cold from the fridge. This is what gives the ice cream its airy, creamy texture. Don’t substitute with half-and-half or milk—it won’t whip properly.
- 1 can (14 ounces / 397g) sweetened condensed milk : This is non-negotiable. It provides the sweetness and structure that makes no-churn ice cream possible. I recommend Eagle Brand or Borden.
- 1 teaspoon vanilla extract : Adds a classic vanilla backdrop that lets the caramel shine.
- Pinch of salt : Just a tiny pinch to balance the sweetness.
Ingredient Selection Tips : When you’re buying heavy cream, look for one with at least 36% milk fat. Higher fat content means a richer, creamier final texture. For the condensed milk, check the label—you want the full-fat version, not the low-fat or fat-free kind. Trust me on this one. The sugar content in the full-fat version is what helps prevent ice crystals from forming.
Substitution Guidance : If you’re dairy-free, you can use full-fat coconut cream (chilled) in place of the heavy cream, and a dairy-free sweetened condensed milk alternative. The texture will be slightly different—a bit more coconutty—but it’s still delicious. For a vegan version, use coconut cream and a vegan butter in the caramel.
Equipment Needed
The beauty of this recipe is that you probably already own everything you need. No fancy gadgets required.
- Medium saucepan : For making the caramel. A heavy-bottomed pan is best—it distributes heat evenly and prevents hot spots that can burn the sugar.
- Large mixing bowl : For whipping the cream. A glass or stainless steel bowl works well.
- Hand mixer or stand mixer : You can whip the cream by hand with a whisk, but it’ll take a solid 5-7 minutes of vigorous whisking. A hand mixer makes it much easier.
- Rubber spatula : For folding everything together gently.
- 8×4-inch loaf pan or freezer-safe container : For freezing the ice cream. A metal loaf pan works best because it conducts cold more efficiently, but any container will do.
- Parchment paper : Optional, but it makes removing the ice cream much easier.
Budget-Friendly Options : If you don’t have a hand mixer, you can use a whisk and a lot of elbow grease. Alternatively, you can whip the cream in a stand mixer if you have one. For the loaf pan, a standard glass baking dish works fine—just note that the ice cream might freeze a bit slower.
Personal Experience : I’ve made this recipe with both a hand mixer and a whisk. The hand mixer is faster, but honestly, whisking by hand is kind of meditative. Plus, it’s a great arm workout. Just don’t try it if you’re in a hurry.
Preparation Method
This recipe comes together in about 5 minutes of active time. The hardest part is waiting for it to freeze.
Step 1: Make the Salted Caramel Sauce
- Place the sugar in a medium, heavy-bottomed saucepan over medium heat. Stir occasionally with a dry whisk or spatula as the sugar begins to melt. It will clump at first—that’s normal. Keep stirring until the sugar melts completely and turns a deep amber color, about 6 to 8 minutes. Watch it carefully; caramel can go from perfect to burnt in seconds.
- Once the sugar is fully melted and amber-colored, remove the pan from the heat. Add the butter pieces one at a time, whisking constantly. The mixture will bubble up vigorously—don’t panic. Keep whisking until the butter is fully incorporated and the mixture is smooth.
- Slowly pour in the heavy cream while whisking continuously. Again, it will bubble up. Keep whisking until the sauce is smooth and glossy.
- Stir in the flaky sea salt and vanilla extract. Let the caramel cool for about 10 minutes at room temperature, then transfer it to a heat-safe jar or bowl. Let it cool completely before using. You can make this a day ahead and store it in the fridge.
Pro Tip : If your caramel seizes up or gets grainy, don’t throw it out. Gently reheat it over low heat while whisking in a tablespoon of warm water. It should smooth out.
Step 2: Whip the Cream
- In a large mixing bowl, pour the cold heavy cream. Using a hand mixer or stand mixer fitted with the whisk attachment, beat the cream on medium-high speed until stiff peaks form. This takes about 2 to 3 minutes with a mixer. You’ll know it’s ready when you lift the beaters and the cream holds its shape without drooping.
- Be careful not to over-whip. If the cream starts to look grainy or separates into butter, you’ve gone too far. Stop at stiff peaks—the cream should be smooth and billowy.
Step 3: Combine the Base
- In a separate small bowl, whisk together the sweetened condensed milk, vanilla extract, and a pinch of salt until smooth.
- Pour the condensed milk mixture into the whipped cream. Using a rubber spatula, gently fold everything together. Fold from the bottom up, turning the bowl as you go, until no white streaks remain. Be gentle—you don’t want to deflate all that air you just whipped in.
Step 4: Swirl in the Caramel
- Pour about one-third of the ice cream base into your loaf pan. Drizzle about one-third of the cooled salted caramel sauce over the top. Use a knife or skewer to gently swirl the caramel into the base—don’t overmix; you want distinct ribbons of caramel.
- Repeat with another layer of base, another layer of caramel, and swirl again. Finish with the remaining base and caramel.
- If you prefer a more even distribution of caramel, you can fold the caramel directly into the entire base before freezing. But I prefer the swirled method—it creates those beautiful pockets of caramel that are so satisfying to find.
Step 5: Freeze
- Cover the loaf pan with plastic wrap or a tight-fitting lid. Place it in the freezer for at least 6 hours, but overnight is best. The ice cream needs time to freeze solid and develop its creamy texture.
- Once frozen, let the ice cream sit at room temperature for 5 to 10 minutes before scooping. This softens it just enough for easy scooping.
Cooking Tips & Techniques
I’ve made this recipe more times than I can count, and I’ve learned a few things along the way. Here are the tips that make the biggest difference.
Don’t skip the caramel cooling step. If you add warm caramel to the whipped cream base, it will melt the cream and deflate all that air. You’ll end up with a dense, icy mess instead of light, creamy ice cream. Let the caramel cool completely—at least to room temperature—before swirling it in.
Use very cold cream. The colder the cream, the faster it whips and the more volume you get. I stick my bowl and beaters in the freezer for 10 minutes before starting. It makes a noticeable difference.
Watch the caramel like a hawk. Sugar goes from melted to burnt in about 30 seconds. The first time I made this, I walked away to answer a text, and my caramel turned into a black, bitter mess. Don’t be me. Stay at the stove, and swirl the pan occasionally instead of stirring constantly once the sugar starts to melt.
Fold, don’t stir. When combining the whipped cream and condensed milk, use a gentle folding motion. Stirring aggressively will deflate the cream and make the ice cream dense. Think of it like folding in egg whites—slow, gentle, patient.
Let it sit before scooping. This is the most common mistake people make. No-churn ice cream freezes harder than churned ice cream because it has less air incorporated. Let it sit on the counter for 5 to 10 minutes before you try to scoop. It’ll be much easier and you won’t break your spoon.
Variations & Adaptations
This recipe is incredibly versatile. Here are some of my favorite variations.
Chocolate Salted Caramel
Add 2 tablespoons of unsweetened cocoa powder to the condensed milk and whisk until smooth before folding into the whipped cream. The chocolate pairs beautifully with the salted caramel. I’ve made this version for chocolate lovers, and it disappears fast.
Vegan Coconut Caramel
Use full-fat coconut cream (chilled) in place of heavy cream, and a dairy-free sweetened condensed milk alternative. For the caramel, use vegan butter and coconut cream instead of heavy cream. The coconut flavor is subtle but lovely, and the texture is still incredibly creamy.
Boozy Bourbon Caramel
Add 2 tablespoons of bourbon to the caramel sauce after you remove it from the heat. The bourbon adds a warm, smoky depth that cuts through the sweetness. Plus, the alcohol helps keep the ice cream slightly softer, making it easier to scoop straight from the freezer.
Nutty Praline
Toast 1/2 cup of chopped pecans or walnuts in a dry skillet until fragrant, about 3 minutes. Let them cool, then fold them into the ice cream base along with the caramel. The crunch adds a lovely texture contrast.
Serving & Storage Suggestions
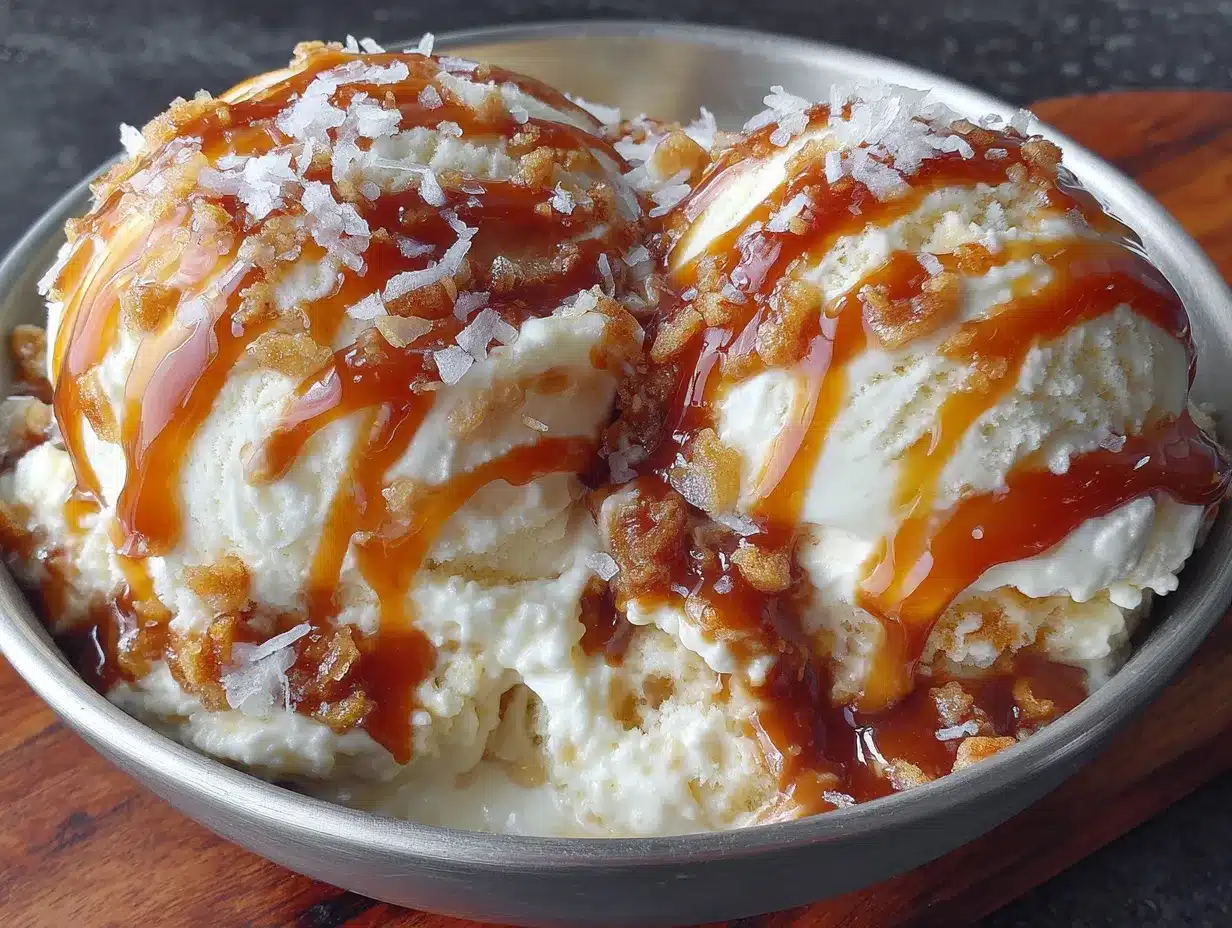
Serving : Scoop the ice cream into bowls or cones and serve immediately after the 5-minute softening rest. For a fancy touch, drizzle a little extra salted caramel sauce on top and sprinkle with a pinch of flaky sea salt. It looks gorgeous and tastes even better.
Storage : Keep the ice cream in a tightly sealed container in the freezer for up to 2 weeks. After that, it may start to develop ice crystals, though it’s still perfectly safe to eat. Press a piece of parchment paper directly onto the surface of the ice cream before sealing the container to prevent freezer burn.
Reheating : If the ice cream freezes too hard to scoop, let it sit at room temperature for 10 to 15 minutes. Alternatively, microwave the container on low power for 10 to 15 seconds just to soften the edges.
Flavor Development : The flavors actually deepen after a day or two in the freezer. The caramel becomes more pronounced, and the salt mellows slightly. It’s at its best about 24 hours after you make it.
Nutritional Information & Benefits
Here’s the honest truth: this is a treat. It’s not health food, and that’s okay. But let’s look at what you’re getting.
| Nutrient | Per Serving (1/2 cup) |
|---|---|
| Calories | 380 |
| Total Fat | 24g |
| Saturated Fat | 15g |
| Cholesterol | 85mg |
| Sodium | 220mg |
| Total Carbohydrates | 38g |
| Sugars | 35g |
| Protein | 4g |
Health Benefits : The heavy cream provides a good source of vitamin A and calcium. The butter in the caramel also contains small amounts of vitamins A, D, and E. And the sea salt? It’s a source of essential electrolytes, though you’d need to eat a lot of ice cream to make a difference. Let’s be real—this is about joy, not nutrition.
Dietary Considerations : This recipe is gluten-free and can be made vegetarian. For a lower-sugar version, you can use a sugar substitute in the caramel, but I haven’t tested it, so I can’t guarantee the results.
Conclusion
This easy no-churn salted caramel ice cream is proof that you don’t need fancy equipment or culinary school to make something genuinely impressive at home. It’s creamy, it’s indulgent, and it comes together in about 5 minutes of active work. The hardest part is waiting for it to freeze—and honestly, that’s a good problem to have.
I love this recipe because it’s forgiving. You can mess up the caramel, over-whip the cream, or get distracted by your phone, and it still turns out delicious. It’s the kind of recipe that builds confidence in the kitchen, one scoop at a time.
So go ahead. Grab a can of condensed milk and some heavy cream, and make this. Swirl in extra caramel if you’re feeling bold. Sprinkle on more salt if you’re a salt fiend. Make it your own. And when you take that first bite—the one where the caramel hits your tongue and the salt lingers on your lips—come back and tell me about it. I’d love to hear how it turned out.
Frequently Asked Questions
Can I use store-bought caramel sauce instead of making my own?
Absolutely. If you’re short on time, use a high-quality store-bought salted caramel sauce. Just make sure it’s thick and not too runny. Thin caramel sauces can sink to the bottom of the ice cream instead of creating those beautiful swirls.
Why did my ice cream turn out icy?
Ice crystals usually happen when the cream isn’t whipped enough or when the caramel was added while still warm. Make sure your cream reaches stiff peaks, and let the caramel cool completely before swirling it in. Also, make sure your freezer is set to 0°F (-18°C) or colder.
Can I make this without a hand mixer?
Yes. You can whip the cream by hand with a whisk. It’ll take about 5 to 7 minutes of vigorous whisking, but it works. Your arm might be sore, but the ice cream will be just as good.
How long does this ice cream last in the freezer?
It’s best within the first 2 weeks. After that, it may develop some ice crystals, but it’s still safe to eat. Just let it soften for a few extra minutes before scooping.
Can I double this recipe?
Yes. Simply double all the ingredients. Use a larger container for freezing, and expect the freezing time to increase by a few hours. A 9×13-inch baking dish works well for a double batch.
Pin This Recipe!
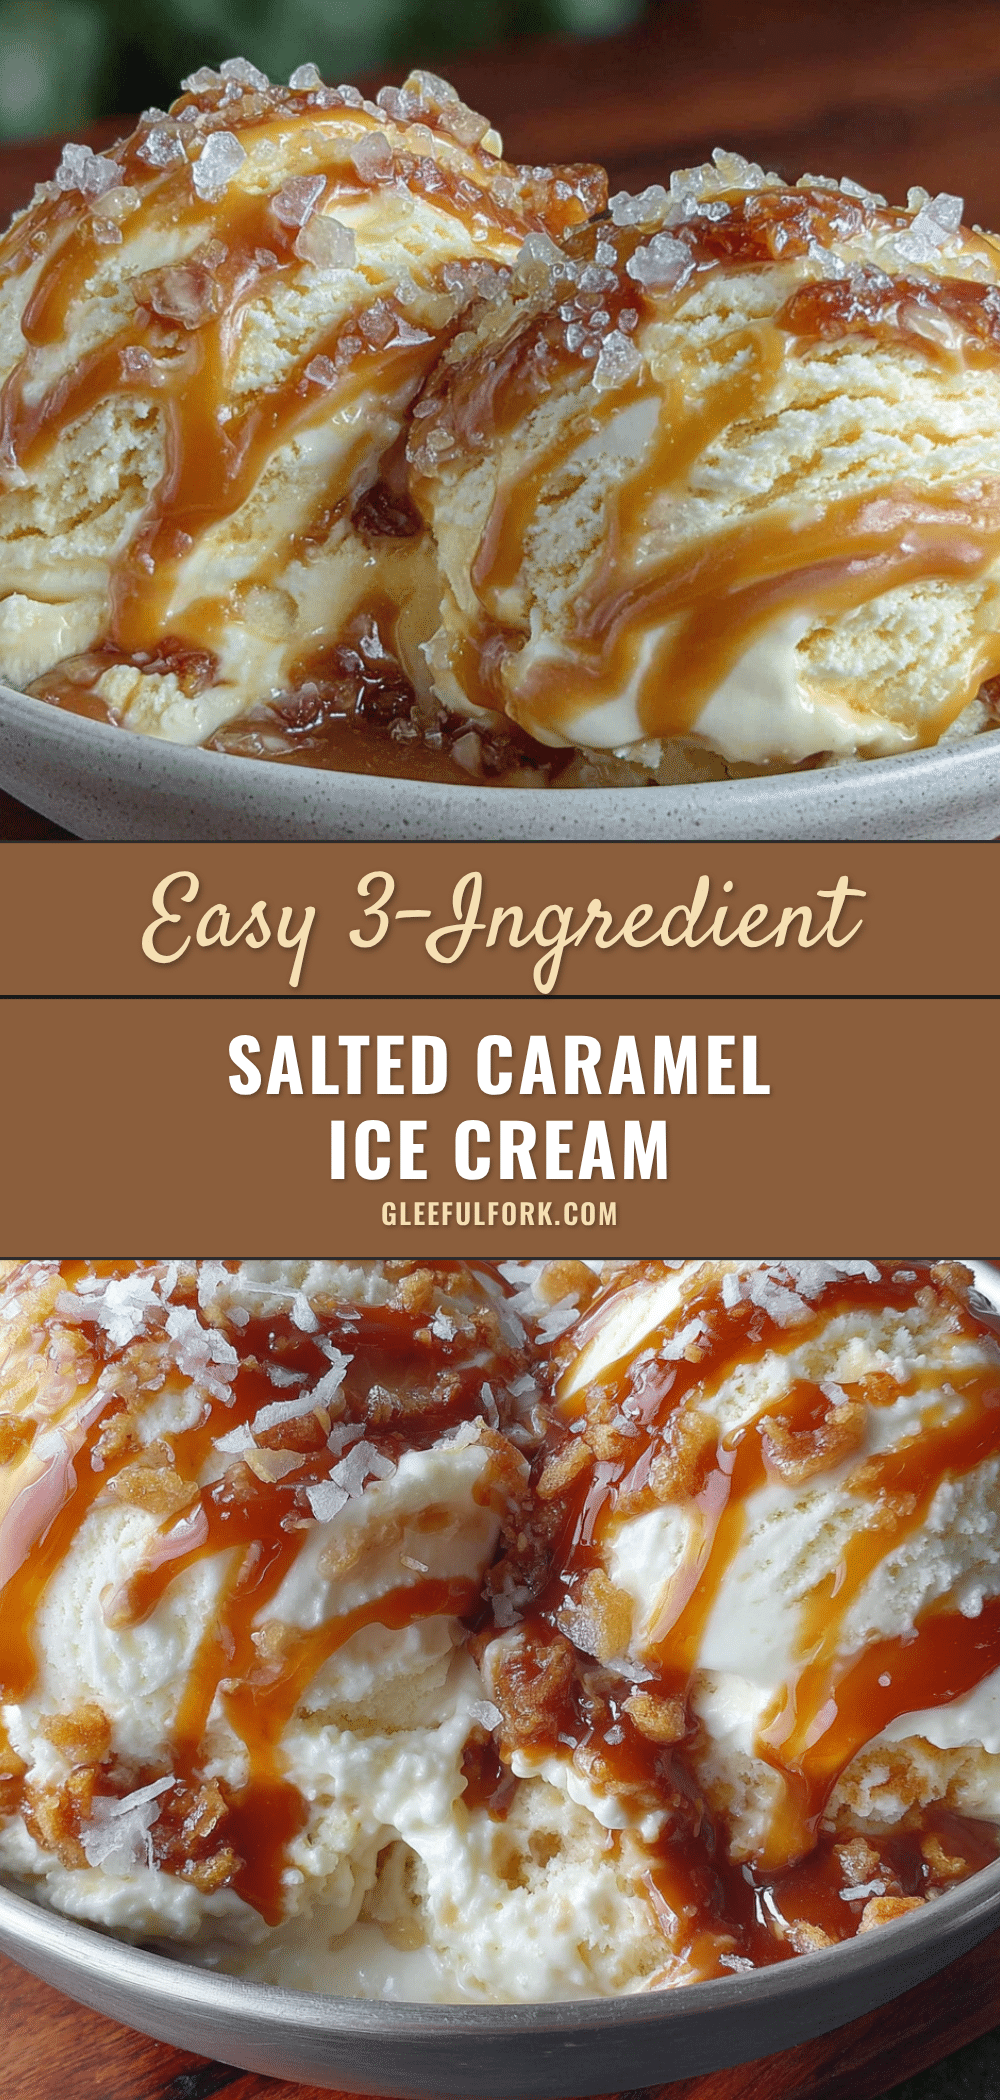
Easy No-Churn Salted Caramel Ice Cream
This no-churn salted caramel ice cream is incredibly creamy and requires no special equipment. With just 5 minutes of prep, you can create a velvety dessert with ribbons of homemade salted caramel in every scoop.
- Prep Time: 5 minutes
- Cook Time: 10 minutes
- Total Time: 6 hours 15 minutes (includes freezing time)
- Yield: 8 servings 1x
- Category: Dessert
- Cuisine: American
Ingredients
- 1 cup (200g) granulated sugar
- 6 tablespoons (85g) unsalted butter, cut into small pieces
- 1/2 cup (120ml) heavy cream, room temperature
- 1 teaspoon flaky sea salt
- 1 teaspoon vanilla extract
- 2 cups (480ml) heavy cream, cold
- 1 can (14 ounces / 397g) sweetened condensed milk
- 1 teaspoon vanilla extract
- Pinch of salt
Instructions
- Make the Salted Caramel Sauce: Place the sugar in a medium, heavy-bottomed saucepan over medium heat. Stir occasionally with a dry whisk or spatula as the sugar begins to melt. It will clump at first—that’s normal. Keep stirring until the sugar melts completely and turns a deep amber color, about 6 to 8 minutes. Watch it carefully; caramel can go from perfect to burnt in seconds.
- Once the sugar is fully melted and amber-colored, remove the pan from the heat. Add the butter pieces one at a time, whisking constantly. The mixture will bubble up vigorously—don’t panic. Keep whisking until the butter is fully incorporated and the mixture is smooth.
- Slowly pour in the heavy cream while whisking continuously. Again, it will bubble up. Keep whisking until the sauce is smooth and glossy.
- Stir in the flaky sea salt and vanilla extract. Let the caramel cool for about 10 minutes at room temperature, then transfer it to a heat-safe jar or bowl. Let it cool completely before using. You can make this a day ahead and store it in the fridge.
- Whip the Cream: In a large mixing bowl, pour the cold heavy cream. Using a hand mixer or stand mixer fitted with the whisk attachment, beat the cream on medium-high speed until stiff peaks form. This takes about 2 to 3 minutes with a mixer. You’ll know it’s ready when you lift the beaters and the cream holds its shape without drooping.
- Be careful not to over-whip. If the cream starts to look grainy or separates into butter, you’ve gone too far. Stop at stiff peaks—the cream should be smooth and billowy.
- Combine the Base: In a separate small bowl, whisk together the sweetened condensed milk, vanilla extract, and a pinch of salt until smooth.
- Pour the condensed milk mixture into the whipped cream. Using a rubber spatula, gently fold everything together. Fold from the bottom up, turning the bowl as you go, until no white streaks remain. Be gentle—you don’t want to deflate all that air you just whipped in.
- Swirl in the Caramel: Pour about one-third of the ice cream base into your loaf pan. Drizzle about one-third of the cooled salted caramel sauce over the top. Use a knife or skewer to gently swirl the caramel into the base—don’t overmix; you want distinct ribbons of caramel.
- Repeat with another layer of base, another layer of caramel, and swirl again. Finish with the remaining base and caramel.
- If you prefer a more even distribution of caramel, you can fold the caramel directly into the entire base before freezing. But I prefer the swirled method—it creates those beautiful pockets of caramel that are so satisfying to find.
- Freeze: Cover the loaf pan with plastic wrap or a tight-fitting lid. Place it in the freezer for at least 6 hours, but overnight is best. The ice cream needs time to freeze solid and develop its creamy texture.
- Once frozen, let the ice cream sit at room temperature for 5 to 10 minutes before scooping. This softens it just enough for easy scooping.
Notes
Don’t skip the caramel cooling step. If you add warm caramel to the whipped cream base, it will melt the cream and deflate all that air. Use very cold cream for best results. Watch the caramel like a hawk—sugar goes from melted to burnt in about 30 seconds. Fold, don’t stir, when combining the whipped cream and condensed milk. Let the ice cream sit before scooping for easier serving.
Nutrition
- Serving Size: 1/2 cup
- Calories: 380
- Sugar: 35
- Sodium: 220
- Fat: 24
- Saturated Fat: 15
- Carbohydrates: 38
- Protein: 4
Keywords: no-churn ice cream, salted caramel, homemade ice cream, easy dessert, summer dessert, no machine ice cream


