Love this? Save it for later!
Share the inspiration with your friends
The fall bake sale was in four hours and I had nothing. Not a single baked good. My son had reminded me the night before, and in the chaos of homework and bath time, I’d completely forgotten. Everyone else would be bringing elaborate pumpkin pies, homemade apple cider donuts, and those perfectly decorated sugar cookies that look like they belong in a bakery window. I had a bag of marshmallows, some butter, and a box of Rice Krispies that was probably meant for breakfast. And a bag of candy corn that my husband bought as a joke because he knows I secretly love them.
Honestly, I almost just sent my husband to the store for something—anything—but then I remembered this no-bake trick I’d seen years ago. I mean, how hard could it be to melt marshmallows and stir in cereal? The answer, as it turns out, is not hard at all. But the real magic happened when I spotted that bag of candy corn sitting on the counter. Let me tell you, I wasn’t aiming for anything special. I just wanted to show up with something edible so my kid wouldn’t be the one whose mom forgot.
So I threw the candy corn into the mix without much thought, pressed it all into a pan, and ran out the door. The treats were still slightly warm when I dropped them off at the bake sale table. And you know that feeling when you’re the one who brought the thing everyone fights over? Yeah. That happened. My simple, last-minute candy corn rice krispie treats sold out in twenty minutes, and three different parents asked me for the recipe. I stood there in my flour-dusted jeans, feeling like an accidental overachiever. It was honestly kind of hilarious. That’s why I keep making them—because sometimes the best recipes come from panic and a pantry that’s almost empty.
Why You’ll Love This Recipe
These easy no-bake candy corn rice krispie treats are the kind of recipe that makes you look like a fall baking superstar with almost zero effort. I’ve tested this about six times now (purely for quality control, you understand), and it works every single time. No oven, no complicated steps, no fancy ingredients.
- Quick & Easy: You can have these ready in under 20 minutes, start to finish. That includes the time it takes to melt the butter and marshmallows.
- Simple Ingredients: You probably already have butter, marshmallows, and Rice Krispies in your kitchen. The candy corn is the only special addition, and you can find it everywhere in the fall.
- Perfect for Fall Gatherings: These are great for Halloween parties, Thanksgiving dessert tables, bake sales, or just a cozy afternoon snack with hot apple cider.
- Crowd-Pleaser: Kids absolutely love the candy corn pieces, and adults appreciate the nostalgic flavor. I’ve never brought these anywhere without someone asking for the recipe.
- Unbelievably Delicious: The combination of gooey marshmallow, crunchy cereal, and sweet candy corn is pure comfort food. The candy corn gets slightly soft and chewy when mixed in, which is honestly the best part.
What makes this recipe different from the usual rice krispie treats is the candy corn. It adds a pop of color and a distinct fall flavor that plain treats just don’t have. Plus, there’s no baking involved, which means no waiting for the oven to preheat and no worrying about burning anything. This isn’t just another version of a classic dessert—it’s the easiest, most festive version you’ll find.
These treats are the kind that make you close your eyes after the first bite. They’re sweet, crunchy, and just a little bit messy—exactly what fall desserts should be. Perfect for when you want to impress people without any stress or when you need a quick dessert that feels special.
What Ingredients You Will Need
This recipe uses simple, pantry-friendly ingredients to create a festive fall dessert that comes together in minutes. Most of these items are probably already in your kitchen, except maybe the candy corn.
- 3 tablespoons unsalted butter (plus a little extra for greasing the pan) – I recommend using salted butter in a pinch, just reduce the added salt slightly. The butter adds richness and helps the marshmallows melt smoothly.
- 1 package (10 ounces) mini marshmallows (about 4 cups) – Mini marshmallows melt faster and more evenly than large ones. I’ve used both and the minis work best. Jet-Puffed is my go-to brand for consistent results.
- 6 cups Rice Krispies cereal (or any crispy rice cereal) – The classic brand gives the best crunch, but generic versions work fine too. Make sure your cereal is fresh and not stale for maximum crunch.
- 1 cup candy corn (plus extra for topping if desired) – Look for fresh candy corn that isn’t hard or stale. Brach’s is the most widely available brand and works perfectly. You can also use autumn mix or harvest blend candy corn for more color variety.
- 1/4 teaspoon vanilla extract (optional but recommended) – This adds a subtle warmth that balances the sweetness. Pure vanilla extract is best, but imitation works fine too.
- Pinch of salt (optional) – Just a tiny pinch helps cut through the sweetness and enhances all the other flavors. I add this every time now after accidentally skipping it once and noticing the difference.
Ingredient Tips: If you want a less sweet version, you can reduce the candy corn to 3/4 cup. For a more festive look, use the autumn mix candy corn that has the brown and orange tips. I’ve also tried this with the pumpkin-shaped candy corn, and it works great—just chop any larger pieces in half so they distribute evenly.
If you’re dairy-free, use a plant-based butter substitute. I’ve tested this with Earth Balance, and it works perfectly. The texture comes out slightly softer, so let the treats set in the fridge for an extra 10 minutes before cutting.
Equipment Needed
You don’t need any fancy kitchen tools for this recipe, which is one of the reasons I love it. Here’s what you’ll need:
- Large pot or saucepan (at least 4 quarts) – You need space to melt the marshmallows and stir in the cereal. A non-stick pot makes cleanup much easier, but any large pot works.
- Rubber spatula or wooden spoon – For stirring the marshmallow mixture. A silicone spatula is my preference because it doesn’t scratch your pot and scrapes the sides clean.
- 9×13-inch baking dish – This is the standard size for rice krispie treats. If you want thicker treats, use an 8×8-inch dish instead and increase the pressing time slightly.
- Parchment paper or wax paper – Lining the pan makes it incredibly easy to lift the treats out for cutting. I learned this the hard way after fighting with stuck treats for ten minutes.
- Measuring cups and spoons – For accurate measurements. Eyeballing works in a pinch, but measuring ensures consistent results.
- Sharp knife – For cutting clean squares. A serrated knife works best, but any sharp knife will do. Spray it with cooking spray to prevent sticking.
Budget-Friendly Alternatives: If you don’t have a 9×13 dish, use a rimmed baking sheet and press the mixture into a rectangle. No parchment paper? Grease the pan generously with butter or cooking spray. The treats will still come out fine—they might just need a little extra coaxing.
Preparation Method
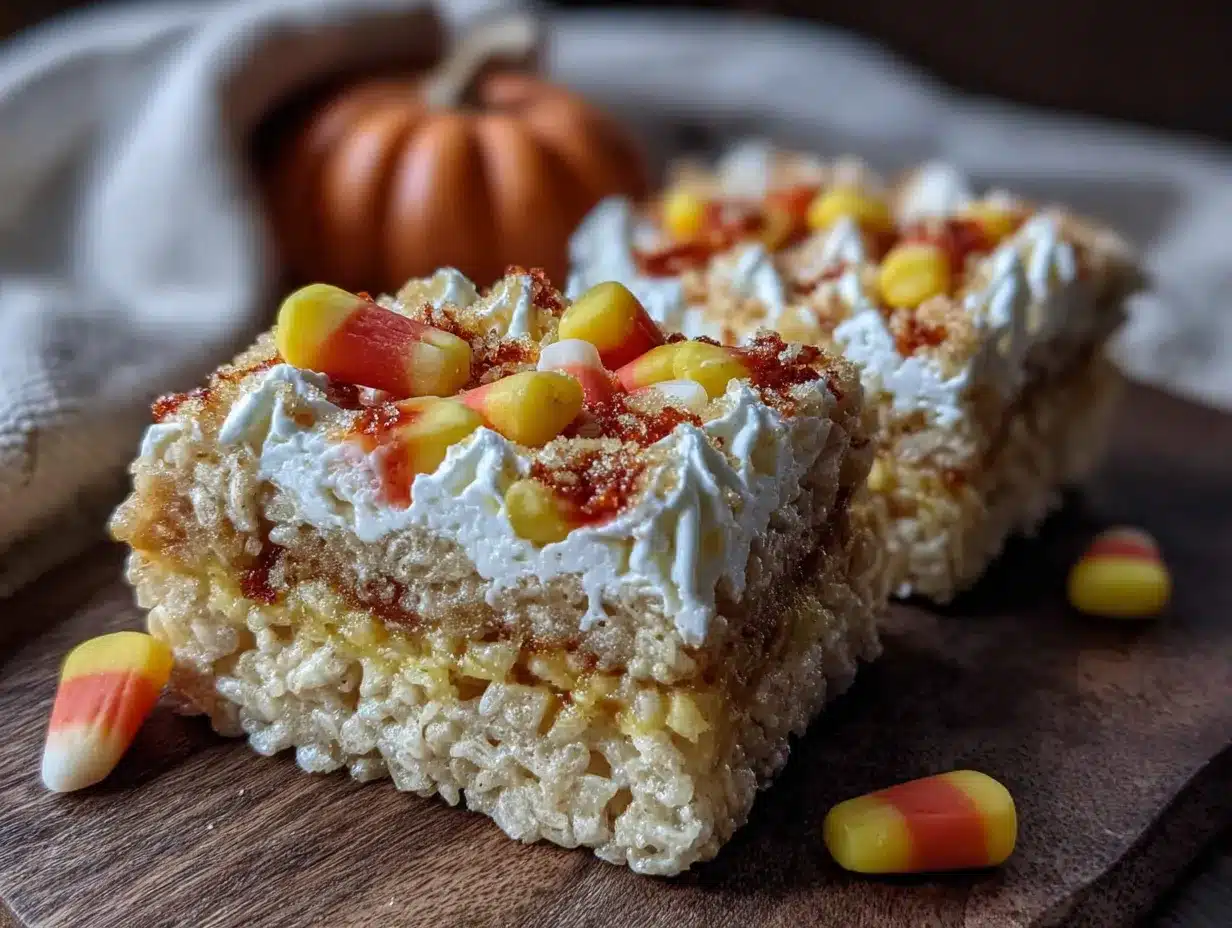
Follow these steps carefully, and you’ll have perfect candy corn rice krispie treats every time. I’ve included all the little details I wish someone had told me the first time I made these.
- Prepare your pan. Line a 9×13-inch baking dish with parchment paper, leaving some overhang on two sides. This creates handles that let you lift the whole block out later. Grease the parchment paper lightly with butter or cooking spray. If you don’t have parchment, just grease the pan generously.
- Melt the butter. Place the 3 tablespoons of unsalted butter in a large pot over low heat. Let it melt slowly, swirling the pan occasionally. Don’t rush this step—medium or high heat can burn the butter, which ruins the flavor. You want the butter fully melted but not bubbling or brown.
- Add the marshmallows. Pour the entire package of mini marshmallows into the pot with the melted butter. Stir constantly with your rubber spatula or wooden spoon. Keep the heat on low. The marshmallows will start to puff up and then collapse into a gooey mass. This takes about 3-4 minutes. Stir until the mixture is completely smooth with no lumps of unmelted marshmallow.
- Add vanilla and salt. If you’re using the vanilla extract and pinch of salt, stir them in now. The vanilla will sizzle slightly when it hits the hot marshmallow—that’s normal. Stir for about 30 seconds until everything is well combined.
- Remove from heat. Take the pot off the burner completely. This is important because if you leave it on the heat while adding the cereal, the mixture can scorch on the bottom.
- Add the cereal. Pour in the 6 cups of Rice Krispies cereal. Gently fold the cereal into the marshmallow mixture using a folding motion—lift from the bottom and fold over the top. Don’t stir too vigorously or you’ll crush the cereal into crumbs. Stop when the cereal is evenly coated with marshmallow, which should take about 1-2 minutes.
- Add the candy corn. Sprinkle the 1 cup of candy corn over the cereal mixture. Fold gently to distribute the candy corn throughout. You want the pieces evenly spread, not all clustered in one spot. The candy corn will soften slightly from the warmth of the marshmallow, which is exactly what you want.
- Press into the pan. Transfer the mixture to your prepared pan. Use a piece of wax paper or parchment paper lightly greased with cooking spray to press the mixture down evenly. Press firmly but don’t smash it flat—you want some texture. Make sure the mixture reaches all the corners and is level across the top. This step takes about 2-3 minutes.
- Add extra candy corn on top (optional). If you want a prettier presentation, press a few extra candy corn pieces into the top of the treats while they’re still warm. This makes them look more festive for parties or gifts.
- Let them set. Allow the treats to cool at room temperature for at least 30 minutes. If you’re in a hurry, pop the pan in the refrigerator for 15 minutes. The treats should be firm to the touch but not hard. Don’t skip this step—cutting them while they’re warm will give you a sticky, messy crumble instead of clean squares.
- Cut and serve. Lift the treats out of the pan using the parchment paper handles. Place them on a cutting board. Use a sharp knife to cut into squares or rectangles. I usually get 12 large squares or 24 smaller ones. For clean cuts, wipe the knife clean between cuts and spray it with cooking spray if the marshmallow starts sticking.
Sensory Cues: When the marshmallows are fully melted, the mixture should look glossy and smooth, not grainy or separated. When you fold in the cereal, you should hear a slight crackling sound. The finished treats should feel firm but slightly springy when you press on them. If they feel rock hard, you pressed them too firmly. If they’re falling apart, you didn’t press enough.
Cooking Tips & Techniques
After making these treats more times than I care to admit, I’ve learned a few things that make a real difference. Here are my best tips:
The Low and Slow Rule: Always melt the butter and marshmallows over low heat. I know it’s tempting to crank up the heat to speed things up, but I’ve burned more batches that way than I’d like to admit. Low heat gives you a smooth, creamy marshmallow base that coats the cereal perfectly. High heat makes the marshmallow seize up and turn grainy.
Don’t Overmix the Cereal: When you add the Rice Krispies, fold gently and stop as soon as everything is coated. Overmixing crushes the cereal into tiny pieces, which gives you dense, hard treats instead of light, crunchy ones. I learned this the hard way when I made a batch that felt like I was eating cardboard.
Wet Your Hands (or Use Wax Paper): Pressing the mixture into the pan is the messiest part. The marshmallow sticks to everything. Use a piece of wax paper or parchment paper lightly greased with cooking spray to press it down. If you don’t have paper, wet your hands slightly with cold water and press gently. The water creates a barrier between your skin and the sticky mixture.
Room Temperature is Best for Cutting: I know it’s hard to wait, but cutting these treats when they’re completely cool gives you the cleanest edges. If you cut them while they’re still warm, the marshmallow stretches and pulls, leaving you with ragged edges. Patience pays off here.
Use Fresh Candy Corn: Stale candy corn gets hard and dry, which ruins the texture of the treats. Check the expiration date on the bag before you buy. Fresh candy corn should be soft and slightly chewy when you bite into it. If it cracks or crumbles, it’s too old.
Timing Strategy: These treats come together so quickly that I recommend having everything measured and ready before you start. The marshmallow mixture cools fast, so you need to work efficiently once you take the pot off the heat. I call this the “mise en place” approach, which is just a fancy way of saying get your stuff ready first.
Variations & Adaptations
One of the best things about this recipe is how easily you can change it up. Here are some variations I’ve tried and loved:
Chocolate Drizzle: After the treats have set, melt 1/2 cup of chocolate chips with 1 teaspoon of coconut oil and drizzle it over the top. Let the chocolate set before cutting. The chocolate and candy corn combination is surprisingly good—like a sweet and salty thing, but sweeter.
Peanut Butter Version: Add 1/4 cup of creamy peanut butter to the marshmallow mixture right after it melts. Stir until smooth before adding the cereal. The peanut butter adds richness and a savory note that balances the sweetness. My husband says this version is his favorite, and he’s not usually a candy corn fan.
Gluten-Free Option: This recipe is naturally gluten-free as long as you use certified gluten-free crispy rice cereal. Rice Krispies brand is made with malt flavoring, which contains gluten, so look for a gluten-free alternative like Nature’s Path or Erewhon. The candy corn is typically gluten-free, but always check the label to be safe.
Halloween Mix: Swap half the candy corn for candy pumpkins or autumn mix. The different colors and shapes make the treats look even more festive. I did this for a Halloween party last year and the kids went crazy over the orange and brown pieces.
Vegan Version: Use vegan marshmallows (Dandies brand works great), plant-based butter, and a vegan crispy rice cereal. The texture comes out slightly different—a bit softer—but the taste is still delicious. Let the treats set in the fridge for an extra 15 minutes to firm up.
Spiced Version: Add 1/2 teaspoon of pumpkin pie spice or cinnamon to the marshmallow mixture along with the vanilla. The warm spices complement the candy corn flavor beautifully and make the treats taste even more like fall. I tried this on a whim one rainy October afternoon and it’s been my go-to ever since.
Serving & Storage Suggestions
These treats are best served at room temperature, which lets the marshmallow stay soft and chewy. If they’ve been refrigerated, let them sit out for about 10 minutes before serving so they soften up slightly.
Presentation Ideas: Arrange the treats on a platter lined with fall-colored napkins or a piece of burlap. Sprinkle a few extra candy corn pieces around the edges for color. For Halloween parties, arrange them on a black platter with fake spider webs for a spooky touch. For Thanksgiving, stack them on a wooden board with small pumpkins and autumn leaves.
What to Serve With Them: These treats pair perfectly with a warm mug of apple cider, hot chocolate, or pumpkin spice latte. They’re also great alongside a scoop of vanilla ice cream for an extra indulgent dessert. If you’re serving them at a party, put out a bowl of fresh apple slices to balance the sweetness.
Storage Instructions: Store the treats in an airtight container at room temperature for up to 5 days. Place a piece of parchment paper between layers to prevent sticking. Do not refrigerate them unless you absolutely have to—the fridge makes them hard and less enjoyable. If you live in a humid climate, add a silica gel packet to the container to keep them from getting sticky.
Freezing Instructions: These treats freeze beautifully for up to 3 months. Wrap each square individually in plastic wrap, then place them in a freezer-safe bag or container. To thaw, let them sit at room temperature for about 30 minutes. The texture will be slightly softer than fresh, but still delicious. I often make a double batch and freeze half for last-minute fall gatherings.
Flavor Development: These treats actually taste better the next day. The flavors meld together overnight, and the candy corn softens into the marshmallow base, creating a more uniform texture. If you can resist eating them right away, make them a day ahead for the best results.
Nutritional Information & Benefits
Let’s be honest—these are a treat, not a health food. But knowing what’s in them helps you enjoy them mindfully. Here’s the estimated nutritional breakdown per serving (based on 12 large squares):
| Nutrient | Amount per Serving |
|---|---|
| Calories | 220 |
| Total Fat | 5g |
| Saturated Fat | 3g |
| Carbohydrates | 44g |
| Sugar | 28g |
| Protein | 2g |
| Sodium | 180mg |
Dietary Considerations: This recipe is vegetarian and can be made vegan and gluten-free with simple substitutions (see variations above). It contains dairy from the butter, but you can easily swap in a plant-based alternative. The main allergens to watch for are dairy and gluten (from the cereal).
Health Perspective: While these treats are definitely on the sweeter side, they do provide a quick source of energy from the carbohydrates. The butter adds a small amount of fat, which helps with satiety. I personally see these as a fun, occasional indulgence—perfect for holidays and special occasions. I don’t make them every week, but when I do, I enjoy every single bite without guilt. Life is too short to skip dessert, right?
If you’re watching your sugar intake, you can reduce the candy corn to 1/2 cup or skip it entirely for plain rice krispie treats. But honestly, the candy corn is what makes these special, so I say go for it and balance it out with lighter meals the rest of the day.
Conclusion
These easy no-bake candy corn rice krispie treats have become my go-to fall dessert for good reason. They’re quick, simple, and always a hit. Whether you’re making them for a Halloween party, a Thanksgiving dessert table, or just because you’re craving something sweet and festive, they deliver every single time.
I love how forgiving this recipe is. You can mess up the measurements, forget an ingredient, or rush through the steps, and they still turn out delicious. That’s the kind of recipe I want in my back pocket—the one that saves me when I’m in a pinch and makes me look like I planned it all along.
Don’t be afraid to make this recipe your own. Add chocolate, peanut butter, or spices. Use different candy corn varieties. Make them gluten-free or vegan. The base recipe is so simple that it invites creativity, and that’s what cooking should be about.
I’d love to hear how these turn out for you! Drop a comment below and let me know if you tried any variations or if these saved you from a bake sale panic like they did for me. And if you’re looking for more easy fall desserts, check out my pumpkin spice popcorn mix or apple cider donut muffins. Happy fall baking, friends!
Frequently Asked Questions
Can I use large marshmallows instead of mini marshmallows?
Yes, you can use large marshmallows, but they take longer to melt and can be harder to get smooth. If using large marshmallows, use about 40 regular-sized marshmallows (which equals one 10-ounce bag). Cut them in half before melting to speed up the process. Keep stirring until completely smooth with no lumps.
Why did my rice krispie treats turn out hard?
Hard treats usually happen for two reasons: you pressed the mixture too firmly into the pan, or you overcooked the marshmallow mixture. Press gently—just enough to spread the mixture evenly without crushing the cereal. Also, make sure you remove the pot from the heat before adding the cereal, and don’t stir longer than necessary.
Can I use a different cereal instead of Rice Krispies?
Absolutely! You can use any crispy rice cereal, or even try other cereals for different textures. Fruity Pebbles gives a fun colorful twist, Cocoa Pebbles adds chocolate flavor, or you can use a generic crispy rice cereal. Just keep the total amount at 6 cups. Avoid heavy or dense cereals like granola, which won’t give the same light, crunchy texture.
How do I prevent the treats from sticking to the knife when cutting?
Spray your knife with cooking spray before cutting, or rub it with a little butter. Wipe the blade clean between cuts and respray as needed. You can also run the knife under hot water and dry it quickly before cutting. The heat helps the knife glide through the marshmallow without sticking.
Can I make these treats ahead of time for a party?
Yes! These treats are actually better when made a day ahead because the flavors have time to meld. Make them the day before your event, let them cool completely, and store them in an airtight container at room temperature. They’ll stay fresh for up to 5 days. Just don’t refrigerate them unless absolutely necessary, as the cold makes them hard.
Pin This Recipe!
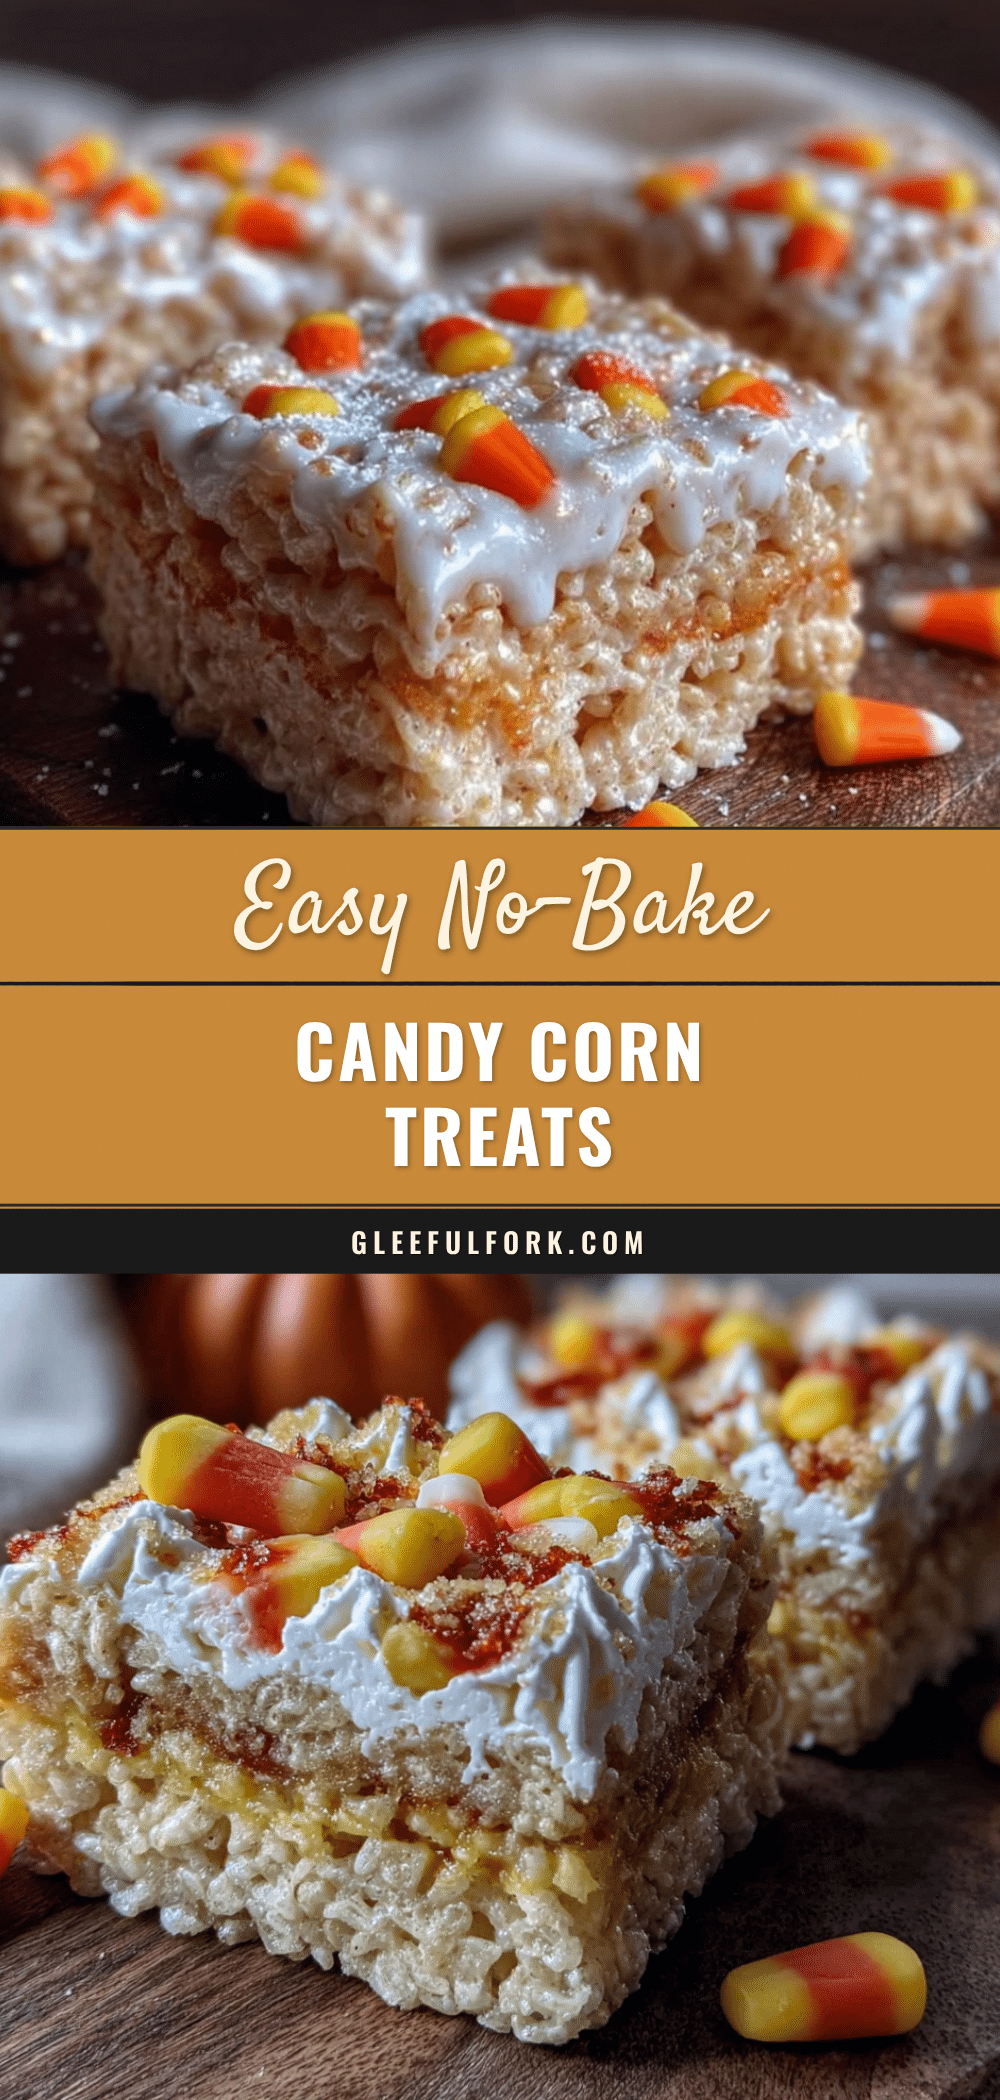
Easy No-Bake Candy Corn Rice Krispie Treats: Best Fall Dessert
These quick and easy no-bake candy corn rice krispie treats are the perfect fall dessert, made with simple pantry ingredients and ready in under 20 minutes. A festive crowd-pleaser that’s ideal for Halloween parties, bake sales, or cozy autumn snacking.
- Prep Time: 10 minutes
- Cook Time: 10 minutes
- Total Time: 20 minutes
- Yield: 12 servings 1x
- Category: Dessert
- Cuisine: American
Ingredients
- 3 tablespoons unsalted butter (plus extra for greasing the pan)
- 1 package (10 ounces) mini marshmallows (about 4 cups)
- 6 cups Rice Krispies cereal (or any crispy rice cereal)
- 1 cup candy corn (plus extra for topping if desired)
- 1/4 teaspoon vanilla extract (optional but recommended)
- Pinch of salt (optional)
Instructions
- Prepare your pan. Line a 9×13-inch baking dish with parchment paper, leaving some overhang on two sides. Grease the parchment paper lightly with butter or cooking spray.
- Melt the butter. Place the 3 tablespoons of unsalted butter in a large pot over low heat. Let it melt slowly, swirling the pan occasionally.
- Add the marshmallows. Pour the entire package of mini marshmallows into the pot with the melted butter. Stir constantly over low heat until the marshmallows are completely melted and smooth, about 3-4 minutes.
- Add vanilla and salt. If using, stir in the vanilla extract and pinch of salt until well combined.
- Remove from heat. Take the pot off the burner completely.
- Add the cereal. Pour in the 6 cups of Rice Krispies cereal. Gently fold the cereal into the marshmallow mixture using a folding motion until evenly coated, about 1-2 minutes.
- Add the candy corn. Sprinkle the 1 cup of candy corn over the cereal mixture and fold gently to distribute evenly.
- Press into the pan. Transfer the mixture to the prepared pan. Use a piece of wax paper or parchment paper lightly greased with cooking spray to press the mixture down evenly. Press firmly but don’t smash flat.
- Add extra candy corn on top (optional). If desired, press a few extra candy corn pieces into the top while still warm.
- Let them set. Allow the treats to cool at room temperature for at least 30 minutes, or refrigerate for 15 minutes if in a hurry.
- Cut and serve. Lift the treats out of the pan using the parchment paper handles. Use a sharp knife to cut into squares or rectangles. Wipe the knife clean between cuts for best results.
Notes
For best results, use fresh candy corn and mini marshmallows. The treats are better the next day as flavors meld. Store in an airtight container at room temperature for up to 5 days. For gluten-free, use certified gluten-free crispy rice cereal. For vegan, use vegan marshmallows and plant-based butter.
Nutrition
- Serving Size: 1 large square
- Calories: 220
- Sugar: 28
- Sodium: 180
- Fat: 5
- Saturated Fat: 3
- Carbohydrates: 44
- Protein: 2
Keywords: candy corn rice krispie treats, no-bake fall dessert, easy Halloween treats, quick rice krispie treats, candy corn dessert


