Love this? Save it for later!
Share the inspiration with your friends
It was 11:47 PM on a quiet Tuesday in late October, and I had a very specific, very ridiculous craving. I wanted that soft, pillowy, cinnamon-swirled warmth you only get from a fresh-baked roll, but I wanted it to taste like fall had somehow taken up permanent residence in my kitchen. I didn’t have the usual bread flour or a standing mixer, but I had a can of pumpkin puree that was staring at me from the pantry, a half-empty jar of maple syrup from last weekend’s pancake breakfast, and the wild, sleep-deprived idea that maybe—just maybe—I could make this work without any of the “proper” tools. Let me tell you, there’s something about the late-night kitchen that makes you braver. The usual rules feel a little looser. I mean, who’s watching? The cat? She doesn’t judge. So I grabbed my biggest bowl, a wooden spoon that’s seen better days, and I just went for it. I figured if these turned out like hockey pucks, no one would ever know. But they didn’t. Honestly, they were the most tender, fragrant, soul-hugging cinnamon rolls I’d ever made. The pumpkin made the dough impossibly soft, and that maple glaze? It’s the kind of thing you want to put on everything. Maybe you’ve been there—standing in your kitchen late at night, wanting something warm and homemade but not wanting to wait for hours. This recipe is for that exact moment. It’s why I keep making it, even when the sun is still up.
Why You’ll Love This Recipe
I’ve tested this recipe more times than I care to admit. I’ve made it with different flours, different rising times, and different amounts of pumpkin. This version is the one that finally made me stop tweaking. It’s the one that feels both forgiving and foolproof, which is exactly what a good weekend baking project should be.
- Quick & Easy: These rolls come together in about 2 hours from start to finish. That includes rising time. For homemade cinnamon rolls, that’s practically instant gratification.
- Simple Ingredients: You probably have most of this in your pantry right now. The pumpkin puree does all the heavy lifting for moisture and flavor, so you don’t need any weird specialty items.
- Perfect for Fall Mornings: This is the recipe you want for a cozy Saturday brunch, Thanksgiving morning, or when the leaves start turning and you just need something warm. It screams “autumn” without being complicated.
- Crowd-Pleaser: I brought a batch to a neighbor’s potluck last month, and I watched a grown man close his eyes after the first bite. Kids love them. Adults love them. They disappear fast.
- Unbelievably Delicious: The pumpkin doesn’t overpower anything. It just makes the dough incredibly tender and gives it this subtle, earthy sweetness that pairs perfectly with the maple glaze. It’s comfort food, but it feels a little bit special.
What makes this different from every other cinnamon roll recipe out there? It’s the texture. The pumpkin puree keeps the rolls soft for days—I mean, seriously soft. They don’t dry out by the next morning. Plus, the maple glaze isn’t just sugar; it has that deep, almost woodsy sweetness that makes you feel like you’re eating something from a cozy cabin. This isn’t just another version. It’s the one I keep coming back to.
What Ingredients You Will Need
This recipe uses simple, wholesome ingredients to deliver that soft, spiced roll you’re dreaming of. Most of these are pantry staples, especially if you do any fall baking. The pumpkin puree is the star here, so don’t skip it.
For the Dough
- 3 ½ cups all-purpose flour (plus more for dusting; I use King Arthur for consistent results)
- ¼ cup granulated sugar
- 1 packet active dry yeast (about 2 ¼ teaspoons; make sure it’s fresh)
- ½ teaspoon salt
- ½ teaspoon pumpkin pie spice (or a mix of cinnamon, nutmeg, and ginger)
- ½ cup whole milk, warmed to about 110°F (adds richness; 2% works too)
- ¼ cup unsalted butter, melted and slightly cooled
- ½ cup pumpkin puree (not pumpkin pie filling—make sure it’s 100% pure pumpkin)
- 1 large egg, room temperature
For the Filling
- ¼ cup unsalted butter, softened to room temperature
- ½ cup packed brown sugar (light or dark both work; dark gives a deeper flavor)
- 2 teaspoons ground cinnamon
- ¼ teaspoon ground nutmeg (freshly grated if you have it)
For the Maple Glaze
- 1 ½ cups powdered sugar, sifted (no lumps allowed)
- 3 tablespoons pure maple syrup (please don’t use pancake syrup—the real stuff matters here)
- 1-2 tablespoons whole milk (or heavy cream for a richer glaze)
- ¼ teaspoon vanilla extract
Ingredient Tips: I recommend using Libby’s pumpkin puree for the most consistent moisture level. If you’re using a different brand, you might need to adjust the flour slightly—some purees are more watery than others. For the maple syrup, I’m partial to Grade A Dark Amber for that robust flavor. And yes, you can use dairy-free milk and butter here if needed; just make sure the butter is melted and cooled the same way.
Equipment Needed
You don’t need a fancy kitchen to make these. Here’s what I used that late night (and every time since):
- Large mixing bowl (any bowl works, but a wide one makes kneading easier)
- Wooden spoon or sturdy spatula (for mixing the dough before you get your hands in there)
- 9×13-inch baking dish (glass or metal both work; I prefer glass so I can see the browning on the bottom)
- Rolling pin (if you don’t have one, a wine bottle works in a pinch—I’ve done it)
- Sharp knife or bench scraper (for cutting the rolls cleanly; dental floss also works brilliantly if you’re desperate)
- Clean kitchen towel (for covering the dough while it rises)
- Measuring cups and spoons
- Small saucepan (for warming the milk)
If you don’t have a stand mixer, don’t worry. I made this dough by hand that first time, and honestly, I prefer it. There’s something satisfying about feeling the dough come together under your palms. Just be prepared for a little arm workout—it’s worth it.
Preparation Method
Step 1: Activate the Yeast
Warm the milk to about 110°F—it should feel like warm bath water, not hot. Pour it into your mixing bowl and sprinkle the yeast over the top. Add a pinch of the granulated sugar (just a pinch) and let it sit for 5-7 minutes. It should get foamy and smell like bread. If it doesn’t, your yeast might be dead. Start over with fresh yeast—trust me, it’s not worth the gamble.
Step 2: Make the Dough
Add the remaining sugar, salt, pumpkin pie spice, melted butter, pumpkin puree, and egg to the yeast mixture. Stir until combined. It’ll look a little lumpy and orange—that’s fine. Add the flour, one cup at a time, stirring with your wooden spoon. After the third cup, the dough will start to come together. Turn it out onto a floured surface and knead in the remaining half cup of flour.
Step 3: Knead the Dough
Knead for about 6-8 minutes. The dough should be soft and slightly tacky, but not sticky. If it’s sticking to your hands like crazy, add a tablespoon of flour at a time. If it feels dry, add a splash of warm milk. You’re looking for that smooth, pillowy feel—like a baby’s cheek, honestly. Shape it into a ball.
Step 4: First Rise
Place the dough ball in a lightly greased bowl (I use a drizzle of oil). Cover with that clean kitchen towel and let it rise in a warm spot for about 1 hour, or until doubled in size. A warm spot could be your oven with the light on, or just a corner of your kitchen away from drafts. That late night, I put mine on top of the fridge where it’s always a little warm.
Step 5: Prepare the Filling
While the dough rises, mix the softened butter, brown sugar, cinnamon, and nutmeg in a small bowl. Set it aside. Don’t refrigerate it—you want it spreadable.
Step 6: Roll and Fill
Once the dough has doubled, punch it down gently. Roll it out on a floured surface into a rectangle about 12×16 inches. It doesn’t have to be perfect—mine never is. Spread the filling evenly over the dough, leaving a ½-inch border on the long edges. Starting from the long side, roll the dough tightly into a log. Pinch the seam to seal it.
Step 7: Cut the Rolls
Using a sharp knife or bench scraper, cut the log into 12 even rolls. A trick I learned: use unflavored dental floss. Slide it under the log, cross the ends over the top, and pull. It cuts through cleanly without squishing the dough. Place the rolls in your greased 9×13-inch baking dish, cut side up. They’ll be touching each other—that’s what you want.
Step 8: Second Rise
Cover the dish with the towel and let the rolls rise for another 30-40 minutes. They should puff up and look like they’re snuggling each other. Preheat your oven to 350°F during the last 10 minutes of this rise.
Step 9: Bake
Bake for 22-25 minutes, or until the tops are golden brown and the rolls sound hollow when you tap them. If the tops are browning too fast, tent loosely with foil after 15 minutes. Let them cool in the pan for about 10 minutes before glazing.
Step 10: Make the Glaze
While the rolls cool, whisk together the sifted powdered sugar, maple syrup, vanilla, and 1 tablespoon of milk. Add more milk a teaspoon at a time until you get a thick but pourable consistency. Drizzle it generously over the warm rolls. I mean, be generous.
Cooking Tips & Techniques
Here’s what I learned from my late-night experiment and the dozen batches after it:
- Don’t overheat the milk. If it’s too hot, it’ll kill the yeast. I’ve done this. It’s sad. Use a thermometer if you have one, or just test it on your wrist like baby formula.
- Knead until it feels right. The dough should be soft and slightly tacky, but not leaving residue on your hands. If it’s sticky, add flour a tablespoon at a time. If it’s dry, add a splash of milk.
- The first rise is crucial. Don’t rush it. If your kitchen is cold, it might take longer than an hour. Be patient. I once put my dough in the oven with just the light on and it took 90 minutes. That’s fine.
- Roll tightly, but not too tight. If you roll too tight, the center will pop up during baking. If too loose, you’ll get gaps. Aim for firm but gentle. It’s like rolling a sleeping bag—you want it snug.
- Use a glass baking dish. I find it bakes more evenly, and you can see if the bottom is getting too dark. Metal pans tend to brown the bottoms faster.
- Glaze while warm. The glaze will melt slightly into the rolls, making them even more tender. If you wait until they’re completely cool, the glaze just sits on top. Both are good, but warm is better.
Variations & Adaptations
I’ve messed around with this recipe more than I’d like to admit. Here are some variations that actually worked:
- Gluten-Free Option: Use a 1:1 gluten-free baking flour blend. The dough will be a little stickier and harder to roll, but it works. Add an extra tablespoon of milk if needed. I’ve tested this with Bob’s Red Mill and it was surprisingly good.
- Vegan Version: Swap the milk for oat milk, the butter for vegan butter, and the egg for a flax egg (1 tablespoon ground flaxseed + 3 tablespoons water, let sit for 5 minutes). The texture is slightly denser, but the flavor is still spot on.
- Pumpkin Spice Roll: Add ½ cup of chopped pecans or walnuts to the filling for crunch. I did this for Thanksgiving one year and it was a hit. Also, swap the maple glaze for a cream cheese frosting if you want something tangier.
- Air Fryer Method: I tried this out of curiosity. Place the rolls in a greased 8-inch round pan that fits in your air fryer. Bake at 320°F for 12-14 minutes. They’re a little less fluffy but still delicious. Great if you don’t want to heat up the whole oven.
- Savory-ish Twist: Reduce the sugar in the dough to 2 tablespoons, skip the filling, and brush the rolls with garlic butter before baking. It’s weird, but I made them for a breakfast-for-dinner thing and they worked as dinner rolls.
Serving & Storage Suggestions
These rolls are best served warm, straight from the oven, with that maple glaze dripping down the sides. But let’s be real—they’re also amazing at room temperature an hour later when you walk past the pan and “accidentally” grab one.
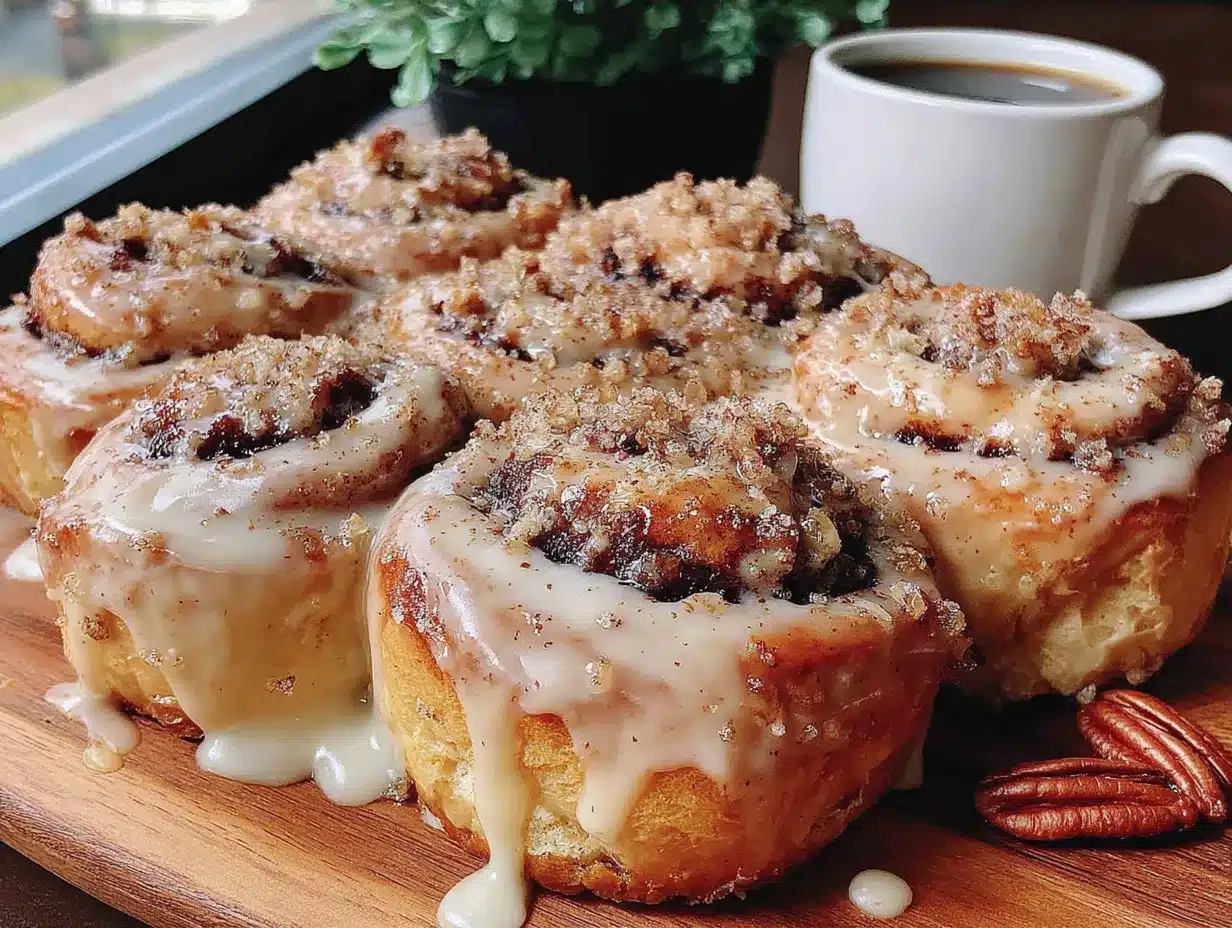
Serving: I like to serve them on a big wooden board or a pretty platter. Sprinkle a little flaky sea salt on top of the glaze if you’re feeling fancy—it cuts the sweetness and adds a nice crunch. They pair beautifully with a hot cup of coffee, a chai latte, or even a glass of cold milk. For brunch, I’ll put them out alongside a frittata or some scrambled eggs for balance.
Storage: Keep leftover rolls in an airtight container at room temperature for up to 2 days. After that, they’ll start to dry out. To reheat, pop one in the microwave for 15 seconds, or in a 300°F oven for 5 minutes. The glaze will get a little melty again, which is exactly what you want.
Freezing: You can freeze the unbaked rolls! After you cut them and place them in the dish, cover tightly with plastic wrap and foil, and freeze for up to 3 months. When you’re ready to bake, thaw in the fridge overnight, then let them do the second rise at room temperature for about an hour before baking. I’ve done this for Christmas morning, and it’s a lifesaver.
Nutritional Information & Benefits
Okay, these aren’t health food. But they’re not total junk either. The pumpkin puree is packed with vitamin A and fiber, which means you’re getting some good stuff with your sugar fix. The maple syrup has antioxidants and minerals like zinc and manganese—way better than refined sugar. And hey, cinnamon is a superfood with anti-inflammatory properties.
Estimated per roll (based on 12 servings):
- Calories: ~310
- Fat: 10g
- Carbohydrates: 52g
- Fiber: 2g
- Sugar: 28g
- Protein: 5g
Dietary Considerations: This recipe contains gluten, dairy, and eggs. For a gluten-free or vegan version, see the variations above. The pumpkin adds a good dose of beta-carotene, which is great for eye health and immunity. So really, you’re doing your body a favor. Sort of.
Conclusion
These cozy baked pumpkin cinnamon rolls with maple glaze are the kind of recipe that makes you want to slow down. They’re not complicated, but they feel special. The dough is forgiving, the filling is warm and spiced, and that glaze is honestly the best part of waking up. I’ve made them for lazy Sundays, for holiday mornings, and for that one random Tuesday night when I just needed something good. They never disappoint.
I’d love for you to try them and make them your own. Add more cinnamon. Swap the glaze for cream cheese frosting. Throw in some pecans. Whatever feels right. And when you do, come back and let me know how they turned out. Drop a comment below, share a photo, or tell me about your own late-night kitchen adventures. I’m always here for a good baking story.
Happy baking, friends. Go make something warm.
Frequently Asked Questions
Can I use pumpkin pie filling instead of pumpkin puree?
No, please don’t. Pumpkin pie filling is pre-sweetened and spiced, and it will throw off the sugar and moisture balance of the dough. Stick with 100% pure pumpkin puree for the best results.
Why didn’t my dough rise?
Most likely, your yeast was dead or your milk was too hot. Make sure your milk is between 105°F and 115°F—anything hotter kills the yeast. Also, check the expiration date on your yeast packet. Old yeast is a common culprit.
Can I make these ahead of time?
Absolutely. You can prepare the rolls up to the point of the second rise, cover them, and refrigerate overnight. The next morning, let them sit at room temperature for 30-45 minutes before baking. You can also freeze the unbaked rolls for up to 3 months.
My rolls came out dry. What went wrong?
You might have added too much flour during kneading, or you overbaked them. Next time, measure your flour by spooning it into the cup and leveling it off, rather than scooping. And check the rolls at 22 minutes—ovens vary.
Can I use bread flour instead of all-purpose?
Yes, you can. Bread flour has more protein, which will give you a chewier, more structured roll. I prefer all-purpose for a softer, more tender texture, but bread flour works fine. Just add an extra tablespoon of milk to compensate for the extra protein.
Pin This Recipe!
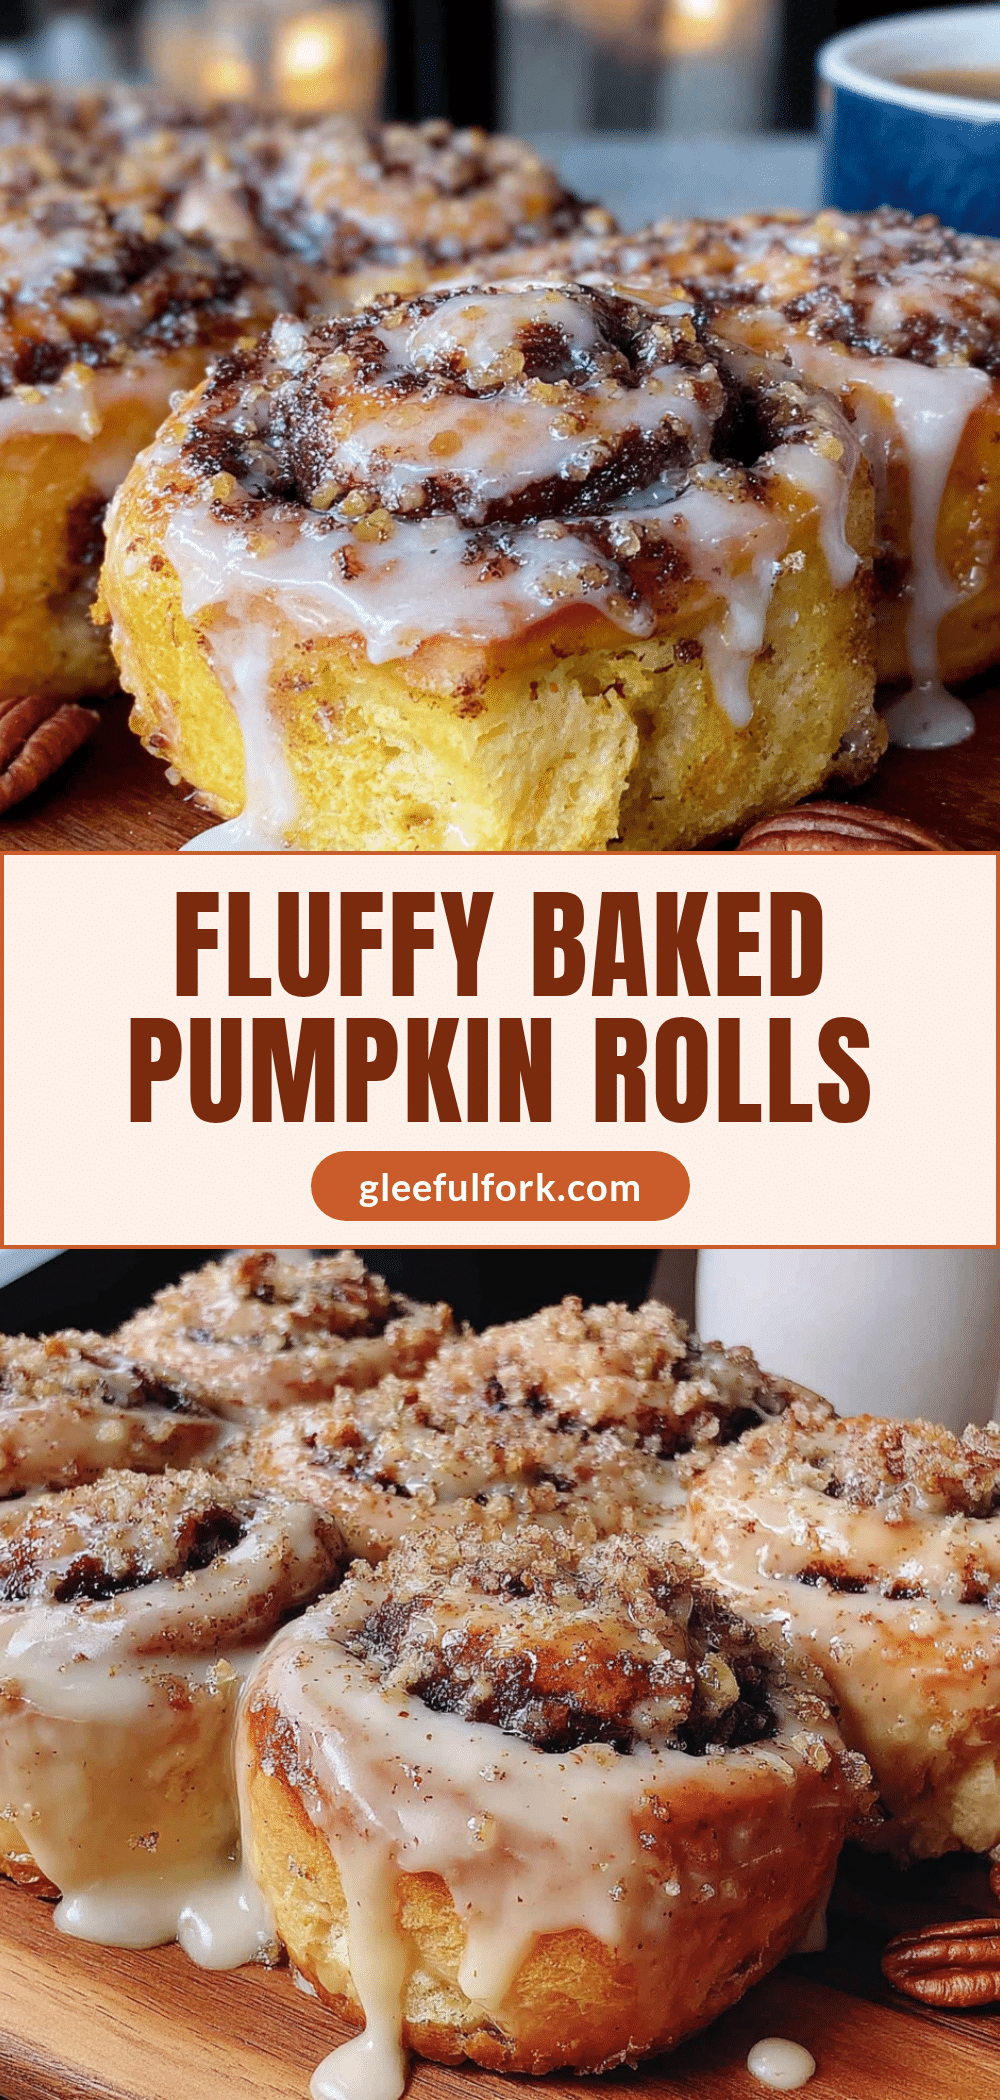
Cozy Baked Pumpkin Cinnamon Rolls with Maple Glaze
Soft, pillowy cinnamon rolls infused with pumpkin and topped with a rich maple glaze. This forgiving recipe comes together in about 2 hours and is perfect for fall mornings or cozy weekend brunches.
- Prep Time: 20 minutes
- Cook Time: 25 minutes
- Total Time: 2 hours (includes rising time)
- Yield: 12 servings 1x
- Category: Dessert
- Cuisine: American
Ingredients
- 3 ½ cups all-purpose flour (plus more for dusting)
- ¼ cup granulated sugar
- 1 packet active dry yeast (about 2 ¼ teaspoons)
- ½ teaspoon salt
- ½ teaspoon pumpkin pie spice (or a mix of cinnamon, nutmeg, and ginger)
- ½ cup whole milk, warmed to about 110°F
- ¼ cup unsalted butter, melted and slightly cooled
- ½ cup pumpkin puree (100% pure pumpkin, not pie filling)
- 1 large egg, room temperature
- ¼ cup unsalted butter, softened to room temperature (for filling)
- ½ cup packed brown sugar (light or dark)
- 2 teaspoons ground cinnamon
- ¼ teaspoon ground nutmeg
- 1 ½ cups powdered sugar, sifted (for glaze)
- 3 tablespoons pure maple syrup (for glaze)
- 1–2 tablespoons whole milk (for glaze)
- ¼ teaspoon vanilla extract (for glaze)
Instructions
- Warm the milk to about 110°F. Pour into a mixing bowl, sprinkle yeast over the top, add a pinch of sugar, and let sit for 5-7 minutes until foamy.
- Add remaining sugar, salt, pumpkin pie spice, melted butter, pumpkin puree, and egg to the yeast mixture. Stir until combined.
- Add flour one cup at a time, stirring with a wooden spoon. After the third cup, turn dough out onto a floured surface and knead in the remaining half cup of flour.
- Knead for 6-8 minutes until dough is soft and slightly tacky but not sticky. Shape into a ball.
- Place dough in a lightly greased bowl, cover with a clean kitchen towel, and let rise in a warm spot for about 1 hour until doubled in size.
- While dough rises, mix softened butter, brown sugar, cinnamon, and nutmeg in a small bowl for the filling. Set aside.
- Punch down the risen dough. Roll out on a floured surface into a 12×16-inch rectangle.
- Spread filling evenly over dough, leaving a ½-inch border on the long edges. Roll tightly from the long side into a log, pinching the seam to seal.
- Cut the log into 12 even rolls using a sharp knife or unflavored dental floss. Place cut side up in a greased 9×13-inch baking dish.
- Cover dish with towel and let rolls rise for 30-40 minutes until puffed. Preheat oven to 350°F during the last 10 minutes.
- Bake for 22-25 minutes until golden brown and rolls sound hollow when tapped. Tent with foil after 15 minutes if browning too fast. Cool in pan for 10 minutes.
- Whisk together sifted powdered sugar, maple syrup, vanilla, and 1 tablespoon milk. Add more milk a teaspoon at a time until thick but pourable. Drizzle generously over warm rolls.
Notes
Don’t overheat the milk—it should be about 110°F. Knead until dough is soft and slightly tacky. The first rise is crucial; be patient if your kitchen is cold. Roll tightly but not too tight. Use a glass baking dish for even browning. Glaze while rolls are warm for best absorption.
Nutrition
- Serving Size: 1 roll
- Calories: 310
- Sugar: 28
- Sodium: 180
- Fat: 10
- Saturated Fat: 5
- Carbohydrates: 52
- Fiber: 2
- Protein: 5
Keywords: pumpkin cinnamon rolls, maple glaze, fall baking, homemade cinnamon rolls, pumpkin recipes


