Love this? Save it for later!
Share the inspiration with your friends
There used to be a little bakery downtown, tucked between a dry cleaner and a vintage shop, that made the most incredible peanut butter granola bars. When they closed their doors three years ago—just a handwritten sign saying “Thanks for the memories”—I honestly felt a little lost. Those bars were my go-to lunchbox treat, my afternoon pick-me-up, and my secret weapon for getting my kids to eat something with oats in it. After about twelve tries—some crumbly disasters, a few that were basically peanut butter bricks—I finally cracked the code.
Let me tell you, the first batch I got right? I may have done a little dance in my kitchen. The texture was spot on—chewy but firm, with just the right amount of crunch from the granola. And the peanut butter flavor? It was that perfect balance of salty and sweet that makes you reach for another piece before you’ve even finished the first one. I mean, that’s the kind of recipe victory that sticks with you, you know?
These Easy No-Bake Peanut Butter Granola Lunchbox Bars are my little tribute to that beloved bakery. They come together in minutes, require zero oven time, and taste like something you’d pay way too much for at a fancy café. Honestly, I think my version might even be better than the original—and that’s saying something. If you’ve been hunting for that perfect lunchbox treat that actually holds together and makes everyone happy, you’re in the right place. Let me show you how it’s done.
Why You’ll Love This Recipe
I’ve tested this recipe more times than I care to admit, and let me just say—these bars have earned their spot in my permanent rotation. Here’s why they’re going to become your new favorite too:
- Quick & Easy: No oven required, no complicated steps. You can whip up a batch in under 15 minutes, and the hardest part is waiting for them to set in the fridge.
- Simple Ingredients: You probably have most of these in your pantry right now. Oats, peanut butter, honey, and a few mix-ins—that’s it. No weird specialty items or expensive purchases.
- Perfect for Lunchboxes: These bars hold up beautifully in a lunch bag. No crumbling, no melting mess. They’re sturdy enough to survive a backpack toss and still come out looking great.
- Crowd-Pleaser: Kids devour them, adults sneak them from the container, and everyone asks for the recipe. I’ve brought these to playdates, school events, and office gatherings—they always disappear first.
- Unbelievably Delicious: The combination of creamy peanut butter, crunchy granola, and just a hint of honey creates this addictive texture and flavor that’s pure comfort. It’s the kind of bar that makes you close your eyes after the first bite.
What sets these apart from every other no-bake bar recipe out there is the texture. I spent weeks figuring out the perfect ratio of wet to dry ingredients so you get a bar that’s firm enough to hold its shape but still soft and chewy when you bite into it. No rock-hard bars that crack your teeth, no sticky messes that fall apart in your hand. Just that perfect, satisfying chew that keeps you coming back for more.
These bars aren’t just good—they’re the kind of treat that makes weekday mornings feel a little more special. You know that feeling when you open a lunchbox and find something homemade? That’s what we’re going for here. It’s comfort food made simple, with ingredients you can feel good about.
What Ingredients You Will Need
This recipe uses simple, wholesome ingredients that come together to create something truly special. Most of these are pantry staples, which makes these bars perfect for those moments when you need a quick treat without a trip to the store.
For the Bars
- 2 cups rolled oats (not quick oats—they get too mushy; I prefer Bob’s Red Mill for consistent texture)
- 1 cup crispy rice cereal (adds that light crunch that makes these bars so satisfying)
- 1/2 cup chopped peanuts (optional, but I love the extra crunch and peanut flavor)
- 1/4 cup mini chocolate chips (because everything is better with a little chocolate)
- 1 cup creamy peanut butter (I use Skippy natural—it has the right consistency without being too runny)
- 1/2 cup honey (local honey is lovely if you have it, but any honey works)
- 1/4 cup coconut oil (helps everything bind together and adds a subtle richness)
- 1 teaspoon vanilla extract
- 1/4 teaspoon salt (brings out all the flavors and balances the sweetness)
Ingredient Tips & Substitutions
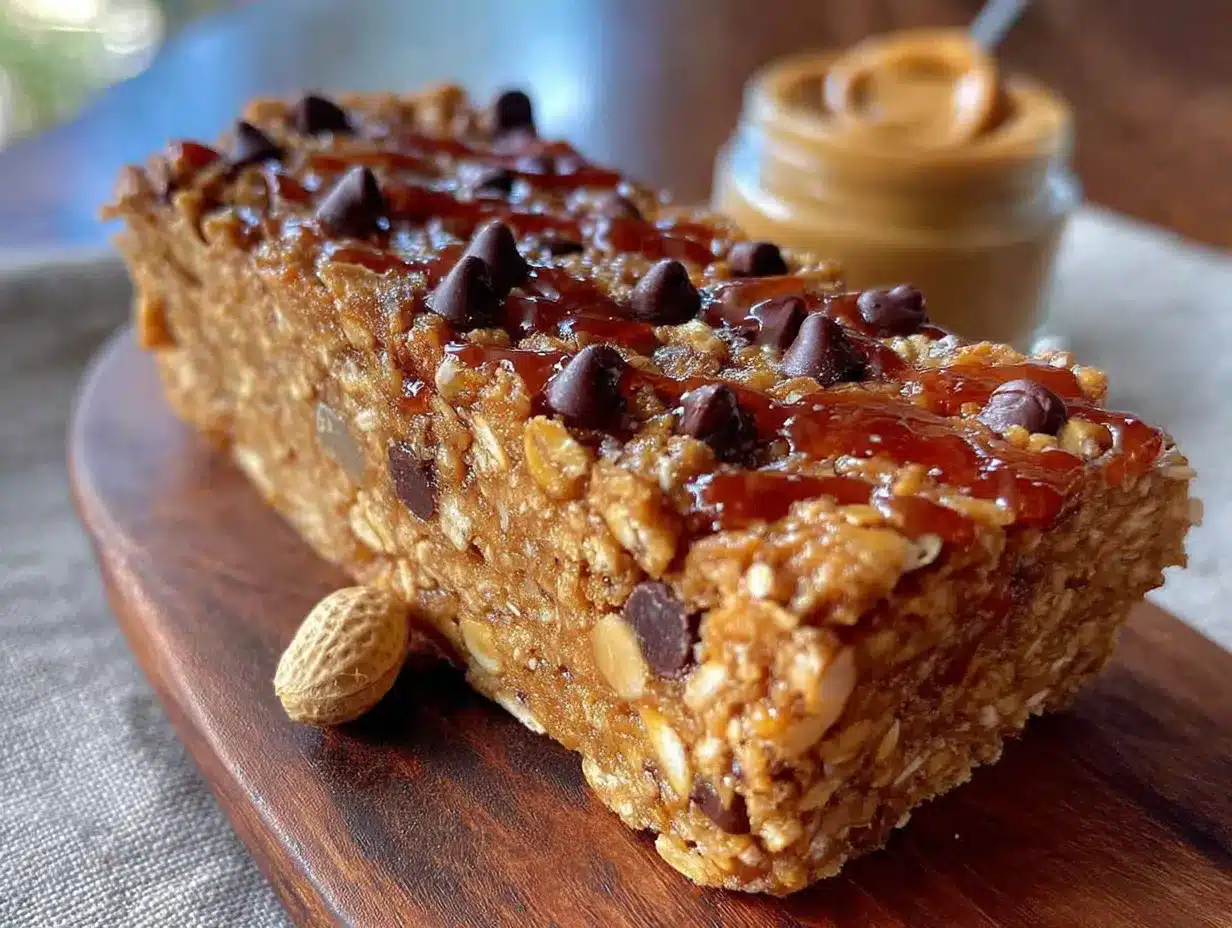
Let me share a few things I’ve learned from making these bars more times than I can count. First, the peanut butter matters more than you’d think. If you use natural peanut butter that separates, make sure you stir it really well before measuring. The oil separation can throw off the whole texture. I’ve had a few batches turn out greasy because I got lazy with the stirring—learn from my mistakes!
For the oats, stick with old-fashioned rolled oats. Quick oats turn into mush and steel-cut oats are too hard. Rolled oats give you that perfect chewy texture that makes these bars so addictive. And if you’re gluten-sensitive, just grab certified gluten-free oats—they work exactly the same.
The honey is another key player. It’s not just for sweetness—it helps bind everything together and gives the bars that slight chewiness. You can substitute maple syrup if you prefer, but the flavor will be a bit different. I’ve tried both and honestly, honey gives a better texture. Agave works too, but the bars will be slightly softer.
If you’re out of coconut oil, you can use butter instead. Just melt it gently and let it cool slightly before mixing. The flavor will be a little different, but the bars will still hold together beautifully. I’ve done this when I ran out of coconut oil mid-batch, and nobody noticed the difference.
Equipment Needed
You don’t need much for these bars, which is part of their charm. Here’s what you’ll need:
- 8×8-inch baking dish (a 9×9 works too, but your bars will be slightly thinner)
- Parchment paper (absolutely essential for easy removal—trust me on this)
- Medium saucepan (for melting the peanut butter mixture)
- Large mixing bowl (for combining dry ingredients)
- Rubber spatula (for mixing and pressing the mixture into the pan)
- Measuring cups and spoons
- Sharp knife (for clean cuts after chilling)
If you don’t have an 8×8 dish, a loaf pan works in a pinch—your bars will just be thicker and you might need to adjust the chilling time slightly. I’ve also used a rectangular casserole dish before, and it worked fine. The key is to press the mixture evenly so everything sets uniformly.
One pro tip: invest in good parchment paper. The cheap stuff can stick to your bars and tear when you try to lift them out. I learned this the hard way after spending ten minutes picking paper bits off my first batch. Not my finest moment.
Preparation Method
Alright, let’s get to the fun part! These bars come together so quickly, you’ll wonder why you ever bought store-bought granola bars.
- Line your baking dish with parchment paper. Leave some overhang on two sides so you can easily lift the bars out later. This step is non-negotiable—I’ve tried skipping it and ended up with a sticky mess that took forever to pry out of the pan.
- Combine your dry ingredients. In a large mixing bowl, whisk together the rolled oats, crispy rice cereal, chopped peanuts (if using), and mini chocolate chips. Give everything a good stir so the mix-ins are evenly distributed. Take a moment to admire how pretty the colors look together—it’s a good sign.
- Melt the wet ingredients. In a medium saucepan over low heat, combine the peanut butter, honey, and coconut oil. Stir constantly with a rubber spatula until everything is melted and smooth. This usually takes about 2-3 minutes. Don’t walk away—peanut butter can burn quickly if you’re not paying attention. I may have ruined a batch or two this way.
- Add the vanilla and salt. Remove the saucepan from heat and stir in the vanilla extract and salt. The mixture will be glossy and smell absolutely amazing. Take a second to enjoy that aroma—it’s one of my favorite parts of making these bars.
- Combine wet and dry ingredients. Pour the warm peanut butter mixture over the dry ingredients. Use your rubber spatula to fold everything together until every oat and cereal piece is coated. This takes a bit of elbow grease, but it’s worth it. The mixture should look uniform and slightly sticky.
- Press into the pan. Transfer the mixture to your prepared baking dish. Here’s the trick: use a piece of parchment paper or wax paper to press the mixture down firmly and evenly. Your hands will thank you—the mixture is sticky! Press hard so the bars hold together. I usually spend a good minute or two really compacting it down.
- Chill until firm. Place the pan in the refrigerator for at least 2 hours, or until the bars are completely firm. If you’re in a hurry, you can pop them in the freezer for about 45 minutes. Just don’t rush this step—bars that aren’t fully set will fall apart when you cut them.
- Cut and serve. Once the bars are firm, use the parchment paper overhang to lift them out of the pan. Place on a cutting board and use a sharp knife to cut into 12 even bars. For clean cuts, wipe the knife between each slice. Store in an airtight container in the refrigerator.
One thing I want to mention: the mixture might seem a little crumbly when you first combine everything. Don’t panic! Once you press it firmly into the pan and give it time to chill, everything will bind together beautifully. The first time I made these, I was convinced I’d done something wrong, but they turned out perfect after chilling.
Cooking Tips & Techniques
After making these bars dozens of times, I’ve picked up a few tricks that make a real difference. Let me share what I’ve learned through trial and error—mostly error, if I’m being honest.
Don’t overheat the peanut butter mixture. This was my biggest mistake early on. I’d get impatient and crank up the heat, thinking it would speed things up. Instead, the peanut butter would seize up and the bars would turn out grainy. Low and slow is the way to go. You want everything just melted and smooth, not bubbling.
Press firmly and evenly. This is the secret to bars that hold their shape. If you’re gentle with the pressing, you’ll end up with crumbly bars that fall apart in your lunchbox. I use the bottom of a measuring cup wrapped in parchment paper to really compact the mixture. It makes a huge difference.
Let them chill completely. I know it’s tempting to cut into them after an hour, but patience pays off here. Bars that aren’t fully set will crumble and frustrate you. I’ve learned to make these the night before I need them, so they have plenty of time to firm up overnight.
Use room temperature ingredients. This isn’t crucial, but it helps everything come together more smoothly. If your honey is crystallized, warm it gently before using. Cold peanut butter can be harder to mix, so let it sit out for a bit if you remember.
Line your pan properly. I cannot stress this enough. Parchment paper overhang on two sides makes removal effortless. The first time I made these, I didn’t use parchment and spent twenty minutes scraping stubborn bits out of the pan. Never again.
Variations & Adaptations
One of the best things about this recipe is how easy it is to customize. Here are some of my favorite variations:
Chocolate Peanut Butter Dream
Swap 1/4 cup of the oats for cocoa powder and add an extra tablespoon of honey. The chocolate-peanut butter combo is irresistible. I made these for a bake sale once and they sold out in fifteen minutes.
Trail Mix Bars
Replace the chocolate chips with dried cranberries, chopped almonds, and pumpkin seeds. These are my go-to for hiking trips—they’re packed with energy and hold up beautifully in a backpack.
Nut-Free Version
Use sunflower seed butter instead of peanut butter and skip the chopped peanuts. Add extra crispy rice cereal for crunch. These work great for school lunchboxes where nuts aren’t allowed.
Vegan Option
Replace the honey with maple syrup or agave nectar. Make sure your chocolate chips are dairy-free. Everything else is already plant-based, so you’re good to go.
Protein-Packed Bars
Add 2 tablespoons of your favorite protein powder to the dry ingredients. You might need to add an extra tablespoon of honey to keep everything binding. I use vanilla protein powder and it adds a nice flavor boost.
Serving & Storage Suggestions
These bars are incredibly versatile when it comes to serving. I love them straight from the fridge on a warm day—they’re refreshing and satisfying. At room temperature, they get a bit softer and chewier, which is also wonderful. For lunchboxes, I pack them straight from the fridge and they’re perfect by lunchtime.
For a fun presentation, cut the bars into smaller squares and arrange them on a platter with fresh fruit. They’re great for brunches, playdates, or afternoon tea. I’ve even packed them in gift bags with a ribbon for holiday treats—everyone loves receiving homemade goodies.
Storage: Keep these bars in an airtight container in the refrigerator for up to two weeks. They also freeze beautifully! Wrap individual bars in parchment paper and place them in a freezer-safe bag. They’ll keep for up to three months. Just grab one from the freezer and let it thaw in the fridge overnight, or pop it directly into a lunchbox—it’ll be thawed by lunchtime.
One thing to note: these bars soften quickly at room temperature, so if you’re taking them on a picnic or to a warm event, keep them cool until serving. I’ve learned this the hard way after pulling out a slightly melty batch at a summer barbecue.
Nutritional Information & Benefits
These bars are a great balance of indulgence and wholesome ingredients. Here’s an approximate breakdown per bar (based on 12 servings):
- Calories: 280
- Protein: 8g
- Carbohydrates: 32g
- Fiber: 4g
- Sugar: 18g
- Fat: 15g
- Iron: 6% DV
- Magnesium: 10% DV
The rolled oats provide steady energy and fiber, while the peanut butter adds protein and healthy fats. The honey gives natural sweetness without refined sugar. These bars are also naturally dairy-free and can easily be made gluten-free or vegan with simple swaps.
I love that I can feel good about giving these to my family. They’re filling enough for a snack but not so heavy that they spoil dinner. Plus, the oats and peanuts provide sustained energy, making them perfect for active kids and adults alike.
Conclusion
These Easy No-Bake Peanut Butter Granola Lunchbox Bars have become a staple in my kitchen, and I have a feeling they’ll become one in yours too. They’re quick, simple, and absolutely delicious—everything a good recipe should be. Whether you’re packing lunches for the week, looking for a healthy snack, or just craving something sweet and satisfying, these bars deliver every single time.
I love how forgiving this recipe is. You can swap ingredients, adjust sweetness, or add your favorite mix-ins, and it still turns out fantastic. That’s the kind of recipe that makes cooking fun—no stress, no fuss, just good food that makes people happy.
So go ahead, give these a try! I’d love to hear how they turn out for you. Did you try a fun variation? Did your kids give them the thumbs up? Drop a comment below and share your experience. And if you loved them as much as I do, don’t forget to share this recipe with a friend who needs a little homemade goodness in their life. Happy snacking!
Frequently Asked Questions
Can I use quick oats instead of rolled oats?
I don’t recommend it. Quick oats absorb moisture differently and can make the bars mushy. Rolled oats give you that perfect chewy texture that holds everything together. If rolled oats are all you have, they’ll work in a pinch, but the texture won’t be the same.
How long do these bars need to chill?
At least 2 hours in the refrigerator, but overnight is even better. The longer they chill, the firmer they get. If you’re in a hurry, you can freeze them for about 45 minutes, but make sure they’re fully set before cutting.
Can I make these bars without coconut oil?
Absolutely! You can substitute melted butter or even a neutral oil like avocado oil. The coconut oil helps with binding and adds a subtle flavor, but the bars will still work with alternatives. Just keep in mind that the texture might be slightly different.
How do I prevent the bars from falling apart?
The key is pressing the mixture firmly into the pan. Use a piece of parchment paper to really compact everything down. Also, make sure you chill them completely before cutting. If they’re still falling apart, try adding an extra tablespoon of honey or peanut butter to help with binding.
Can I double this recipe?
Yes! Double all the ingredients and use a 9×13-inch pan. You’ll need to chill them a bit longer since the batch is larger. I do this all the time for parties and bake sales—they disappear just as fast as the single batch.
Pin This Recipe!
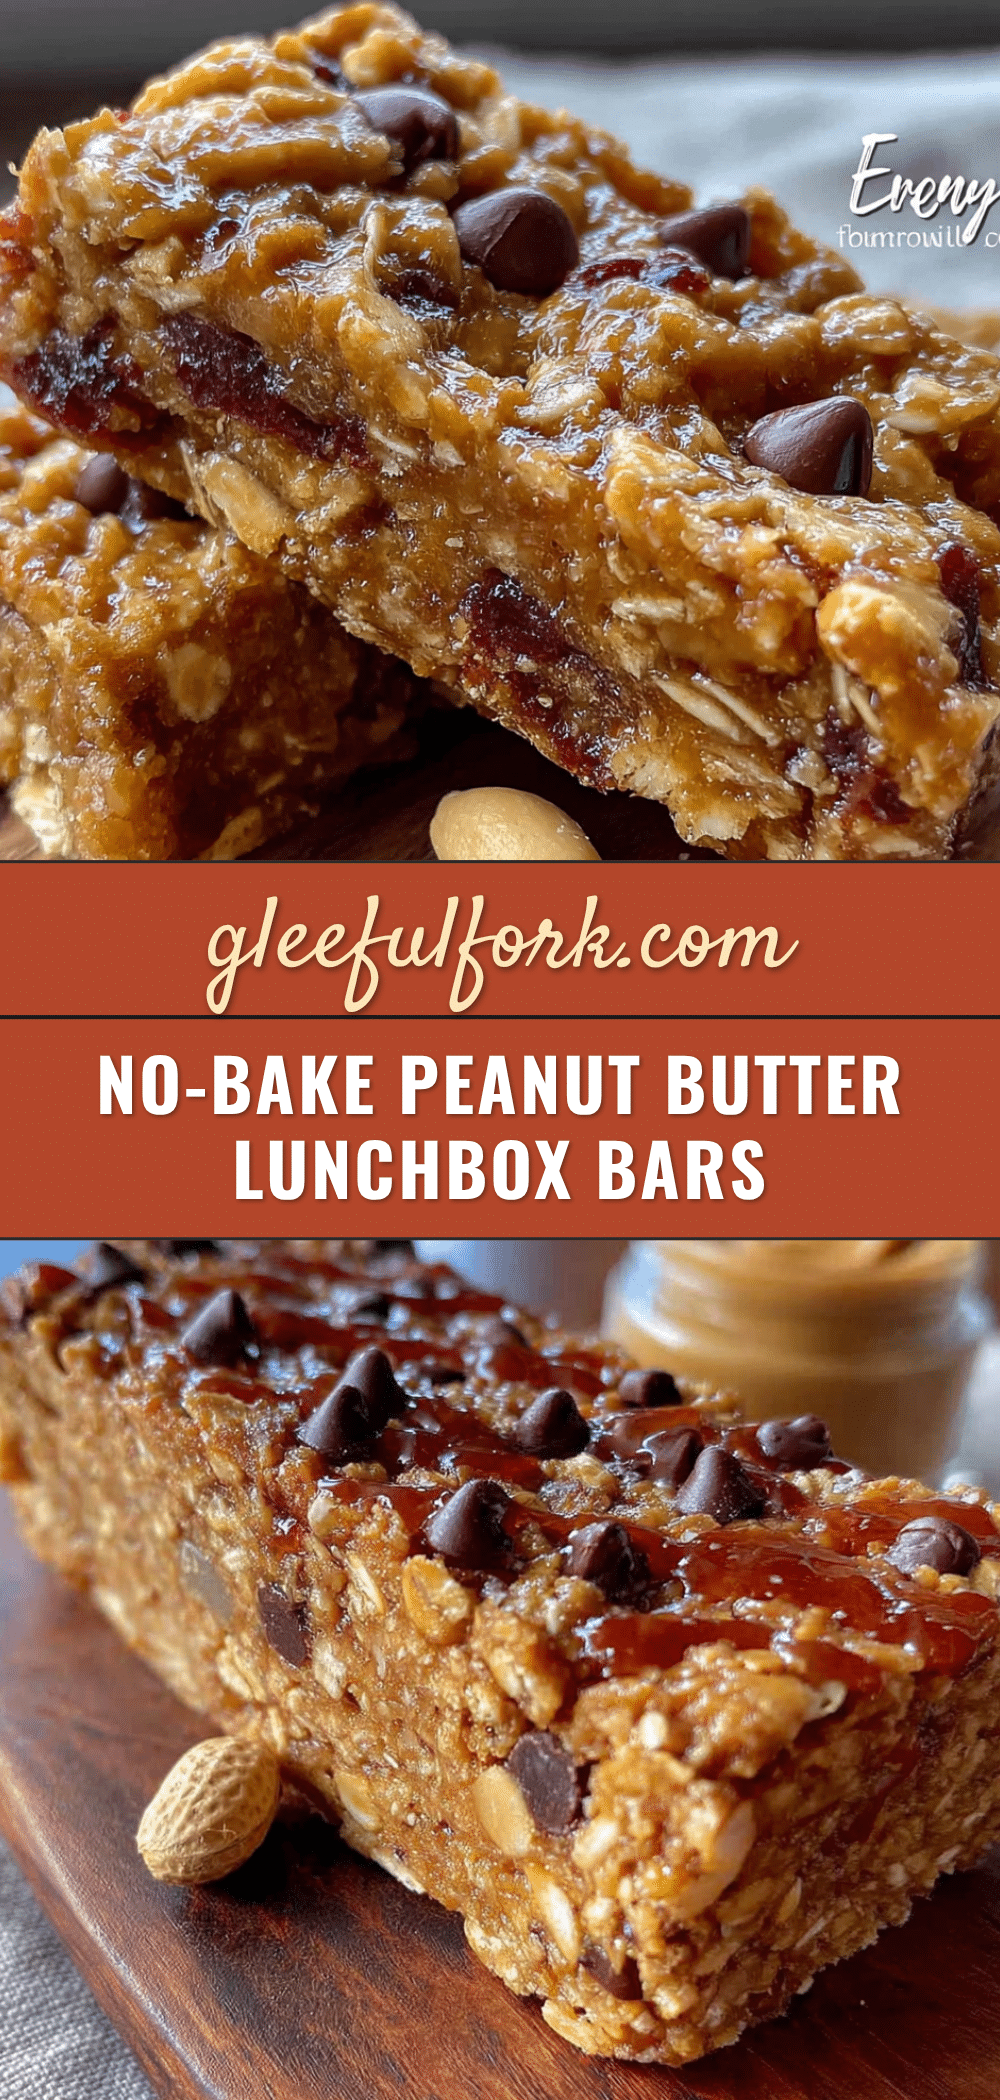
Easy No-Bake Peanut Butter Granola Lunchbox Bars
These no-bake peanut butter granola bars are chewy, crunchy, and perfectly balanced with salty-sweet flavor. Made with simple pantry ingredients, they come together in minutes and are ideal for lunchboxes, snacks, or a quick treat.
- Prep Time: 15 minutes
- Cook Time: 0 minutes
- Total Time: 2 hours 15 minutes (includes chilling)
- Yield: 12 bars 1x
- Category: Snack
- Cuisine: American
Ingredients
- 2 cups rolled oats (not quick oats)
- 1 cup crispy rice cereal
- 1/2 cup chopped peanuts (optional)
- 1/4 cup mini chocolate chips
- 1 cup creamy peanut butter (e.g., Skippy natural)
- 1/2 cup honey
- 1/4 cup coconut oil
- 1 teaspoon vanilla extract
- 1/4 teaspoon salt
Instructions
- Line an 8×8-inch baking dish with parchment paper, leaving overhang on two sides for easy removal.
- In a large mixing bowl, whisk together rolled oats, crispy rice cereal, chopped peanuts (if using), and mini chocolate chips.
- In a medium saucepan over low heat, combine peanut butter, honey, and coconut oil. Stir constantly until melted and smooth (about 2-3 minutes). Do not overheat.
- Remove saucepan from heat and stir in vanilla extract and salt until glossy.
- Pour the warm peanut butter mixture over the dry ingredients. Fold with a rubber spatula until every oat and cereal piece is coated. The mixture should be uniform and slightly sticky.
- Transfer the mixture to the prepared baking dish. Use a piece of parchment paper or wax paper to press the mixture down firmly and evenly. Compact well so bars hold together.
- Refrigerate for at least 2 hours (or freeze for about 45 minutes) until completely firm.
- Once firm, lift the bars out using the parchment overhang. Place on a cutting board and cut into 12 even bars with a sharp knife, wiping the knife between slices for clean cuts.
- Store in an airtight container in the refrigerator.
Notes
For best texture, use old-fashioned rolled oats (not quick oats). Press the mixture firmly into the pan to prevent crumbling. Chill completely before cutting. Bars can be stored in the refrigerator for up to 2 weeks or frozen for up to 3 months. For nut-free version, use sunflower seed butter and omit peanuts. For vegan option, replace honey with maple syrup or agave nectar and use dairy-free chocolate chips.
Nutrition
- Serving Size: 1 bar
- Calories: 280
- Sugar: 18
- Sodium: 150
- Fat: 15
- Saturated Fat: 6
- Carbohydrates: 32
- Fiber: 4
- Protein: 8
Keywords: no-bake granola bars, peanut butter bars, lunchbox snacks, easy granola bars, healthy snacks, no-bake recipe


