Love this? Save it for later!
Share the inspiration with your friends
Introduction
“You know that moment when the power blinks out right as you’re about to finish dinner? Yeah, that happened last Friday at my place. I was halfway through making a fancy dessert for some unexpected guests when everything went dark. No oven, no mixer, no fancy gadgets—just me, a flickering candle, and a pantry that looked like a snack aisle exploded. Honestly, I was this close to ordering takeout when I spotted a box of instant pudding tucked behind the cereal. I thought, ‘Why not?’ So I grabbed a few cups, whipped up some cream by hand (yes, hand-whipped during a blackout!), and layered these easy instant pudding cups with whipped topping. The best part? Everyone loved it, and the pudding cups became the star of the night—no oven needed!
Maybe you’ve been there—scrambling to throw together something sweet without all the usual tools or ingredients. This recipe is exactly for those moments when you want a quick, fuss-free dessert that still feels special. It’s honestly saved me more times than I can count, whether it’s a last-minute treat for the kids or a simple way to impress guests without breaking a sweat. Plus, it’s ridiculously easy, so even if you’re not a dessert person, you’ll get it right on the first try. Let me tell you, the creamy pudding paired with fluffy whipped topping is pure comfort in a cup, and the best part is you can customize it however you like. This easy instant pudding cups recipe has stuck around in my kitchen because it’s just that good and that simple.”
Why You’ll Love This Recipe
- Quick & Easy: Ready in under 15 minutes—perfect for those evenings when time is tight or when a sweet craving hits unexpectedly.
- Simple Ingredients: Uses pantry staples like instant pudding mix and whipped topping—no fancy shopping list required.
- Perfect for Any Occasion: Whether it’s a casual family night, potluck, or an after-school snack, these pudding cups fit right in.
- Crowd-Pleaser: Kids adore the creamy texture, and adults appreciate the nostalgic flavors with a fresh twist.
- Unbelievably Delicious: The silky pudding contrasts beautifully with the airy whipped topping, creating a texture combo that’s downright addictive.
This isn’t just another instant pudding recipe. I’ve fine-tuned the balance—making sure the pudding isn’t too thick or too runny, and pairing it with a lightly sweetened whipped topping that feels homemade (because, honestly, store-bought whipped cream can be a little too sweet or artificial sometimes). Plus, I’ve played around with layering and presentation to make these cups look like they came from a café, not a box. That’s why when you serve these easy instant pudding cups, everyone will think you spent way more time on them than you actually did.
It’s comfort food in its simplest form, and honestly, it’s one of my go-to desserts when I want something that feels indulgent but doesn’t require a degree in baking or hours in the kitchen.
What Ingredients You Will Need
This recipe uses simple, wholesome ingredients that come together to create a smooth, creamy dessert with a fluffy finish. Most of these are pantry staples, so you can make these pudding cups on a whim without running to the store.
- Instant pudding mix (choose your favorite flavor—chocolate, vanilla, butterscotch, or even banana; I personally love Jell-O brand for its consistency)
- Cold milk (whole milk works best for creaminess, but 2% is fine; about 2 cups / 475 ml)
- Whipped topping (store-bought whipped cream or homemade whipped cream; see tips below for homemade version)
- Vanilla extract (just 1 teaspoon adds depth and warmth to the pudding)
- Sugar (optional, about 1 tablespoon if you like it sweeter, especially when using unsweetened whipped cream)
- Chocolate shavings or sprinkles (for garnish, optional but highly recommended for that extra wow factor)
- Fresh berries or fruit slices (optional, adds freshness and a pop of color)
If you want to make it dairy-free, swap the milk for almond or oat milk, and use coconut-based whipped topping. For a lighter option, low-fat milk and light whipped topping work just fine too. The beauty here is flexibility!
Equipment Needed
- Mixing bowl: At least one medium-sized bowl to whisk the pudding mix and milk together.
- Whisk or electric mixer: A whisk will do, but an electric hand mixer speeds up the whipped topping preparation if making homemade.
- Measuring cups and spoons: Essential for accuracy—instant pudding can be sensitive to liquid ratios.
- Serving cups or ramekins: Small clear plastic or glass cups work great to show off the layers.
- Spatula: For folding in whipped topping or layering pudding smoothly.
If you don’t have an electric mixer, no worries. I’ve whipped cream by hand plenty of times (takes a bit of arm muscle but feels rewarding!). For budget-friendly options, a simple balloon whisk and glass cups from the dollar store do the job perfectly. Keeping tools simple means this recipe is accessible to almost everyone.
Preparation Method
- Chill your mixing bowl and whisk (optional): If you’re making homemade whipped topping, pop your bowl and whisk in the fridge for 10-15 minutes beforehand. Cold tools help cream whip faster and fluffier.
- Prepare the instant pudding: In a medium bowl, whisk together 1 (3.4 oz / 96 g) packet of instant pudding mix with 2 cups (475 ml) cold milk. Whisk vigorously for about 2 minutes until thickened. The pudding should be smooth, creamy, and slightly glossy.
- Add vanilla and sugar (if using): Stir in 1 teaspoon vanilla extract and 1 tablespoon sugar for a richer and sweeter flavor. Taste and adjust if you want it sweeter.
- Make the whipped topping (if homemade): Pour 1 cup (240 ml) heavy cream into your chilled bowl. Whisk on medium-high speed until soft peaks form (about 3-4 minutes). Add 1 tablespoon powdered sugar and 1 teaspoon vanilla extract, then whip until stiff peaks form but don’t overdo it or it’ll turn grainy.
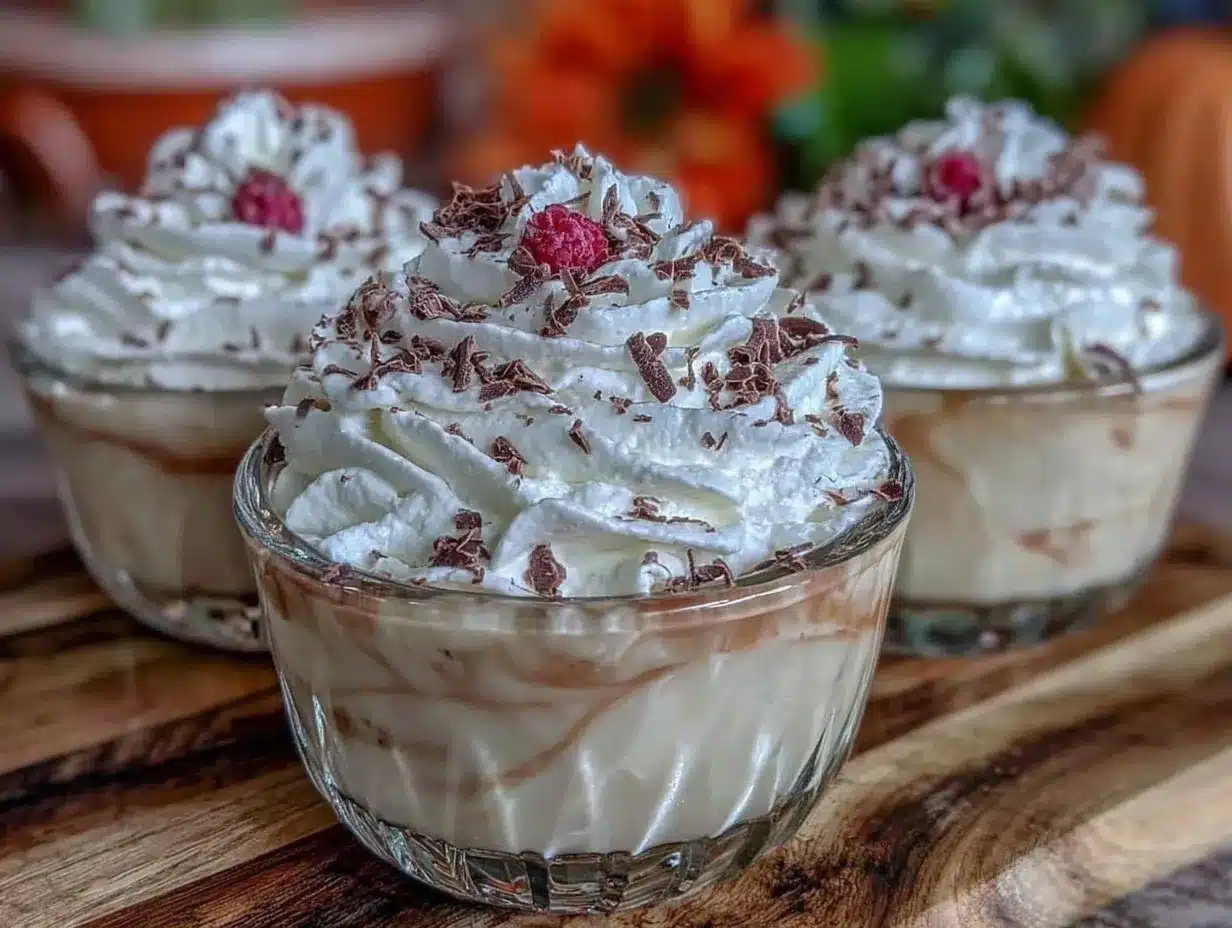
- Layer the pudding cups: Spoon a generous layer of pudding into your serving cups—about ⅔ full. Then add a dollop or layer of whipped topping (homemade or store-bought) on top. Repeat if you want multiple layers or just leave a fluffy crown on top.
- Garnish: Sprinkle with chocolate shavings, sprinkles, or fresh fruit slices to brighten up the presentation.
- Chill before serving: Refrigerate for at least 30 minutes to set and let flavors meld. If you’re in a rush, you can serve immediately, but chilled pudding cups have better texture and taste.
Pro tip: If your pudding seems too runny, let it sit a few extra minutes before layering. Instant pudding thickens as it rests, so patience pays off here.
Cooking Tips & Techniques
- Whisk vigorously: When mixing pudding and milk, whisk fast and steady to avoid lumps and get that silky smooth texture everyone loves.
- Don’t overmix whipped cream: Stop whipping as soon as stiff peaks form. Going beyond that can turn whipped cream into butter—trust me, I’ve ruined more batches than I care to admit.
- Use cold milk and cream: Cold dairy helps pudding set better and whips cream faster, making your dessert more stable and fluffy.
- Layer for impact: If you want to impress, try layering pudding and whipped topping multiple times for a parfait effect. It looks fancy but is actually super simple.
- Multitask while chilling: While pudding cups chill, clean up or prep a quick side dish. Trust me, the waiting time feels shorter that way.
- Experiment with flavors: Add a pinch of cinnamon or espresso powder to the pudding mix for a subtle twist. I once sneaked in some orange zest and it was surprisingly delightful.
Variations & Adaptations
- Dietary swaps: Use coconut milk and dairy-free whipped topping for a vegan-friendly version. Instant pudding mixes labeled gluten-free also make this recipe accessible for those with gluten sensitivities.
- Flavor combos: Try layering chocolate pudding with peanut butter whipped topping or vanilla pudding with fresh mango slices for a tropical vibe.
- Seasonal twists: In fall, sprinkle pumpkin pie spice over the whipped topping or stir in a spoonful of pumpkin puree for a cozy autumn dessert.
- Cooking method adaptations: If you’re short on time, skip chilling and serve immediately. It won’t be quite as set but still delicious.
- Personal variation: Once, in a pinch, I swapped the whipped topping for a quick mascarpone cream mixed with a touch of honey. It was richer and surprisingly hit the spot on a chilly evening.
Serving & Storage Suggestions
These pudding cups are best served chilled, straight from the fridge, when the pudding is set and the whipped topping is delightfully fluffy. They make a great light dessert after dinner or a fun treat for kids’ parties.
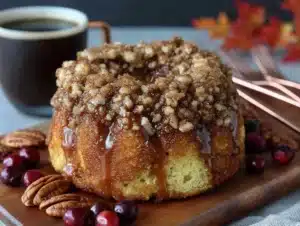
Pair with a hot cup of coffee or a cold glass of milk for that classic combo. If you’re serving at a gathering, try adding fresh berries on the side or a sprinkle of toasted nuts for contrasting texture.
Store leftover pudding cups covered in the fridge for up to 3 days. Avoid freezing as the texture of the pudding and whipped topping can change and become watery once thawed.
When reheating (if you prefer it warm), remove the whipped topping and warm the pudding gently in the microwave for 20-30 seconds, then add fresh whipped topping before serving.
Over time, the pudding thickens and flavors meld, so leftovers taste even better the next day—perfect for prepping ahead.
Nutritional Information & Benefits
Each serving of these easy instant pudding cups contains approximately 180-220 calories, depending on the pudding flavor and amount of whipped topping used. They provide a moderate amount of calcium and vitamin D from the milk, which supports bone health.
Using instant pudding also means this dessert is lower in fat compared to traditional custards or heavy cream-based puddings, especially if you opt for low-fat milk and whipped topping versions.
For those watching sugar intake, you can reduce or omit added sugar, or use a sugar-free instant pudding mix. Just keep in mind this might alter the sweetness slightly.
Overall, these pudding cups are a balanced treat—comforting yet easy on the pantry and your schedule.
Conclusion
Easy instant pudding cups with whipped topping are a lifesaver when you want a quick, satisfying dessert without fuss or fancy ingredients. They’re flexible, tasty, and come together in a flash—ideal for busy nights, surprise guests, or just because you deserve a sweet moment.
Feel free to tweak the flavors or toppings to match your mood or pantry. Honestly, I keep coming back to this recipe because it’s the perfect blend of simplicity and indulgence. So, go ahead, whip up a batch and tell me how you made it your own!
If you try this recipe, I’d love to hear your thoughts or any fun variations you’ve come up with. Leave a comment below and share your pudding cup story—it’s always exciting to see how this humble dessert shines in kitchens everywhere.
Remember, sometimes the easiest recipes bring the most joy—these pudding cups are proof!
FAQs
Can I make these pudding cups ahead of time?
Absolutely! They taste even better after chilling for at least 30 minutes. You can prepare them a few hours ahead and keep refrigerated until serving.
What if I don’t have instant pudding mix?
While instant pudding mix is key for the texture, you can try a homemade pudding recipe, but it will take longer to set and requires cooking.
Can I use fresh whipped cream instead of store-bought topping?
Yes! Homemade whipped cream adds a fresh, light taste and you can control the sweetness easily.
Is this recipe suitable for kids?
Definitely. Kids love the creamy texture and sweet flavor, and it’s a quick, mess-free dessert option.
How do I store leftover pudding cups?
Keep them covered in the fridge for up to 3 days. Avoid freezing as the texture may change upon thawing.
Pin This Recipe!
Easy Instant Pudding Cups Recipe with Whipped Topping

A quick and fuss-free dessert made with instant pudding mix and whipped topping, perfect for last-minute treats or casual gatherings. This recipe is customizable, easy to prepare, and requires no baking.
- Prep Time: 10 minutes
- Cook Time: 0 minutes
- Total Time: 40 minutes
- Yield: 4 servings 1x
- Category: Dessert
- Cuisine: American
Ingredients
- 1 (3.4 oz / 96 g) packet instant pudding mix (chocolate, vanilla, butterscotch, or banana)
- 2 cups (16 fl oz / 475 ml) cold milk (whole milk preferred, 2% acceptable)
- 1 cup (8 fl oz / 240 ml) whipped topping (store-bought or homemade whipped cream)
- 1 teaspoon vanilla extract
- 1 tablespoon sugar (optional)
- Chocolate shavings or sprinkles (optional, for garnish)
- Fresh berries or fruit slices (optional, for garnish)
Instructions
- Chill your mixing bowl and whisk for 10-15 minutes if making homemade whipped topping to help cream whip faster and fluffier.
- In a medium bowl, whisk together the instant pudding mix and cold milk vigorously for about 2 minutes until thickened and smooth.
- Stir in vanilla extract and sugar if using; adjust sweetness to taste.
- If making homemade whipped topping, pour heavy cream into the chilled bowl and whisk on medium-high speed until soft peaks form (3-4 minutes). Add powdered sugar and vanilla extract, then whip until stiff peaks form without overwhipping.
- Spoon pudding into serving cups until about two-thirds full, then add a layer or dollop of whipped topping on top. Repeat layering if desired.
- Garnish with chocolate shavings, sprinkles, or fresh fruit slices.
- Refrigerate pudding cups for at least 30 minutes before serving to set and meld flavors. Can be served immediately if needed.
Notes
If pudding seems too runny, let it rest a few extra minutes before layering as it thickens over time. Use cold milk and cream for best texture. Stop whipping cream at stiff peaks to avoid turning it into butter. Customize with different pudding flavors or toppings. For dairy-free, use almond or oat milk and coconut-based whipped topping.
Nutrition
- Serving Size: 1 pudding cup (appro
- Calories: 180220
- Sugar: 20
- Sodium: 150
- Fat: 8
- Saturated Fat: 5
- Carbohydrates: 28
- Protein: 3
Keywords: instant pudding, quick dessert, whipped topping, easy pudding cups, no bake dessert, last minute dessert, kid-friendly dessert