Love this? Save it for later!
Share the inspiration with your friends
I figured that crumbling a whole cake into crumbs would be the hard part. It took about ten minutes for that assumption to fall apart completely. The real challenge wasn’t the baking or even the frosting; it was the sheer, sticky audacity of trying to roll a ball of cake and frosting mixture without it sticking to every surface on earth. You know that feeling when you’re making holiday treats and suddenly your hands are covered in red velvet sludge? Yeah, that was my Christmas Eve. I had planned to make elegant, dusted snowmen. What I got were lumpy, red-and-green speckled spheres that looked more like angry gnomes than festive decorations.
But here is the thing about failure in the kitchen: it usually tastes good. These Festive Christmas Cake Pops with Red & Green Sprinkles were delicious, even if they weren’t Pinterest-perfect. The contrast between the dry, crumbly cake base and the wet, sugary frosting is a battle you have to win. If you get it wrong, you get cake balls that crack. If you get it right, you get that melt-in-your-mouth texture that makes you close your eyes. Honestly, I ended up eating three of them before they were even dipped in chocolate. They are messy, they are sweet, and they are exactly what you need when the house is full of people and the oven is still warm.
I realized pretty quickly that these pops aren’t just about looking cute on a cupcake stand. They are about control. You can make them ahead, you can hide them in the fridge, and you can hand them to kids who are otherwise impossible to please. The red and green sprinkles aren’t just decoration; they are camouflage for any imperfections in your rolling technique. Let’s face it, not everyone has the steady hands of a surgeon when covered in melted chocolate. These pops forgive a lot. They stick together, they hold their shape, and they bring a serious amount of holiday cheer to any table. After that chaotic first batch, I never looked back. Now, they are a staple in my December routine, right alongside the peppermint bark and the gingerbread houses.
Why You’ll Love This Recipe
Let’s be real for a second. Baking a whole cake just to eat a few slices can feel like a lot of work for what you get. But turning that cake into Festive Christmas Cake Pops with Red & Green Sprinkles changes the entire game. It transforms a simple dessert into an interactive experience. I’ve tested this method with everything from box mixes to scratch-made vanilla batters, and the result is always the same: pure, concentrated joy. This isn’t just another cake pop recipe; it’s the version that actually stays on the stick and doesn’t fall off halfway through eating.
Here is why these pops deserve a spot in your holiday rotation:
- Quick & Easy: Once you have the cake base ready, these come together in under 30 minutes. You can bake the cake while the kids wrap gifts, then spend the evening rolling and dipping. It’s perfect for busy weeknights or last-minute holiday gatherings.
- Simple Ingredients: No fancy grocery trips needed. You likely already have a box of cake mix, some frosting, and a jar of sprinkles in your pantry. It’s the ultimate “use what you have” recipe that still looks professional.
- Perfect for Holiday Parties: Whether it’s an office party, a school bake sale, or a cozy dinner at home, these pops fit right in. They are small enough to eat one-handed while holding a drink, which is a huge plus during the holidays.
- Crowd-Pleaser: Always gets rave reviews from kids and adults alike. The combination of sweet cake, rich frosting, and crunchy sprinkles hits all the right notes. Even picky eaters who usually avoid “frosting-heavy” desserts tend to love these.
- Unbelievably Delicious: The texture is next-level comfort food. It’s soft, airy, and melts on the tongue. It’s not just good; it’s the kind of treat that makes you want to bake another batch immediately.
What makes this recipe different is the balance. Too much frosting and they become greasy balls. Too little and they crumble apart. This method finds that sweet spot every time. It’s comfort food reimagined—easier than decorating a tiered cake, but with the same soul-soothing satisfaction. Plus, the red and green color scheme is timeless. It doesn’t matter if you’re celebrating Christmas, Hanukkah (if you swap the colors), or just want to add some festive flair to a winter night. These pops are stress-free entertaining at its finest.
What Ingredients You Will Need
This recipe uses simple, wholesome ingredients to deliver bold flavor and satisfying texture without the fuss. The beauty of these pops lies in the simplicity of the base. You don’t need artisanal flours or imported chocolates to make something special. The key is to use ingredients that complement each other, creating a cohesive flavor profile that isn’t too heavy. Here is what you need to get started, broken down by function.
- For the Cake Base:
- One 15.25 oz box of red velvet cake mix: This provides the classic red color and a tender crumb. I recommend using a high-quality box mix like Duncan Hines or Wilton for consistent results. If you prefer a less sweet option, you can use a white cake mix and add red food gel, but red velvet is the traditional choice for a reason.
- Ingredients to prepare the cake: Check the box for the required water, oil, and eggs. Usually, it’s about 1 1/3 cups water, 1/3 cup vegetable oil, and 3 large eggs. Using room temperature eggs helps the cake bake evenly.
- For the Binder (Frosting):
- One 16 oz container of cream cheese frosting: This is crucial. Do not use buttercream if you can avoid it; cream cheese frosting has a thicker consistency that helps the cake balls hold their shape better. Brands like Wilton or Betty Crocker work well. If you make your own, ensure it is chilled and thick.
- Optional: 1 tsp vanilla extract: Adds a depth of flavor that cuts through the sweetness.
- For the Coating:
- 12 oz white chocolate melting wafers: These are easier to work with than chocolate chips, which can seize up. Brands like Almond Bark or Candy Melts are widely available and come in various colors. If you want a natural coating, you can use high-quality white chocolate chips, but you will need to add a teaspoon of coconut oil to thin them out.
- 1 tbsp coconut oil or shortening: This helps thin the chocolate for a smoother dip. It also adds a slight sheen to the finished pop.
- For the Decoration:
- Red and green holiday sprinkles: Jimmies or nonpareils work best. They stick to the wet chocolate and create that festive look. Make sure you have a mix of both colors to get that classic holiday vibe.
- Red and green sugar crystals: For a little extra sparkle and crunch, sprinkle these on top before the chocolate sets.
If you want to swap ingredients, you can use chocolate cake mix for a “chocolate covered strawberry” vibe, or lemon cake for a tart contrast. Just remember that the color of the cake mix will show through if you don’t use enough frosting or chocolate. For a gluten-free option, simply swap the standard cake mix for a gluten-free version, though you may need slightly more frosting to bind it.
Equipment Needed
You don’t need a professional kitchen to make these, but having the right tools makes the process infinitely less frustrating. The most important piece of equipment is a set of cake pop molds or, if you are making traditional round pops, a sturdy cake pop stand. I used to use a block of foam, but it gets messy and sticky. A wooden or plastic stand keeps them upright and makes dipping much easier.
You will also need a large mixing bowl. If you are crumbling the cake by hand, a big bowl gives you enough room to work without making a mess. A silicone spatula is essential for folding the frosting into the crumbs. Metal spoons can tear the bowl or scratch non-stick surfaces, so stick to silicone. For dipping, long-handled dipping forks or even chopsticks work well. I prefer the forks because they have a flat surface that helps control the amount of chocolate on the pop.
A microwave-safe bowl is needed for melting the chocolate. If you don’t have one, a glass measuring cup with a spout works great. Make sure you have parchment paper or a silicone baking mat ready to place the dipped pops on. Lining a baking sheet with parchment paper is a must; chocolate sticks to everything else. Finally, keep a roll of paper towels nearby. You will need them to wipe off your fingers when the chocolate gets messy. It’s not glamorous, but it’s practical.
Preparation Method
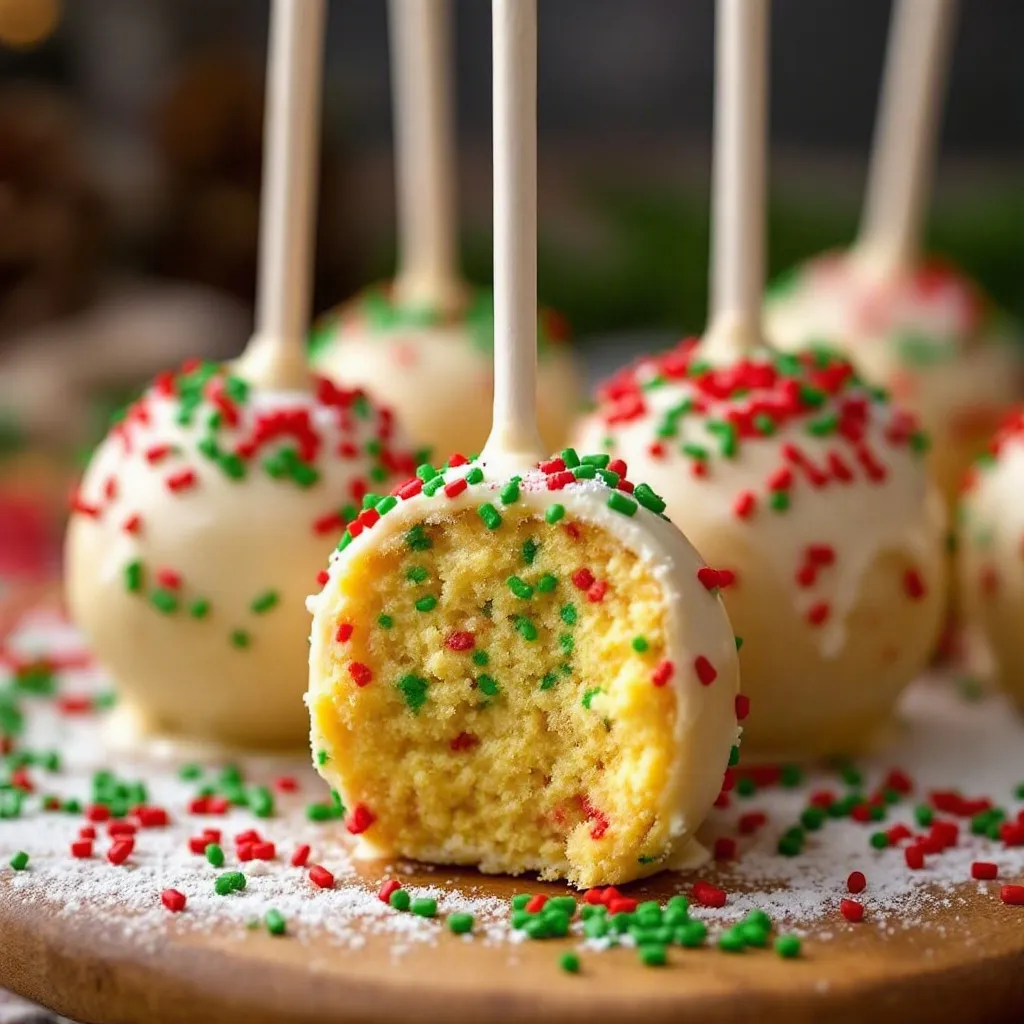
Making Festive Christmas Cake Pops with Red & Green Sprinkles is a process of layering and patience. Here is how to do it step-by-step, with measurements and tips for success.
- Bake the Cake (30 minutes): Preheat your oven to 350°F (175°C). Prepare the red velvet cake mix according to the package directions. Pour the batter into a greased 9×13 inch baking pan. Bake for 25-30 minutes, or until a toothpick inserted into the center comes out clean. Let the cake cool completely in the pan. This step is critical; if the cake is warm, it will melt the frosting and make a soggy mess.
- Tip: You can speed this up by putting the pan in the fridge for an hour, but make sure it’s covered to prevent it from drying out.
- Crumble the Cake (10 minutes): Once the cake is cool, break it apart into large chunks. Place the chunks into a large mixing bowl. Use your hands, a fork, or a food processor to crumble the cake into fine, sand-like crumbs. There should be no large chunks left. The finer the crumbs, the smoother your cake pops will be.
- Warning: Don’t skip this step. Large chunks lead to uneven pops that might crack when you dip them.
- Mix the Dough (5 minutes): Add the cream cheese frosting to the cake crumbs. Start with 1/2 cup of frosting and mix it in. Add more frosting, one tablespoon at a time, until the mixture holds together when pressed. You want a consistency like playdough. If it’s too dry, add more frosting. If it’s too wet, add more cake crumbs.
- Sensory Cue: The mixture should look dark and uniform, with no dry spots. It should feel cool and slightly tacky to the touch.
- Roll the Balls (15 minutes): Pinch off small portions of the cake mixture, about 1.5 tablespoons each. Roll them between your palms to form smooth balls. Place them on a baking sheet lined with parchment paper. As you roll, you might notice the mixture sticking to your hands. Wet your hands slightly with water or wipe them with a damp paper towel to prevent sticking.
- Pro Tip: Keep the balls uniform in size so they look professional. Aim for about 24-30 pops.
- Chill the Balls (30 minutes): Place the baking sheet with the cake balls in the freezer for 30 minutes. This step is non-negotiable. Cold cake balls are much easier to dip without falling apart. If you skip this, the heat from your hands will melt the frosting, and the pops will slide off the sticks.
- Alternative: If you are short on time, the fridge works, but the freezer is faster and more effective.
- Melt the Chocolate (5 minutes): While the balls are chilling, melt the white chocolate wafers. Place them in a microwave-safe bowl. Microwave in 30-second intervals, stirring between each interval, until smooth. Stir in the coconut oil. The mixture should be thin and pourable, like warm honey.
- Warning: Do not overheat the chocolate. If it gets too hot, it will seize and become grainy. If it looks lumpy, keep stirring; it might just need a little more time.
- Dip and Decorate (20 minutes): Remove the cake balls from the freezer. Dip a cake pop stick into the melted chocolate, about 1/2 inch down, then insert it into the cake ball. This chocolate acts as glue. Hold the stick for a few seconds to set. Then, dip the entire cake pop into the melted chocolate, swirling it to coat evenly. Let excess chocolate drip off. Immediately sprinkle with red and green sprinkles.
- Technique: Tap the handle of the dipping fork gently against the side of the bowl to remove excess chocolate. This prevents drips and keeps the pop clean.
- Set the Pops (1 hour): Place the dipped pops back on the baking sheet or in a cake pop stand. Let them sit at room temperature until the chocolate is fully set. This usually takes about an hour. Once set, they are ready to serve or store.
- Tip: If your kitchen is warm, you can put them in the fridge for 15 minutes to speed up the setting process.
Cooking Tips & Techniques
I have made my fair share of cake pop disasters, so let me save you some time. The biggest mistake people make is using too much frosting. It’s tempting to add more to make the mixture easier to roll, but too much frosting makes the center soft and prone to falling off the stick. Start with less frosting than you think you need. You can always add more, but you can’t take it out.
Another common issue is the chocolate coating. If your chocolate is too thick, it will crack when you bite into it. If it’s too thin, it won’t cover the pop evenly. The key is the coconut oil. Add it gradually until you reach the right consistency. Also, always dip the stick in chocolate before inserting it into the cake ball. This creates a seal that prevents the pop from sliding off.
Temperature control is everything. Your cake balls must be cold before dipping. If they are warm, the chocolate will melt on contact, and you’ll end up with a chocolate-covered cake ball on your counter, not on a stick. Work quickly once you take them out of the freezer. If you feel the balls softening, put them back in for a few minutes.
Don’t worry about perfection. Cake pops are rustic by nature. If one is slightly lopsided or has a few extra sprinkles, it’s part of the charm. In fact, I’ve found that the “ugly” ones are often the first to disappear because people are curious. And if a pop does break off the stick, don’t throw it away. Crumble it up and eat it with a spoon. It’s basically cake batter ice cream.
Variations & Adaptations
While the classic red velvet and cream cheese combo is a holiday staple, there are plenty of ways to twist this recipe. You can adapt the flavors to suit different tastes or dietary needs.
- Chocolate Peppermint: Use a chocolate cake mix and mint-flavored frosting. Dip in white chocolate and decorate with crushed peppermint candies. This is a favorite among adults who love a strong mint kick.
- Snickerdoodle: Use a sugar cake mix and cinnamon cream cheese frosting. Dip in white chocolate and roll in a mix of cinnamon and sugar. It’s warm, cozy, and perfect for winter.
- Gluten-Free Option: Swap the red velvet cake mix for a gluten-free vanilla or chocolate mix. Ensure your frosting and sprinkles are also certified gluten-free. The texture might be slightly denser, so you may need a bit more frosting to bind it.
- Vegan Twist: Use a vegan cake mix and dairy-free cream cheese frosting. Dip in vegan white chocolate (made with coconut milk instead of dairy). Decorate with vegan sprinkles. These are surprisingly good and just as festive.
I once tried making these with pumpkin spice cake mix and pumpkin cream cheese frosting. They were amazing, but they required a bit more frosting to hold together because pumpkin puree adds moisture. If you try a variation with added purees or liquids, be careful not to over-mix. The goal is a firm, rollable dough.
Serving & Storage Suggestions
These Festive Christmas Cake Pops with Red & Green Sprinkles are best served at room temperature. Cold chocolate can be hard to bite through, and room temperature allows the flavors to fully develop. Arrange them in a cupcake stand or a mason jar for a festive display. They pair well with hot cocoa, coffee, or even a glass of cold milk.
For storage, keep the pops in an airtight container at room temperature for up to 5 days. If your kitchen is very warm or humid, store them in the fridge. However, bring them to room temperature before serving for the best texture. They can also be frozen for up to 3 months. To freeze, place the undipped cake balls in a freezer-safe bag. When you are ready to make them, let them thaw in the fridge overnight, then proceed with dipping.
Avoid stacking the pops in the container, as the chocolate can stick together. If you must stack them, place a piece of parchment paper between layers. The flavors tend to meld and intensify after a day or two, so they might taste even better on day two.
Nutritional Information & Benefits
These cake pops are a sweet treat, so moderation is key. Each pop contains approximately 150-200 calories, depending on the size and coating. They are high in sugar and carbohydrates, primarily from the cake mix and chocolate. However, they do provide a quick energy boost, which can be helpful during busy holiday seasons. The cream cheese frosting adds a small amount of protein and calcium, though it is negligible in the grand scheme of things.
For those with dietary restrictions, note that standard versions contain gluten, dairy, and eggs. The vegan and gluten-free variations offer alternatives, but always check the labels of your specific ingredients. I try to balance these treats with a healthy meal beforehand, perhaps with some of our fresh cowboy caviar or a side of honey mustard coleslaw to add some fiber and veggies to the holiday spread. Remember, a little bit goes a long way.
Conclusion
Festive Christmas Cake Pops with Red & Green Sprinkles are more than just a dessert; they are a memory maker. They bring the family together in the kitchen, creating a mess that is worth every minute of cleanup. I love these pops because they are forgiving, delicious, and undeniably festive. Whether you are a seasoned baker or a beginner, this recipe will give you confidence and a plate of happy guests.
I encourage you to try your own variations. Maybe you add a hint of orange zest to the red velvet, or you use gold sprinkles for a touch of luxury. Share your creations with friends and family, and don’t be afraid to ask for feedback. I’d love to hear how your pops turned out. Leave a comment below with your favorite twist or any tips you discovered along the way. Happy baking, and Merry Christmas!
FAQs
Can I make cake pops ahead of time?
Yes, you can make the cake balls up to a week in advance and store them in the freezer. Dip them in chocolate just before serving for the best texture. If you dip them ahead of time, store them in the fridge and bring to room temperature before serving.
Why do my cake pops fall off the stick?
This usually happens because the cake ball is too warm or the chocolate seal isn’t strong enough. Always dip the stick in chocolate before inserting it, and ensure the cake balls are thoroughly chilled in the freezer before dipping.
Can I use buttercream instead of cream cheese frosting?
You can, but buttercream is softer and can make the cake balls too wet. Cream cheese frosting provides a thicker, more stable base. If you must use buttercream, chill it thoroughly and use less of it to bind the crumbs.
How do I store leftover cake pops?
Store them in an airtight container at room temperature for up to 5 days. If your kitchen is warm, store them in the fridge. Avoid freezing dipped pops as the chocolate may develop condensation and lose its shine.
What kind of sprinkles work best?
Jimmies (long sprinkles) and nonpareils (round sprinkles) stick well to wet chocolate. Sugar crystals also add a nice crunch. Avoid sprinkles that are too large or heavy, as they may not adhere properly and could weigh down the pop.
Pin This Recipe!

Festive Christmas Cake Pops: Best 30-Min Holiday Treat
Delicious and festive red velvet cake pops coated in white chocolate and decorated with red and green sprinkles. These easy-to-make treats are perfect for holiday parties and come together in under 30 minutes after baking.
- Prep Time: 30 minutes
- Cook Time: 30 minutes
- Total Time: 1 hour 15 minutes
- Yield: 24-30 servings 1x
- Category: Dessert
- Cuisine: American
Ingredients
- 15.25 oz box red velvet cake mix
- 1 1/3 cups water
- 1/3 cup vegetable oil
- 3 large eggs
- 16 oz container cream cheese frosting
- 1 tsp vanilla extract (optional)
- 12 oz white chocolate melting wafers
- 1 tbsp coconut oil or shortening
- Red and green holiday sprinkles
- Red and green sugar crystals (optional)
Instructions
- Preheat oven to 350°F (175°C). Prepare red velvet cake mix according to package directions using water, oil, and eggs. Pour into a greased 9×13 inch pan and bake for 25-30 minutes until a toothpick comes out clean.
- Let the cake cool completely in the pan. Once cool, crumble the cake into fine, sand-like crumbs in a large mixing bowl.
- Add cream cheese frosting to the crumbs, starting with 1/2 cup. Mix and add more frosting one tablespoon at a time until the mixture holds together like playdough.
- Roll the mixture into 1.5 tablespoon balls. If the mixture sticks to your hands, wet them slightly with water. Place balls on a parchment-lined baking sheet.
- Chill the cake balls in the freezer for 30 minutes to firm them up.
- Melt white chocolate wafers in a microwave-safe bowl in 30-second intervals, stirring between each. Stir in coconut oil until smooth and pourable.
- Dip the tip of a cake pop stick into the melted chocolate and insert it into a chilled cake ball. Dip the entire pop into the chocolate, coating evenly.
- Immediately sprinkle with red and green sprinkles while the chocolate is wet.
- Place pops on a stand or parchment-lined sheet and let set at room temperature for about 1 hour until the chocolate is fully hardened.
Notes
Ensure the cake is completely cool before crumbling to prevent the frosting from melting. Chill the cake balls thoroughly before dipping to prevent them from falling off the sticks. Dip the stick in chocolate before inserting it into the cake ball to create a seal. Store in an airtight container at room temperature for up to 5 days.
Nutrition
- Serving Size: 1 cake pop
- Calories: 175
- Sugar: 18
- Sodium: 150
- Fat: 10
- Saturated Fat: 5
- Carbohydrates: 22
- Fiber: 1
- Protein: 2
Keywords: Christmas cake pops, red velvet cake pops, holiday treats, easy dessert, white chocolate cake pops, festive baking


