Love this? Save it for later!
Share the inspiration with your friends
I assumed that a can of kidney beans was the secret to a thick, hearty diner chili. It took about twenty minutes for that assumption to fall apart completely. I had spent years believing that the heavy, meaty texture of the best chili came from an excessive amount of ground beef and a generous pour of tomato paste. I was wrong. The truth is, the beans are just the filler. The real magic—the stuff that makes you pull your chair closer to the table and ignore your phone—is the balance of spices and the slow, stubborn reduction of the sauce.
This isn’t a chili that tries to be gourmet. It doesn’t have fancy smoked paprika from a specialty shop or exotic chilies you have to soak in hot water for an hour. It’s the kind of Classic Diner-Style Chili with Kidney Beans you find in a place with red vinyl booths and a jukebox that only plays songs from 1974. It’s messy, it’s loud, and it smells like comfort.
I remember the first time I made this for a group of friends who were skeptical about “bean chili.” They expected something watery and bland. Instead, they got a bowl of rich, dark red stew that clung to the spoon. One guy actually asked for the recipe before he finished his second helping. That’s the thing about diner-style chili; it’s not about perfection. It’s about consistency. It’s about getting that deep, savory flavor that sticks to your ribs on a cold Tuesday night.
There’s a specific moment when you taste it right out of the pot, before it has a chance to cool down. The heat hits your tongue, followed by the sweetness of the onions, and then that slow, smoky warmth from the cumin and chili powder. It’s not complicated. It doesn’t need to be. You just need to let it simmer long enough for the flavors to marry. If you rush it, you’re just eating spiced tomato soup with meat. But if you wait? You get something that feels like a hug in a bowl.
It’s not a fancy dish. It doesn’t need a garnish of microgreens or a drizzle of truffle oil. It needs sour cream, cheddar cheese, and maybe some cornbread on the side. That’s it. That’s the whole story. And honestly? That’s enough.
Why You’ll Love This Recipe
This recipe isn’t just another entry in the endless sea of chili recipes online. It’s the result of years of testing, tweaking, and yes, a few failures. I’ve tried making chili with just meat, then just beans, then a mix, and finally, I landed on this balance that feels right. Here’s why this Classic Diner-Style Chili with Kidney Beans is worth your time:
- Quick & Easy: While it simmers for a while, the active prep time is minimal. You’re mostly just chopping and stirring. It’s perfect for busy weeknights when you want something homemade but don’t have hours to spare.
- Simple Ingredients: No fancy grocery trips needed. You likely already have most of these items in your pantry. It’s about using what you have and making it work.
- Perfect for Meal Prep: Chili tastes better the next day, and this one is no exception. It’s great for making a big batch on Sunday and eating it all week long. It pairs well with other make-ahead sides like fresh cowboy caviar for a full meal.
- Crowd-Pleaser: Whether you have picky eaters or seasoned chili heads, this recipe hits the sweet spot. The beans add bulk without overpowering the flavor, making it satisfying for everyone.
- Unbelievably Delicious: The texture is thick and hearty, and the flavor is deep and complex. It’s comfort food reimagined—simpler, but with the same soul-soothing satisfaction.
What makes this recipe different is the technique. Many people rush the browning of the meat or skip the step of blooming the spices. I don’t. By taking the time to properly sear the beef and toast the spices in the oil, you unlock a depth of flavor that you just can’t get by throwing everything in a pot and walking away. It’s a small step that makes a huge difference.
Connect with the why: This recipe isn’t just good—it’s the kind that makes you close your eyes after the first bite. It’s the kind of meal that brings people together, around a table, sharing stories and passing bowls. It’s perfect for impressing guests without stress, or turning a simple meal into something memorable.
What Ingredients You Will Need
This recipe uses simple, wholesome ingredients to deliver bold flavor and satisfying texture without the fuss. The key to a great diner-style chili is not having too many ingredients, but having the *right* ones. You want quality over quantity here. Since the flavor profile is so focused on the beef and spices, you need good quality beef and fresh spices.
Here is what you’ll need to get started:
- Ground Beef (80/20 blend): About 2 pounds. You want some fat here. Lean beef will result in dry, crumbly chili. The fat carries the flavor. If you can find grass-fed, even better, but standard ground chuck works perfectly.
- Yellow Onions: 2 large onions, finely diced. Onions are the base of the flavor. Don’t skimp on them. You want them to melt into the sauce.
- Garlic: 4 cloves, minced. Fresh garlic is non-negotiable. Jarred garlic just doesn’t have the same punch.
- Kidney Beans: 2 cans (15 oz each). Rinse and drain them well. This removes the excess sodium and the starchy liquid that can make the chili slimy.
- Tomato Sauce: 1 can (15 oz). I prefer no-salt-added tomato sauce so I can control the sodium level. It provides the liquid base for the chili.
- Tomato Paste: 2 tablespoons. This adds concentration and depth. It’s not just for thickening; it adds a rich, umami flavor.
- Beef Broth: 1 cup. Use low-sodium broth. It adds body to the chili without making it too salty.
- Chili Powder: 2 tablespoons. Use a good quality blend. I recommend Tone’s or McCormick for consistent results. This is the main flavor driver.
- Ground Cumin: 1 tablespoon. Cumin adds that earthy, warm note that defines chili. Don’t skip it.
- Smoked Paprika: 1 teaspoon. This adds a subtle smokiness that mimics the flavor of slow-cooked meat. It’s a game-changer.
- Garlic Powder: 1 teaspoon. Adds an extra layer of garlic flavor without the texture of fresh garlic.
- Onion Powder: 1 teaspoon. Similar to garlic powder, it adds a concentrated onion flavor.
- Cayenne Pepper: 1/2 teaspoon (optional). Adjust based on your heat preference. Start with less if you’re not a fan of spice.
- Salt and Black Pepper: To taste. Always season at the end, so you don’t over-salt the broth.
- Vegetable Oil: 1 tablespoon. For sautéing the onions and browning the meat.
You can swap the kidney beans for pinto beans if you prefer, but kidney beans hold their shape better in long simulations. If you’re looking for a lighter side to serve with this, try a fresh zesty zucchini ribbon salad to cut through the richness.
Equipment Needed
You don’t need a lot of fancy gear for this. A heavy-bottomed pot is key. I use a 6-quart Dutch oven. It distributes heat evenly and prevents hot spots that can burn the bottom of the chili. If you don’t have a Dutch oven, a large stockpot works fine, just keep an eye on the heat.
- 6-Quart Dutch Oven or Stockpot: Essential for even cooking and holding the volume of the chili.
- Wooden Spoon: Better than metal, which can scratch the pot. It’s also great for scraping the bottom of the pot to deglaze.
- Sharp Knife and Cutting Board: For dicing onions and mincing garlic.
- Measuring Cups and Spoons: Precision matters with spices. Too much cumin can overpower the dish.
- Colander: For rinsing the beans.
If you’re short on space, a large Instant Pot can also work, but the texture won’t be quite the same because you can’t reduce the sauce as effectively. For the best results, stick with the stovetop. It’s slower, but worth it.
Preparation Method
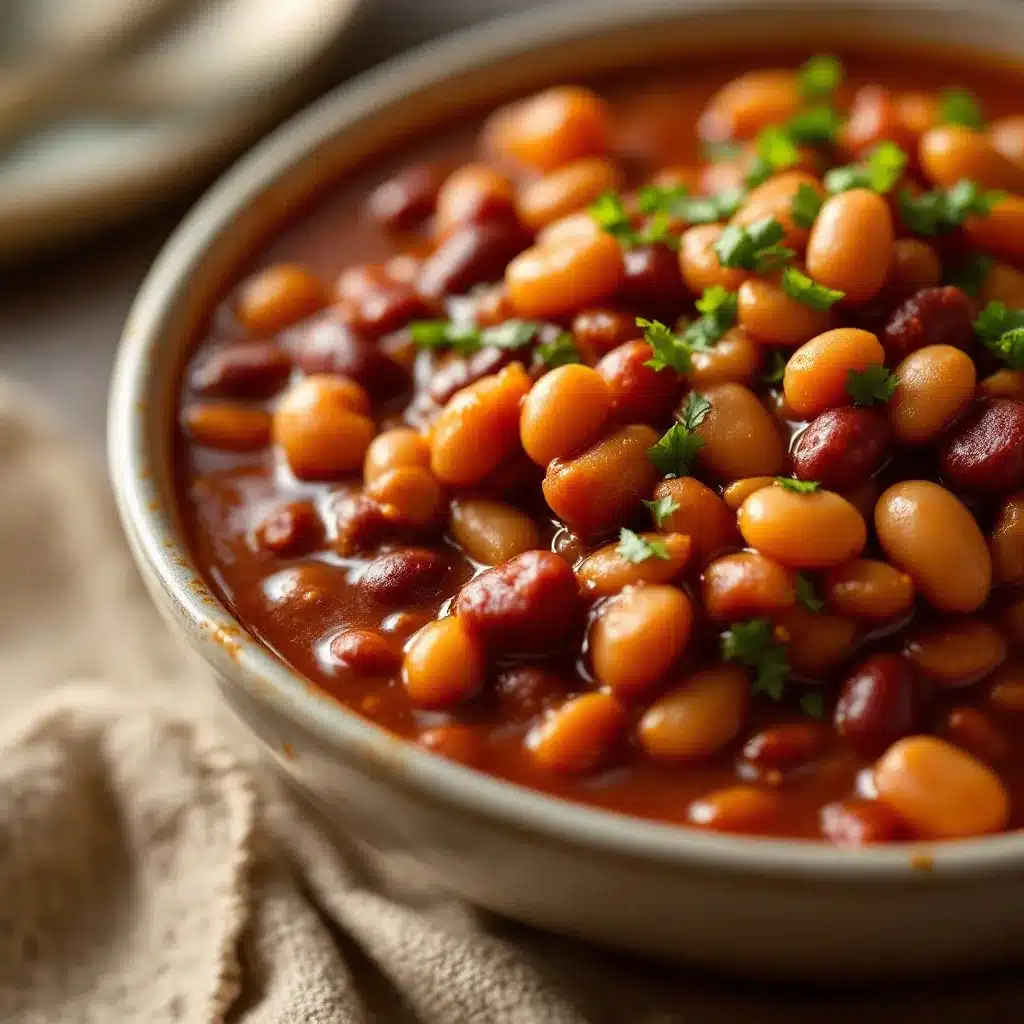
Let’s get into the nitty-gritty. This process is straightforward, but attention to detail makes all the difference.
- Prep the Ingredients (10 minutes): Dice your onions finely. Mince the garlic. Open your cans of beans, tomato sauce, and broth. Rinse the beans under cold water in a colander until the water runs clear. This step is crucial for texture. Pat the ground beef dry with a paper towel if it’s very wet. This helps it brown instead of steam.
- Sauté the Aromatics (5 minutes): Heat the vegetable oil in your Dutch oven over medium heat. Add the diced onions. Cook them until they are soft and translucent, about 5 minutes. Don’t rush this. You want them to sweat out their moisture. Add the minced garlic in the last minute of cooking. Stir constantly to prevent burning. The kitchen should start smelling amazing.
- Brown the Beef (10 minutes): Increase the heat to medium-high. Add the ground beef to the pot. Break it up with your wooden spoon. You want small crumbles, not large chunks. Cook until the beef is no longer pink and has developed some brown bits on the bottom. These brown bits are flavor gold. Do not drain the fat unless it’s excessive. That fat is part of the flavor profile.
- Bloom the Spices (2 minutes): Reduce the heat to medium. Add the chili powder, cumin, smoked paprika, garlic powder, onion powder, and cayenne pepper. Stir the spices into the meat and onion mixture. Cook for about 1-2 minutes. This “blooms” the spices, releasing their essential oils and intensifying their flavor. It’s a small step that makes a big difference.
- Add the Liquids (5 minutes): Stir in the tomato paste. Cook it for another minute to caramelize slightly. Then, pour in the tomato sauce and beef broth. Scrape the bottom of the pot with your wooden spoon to release all the browned bits. This is called deglazing, and it adds so much depth. Bring the mixture to a simmer.
- Add the Beans (5 minutes): Add the rinsed kidney beans to the pot. Stir everything together. Taste the sauce. Add salt and black pepper to taste. Remember, you can always add more salt, but you can’t take it out.
- Final Adjustments (5 minutes): Once the chili has reached your desired consistency, taste it again. Adjust the seasoning if needed. Add more salt, pepper, or a pinch of cayenne if you want more heat. Remove from heat.
The total time is about an hour and a half, but most of that is passive simmering. You’re free to do other things during that time. Just give it a stir every 15 minutes or so.
Cooking Tips & Techniques
Here are some pro tips to ensure your chili turns out perfectly every time.
- Don’t Drain the Fat: I know it sounds unhealthy, but that fat carries flavor. If it’s too much, you can skim some off at the end, but leave some in for richness.
- Bloom Your Spices: This is the most important step. Adding dry spices directly to liquid doesn’t extract their full flavor. Cooking them in oil first unlocks their potential.
- Simmer, Don’t Boil: A rolling boil can make the meat tough and the sauce watery. A gentle simmer is what you want. It allows the collagen in the meat to break down slowly, creating a tender texture.
- Taste as You Go: Seasoning is not just for the end. Taste after browning the meat, after adding the tomatoes, and again at the end. This ensures balanced flavor at every stage.
- Use a Heavy Pot: Thin pots can create hot spots, leading to burnt bits that taste bitter. A heavy-bottomed pot distributes heat evenly.
I once made chili in a thin aluminum pot and it burned on the bottom. The whole batch tasted acrid. I had to throw it out. Lesson learned. Invest in a good pot. It’s worth it.
Variations & Adaptations
While this recipe is classic, there are plenty of ways to make it your own.
- Vegetarian Option: Swap the ground beef for a plant-based ground meat alternative or use extra beans and lentils. You’ll need to add a bit more vegetable broth to compensate for the lost meat flavor.
- Spicy Kick: Add a diced jalapeño pepper when you sauté the onions. Or, add a teaspoon of crushed red pepper flakes when you bloom the spices.
- Smoky Twist: Add a chipotle pepper in adobo sauce, finely chopped. This adds a deep, smoky heat that pairs perfectly with the kidney beans.
- Gluten-Free: This recipe is naturally gluten-free. Just ensure your beef broth and tomato sauce are certified gluten-free.
- Slow Cooker Method: Brown the meat and onions on the stovetop, then transfer everything to a slow cooker. Add the rest of the ingredients and cook on low for 6-8 hours. This is great for busy days.
I often add a splash of dark beer when I’m feeling fancy. It adds a rich, malty flavor that complements the beef. But honestly, the classic version is hard to beat.
Serving & Storage Suggestions
This chili is best served hot, straight from the pot. Top it with shredded cheddar cheese, a dollop of sour cream, and chopped fresh cilantro or green onions. Serve with crusty bread, cornbread, or over baked potatoes. It’s also great with a side of crispy southern fried green tomato BLT sandwich for a hearty meal.
For storage, let the chili cool completely before transferring it to an airtight container. It will keep in the refrigerator for up to 5 days. In fact, it tastes even better the next day as the flavors continue to meld.
To freeze, portion the chili into freezer-safe containers or bags. It will keep for up to 3 months. Thaw it in the refrigerator overnight and reheat on the stovetop over medium heat. Add a splash of water or broth if it’s too thick after thawing.
Nutritional Information & Benefits
This chili is a good source of protein and fiber, thanks to the beef and kidney beans. It’s also rich in iron and other essential nutrients. However, it is relatively high in sodium, so be mindful of your salt intake. If you’re watching your sodium, use low-sodium broth and tomato sauce, and skip the added salt until the end.
For those on a low-carb diet, you can reduce the amount of beans or swap them for cauliflower rice. But honestly, the beans are part of the charm. They add bulk and texture without overwhelming the flavor.
Conclusion
This Classic Diner-Style Chili with Kidney Beans is more than just a recipe. It’s a reminder that some of the best meals are the simplest ones. It’s about taking basic ingredients and transforming them into something comforting and satisfying. I love this recipe because it’s reliable. It’s always there when I need it, whether I’m having a rough day or hosting a dinner party.
I encourage you to try it and make it your own. Add your favorite spices, swap out the beans, or top it with whatever you have in your fridge. The beauty of chili is its flexibility.
If you make this recipe, I’d love to hear how it turned out. Leave a comment below with your thoughts and any variations you tried. And if you enjoyed this, check out my tender instant pot pulled pork for another hearty meal. Happy cooking!
Frequently Asked Questions
Can I use canned chili powder or do I need to make my own?
Store-bought chili powder is perfectly fine and saves time. Just make sure it’s a blend that includes cumin and other spices, not just pure chili peppers. If you want to make your own, you can mix chili powder, cumin, paprika, and garlic powder.
Why does my chili taste bland?
It likely needs more seasoning or time. Taste it and add salt, pepper, or more chili powder. Also, ensure you simmered it long enough for the flavors to meld. Sometimes, chili needs an extra day in the fridge to really develop its flavor.
Can I freeze this chili?
Yes, this chili freezes very well. Let it cool completely, then portion it into containers or bags. It will keep for up to 3 months in the freezer.
What can I serve with this chili?
Classic sides include cornbread, rice, baked potatoes, or a simple green salad. It’s also great topped with cheese, sour cream, and green onions.
Is this chili spicy?
The base recipe is mildly spicy. You can adjust the heat by adding more cayenne pepper or a diced jalapeño. If you prefer mild chili, omit the cayenne.
Pin This Recipe!
Classic Diner-Style Chili with Kidney Beans

A hearty, thick, and flavorful diner-style chili featuring ground beef and kidney beans. This recipe focuses on blooming spices and slow simmering to create a deep, savory flavor that is perfect for meal prep and cold nights.
- Prep Time: 10 minutes
- Cook Time: 1 hour 10 minutes
- Total Time: 1 hour 20 minutes
- Yield: 6 servings 1x
- Category: Main Course
- Cuisine: American
Ingredients
- 2 pounds ground beef (80/20 blend)
- 2 large yellow onions, finely diced
- 4 cloves garlic, minced
- 2 cans (15 oz each) kidney beans, rinsed and drained
- 1 can (15 oz) tomato sauce (no-salt-added preferred)
- 2 tablespoons tomato paste
- 1 cup beef broth (low-sodium)
- 2 tablespoons chili powder
- 1 tablespoon ground cumin
- 1 teaspoon smoked paprika
- 1 teaspoon garlic powder
- 1 teaspoon onion powder
- 1/2 teaspoon cayenne pepper (optional)
- Salt and black pepper to taste
- 1 tablespoon vegetable oil
Instructions
- Prep ingredients: Dice onions, mince garlic, and rinse kidney beans until water runs clear. Pat ground beef dry.
- Sauté aromatics: Heat vegetable oil in a Dutch oven over medium heat. Add onions and cook until soft and translucent (about 5 minutes). Add garlic in the last minute.
- Brown the beef: Increase heat to medium-high. Add ground beef and break into small crumbles. Cook until no longer pink and brown bits form on the bottom. Do not drain excess fat.
- Bloom the spices: Reduce heat to medium. Add chili powder, cumin, smoked paprika, garlic powder, onion powder, and cayenne. Stir into the meat mixture and cook for 1-2 minutes to release oils.
- Add liquids: Stir in tomato paste and cook for 1 minute. Pour in tomato sauce and beef broth. Scrape the bottom of the pot to deglaze and bring to a simmer.
- Add beans: Stir in the rinsed kidney beans. Taste and add salt and black pepper to taste.
- Simmer: Reduce heat to low and simmer uncovered for 45-60 minutes, stirring occasionally, until the sauce thickens and flavors meld.
- Final adjustments: Taste again and adjust seasoning if needed. Remove from heat and serve.
Notes
Do not drain the fat from the beef as it carries flavor. Bloom spices in oil before adding liquid for deeper flavor. Simmer gently; do not boil. Chili tastes better the next day. Can be frozen for up to 3 months.
Nutrition
- Serving Size: 1 bowl
- Calories: 450
- Sugar: 4
- Sodium: 650
- Fat: 28
- Saturated Fat: 10
- Carbohydrates: 22
- Fiber: 6
- Protein: 32
Keywords: chili recipe, diner chili, kidney bean chili, ground beef chili, comfort food, meal prep, slow simmered chili, spicy beef stew


